


Developer portal as a service
One APIMarketplace is a comprehensive platform designed to support API developers in building, testing, and deploying their applications. Our aim is to provide developers with the tools and resources they need to create innovative and powerful applications that can integrate seamlessly with your API.
One APIMarketplace offers a variety of features and resources to help developers get started quickly and easily. These include:
- Multi Gateway Connectivity : One APIMarketplace supports multi API gateway connectivity, allowing developers to seamlessly integrate with multiple API gateways and manage their APIs from a single centralized platform.
- API Documentation: Our documentation provides a clear and comprehensive overview of our API, including endpoints, parameters, response codes, and examples of how to use it.
- Code Samples: We offer code samples in various programming languages to help developers accelerate their development process.
- Support and Community: We provide support to the developers through our developer community features like articles , webinar and user cases , where developers can learn about your API(s) , understand various use cases such as how to use your API(s) and so on.
- Analytics and Monitoring: One APIMarketplace also provides developers with analytics and monitoring tools, enabling them to track their API usage and performance in real-time.
We are committed to providing the best possible developer experience and supporting your developer community throughout their API development and integration journey.
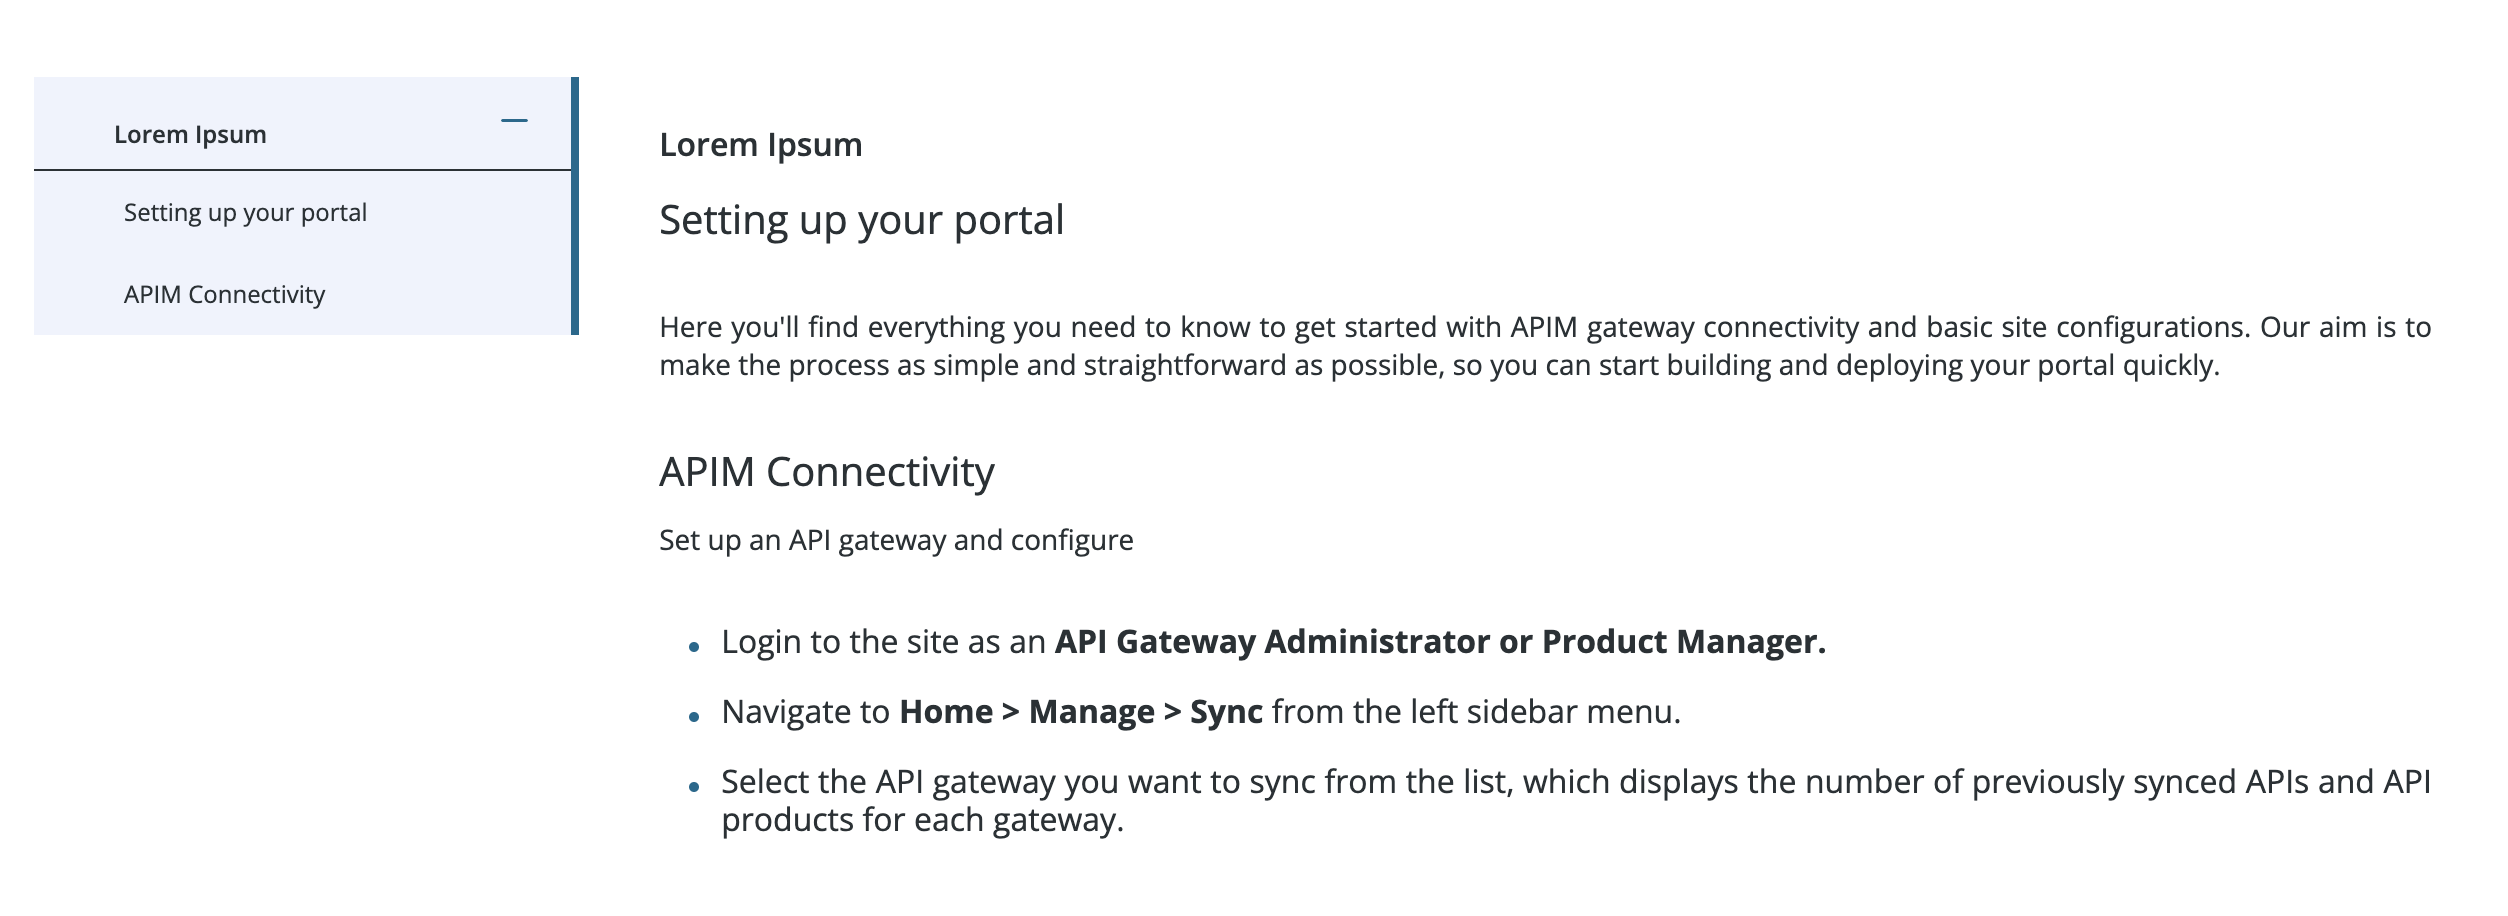
Setting up your portal
Here you'll find everything you need to know to get started with APIM gateway connectivity and basic site configurations. Our aim is to make the process as simple and straightforward as possible, so you can start building and deploying your portal quickly.
To get started, you'll need to have an API gateway that is compatible with One APIMarketplace. One APIMarketplace supports a wide range of API gateways, including AWS, Apigee, Kong, Mulesoft & Azure. Once you've connected your API gateway to One APIMarketplace, you'll be able to sync your APIs with just a few clicks.
Before you start with API documentation , it's important to configure your site settings. One APIMarketplace provides a range of customizable options, including site branding, menus, email templates etc. . We recommend that you take some time to review and configure these settings to ensure that your site is set up and meets your specific needs.
We're excited to see what you'll build. Let's get started!
APIM Connectivity
Set up an API gateway and configure
- Login to the site as an APIM Administrator or Product Manager.
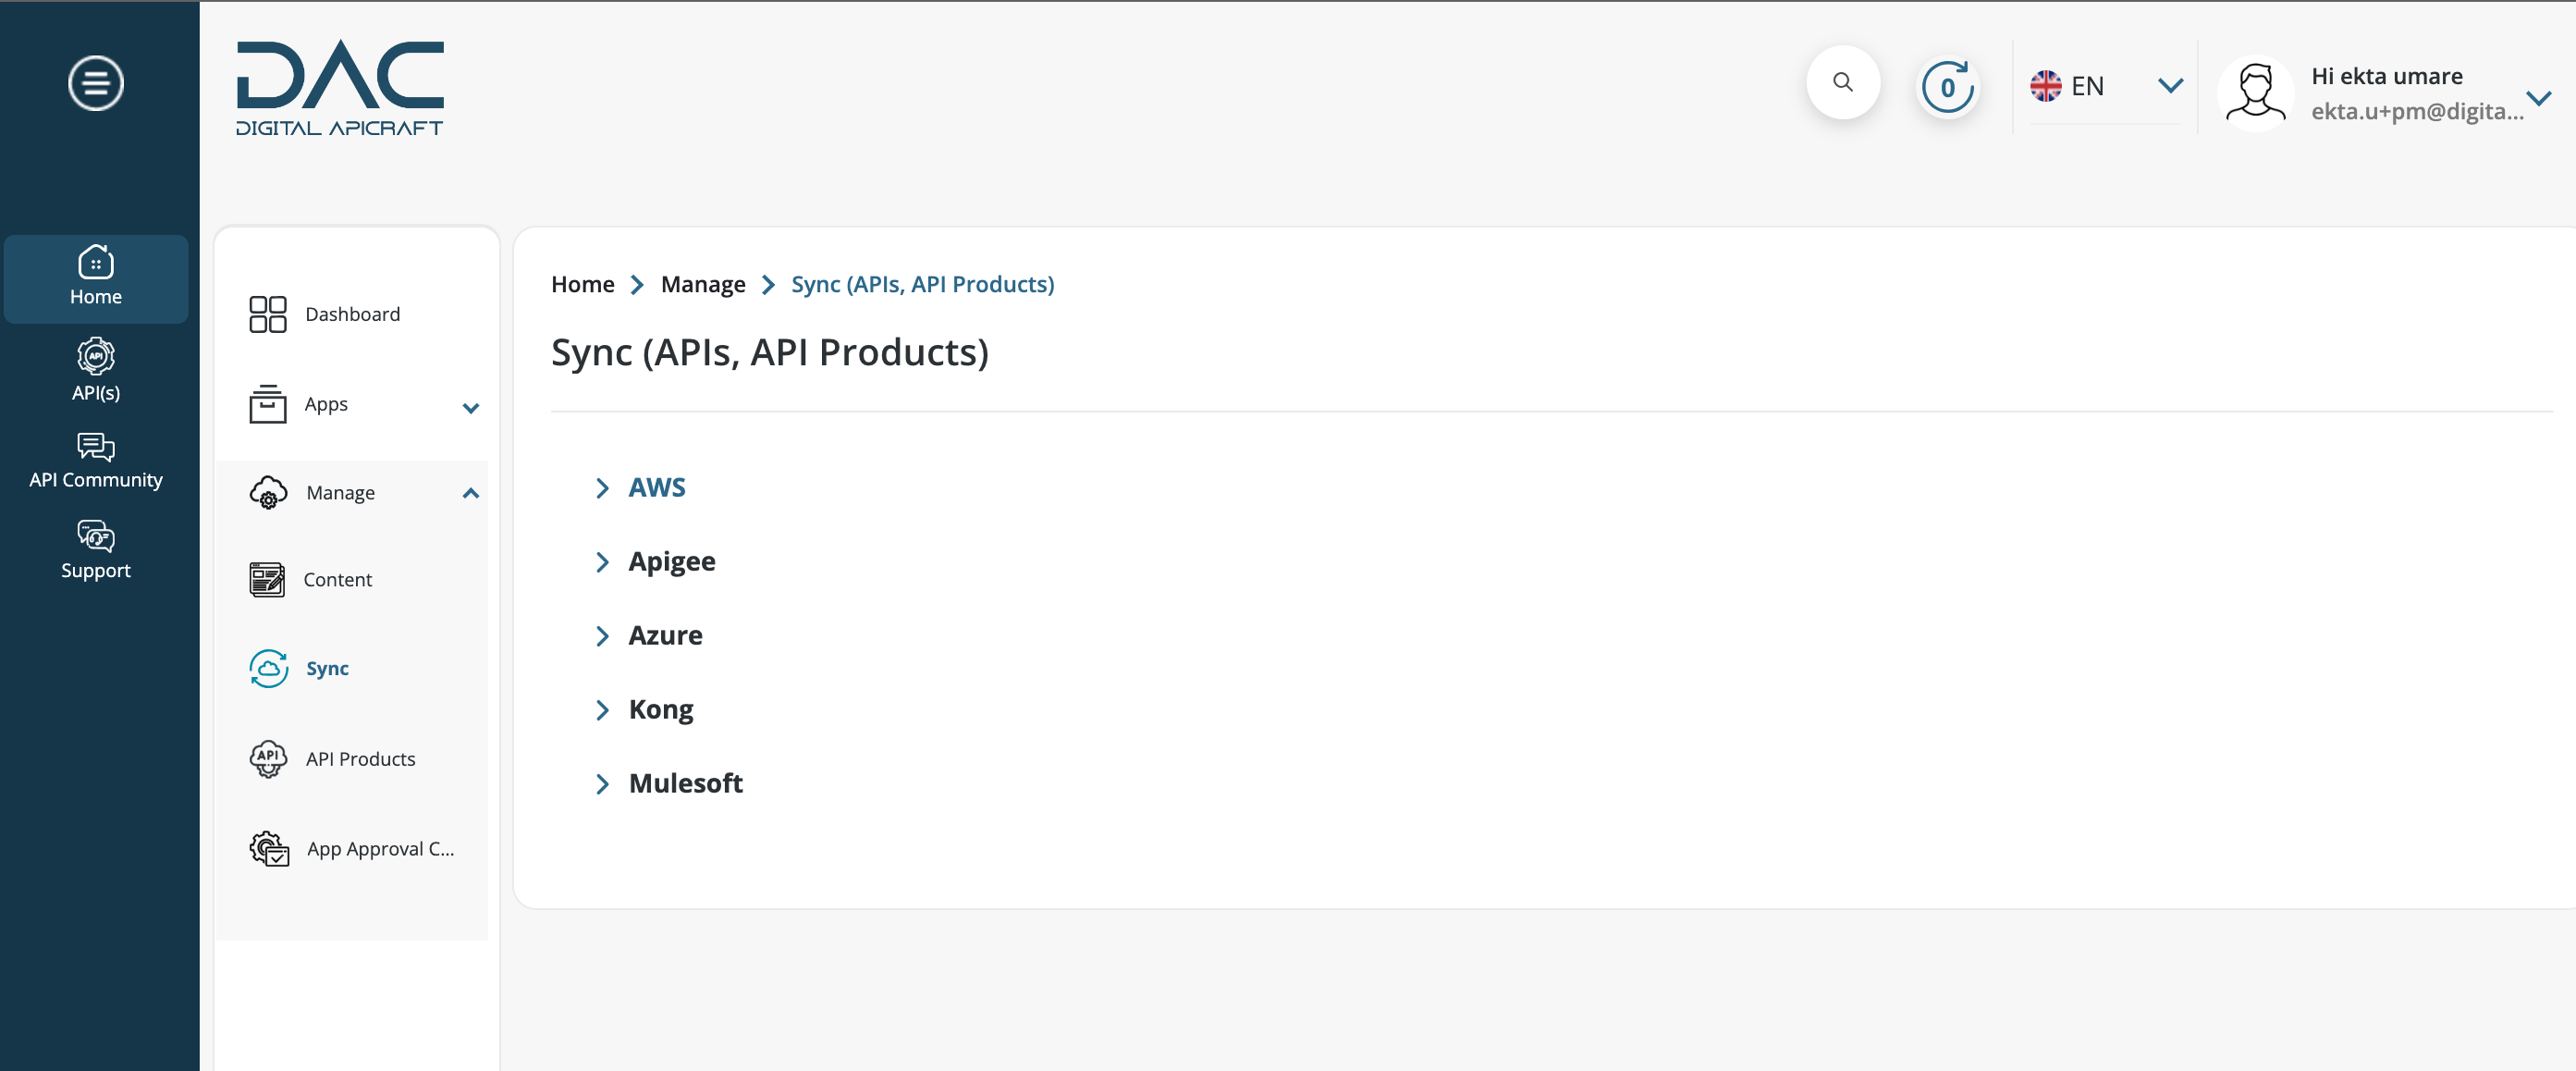
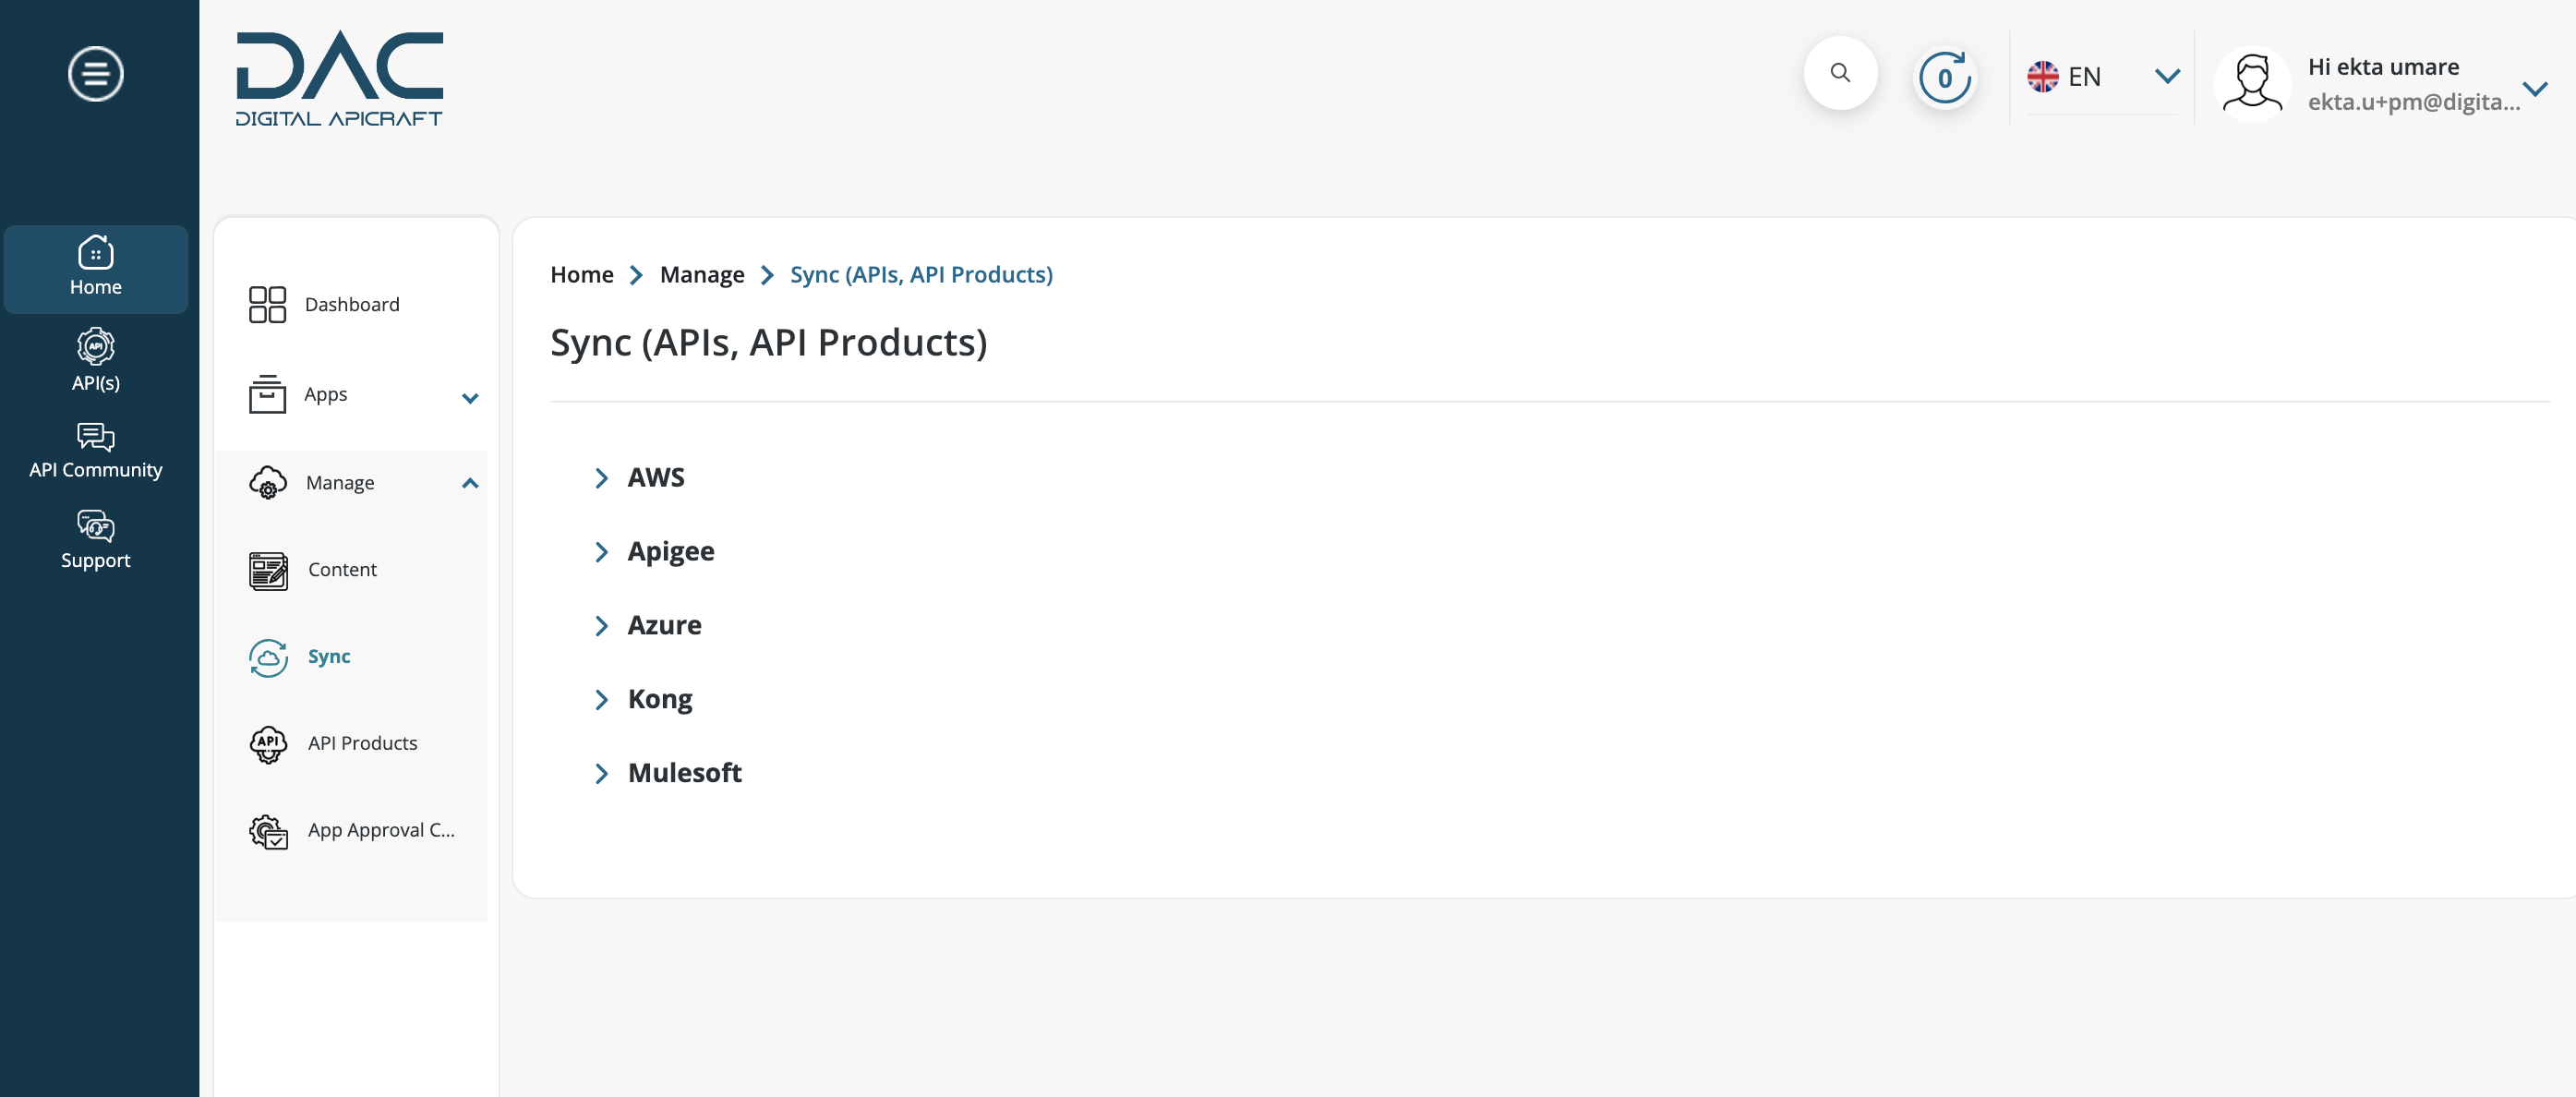
- Navigate to Home > Manage > Sync from the left sidebar menu.
- Select the API gateway you want to sync from the list, which displays the number of previously synced APIs and API products for each gateway.
- The number of gateways allowed is based on the user selected Plan. If the user wants to switch the gateways after reaching the maximum limit, they need to contact us for the further assistance.
- Select the API gateway name and credentials from the list or menu tab, such as AWS Credentials. Once selected, input the connection details in the available fields.
- To add more details, select the Add one more button.Click the Remove one button to remove the last added set of details.

- Click the Submit button to save the credentials.
Menus
-
Log in to the site as the Portal Administrator.
-
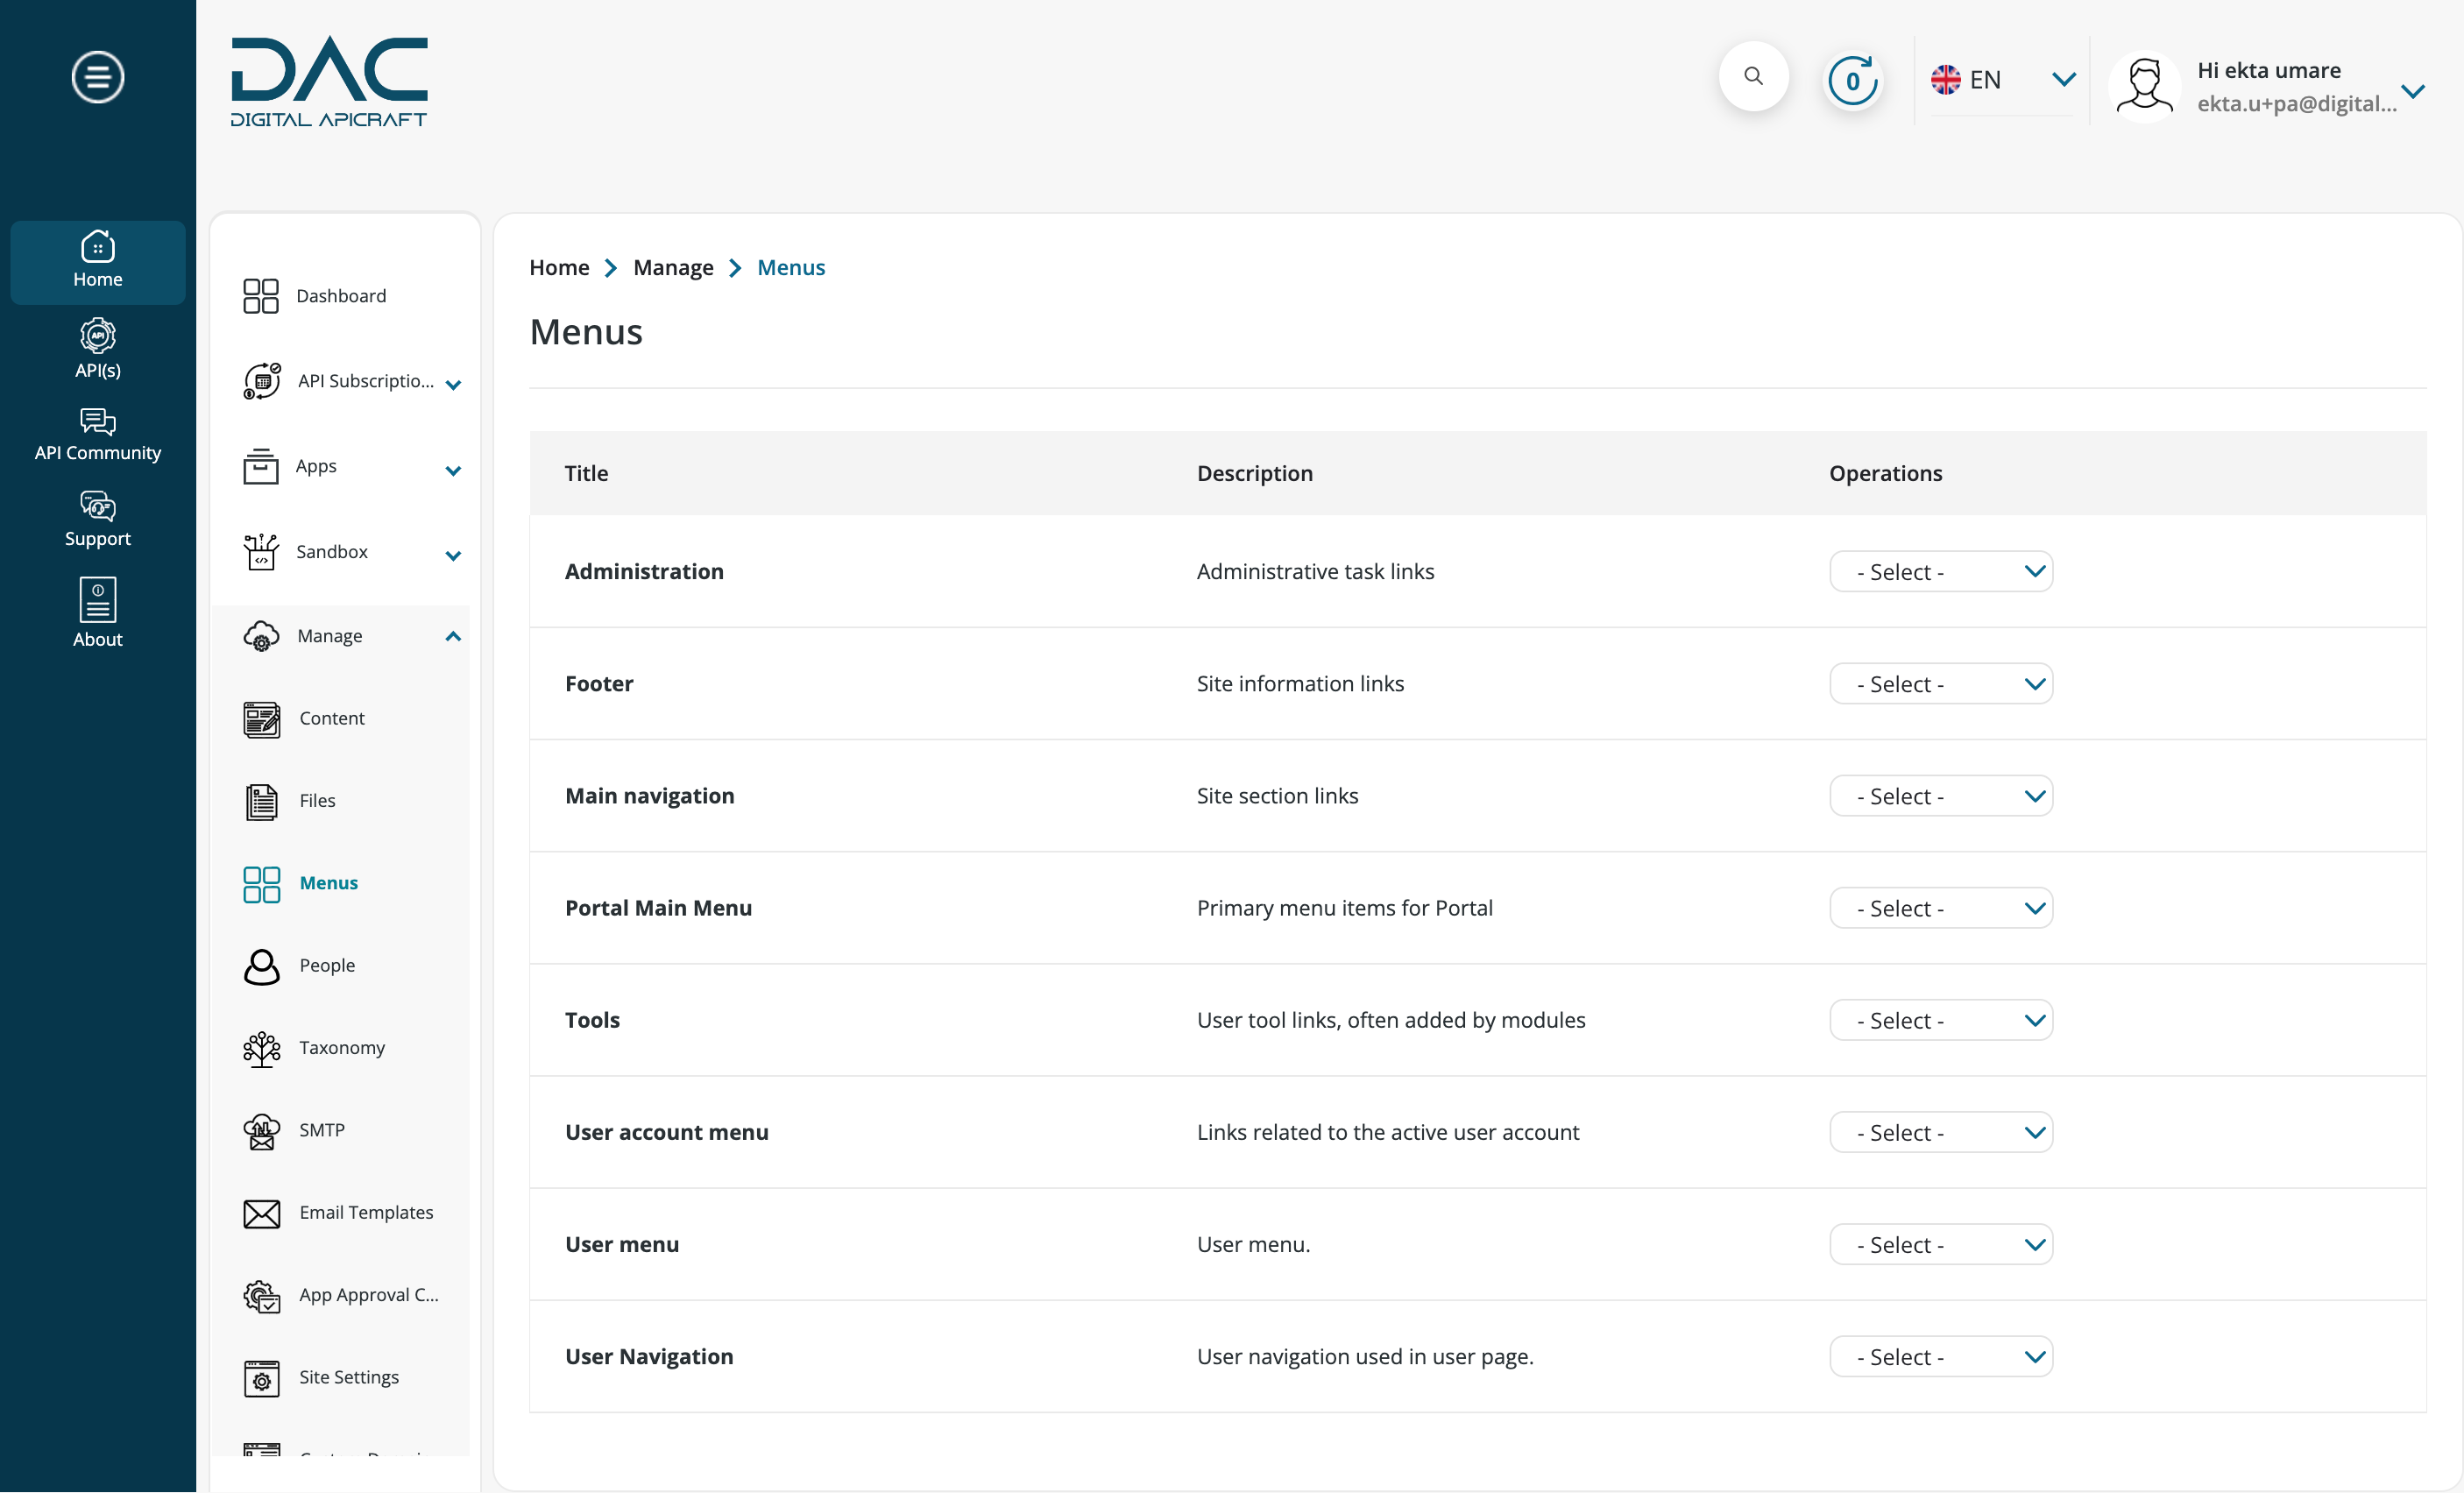
From the left sidebar menu, select Home > Manage > Menus. The page will have a list of every menu.
-
To access the menu detail page and see a list of all menu links, click the Edit menu button.
-
To change a menu link's label, click Edit, update the new label in the title field on the menu link detail page, and click Save.
Taxonomy
- Log in to the site as the Portal Administrator.
- Navigate to Home > Manage > Taxonomy from the left sidebar menu. All vocabulary will be listed on the page.

- Edit Vocabulary
- To edit any vocabulary, select the Edit option from the drop-down menu.
- Once the necessary changes are done, click Save.

- List Terms
- To view all the taxonomy terms for a vocabulary, simply select List Terms from the drop-down menu, and they will be loaded onto the page.

- Click the Add Term button to add a new taxonomy term.
- Click the Edit button to update the taxonomy term.
- Click the Delete button to delete the taxonomy term.
- To view all the taxonomy terms for a vocabulary, simply select List Terms from the drop-down menu, and they will be loaded onto the page.
SMTP
- Log in to the site as the Portal Administrator.
- Navigate to Home > Manage > SMTP from the left sidebar menu.
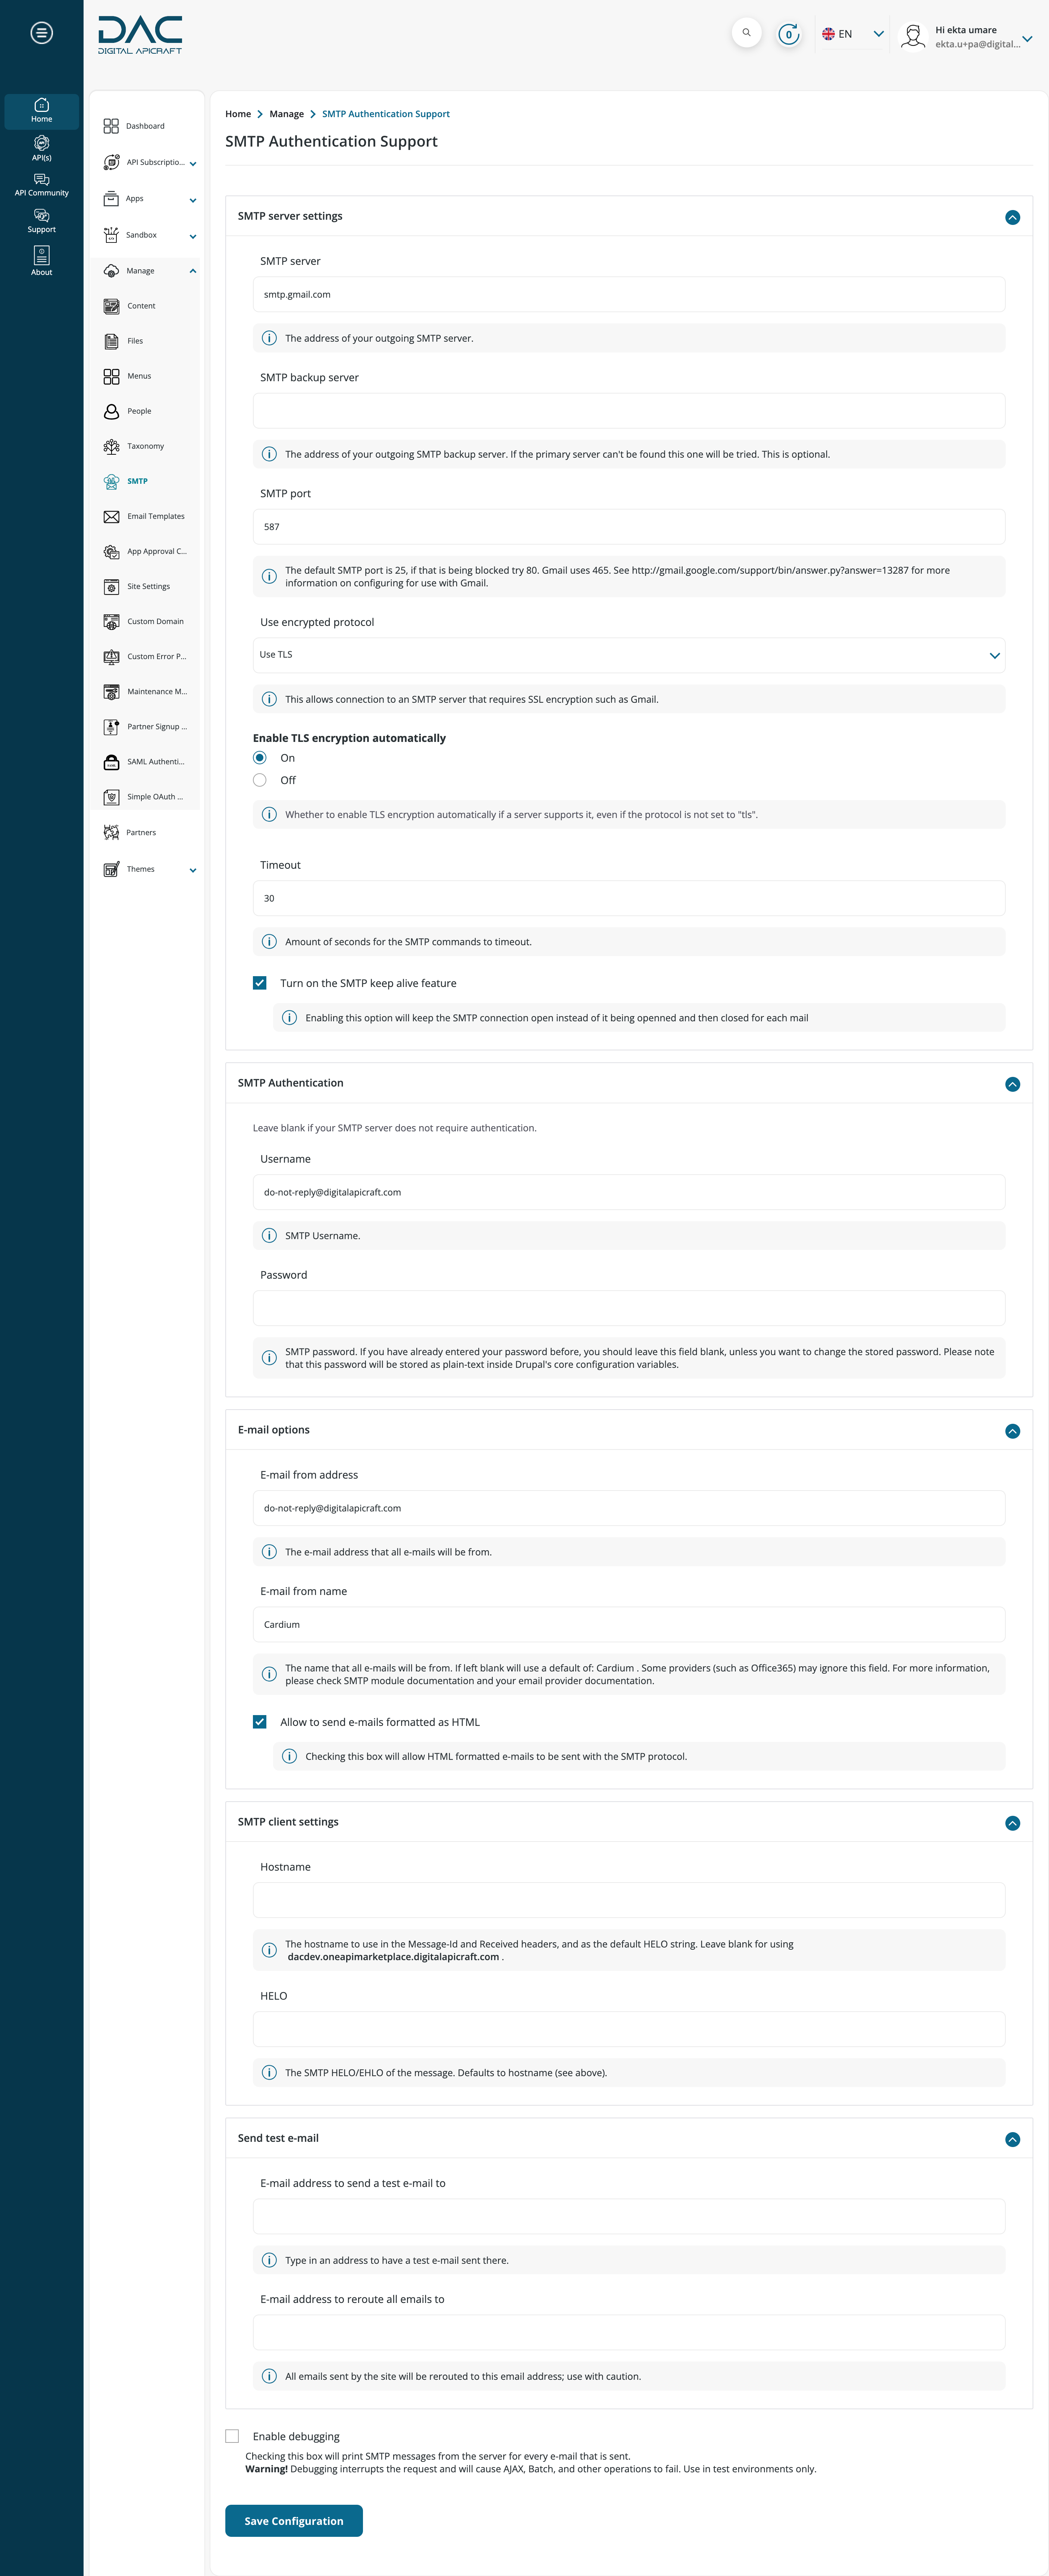
- Configure the fields under SMTP server settings and SMTP Authentication.
- Under the Email options, set the default sender's email and name.
- Click the Save button to save the SMTP configuration.
Email Templates
- Login to the site as the Portal Administrator.
- Navigate to Home > Manage > Email Templates from the left sidebar menu.
- Scroll down to the Emails section. Click on the Email Template you want to change. For instance, welcome.
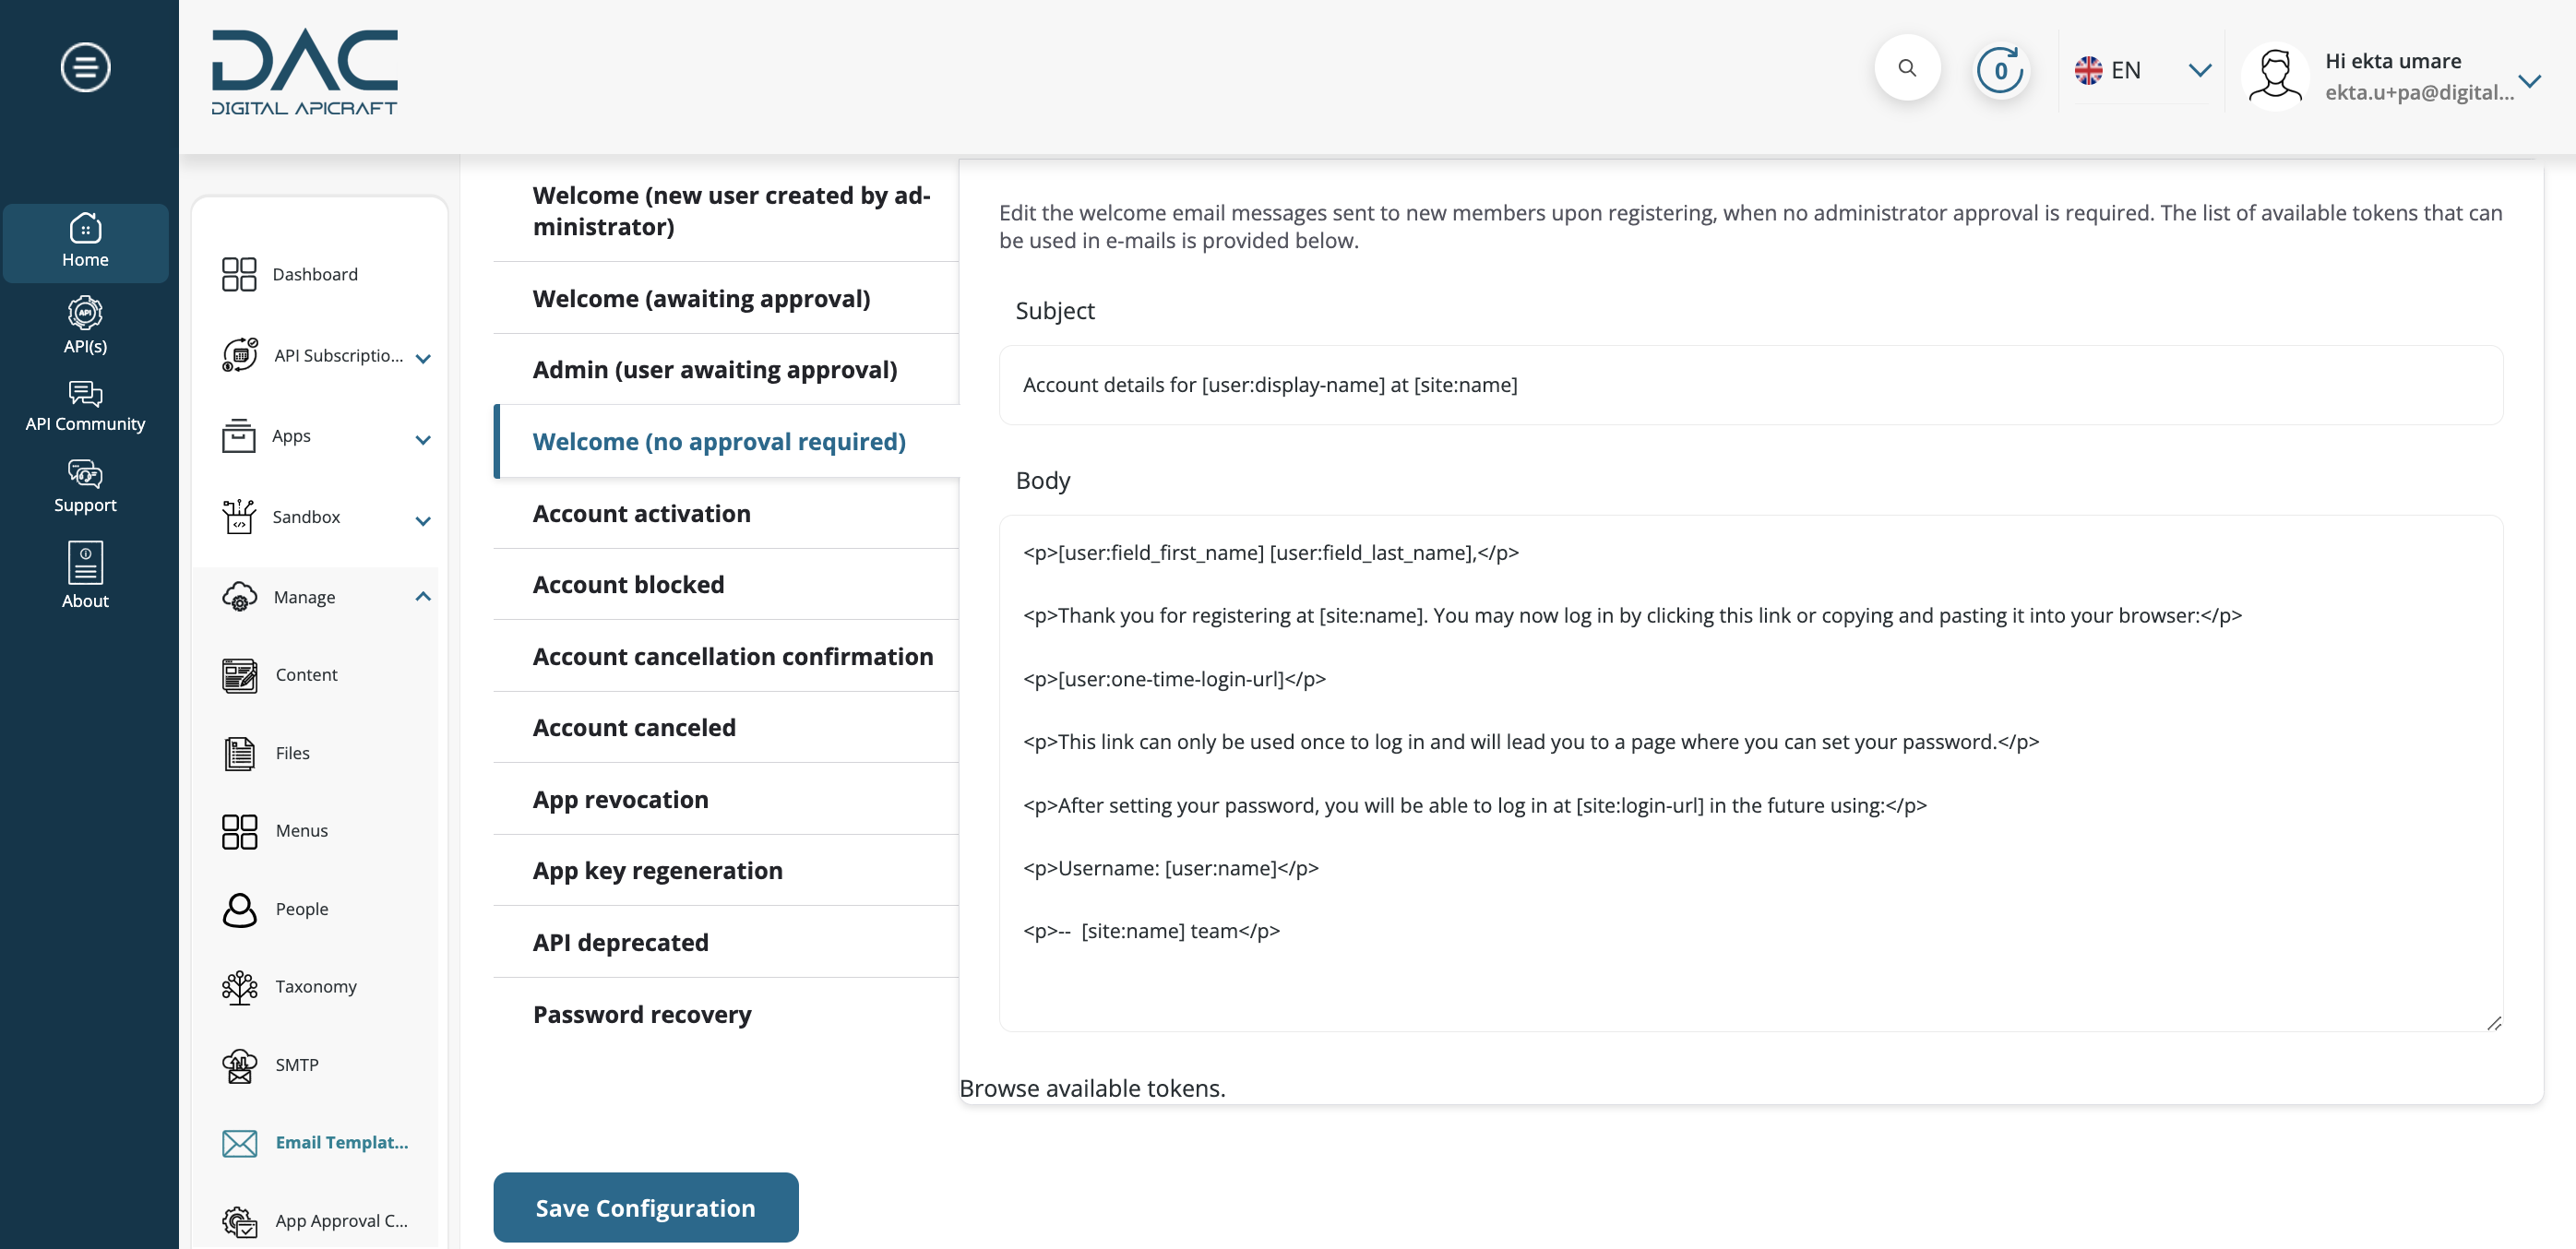
- You will find the detailed email template on the right side. Update the subject and body fields.
- Click on the other template you want to change.
- Once the desired templates are changed, click the Save Configuration button to save the changes.
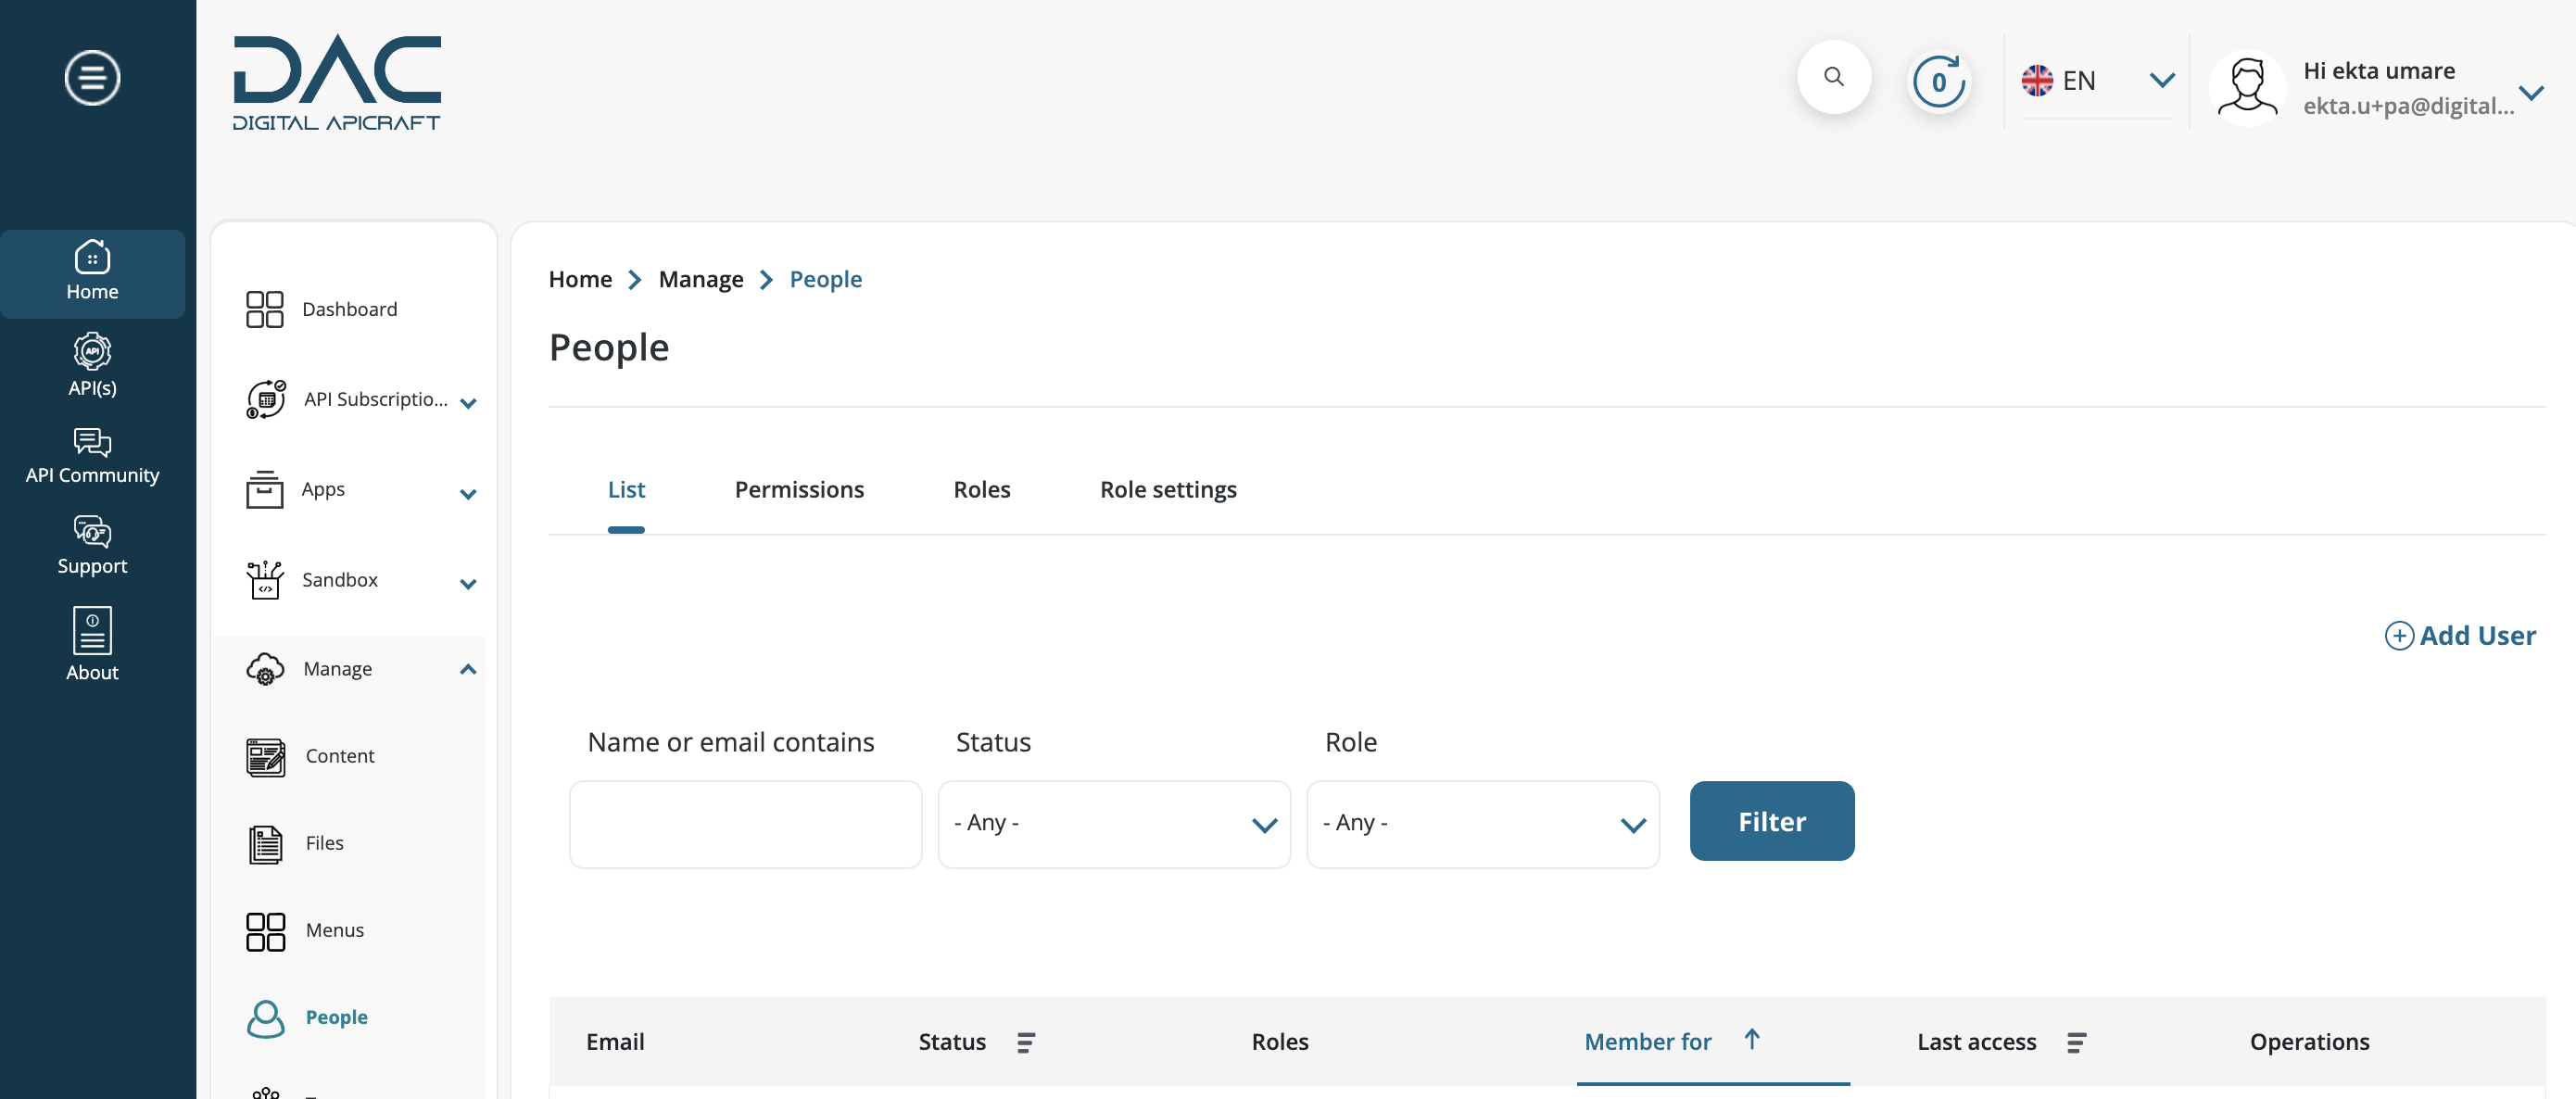
People
- Add users and assign roles
- Login as a Administrator, Portal Administrator and navigate to dashboard.
- Click on Home > Manage > People.
- Click on Add User button.
- Enter all the fields and roles.
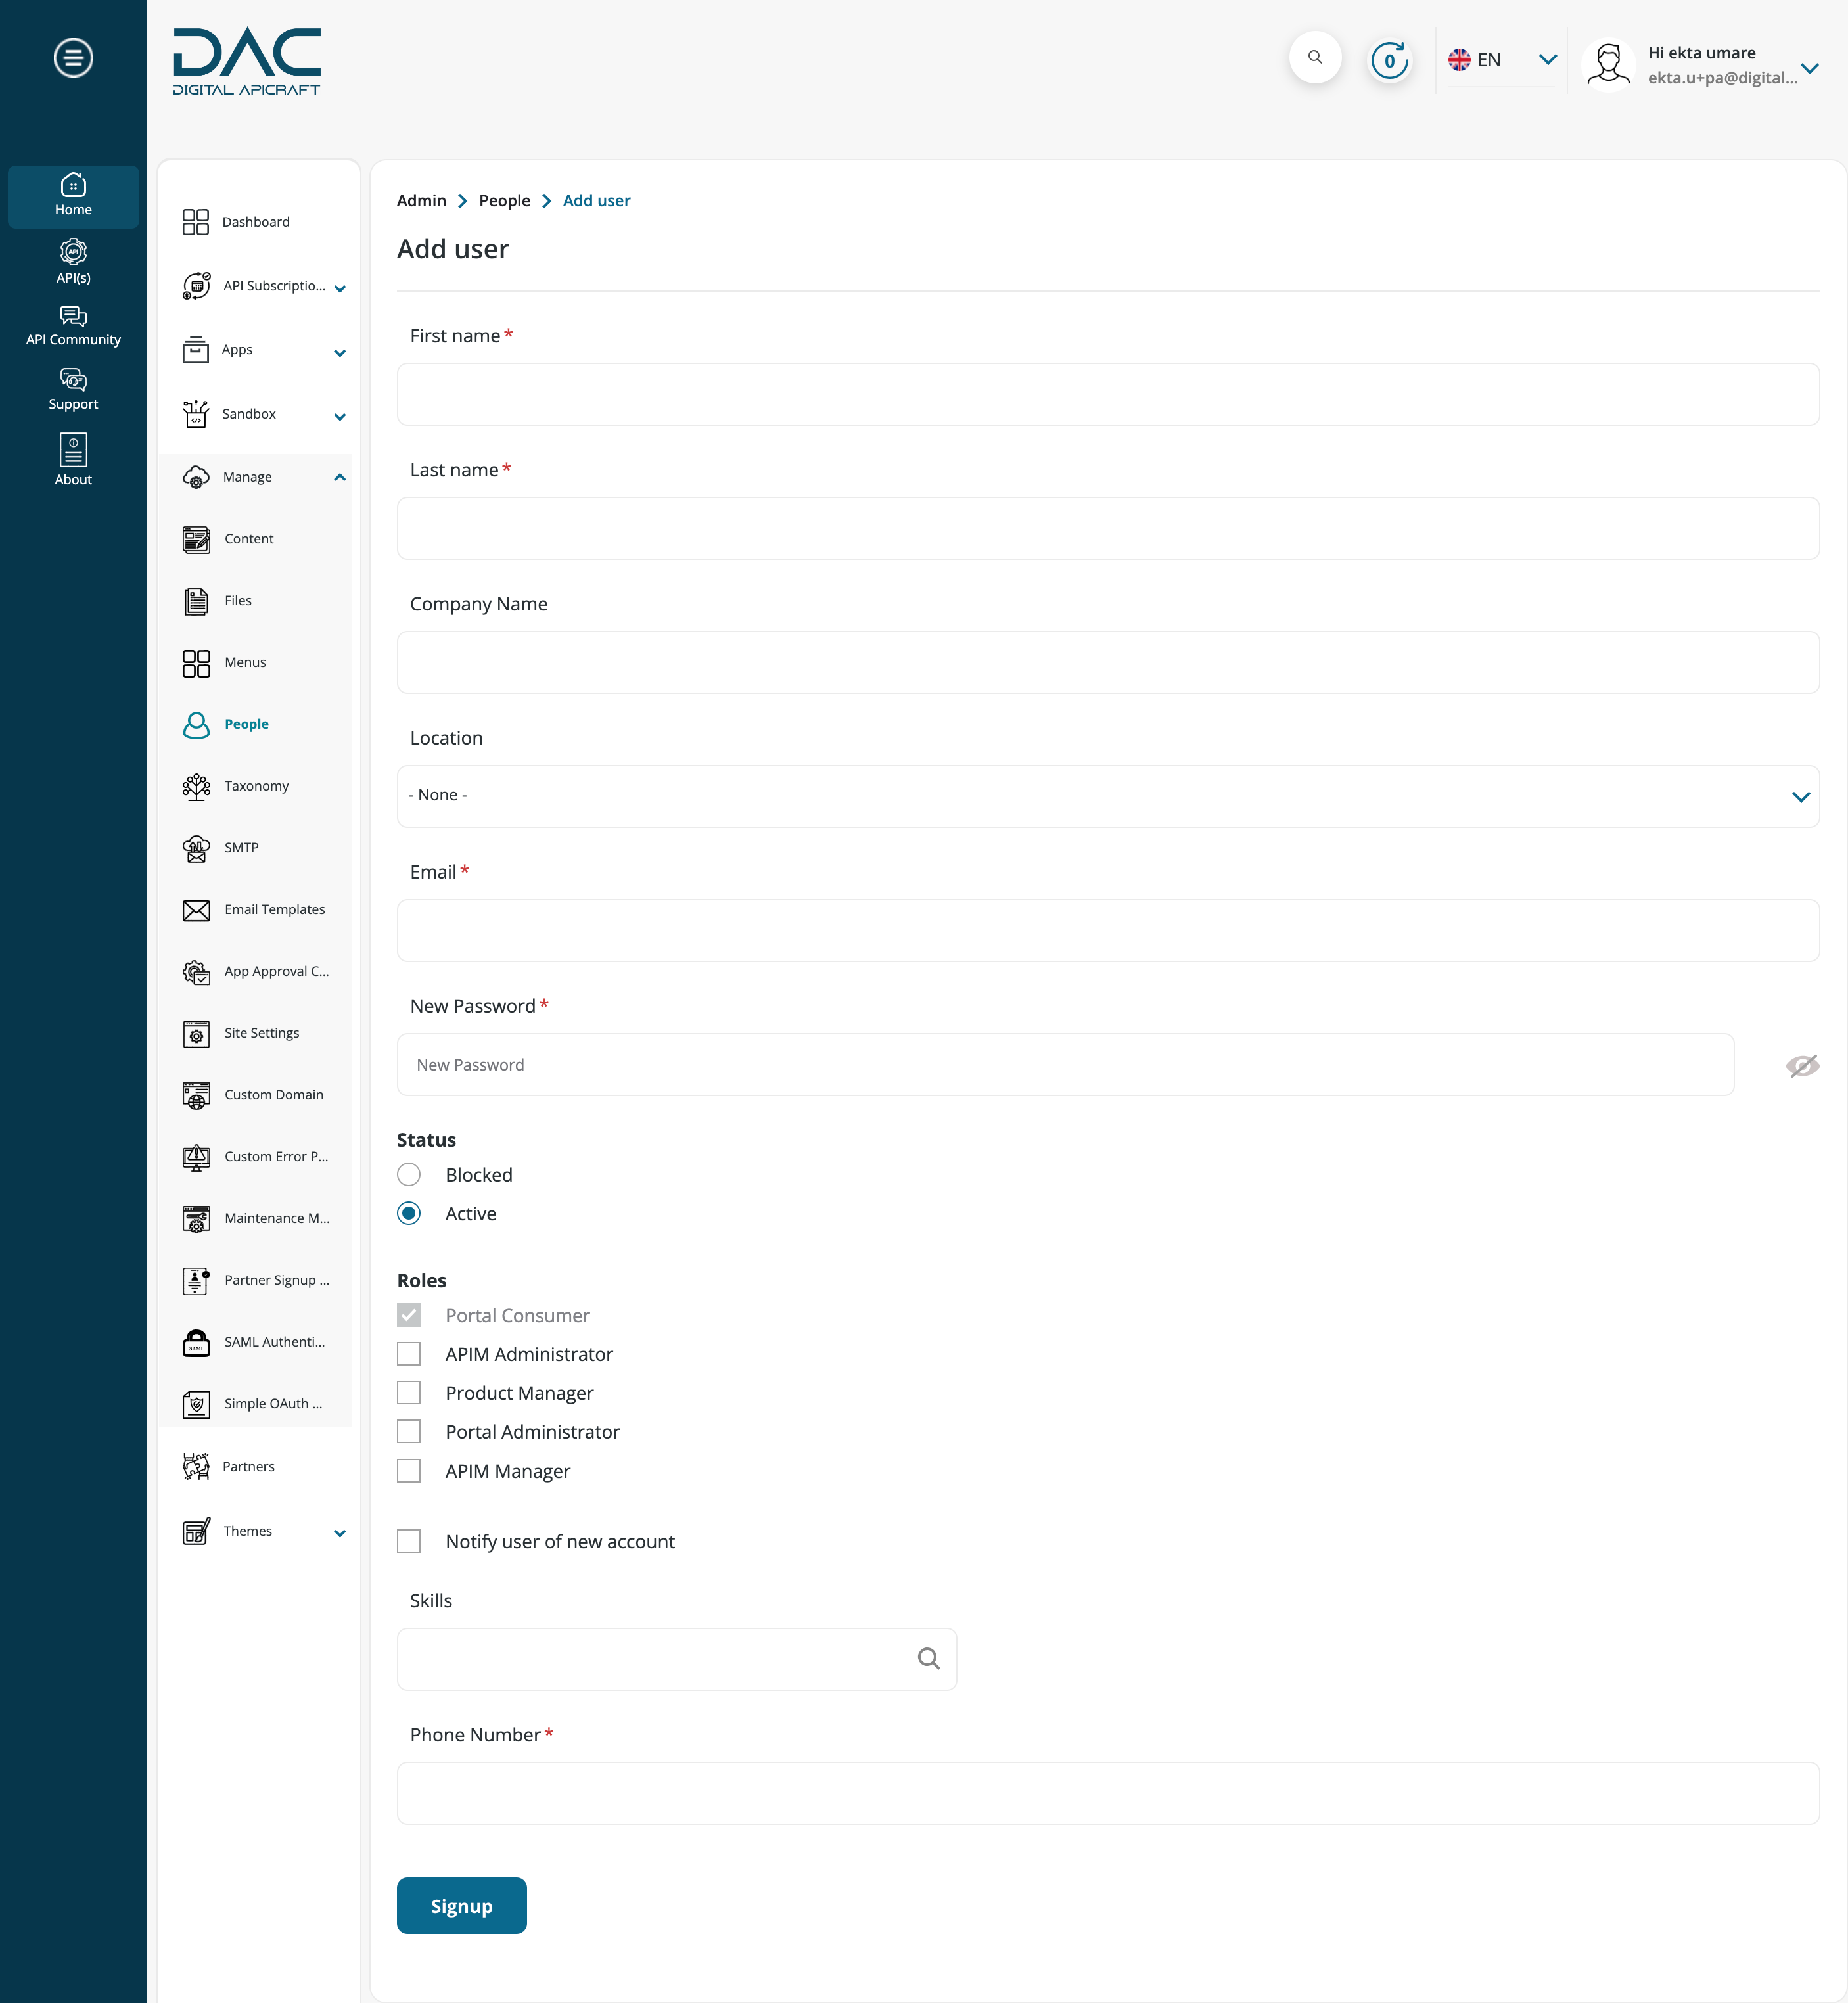
- Click Signup.
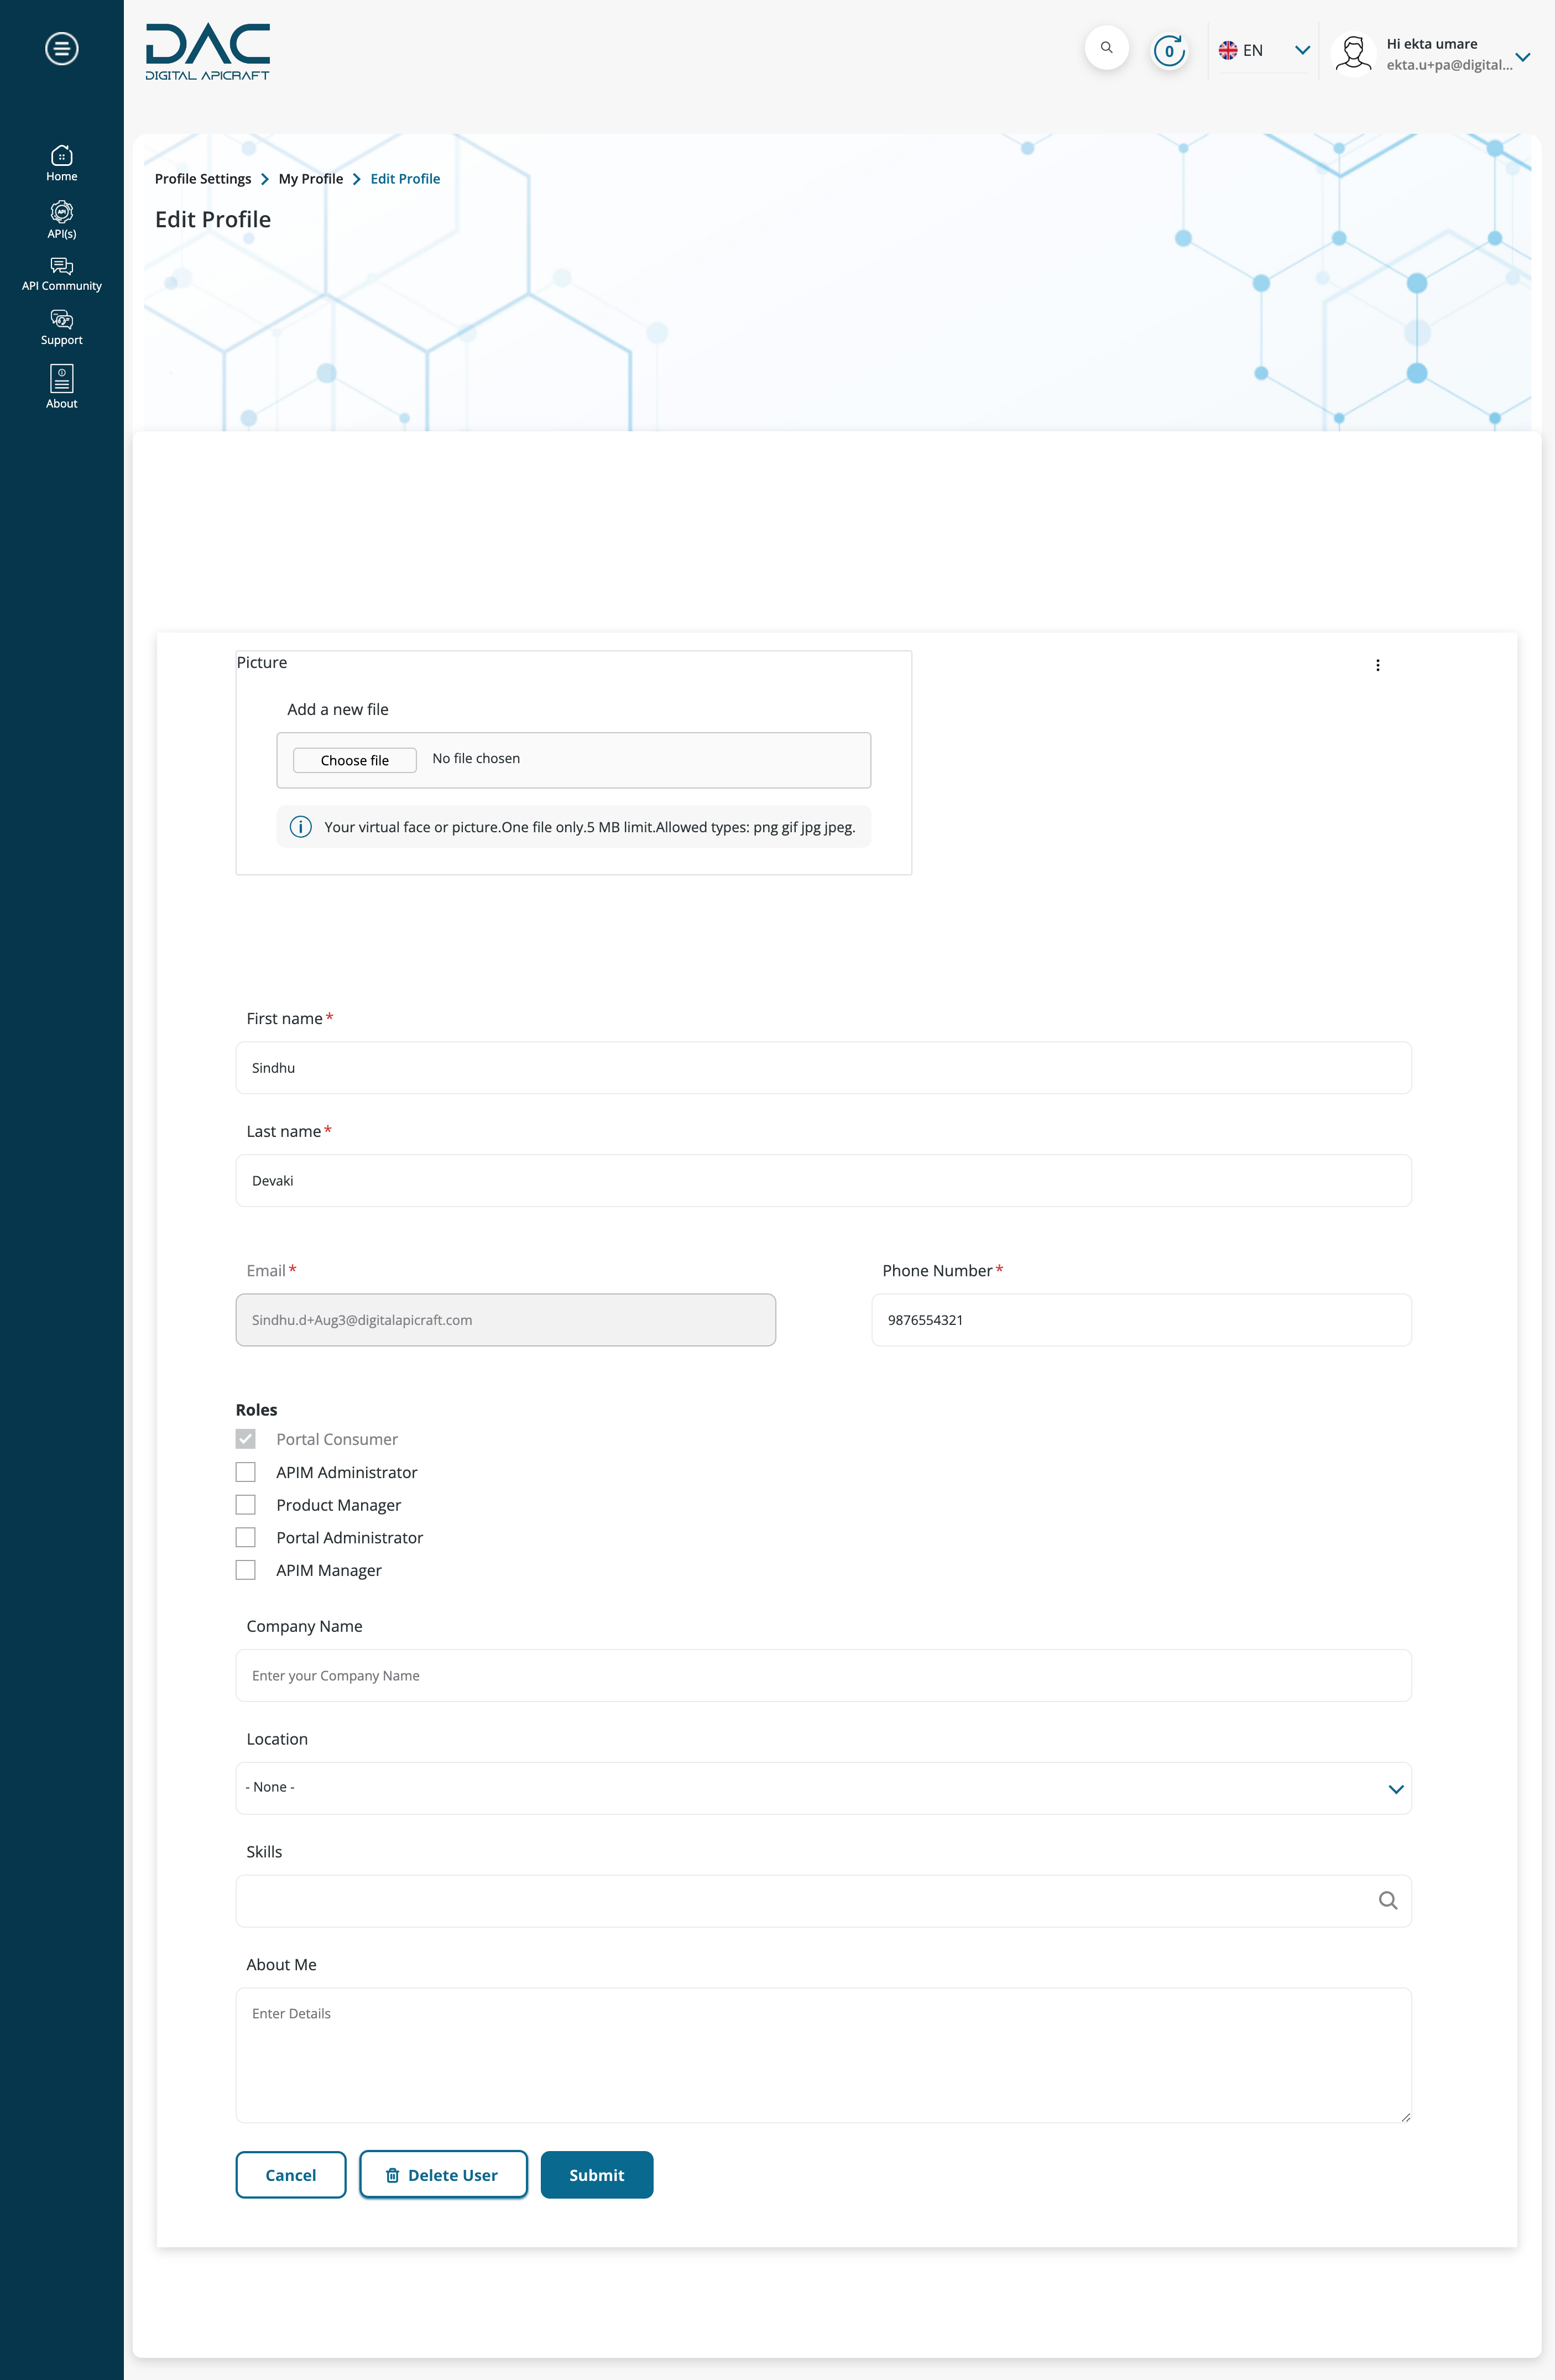
- Deleting an user

- Log in as a Portal Administrator, and navigate to the dashboard.
- View the list of users at Home > Manage > People.
- You can delete user by clicking on Delete User or edit which user account needs to be deleted.
- Click on Delete User to delete the user.
- Describe roles
- Portal Consumer
- To create an app, go to Home > Manage > Apps > Create App.
- The app list can be seen under Home > Manage > Apps.
- APIM Administrator
- To create the app, click Home > Manage > Apps.
- To create the content, go to Home > Manage > Content.
- To sync the APIs and products, select Home > Manage > Sync.
- Go to Home > Manage > Sync and click any of the gateways to provide the login information.
- Go to the Credentials tab after selecting any gateway. Complete the form and submit it.
- Before syncing the API, you need to sync the API products first.
- Go to the product page for Sync API.
- You will find two options Sync all selected products and Sync all products.
- Go to the Sync APIs tab and sync the desired APIs.
- Go to Home > Manage > API Products. Here the API gateway administrator can see the list of API products, and we can edit this product as well.
- Product Manager
- To create an app, go to Home > Manage > Apps.
- To create the content, click Home > Manage > Content.
- To sync the APIs and products, go to Home > Manage > Sync.
- Go to Home > Manage > API Products. You can see the list of API products and edit the product as well.
- Portal Administrator
- Portal administrators will get dashboard access.
- For the dashboard page, click User Profile Block.
- You can create apps by going to Home > Manage > Apps > Create App.
- To see a list of apps, go to Home > Manage > Apps > My Apps.
- Also, users have the provision to edit and delete the app, go to Home > Manage > Apps > My Apps.
- Every app has an edit and delete icon.
- You can create all content under Home > Manage > Content.
- Click on the Add content button.
- You can edit or delete the contents.
- You can add media by going to Home > Manage > Files > Media.
- Once you select the media type and fill in the required fields, click the Add media button and save.
- That media will come under Home > Manage > Files.
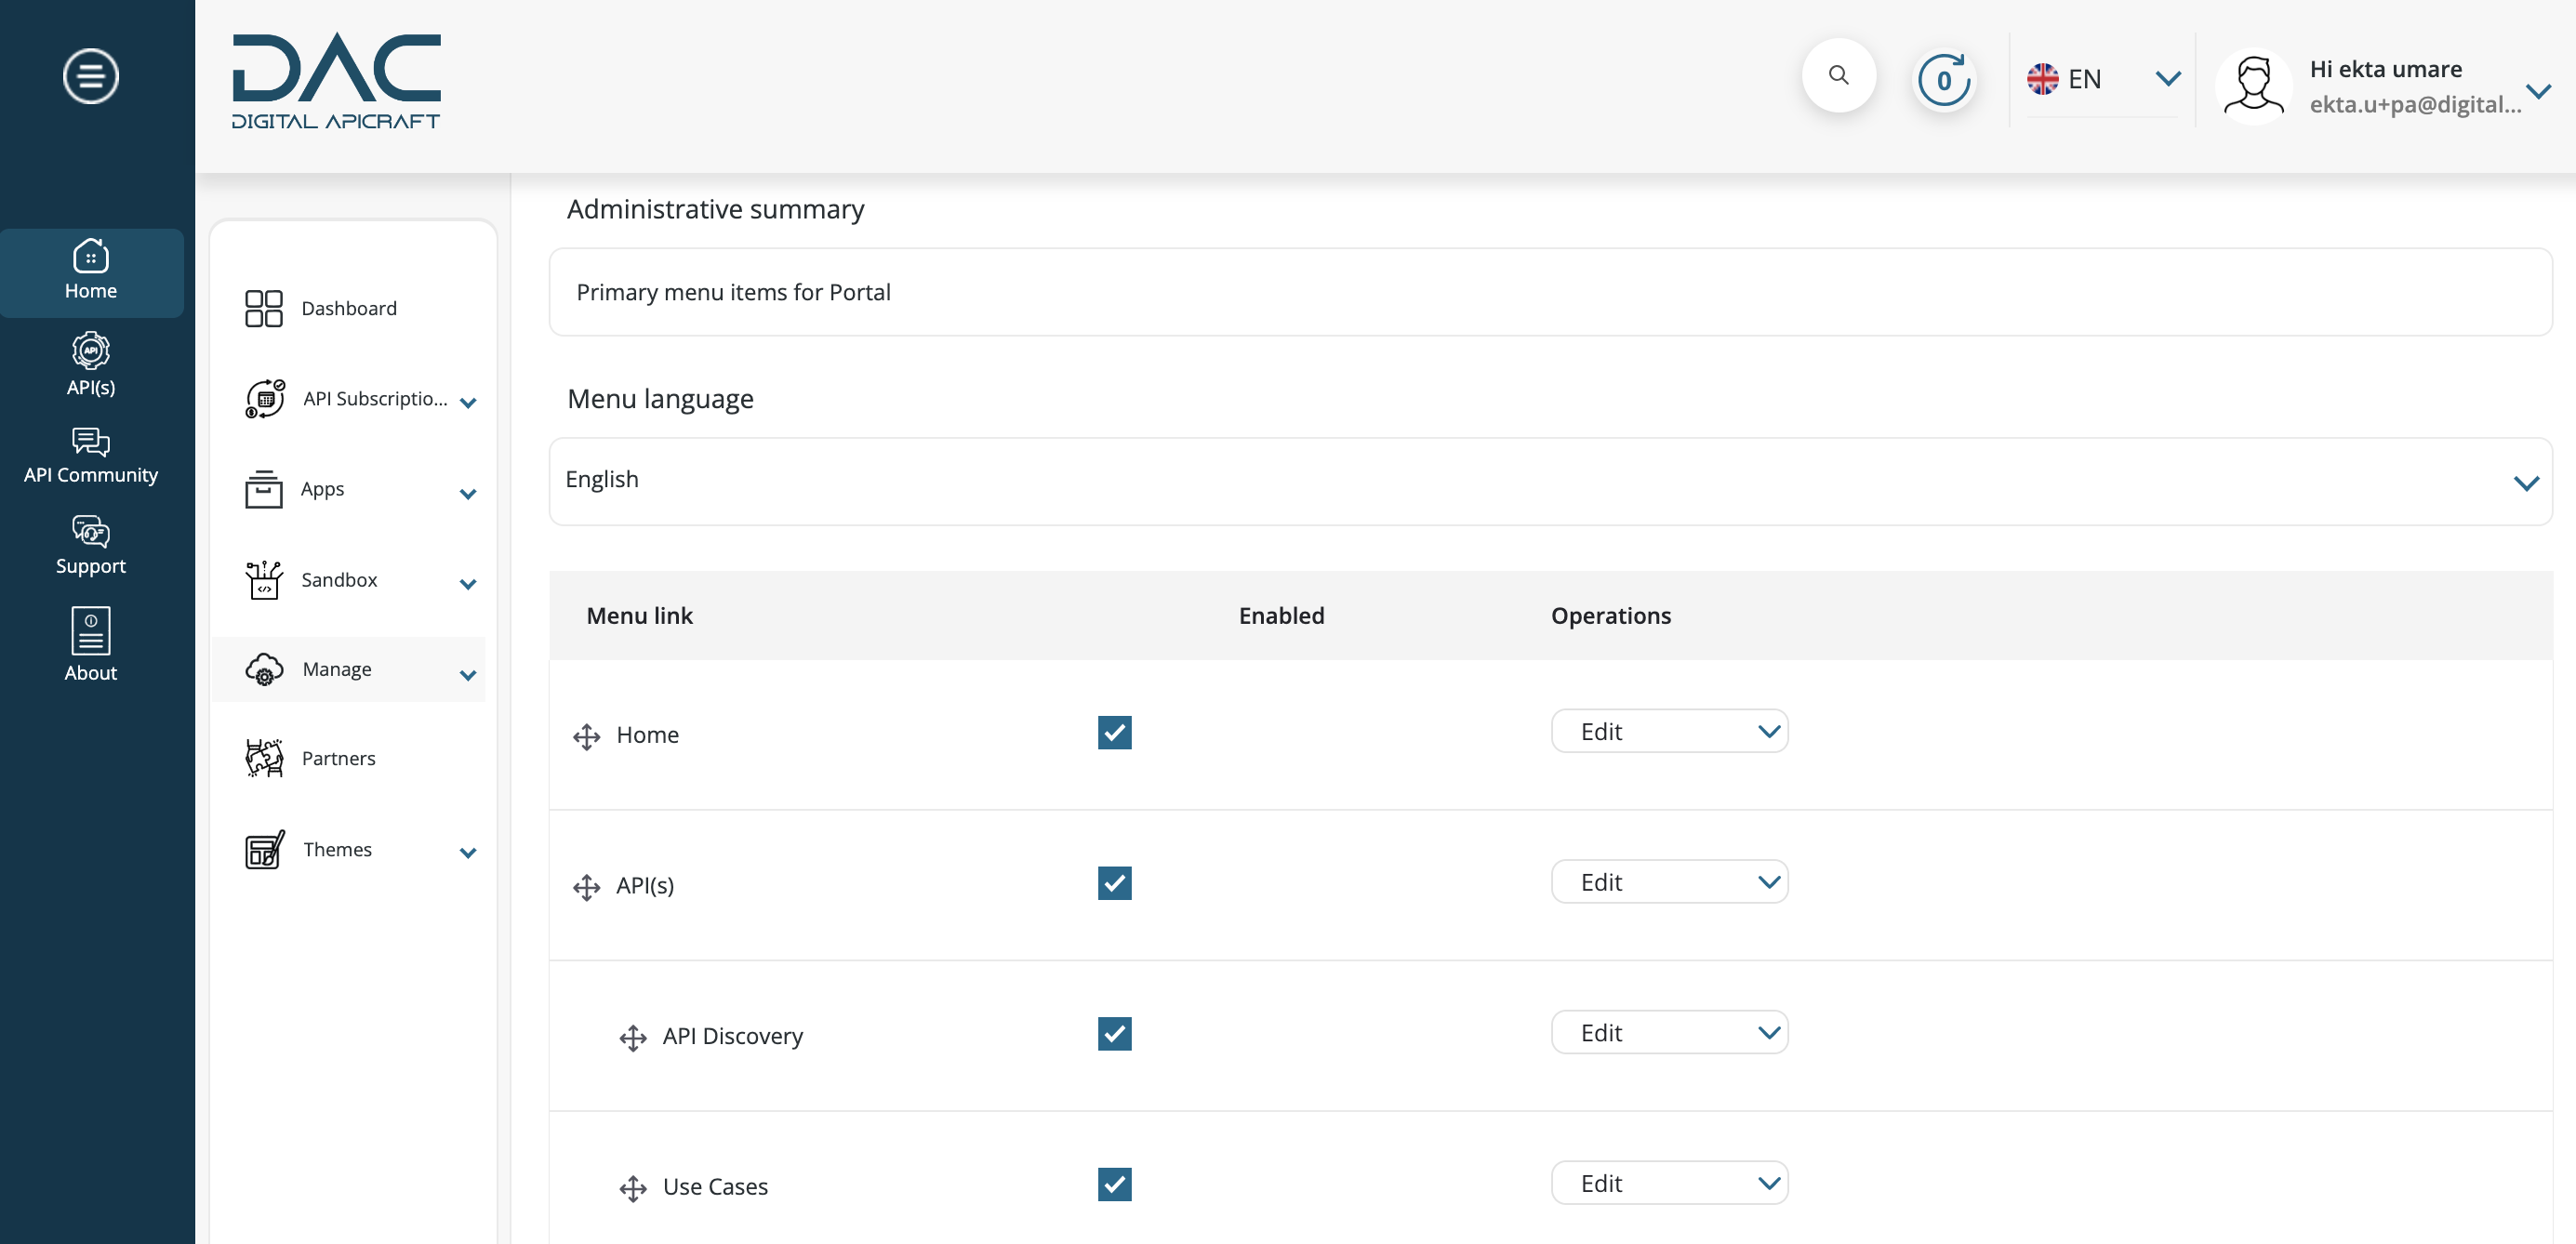
- You will get permission to edit the menus under Home > Manage > Menus.
- Click the Edit Menu button, and then click Add Link to add the new menu link.
- You can add the new user under Home > Manage > People.
- Click the Add User button, fill in the required fields, and save.
- User lists will come under Home > Manage > People.
- Go to Home > Manage > Taxonomy to add the taxonomy vocabulary and items
- Click on Add vocabulary and give a name, then save.
- Home > Manage > Taxonomy will appear here, then add the terms.
- Click on the List Term button, then click the Add Term button.
- Click on Home > Themes > Cardium Light to access cardiumlight themes.
- You can set the default colors for the site's text, buttons, links, tables, pagination, and tabs here. This will apply to all pages. In the Logo Image box, you can also add a logo and a favicon.
- Go to Home > Themes > Portal if you have permission for the Portal theme.
- Administrator
- Administrator will get the overall site access.
- Portal Consumer
Files and Media
- Login to the site as an Portal Administrator.
- Navigate to Home > Manage > Files from the left navigation. Click on the Media tab. Click on Add Media.

- Select the type of media you want to upload.

- Fill in the required fields and click Save.

- That media will be listed under Home > Manage > Files.

Cardium Light Theme
- For portal administrators, Click on Profile and go to Home > Themes > Cardium Light
- To add or customize a logo, use the logo image section to set the custom logo path or upload a new logo image.
- The Favicon section contains settings for the shortcut icon or favicon.
Portal Theme
- For portal administrators, Click on Profile and go to Home > Themes > Portal.
- To add or customize a logo, use the logo image section to set the custom logo path or upload a new logo image.
- The Favicon section contains settings for the shortcut icon or favicon.

Custom Domain Settings
- Login to the site as the Portal Administrator.
- Go to Home > Manage > Custom Domain in your dev portal.
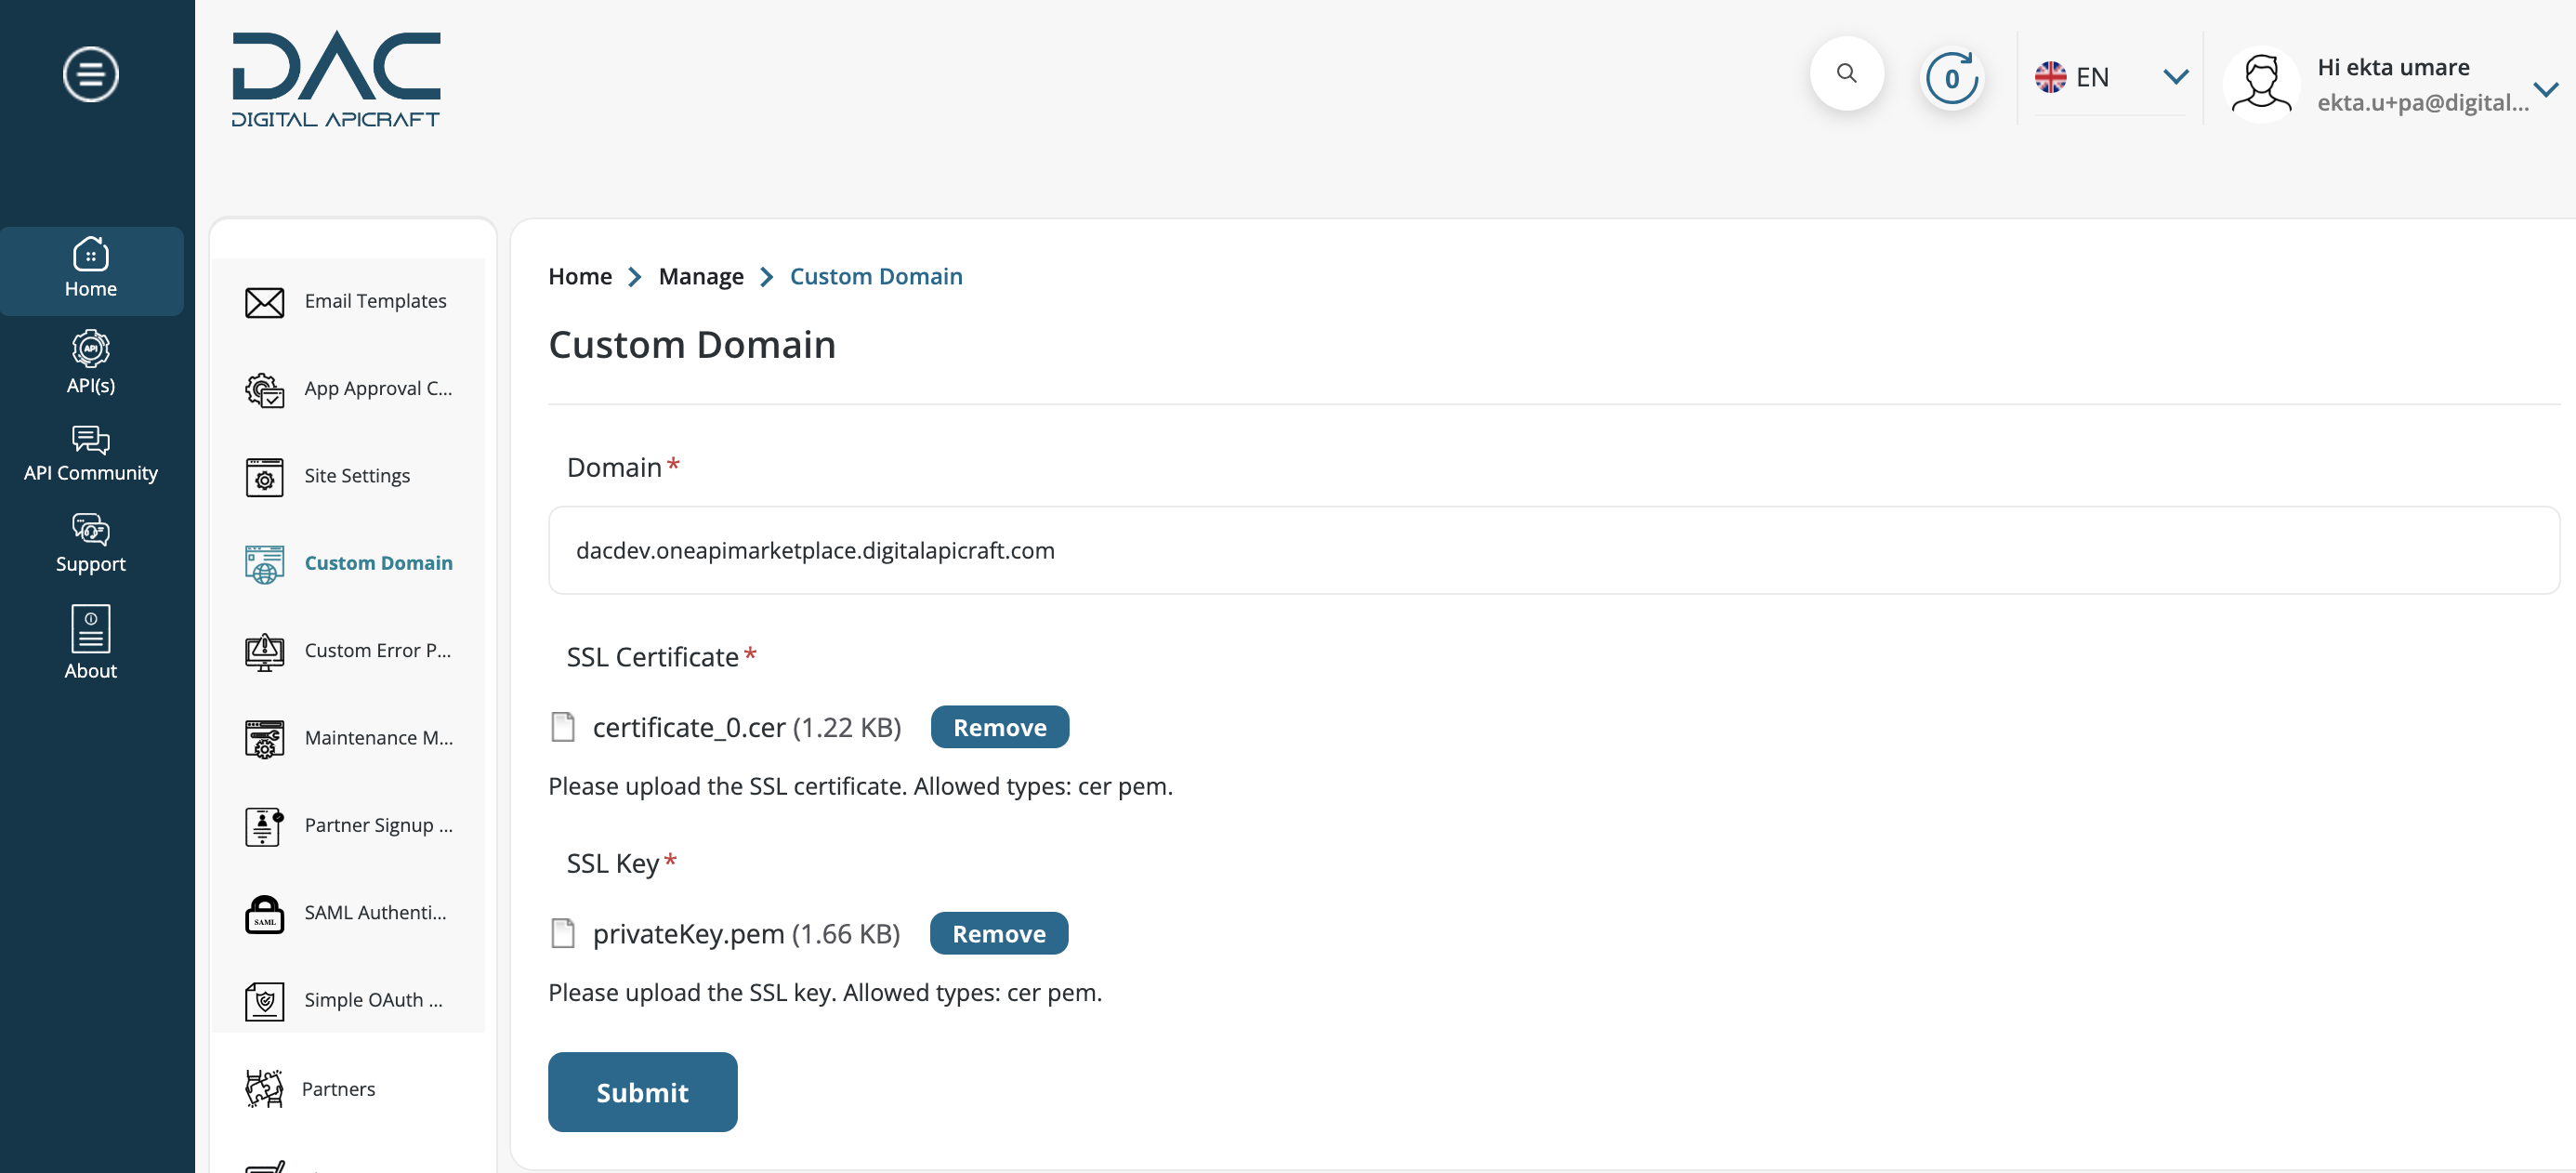
- Enter the domain name and upload the certificate and key. Make sure that the file types are allowed (cer and pem).
- After you have uploaded the certificate and key, a notification email will be sent to the DevOps team. They will get back to you within 24 hours.
- You will receive three reminders as the SSL expiration date approaches.
- When the SSL certificate is about to expire, you can upload the updated certificate and key on the same page.
Multilingual
- Content Translation - (APIs, Apps, Articles, Basic page, SOAP Service, WSDL Doc operation, and Webinars):
- Login to the site as the Portal administrator.
- Navigate to Home > Manage > Content from the left sidebar menu.
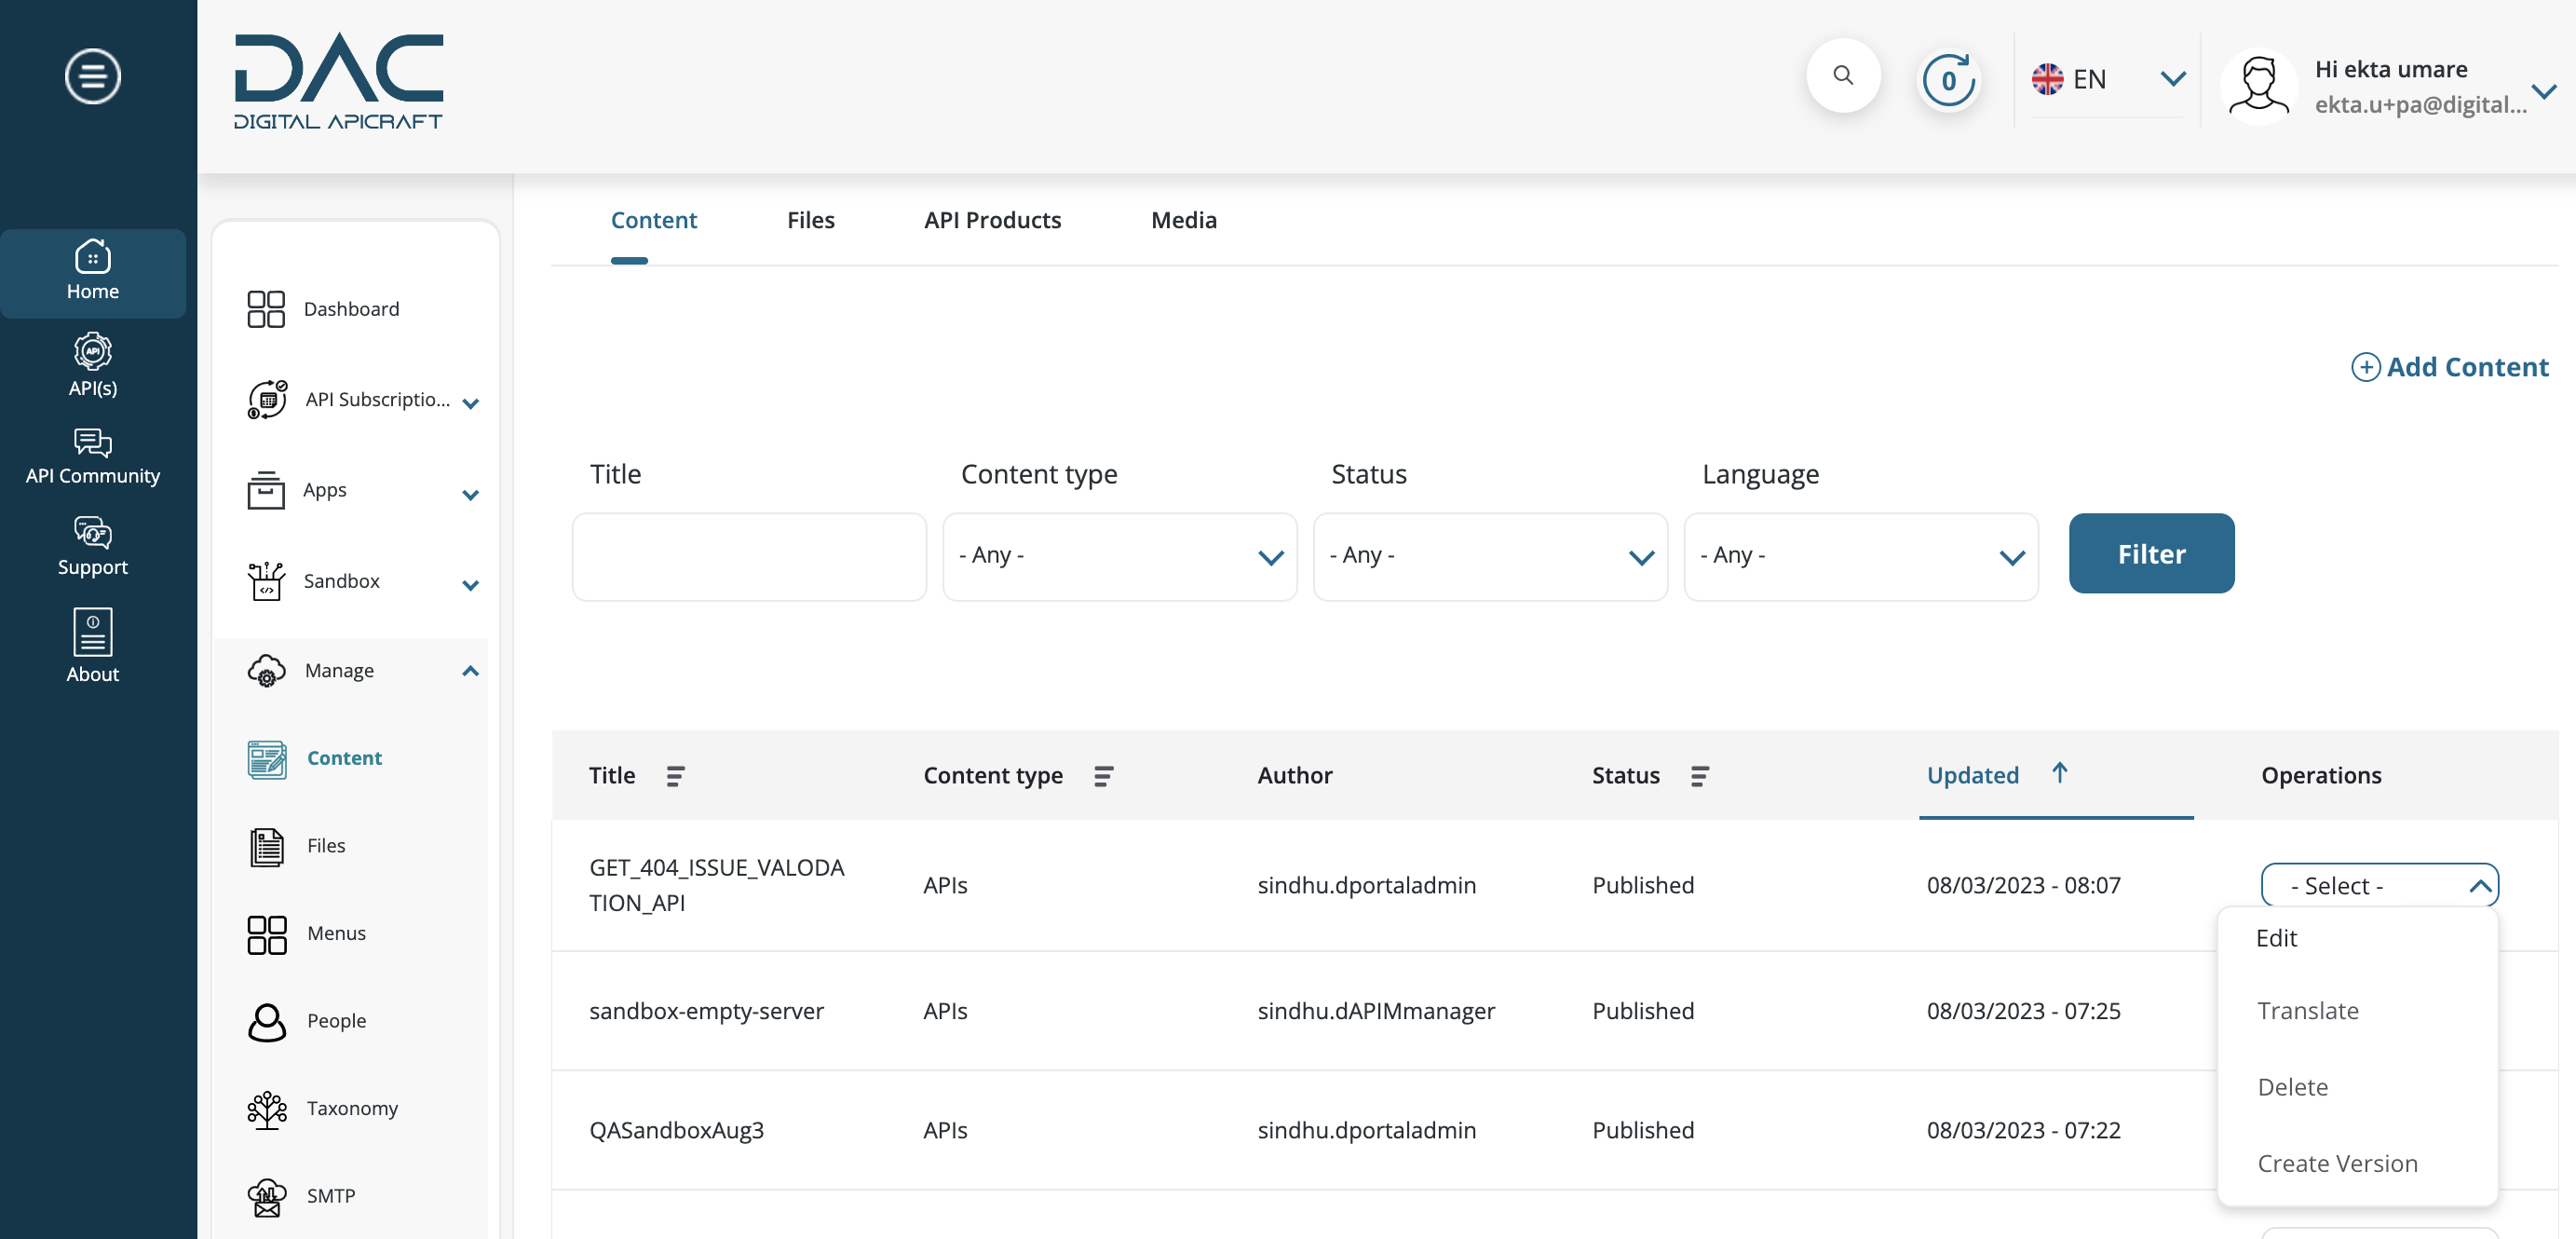
- Click on the Edit arrow button and then click on the Translate option.
- Click on the Add button specific to the language that we need to translate.
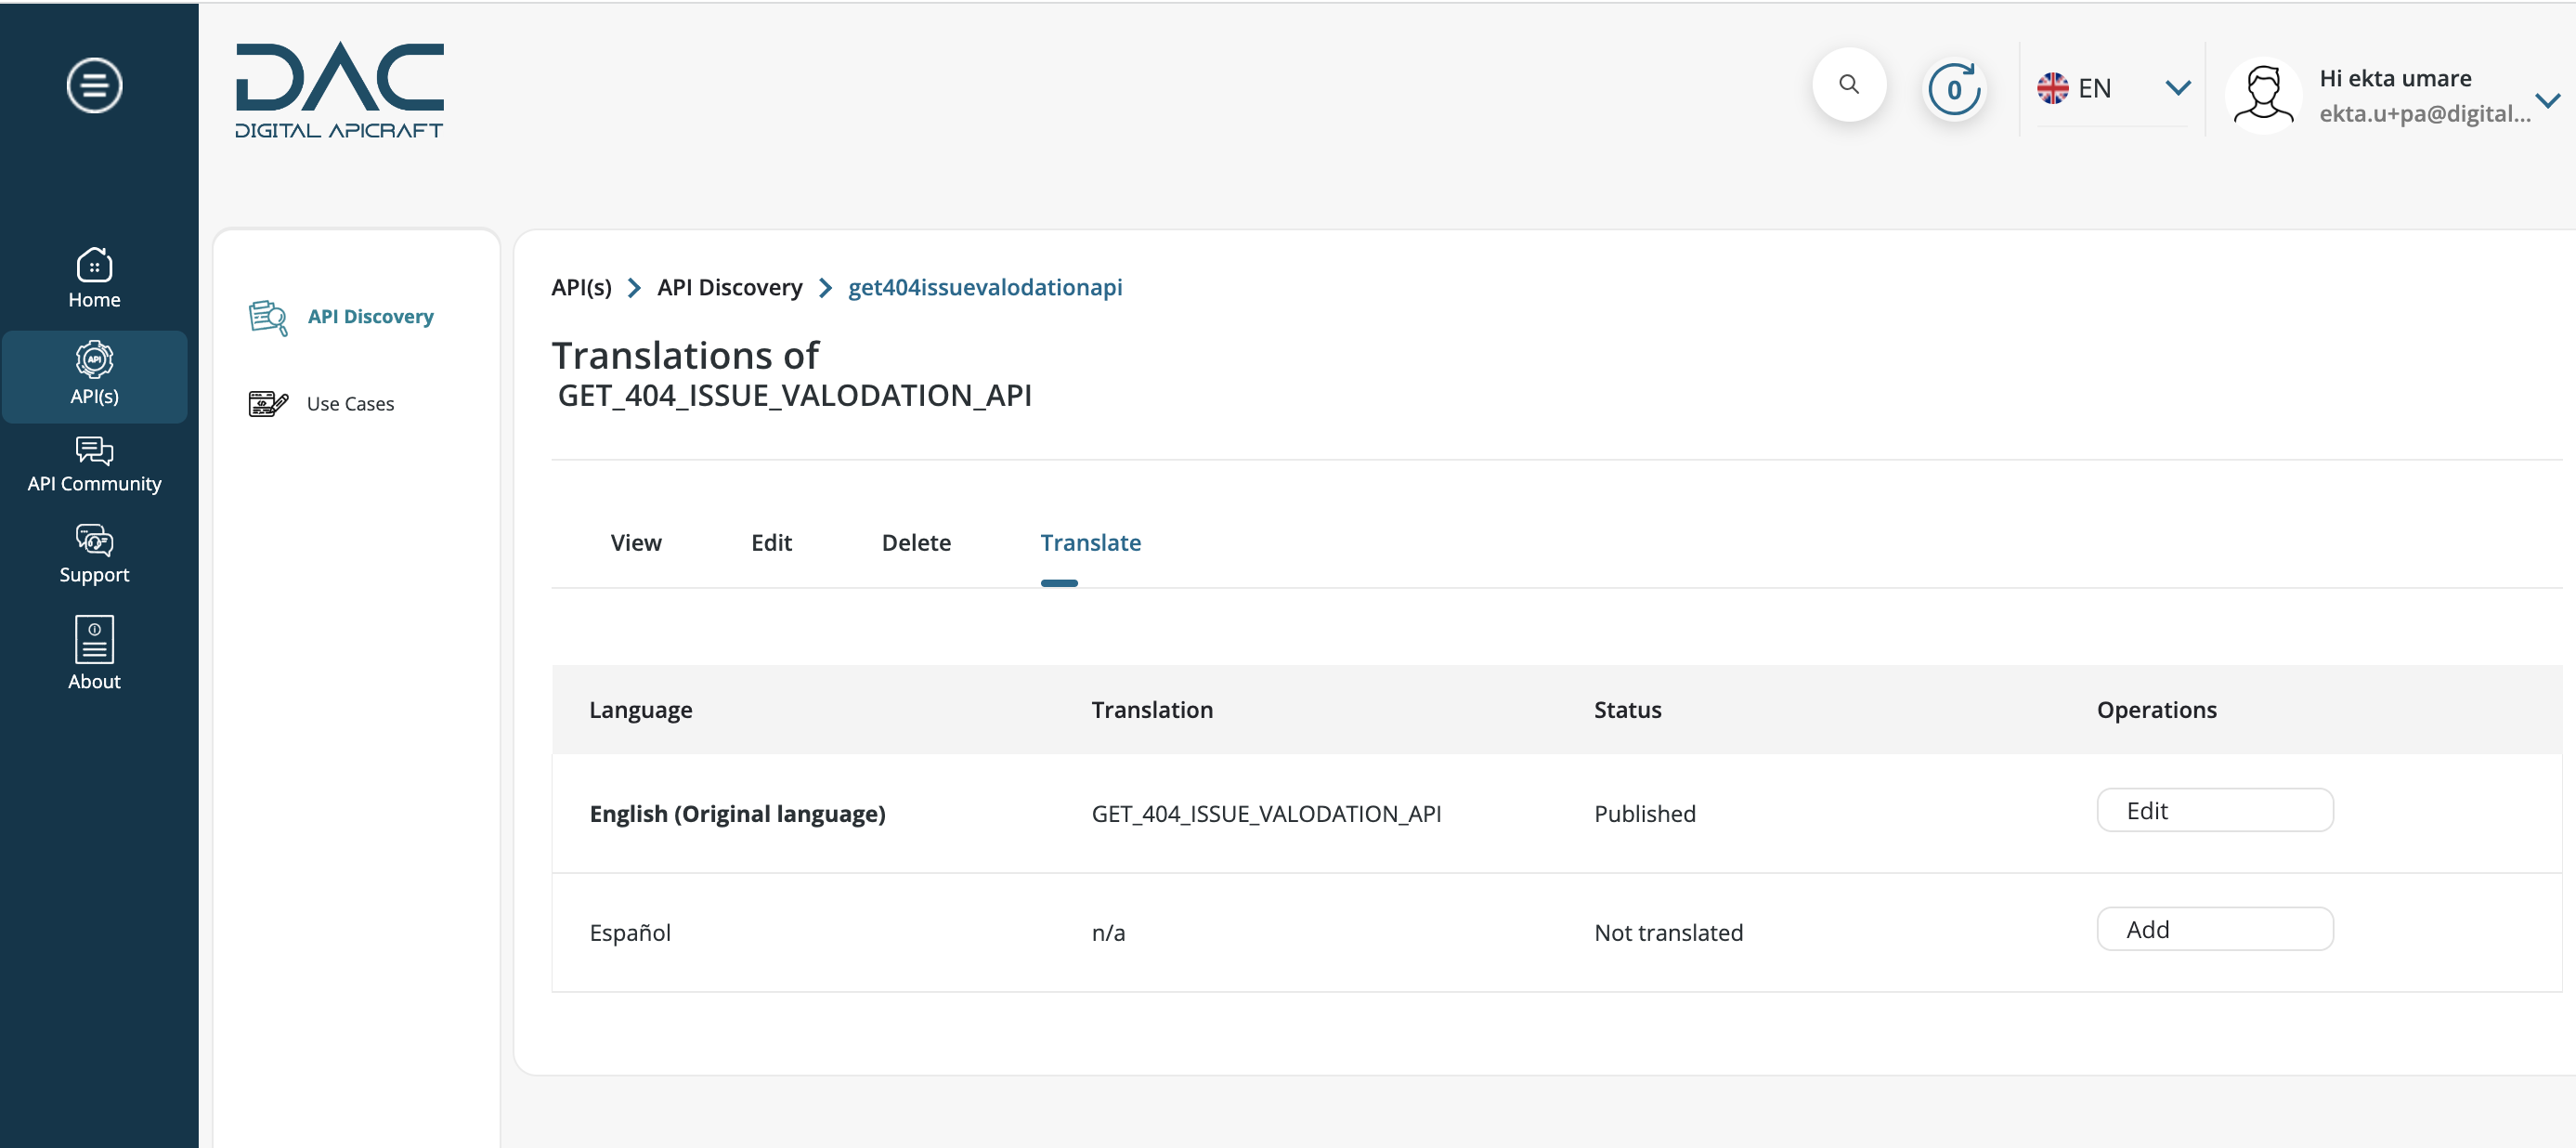
- Add all the translated content and click on Save.
App Approval Configuration
- Login to the site as a Portal Administrator.
- Navigate to Manage > Apps Approval Configuration from the left sidebar menu.
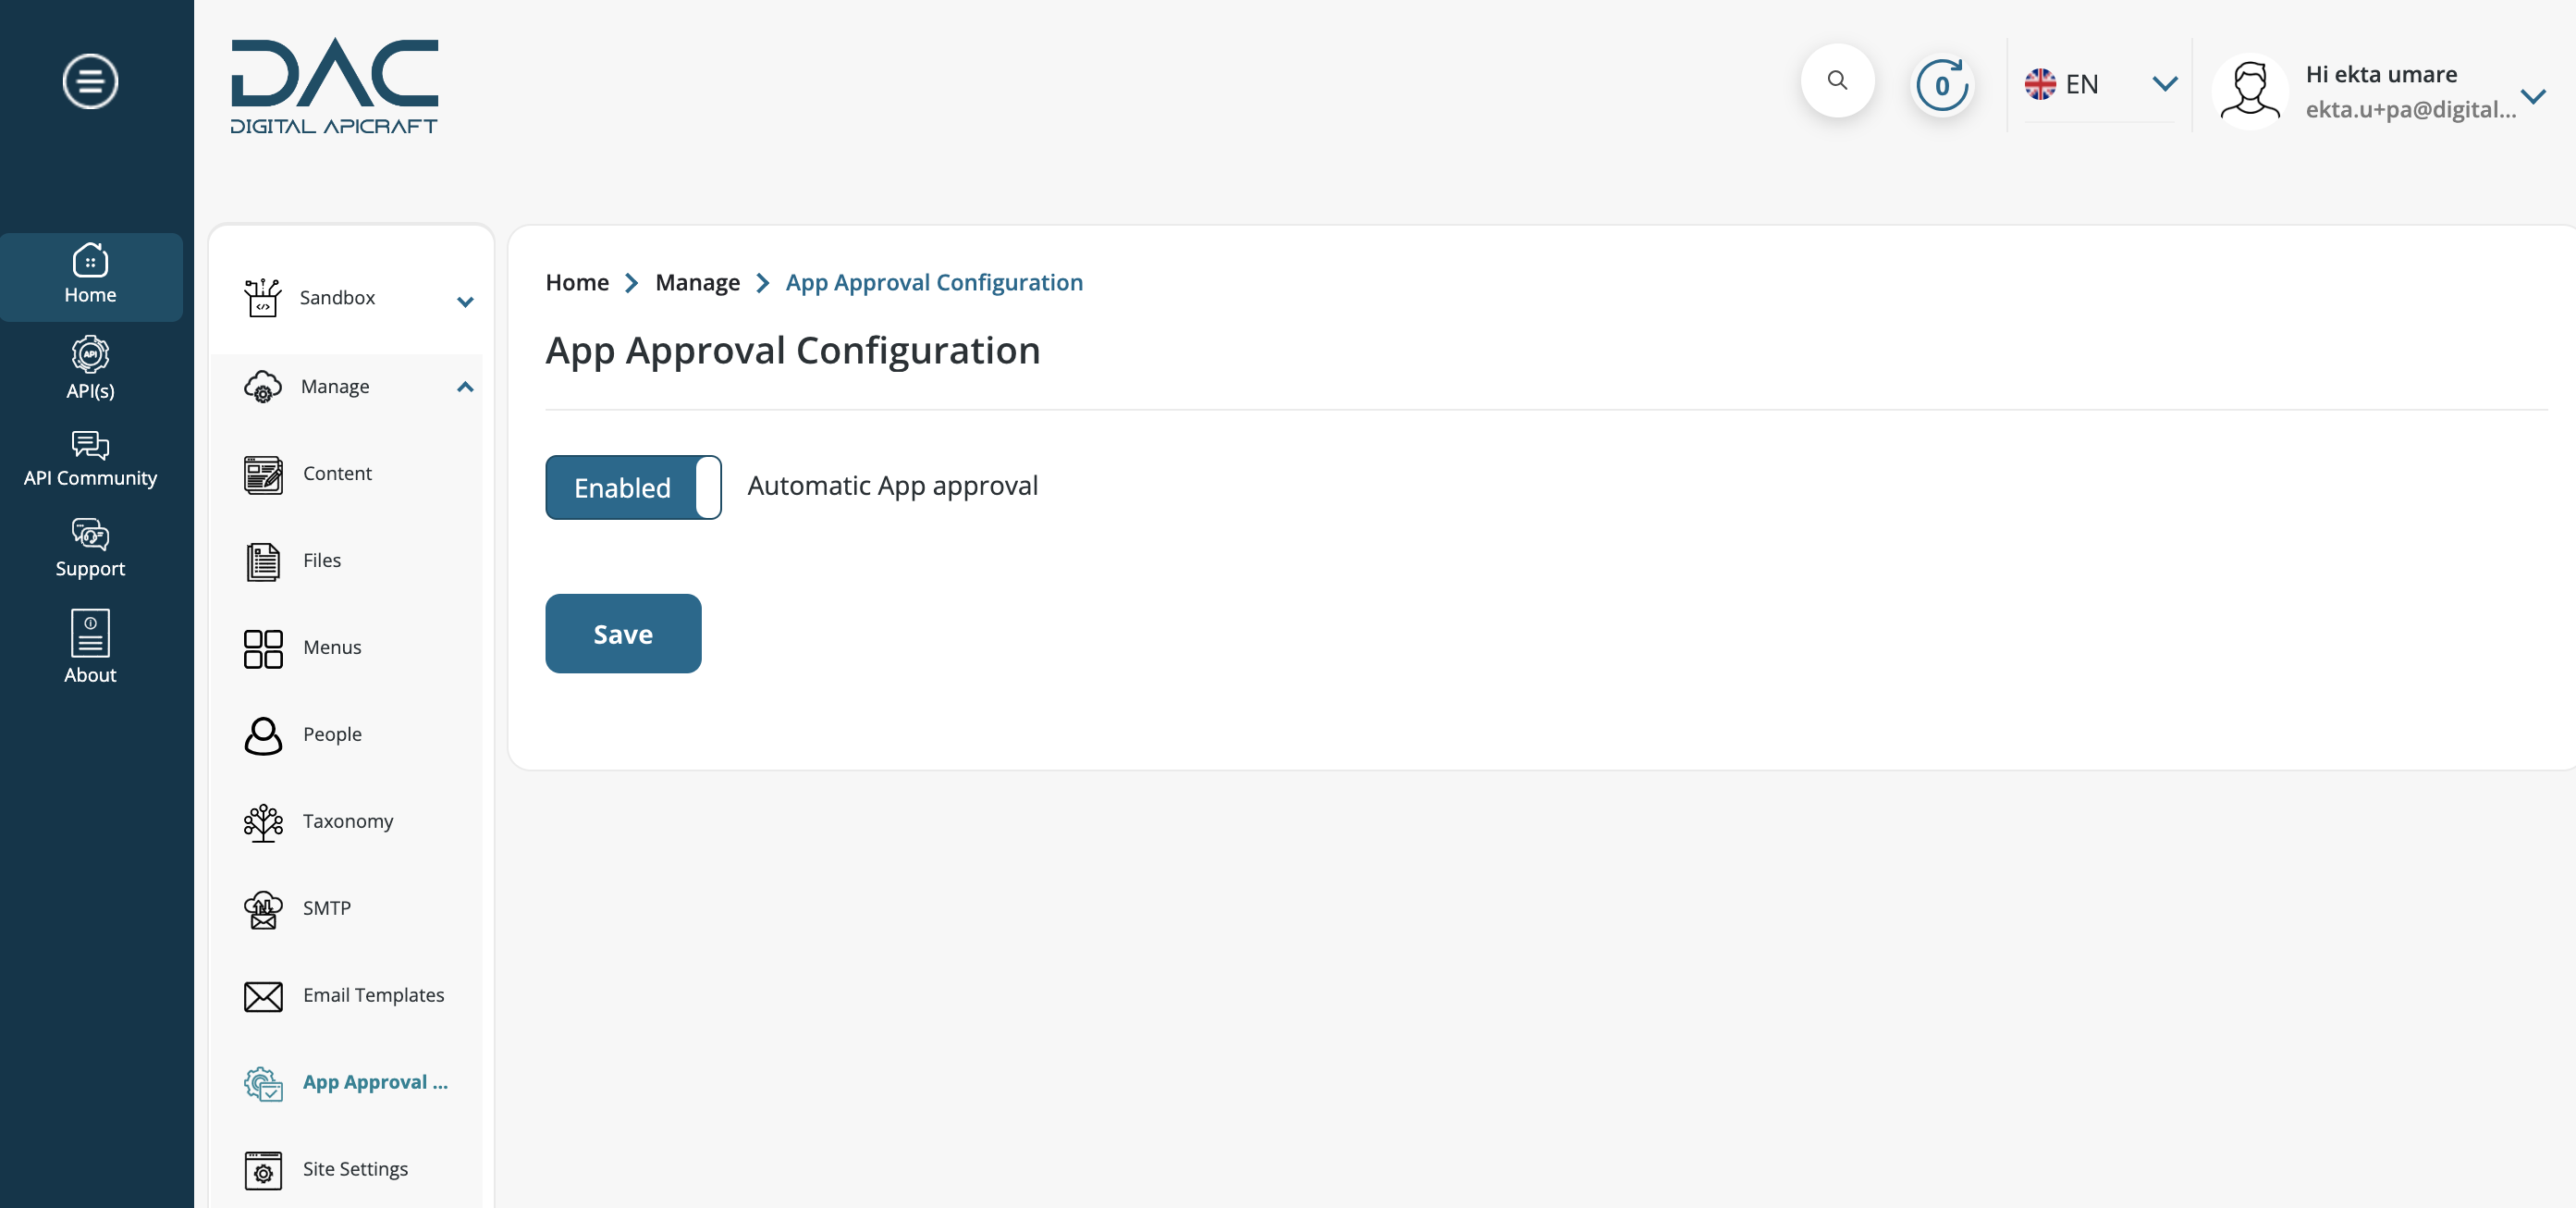
- In the App approval workflow, the portal admin has the ability to enable or disable automatic app approval.
- When automatic app approval is enabled, the app is approved automatically.
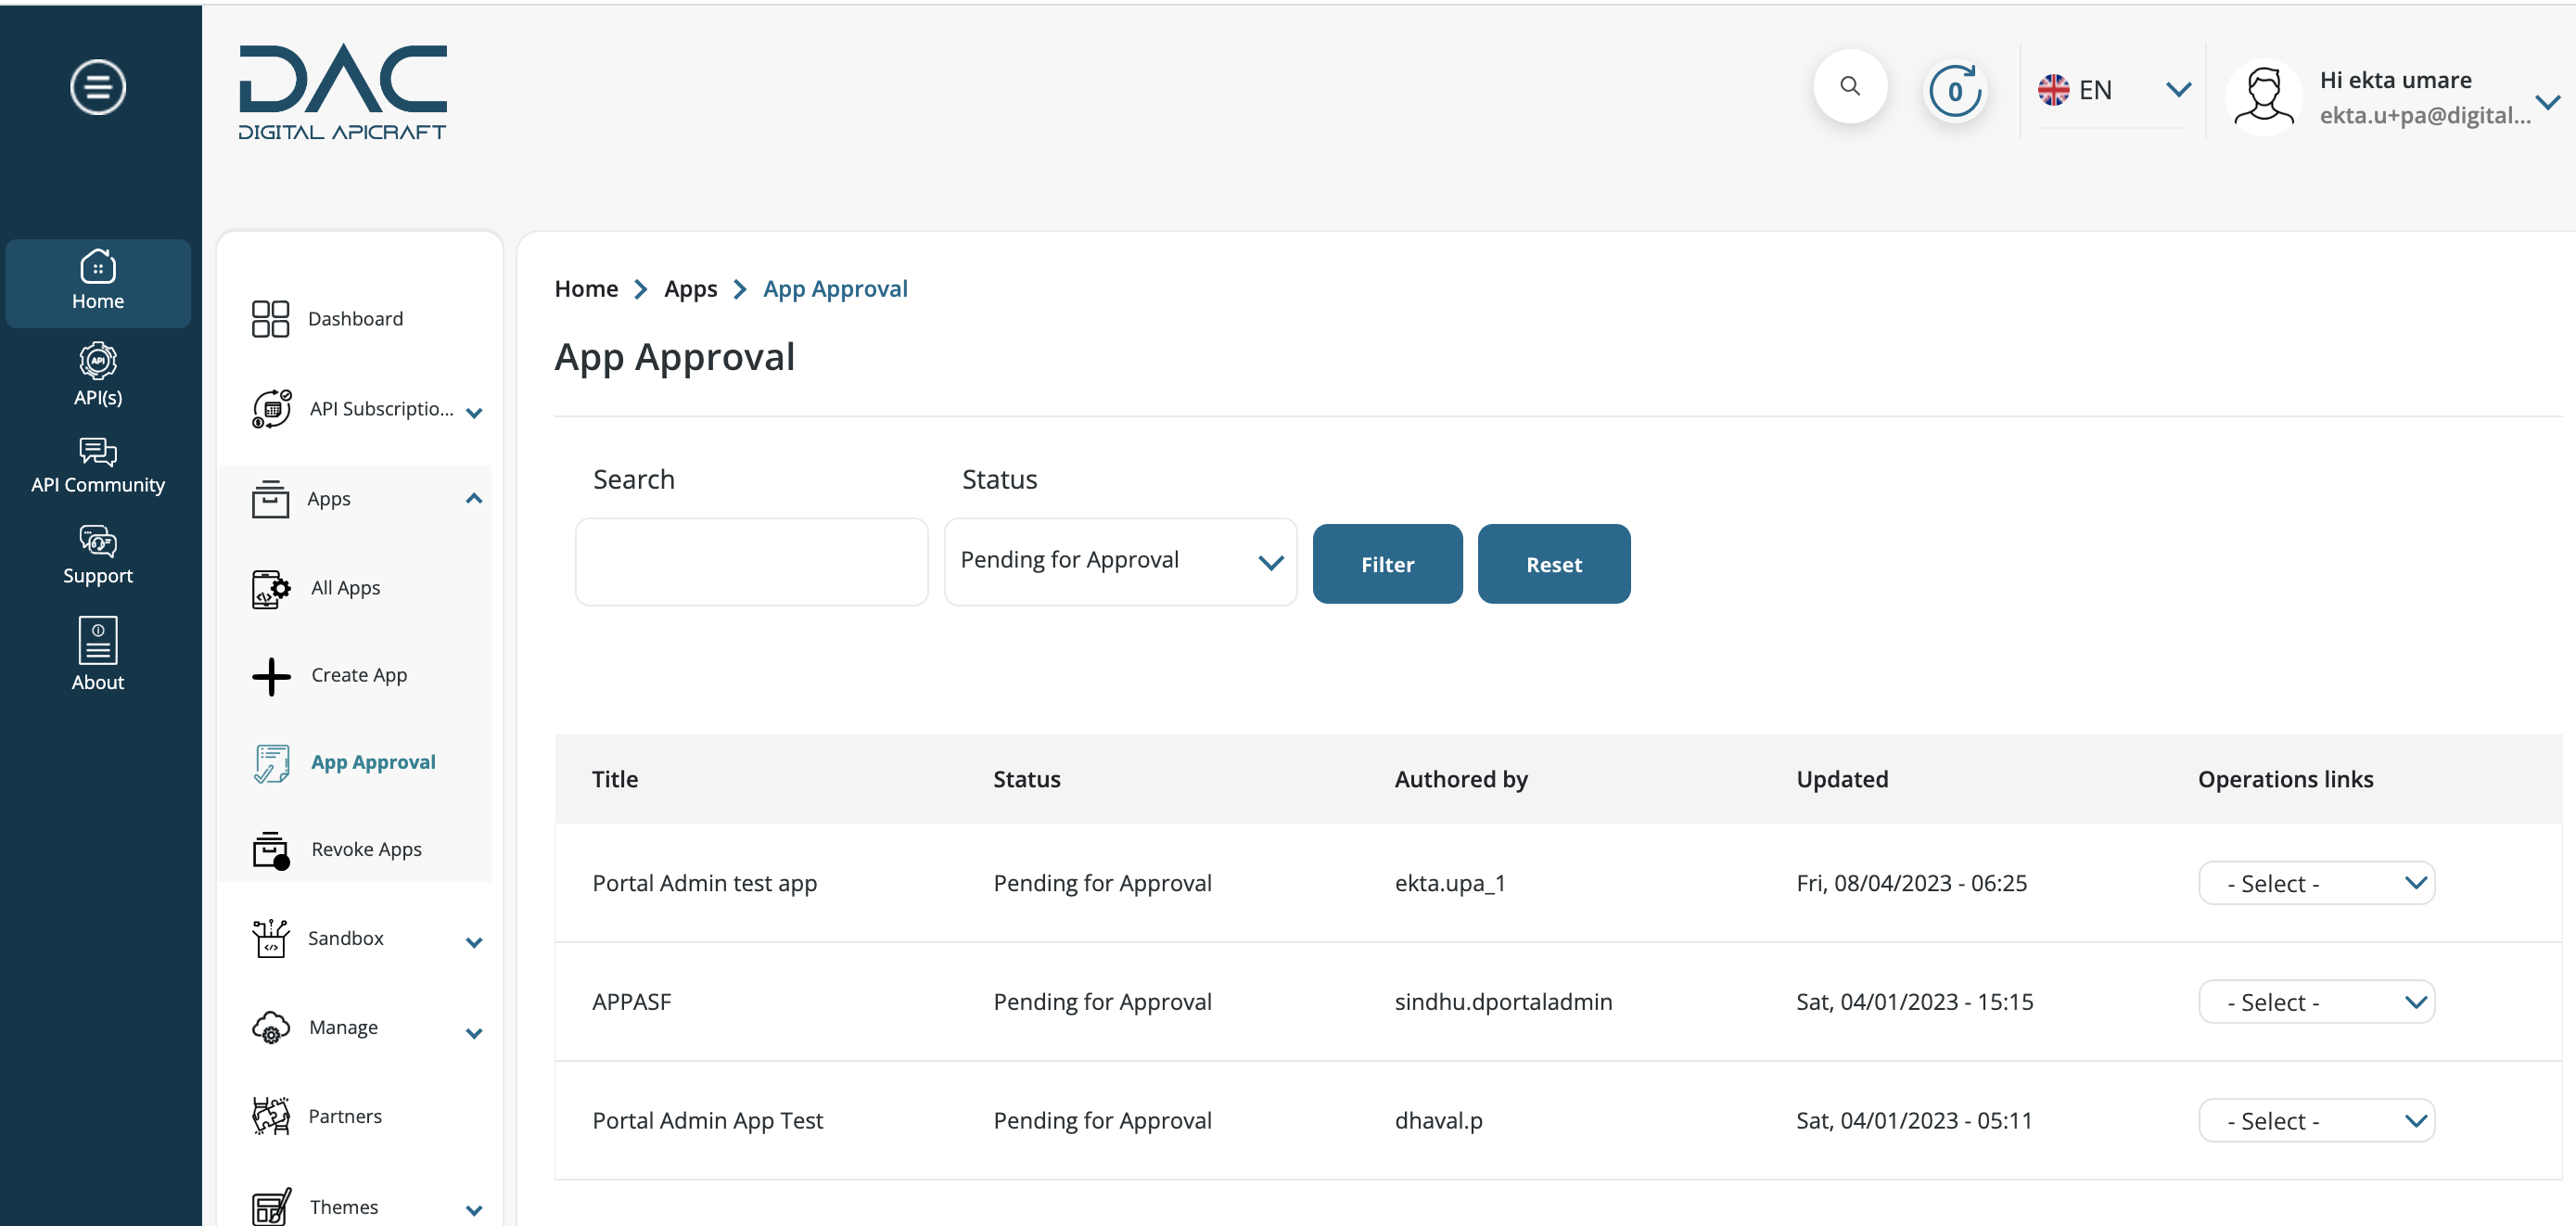
- If automatic app approval is disabled, the app will be in a pending state until approval. The path for this feature is Home > Manage > Apps Approval Configuration.
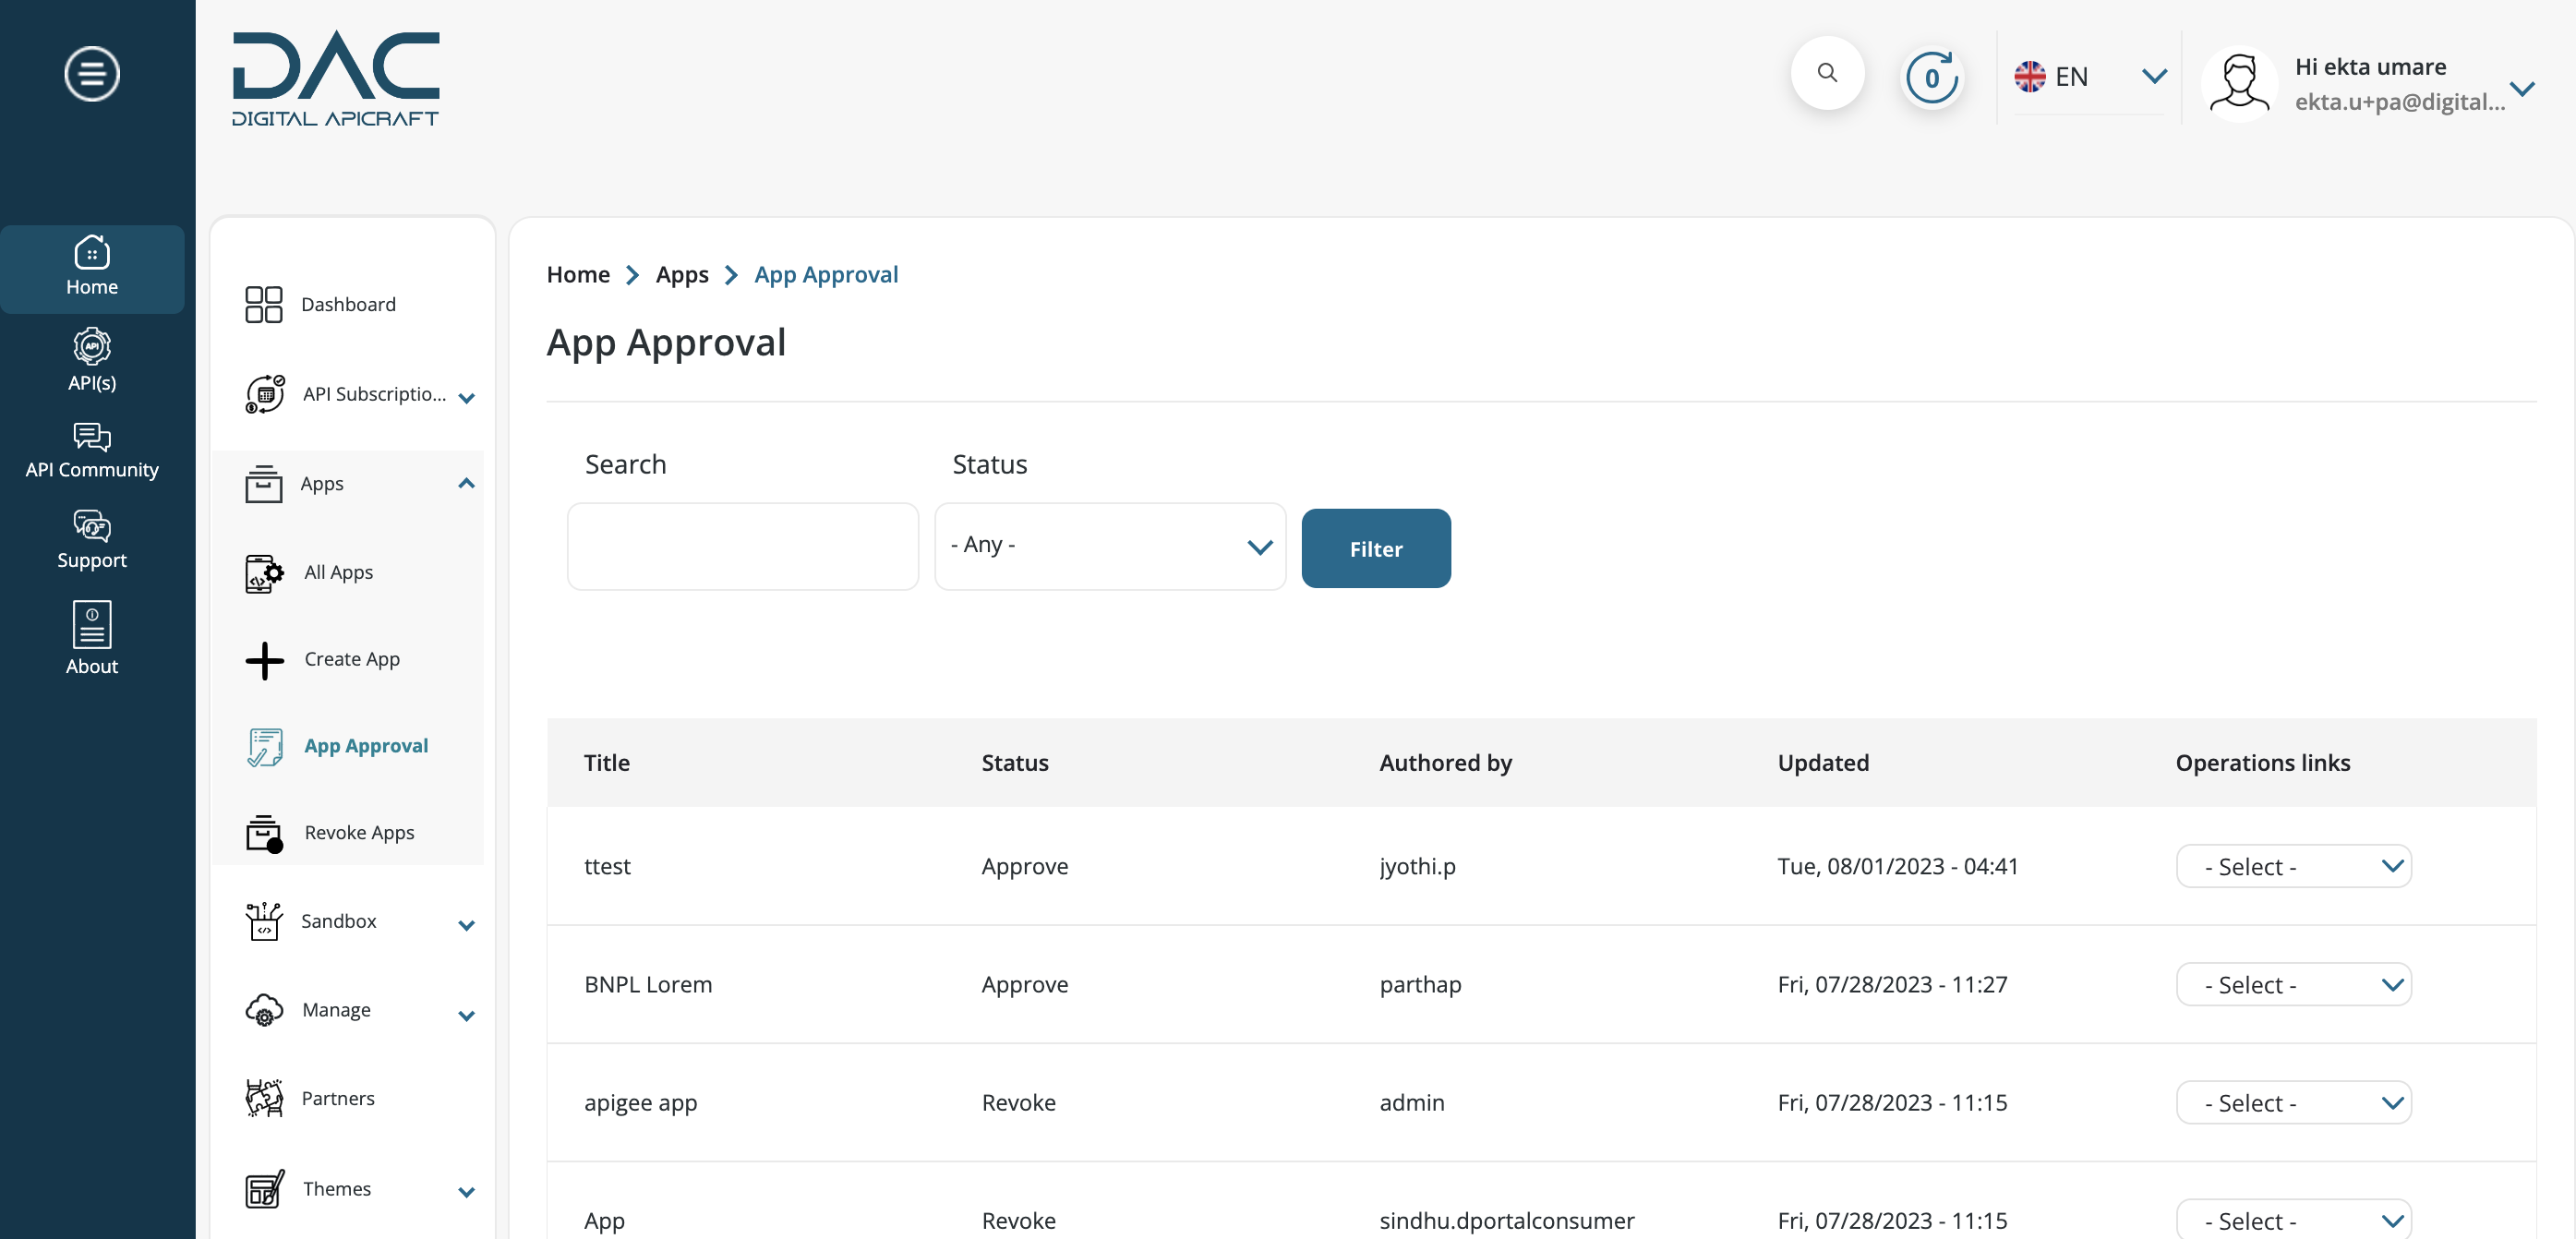
- Navigate to Home > Apps > App Approval from the left sidebar menu.
-
When an app is in the pending approval state, the portal admin can either approve or reject the app.
-
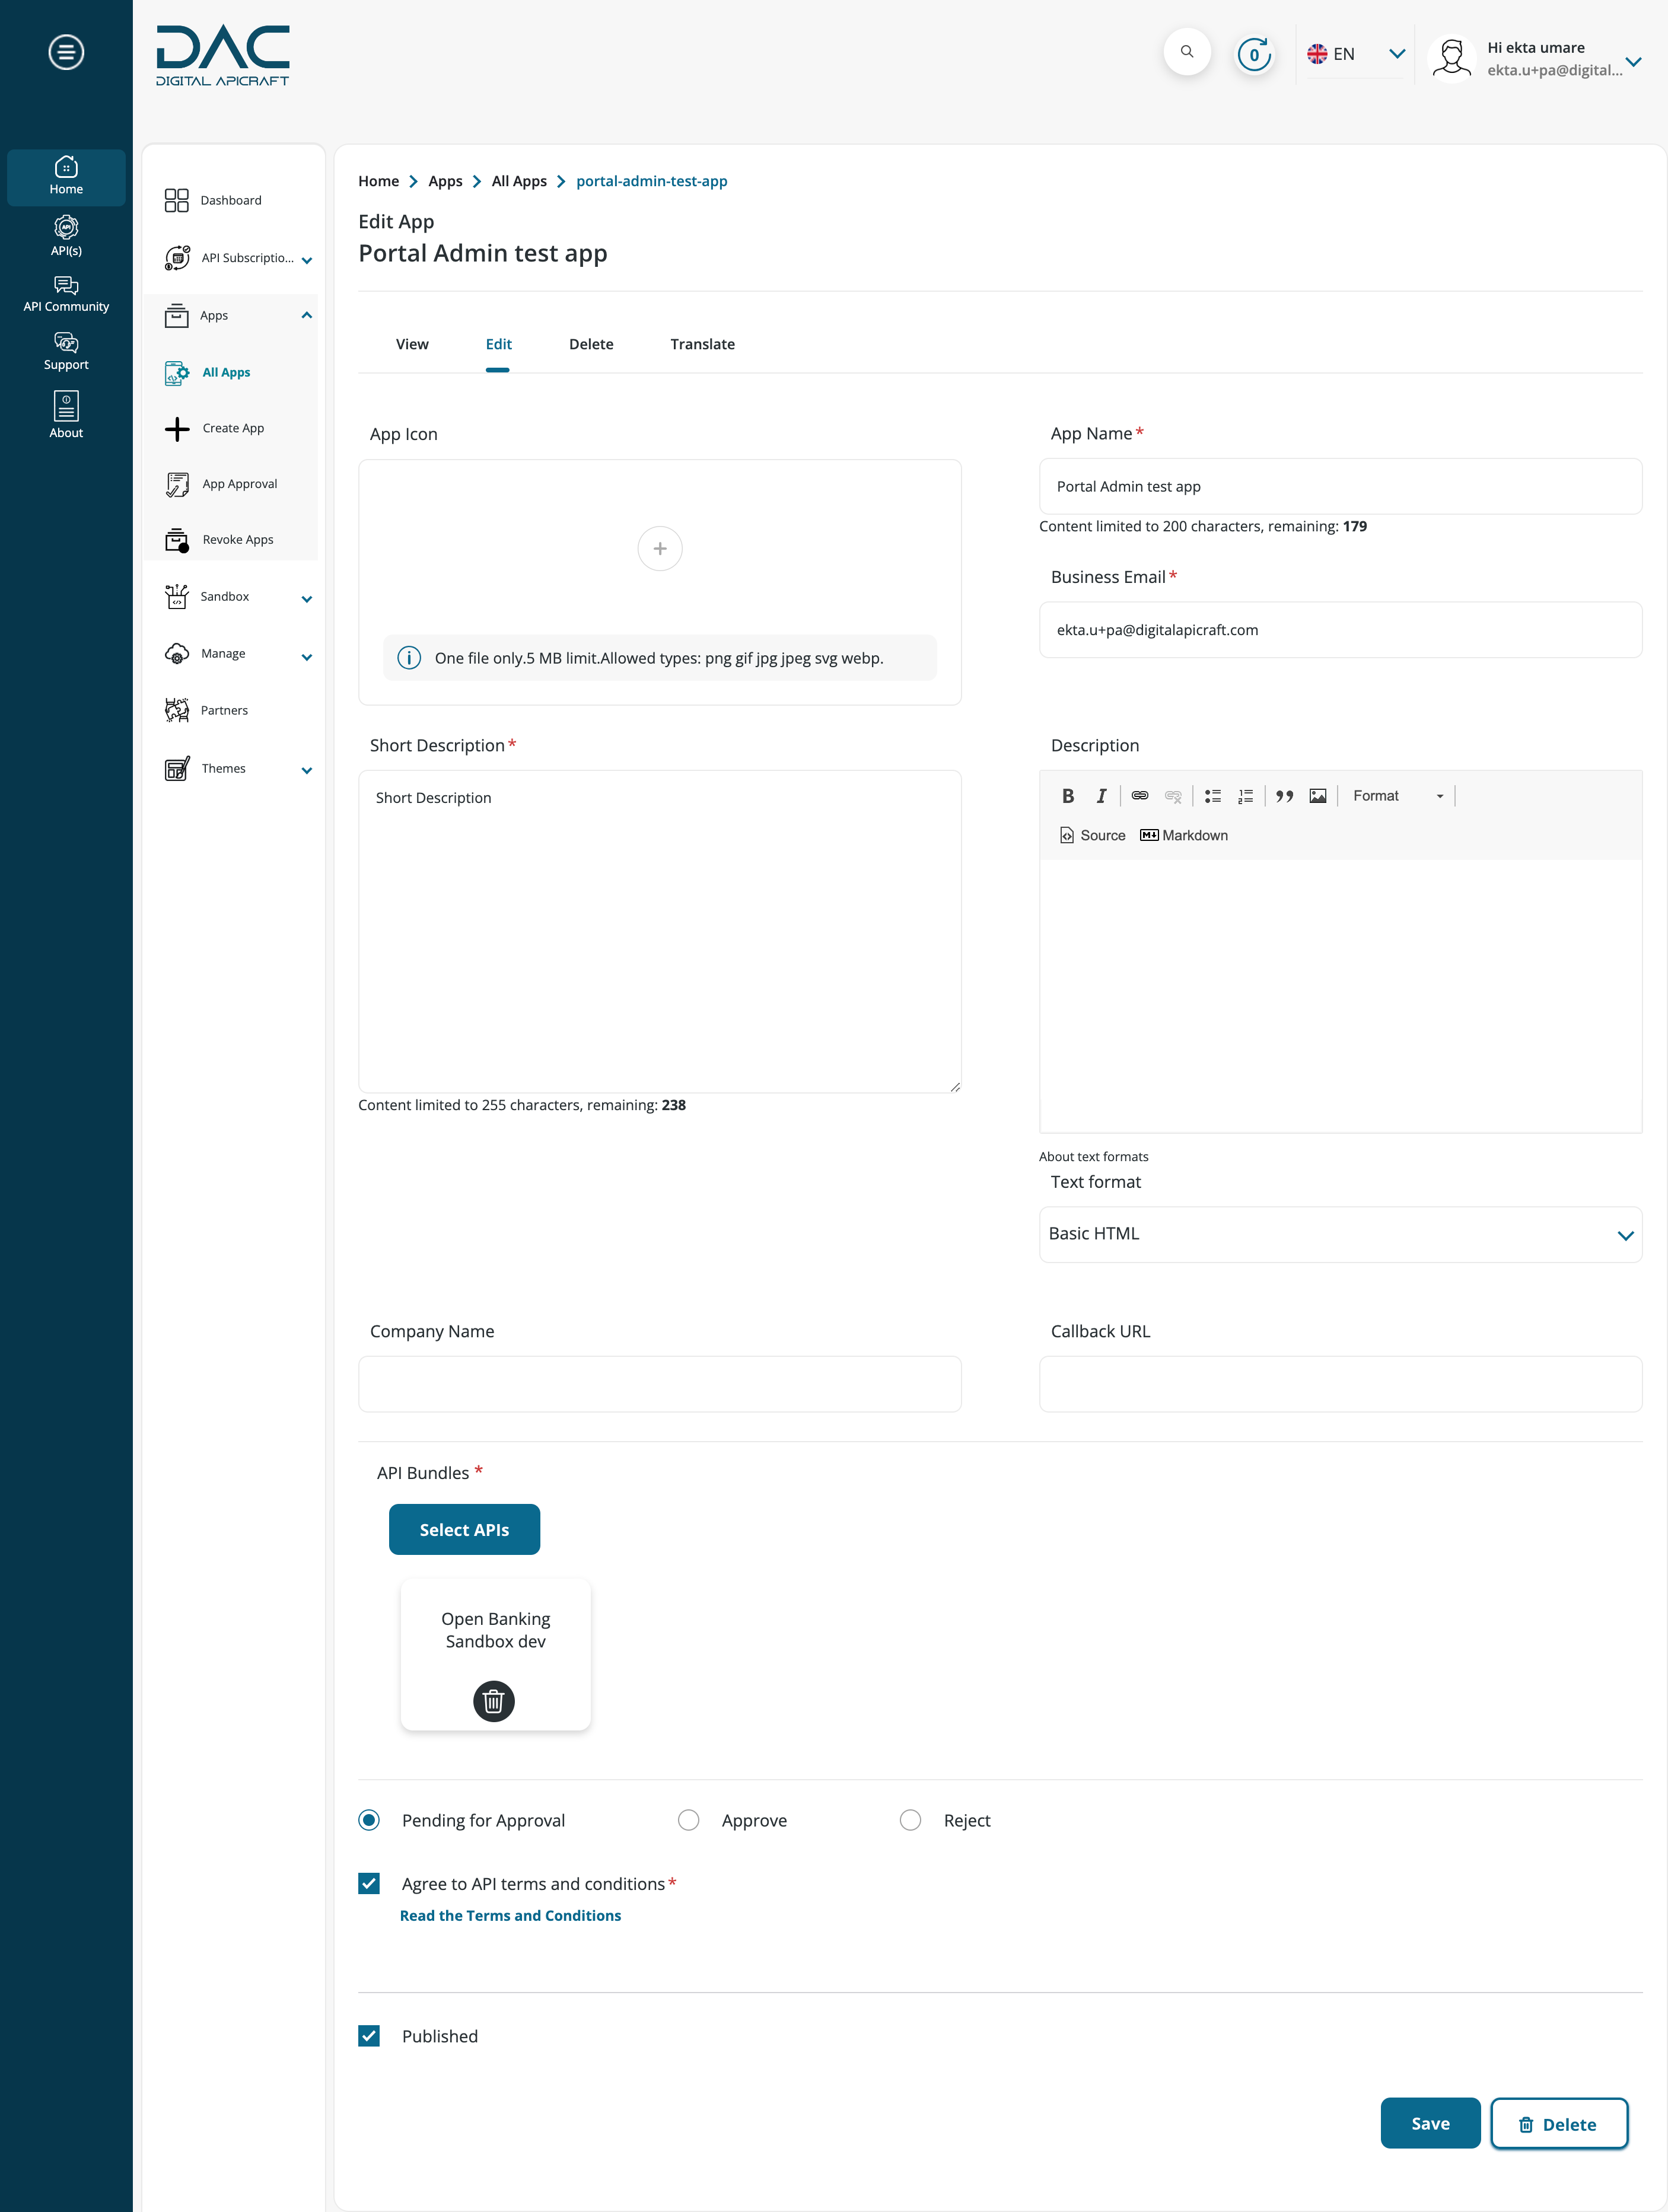
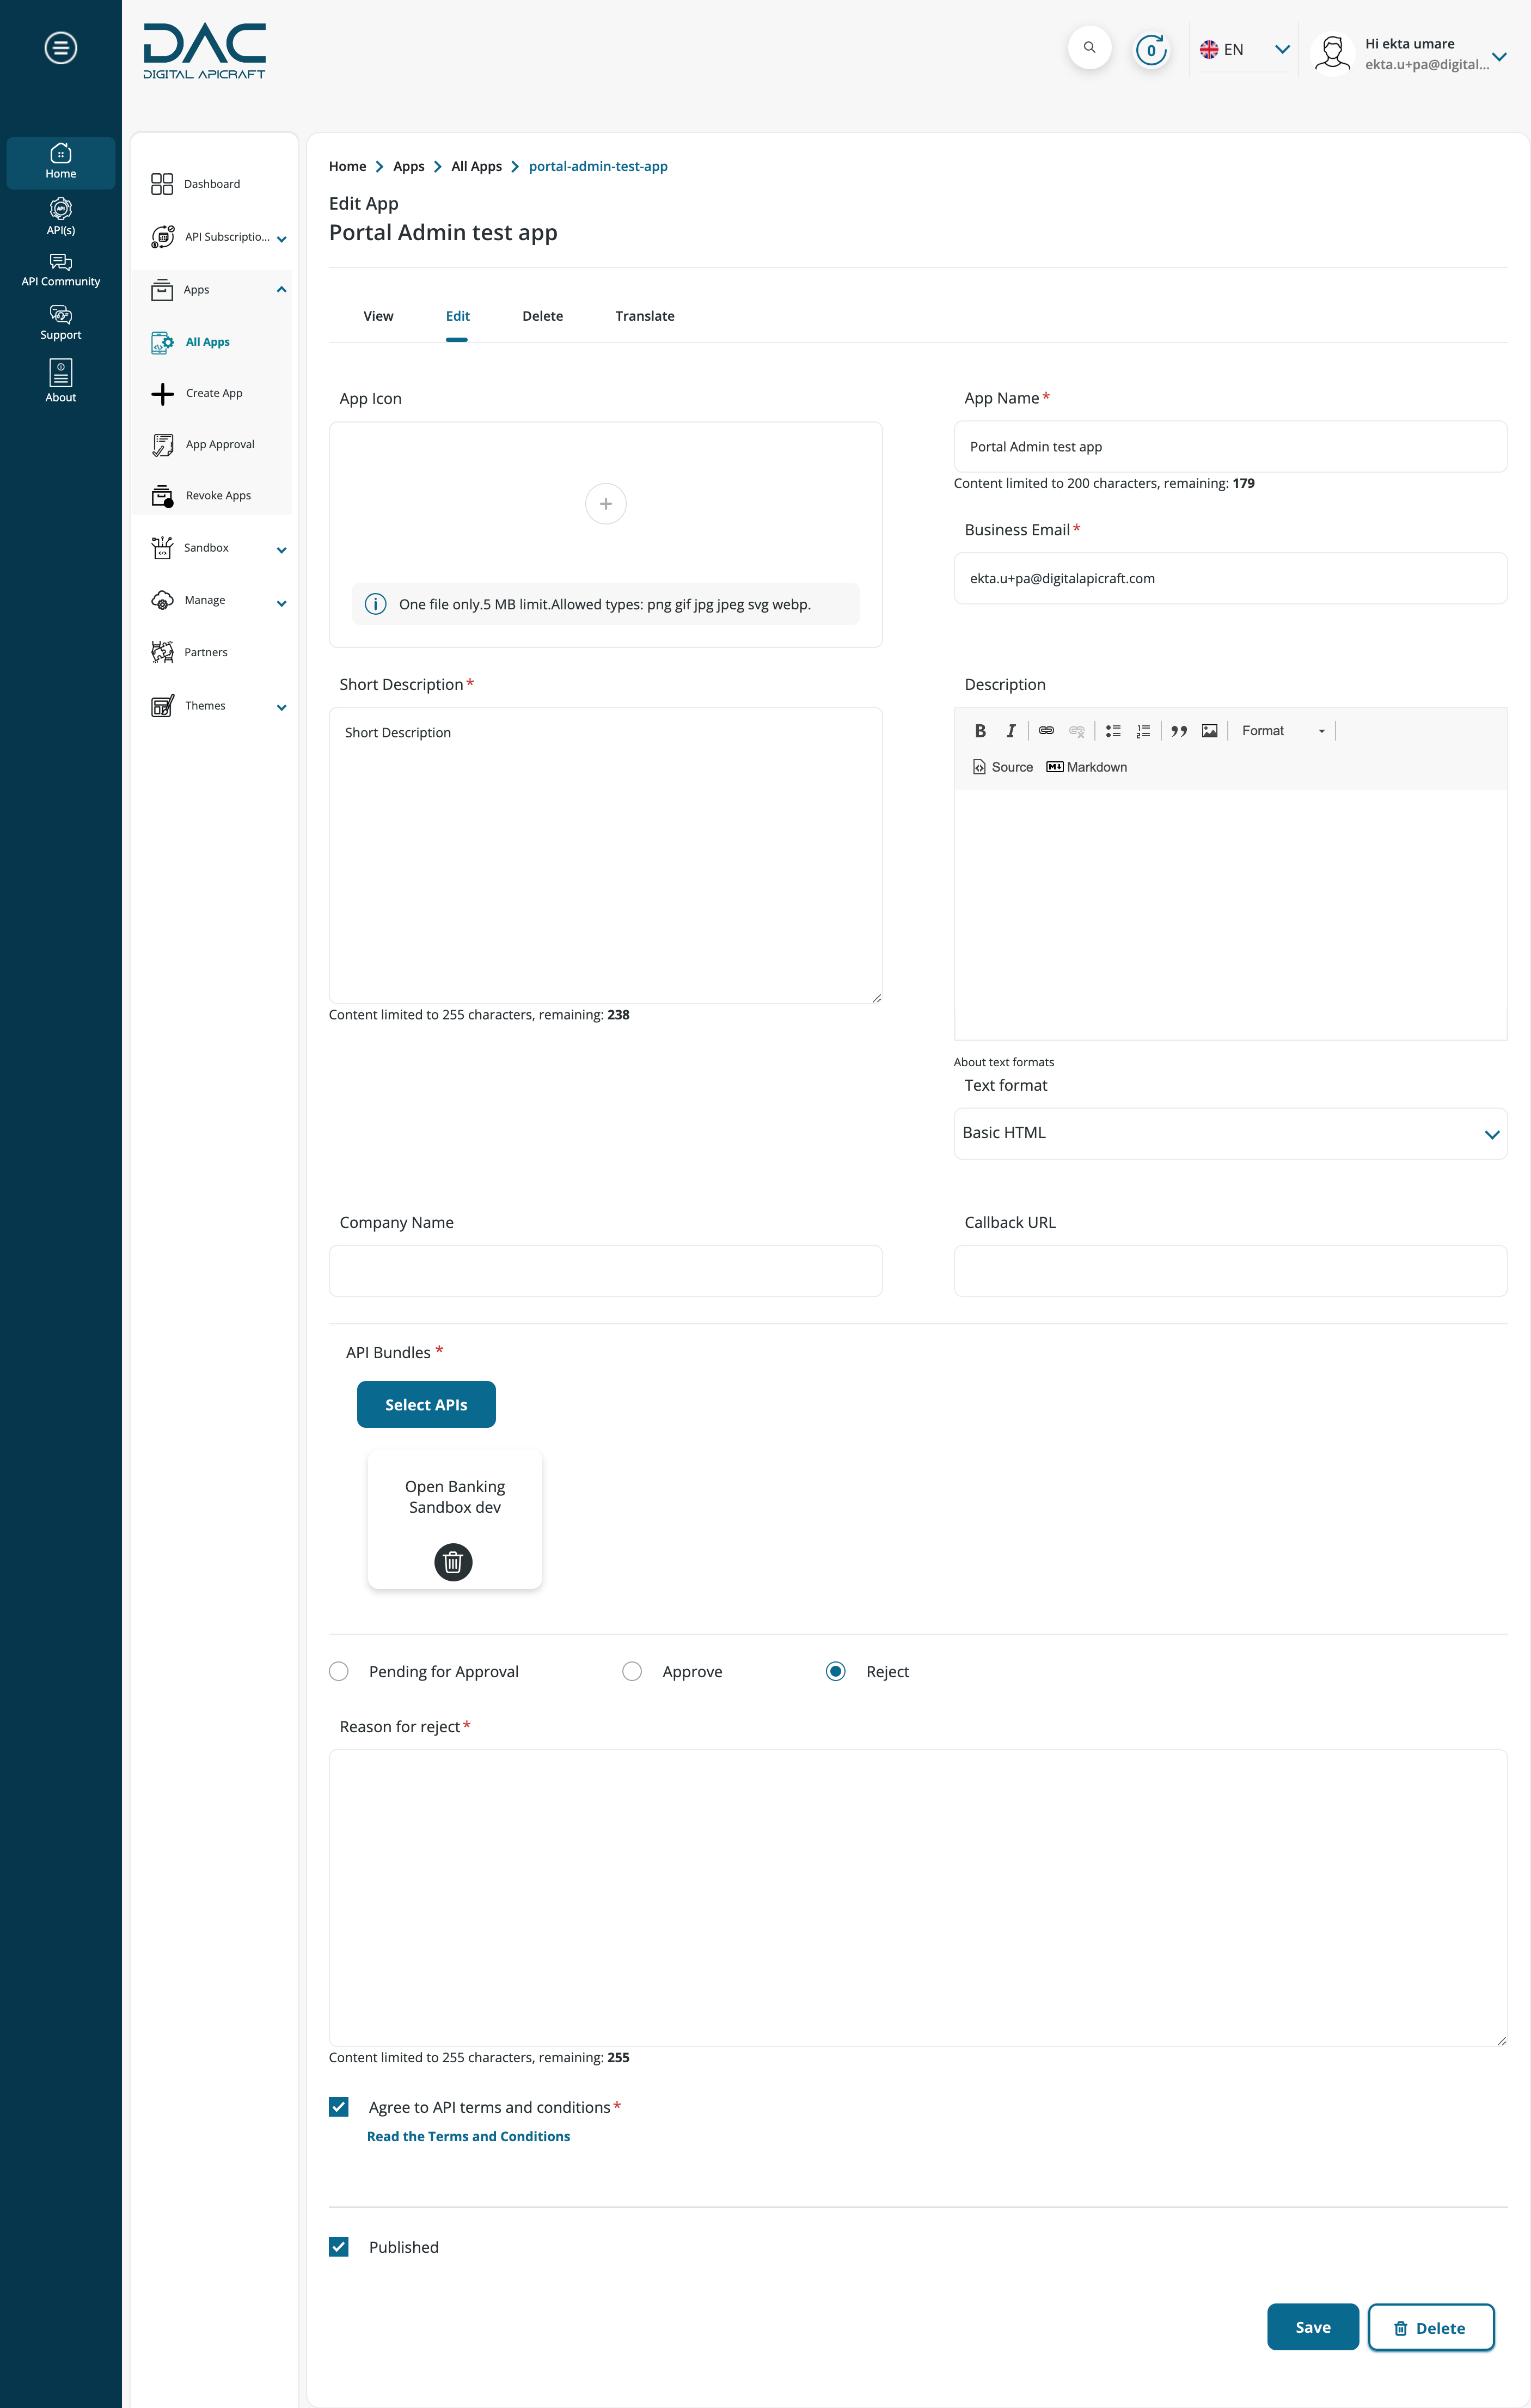
If the portal admin rejects an app, they must provide a reason for the rejection click on Edit button for Approve or Rejected.
-
If an app remains in a pending approval state, it is neither approved nor rejected.
-
Once an app is approved, it may proceed to the next stage of the workflow.

-
If an app is rejected, it will not progress further in the workflow.
Using the trial version of OneAPIMarketplace
-
These guidelines apply if you are using the trial version of OneAPIMarketplace.
-
Upon login, the portal administrator will receive a notification pop-up reminding them of the remaining days in their trial period, as well as a link to upgrade to the premium version.
-
The plugin for trial mode enables users to use the website for a set duration of 30 days, which can be adjusted as needed.
-
A maximum of 10 users can be registered for each trial instance.
-
After the trial duration is over, the system will switch to read-only mode, where the user will be unable to add, edit, or delete content in the application.
-
The user will only be able to view any content that has been created previously.
Manage your APIs
One of the key features of our API gateway connectivity service is the ability to sync your APIs from your gateway into One APIMarketplace. This makes it easy to manage and deploy your APIs, and ensures that your developers have access to the latest and most up-to-date versions of your APIs.
Once your gateway is connected, One APIMarketplace will automatically discover your APIs and import them into our system. You can then manage and deploy your APIs from One APIMarketplace, without having to manually create and update them.
In addition to API syncing, One APIMarketplace also supports API discovery. This means that developers can easily find and access your APIs, even if they are not familiar with your specific gateway. One APIMarketplace provides a comprehensive API catalog that developers can search and browse, making it easy for them to find the APIs they need to build their applications.
To ensure that your APIs are discoverable, we recommend that you provide clear and descriptive documentation that outlines the purpose, functionality, and usage of your APIs. One APIMarketplace provides tools and resources to help you create and manage your documentation, including markdown support and versioning.
By syncing your APIs and supporting API discovery, One APIMarketplace makes it easy for developers to build and deploy powerful and innovative applications that integrate seamlessly with your APIs. So why not give it a try and see how our API gateway connectivity and discovery can help you streamline your API management process and boost your developer productivity!
Sync APIs
- Login to the site as an APIM Administrator / Product Manager.
- Navigate to Home > Manage > Sync from the left sidebar menu.

- Select the API gateway you want to sync from the list, which displays the number of previously synced APIs and API products for each gateway.
- Select AWS Credentials, fill in the relevant data in the fields (instance name, description, version, Region, Access key & secret key) and click Test Connection.
- To sync AWS APIs, click Sync AWS APIs.

- A list of APIs will then be displayed, along with details such as ID, name, and source.To sync a specific set of APIs, select them and click Sync selected API(s). To sync all APIs, click Sync all APIs. A success message will appear once the syncing process is complete.
- Navigate to Home > Manage > Sync from the left sidebar menu & select Apigee.
- Select Apigee Credentials, fill in the relevant data in the fields (instance name, description, Apigee Edge endpoint, Organization, Username & password) and click Test Connection.
- To sync APIs, click Sync Apigee APIs.
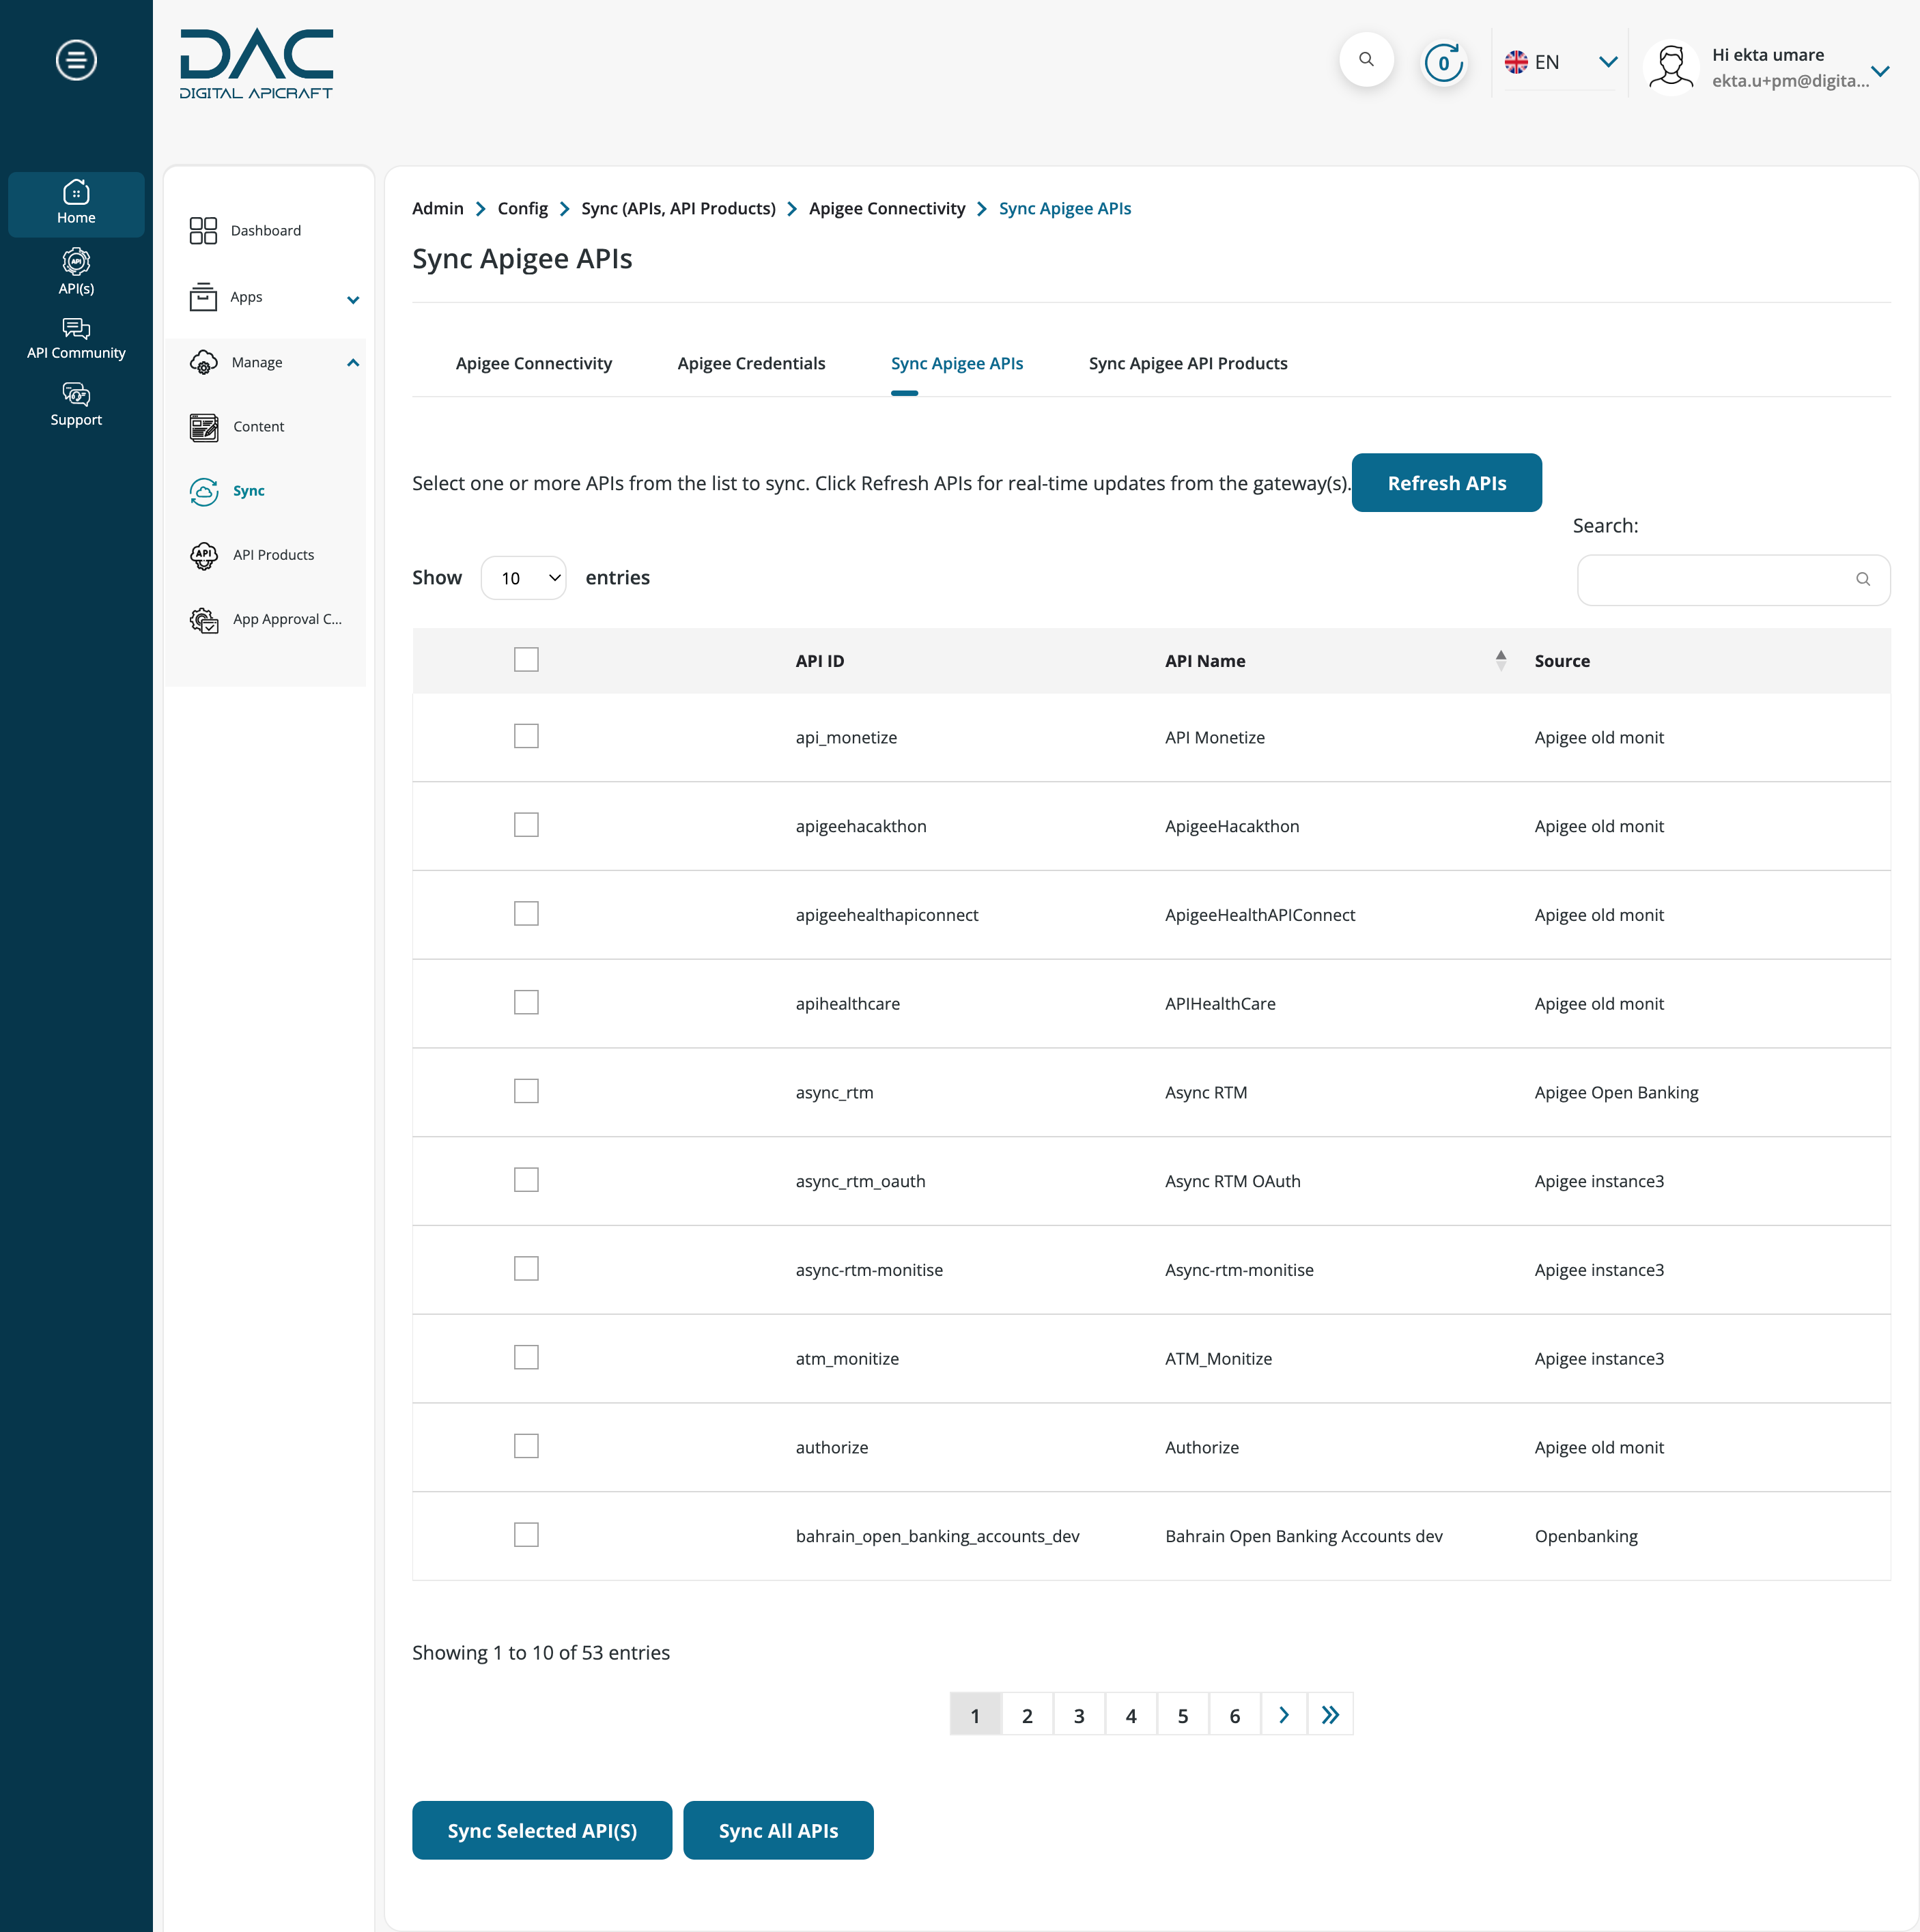
- A list of APIs will then be displayed, along with details such as ID, name, and source.To sync a specific set of APIs, select them and click Sync selected API(s). To sync all APIs, click Sync all APIs. A success message will appear once the syncing process is complete.
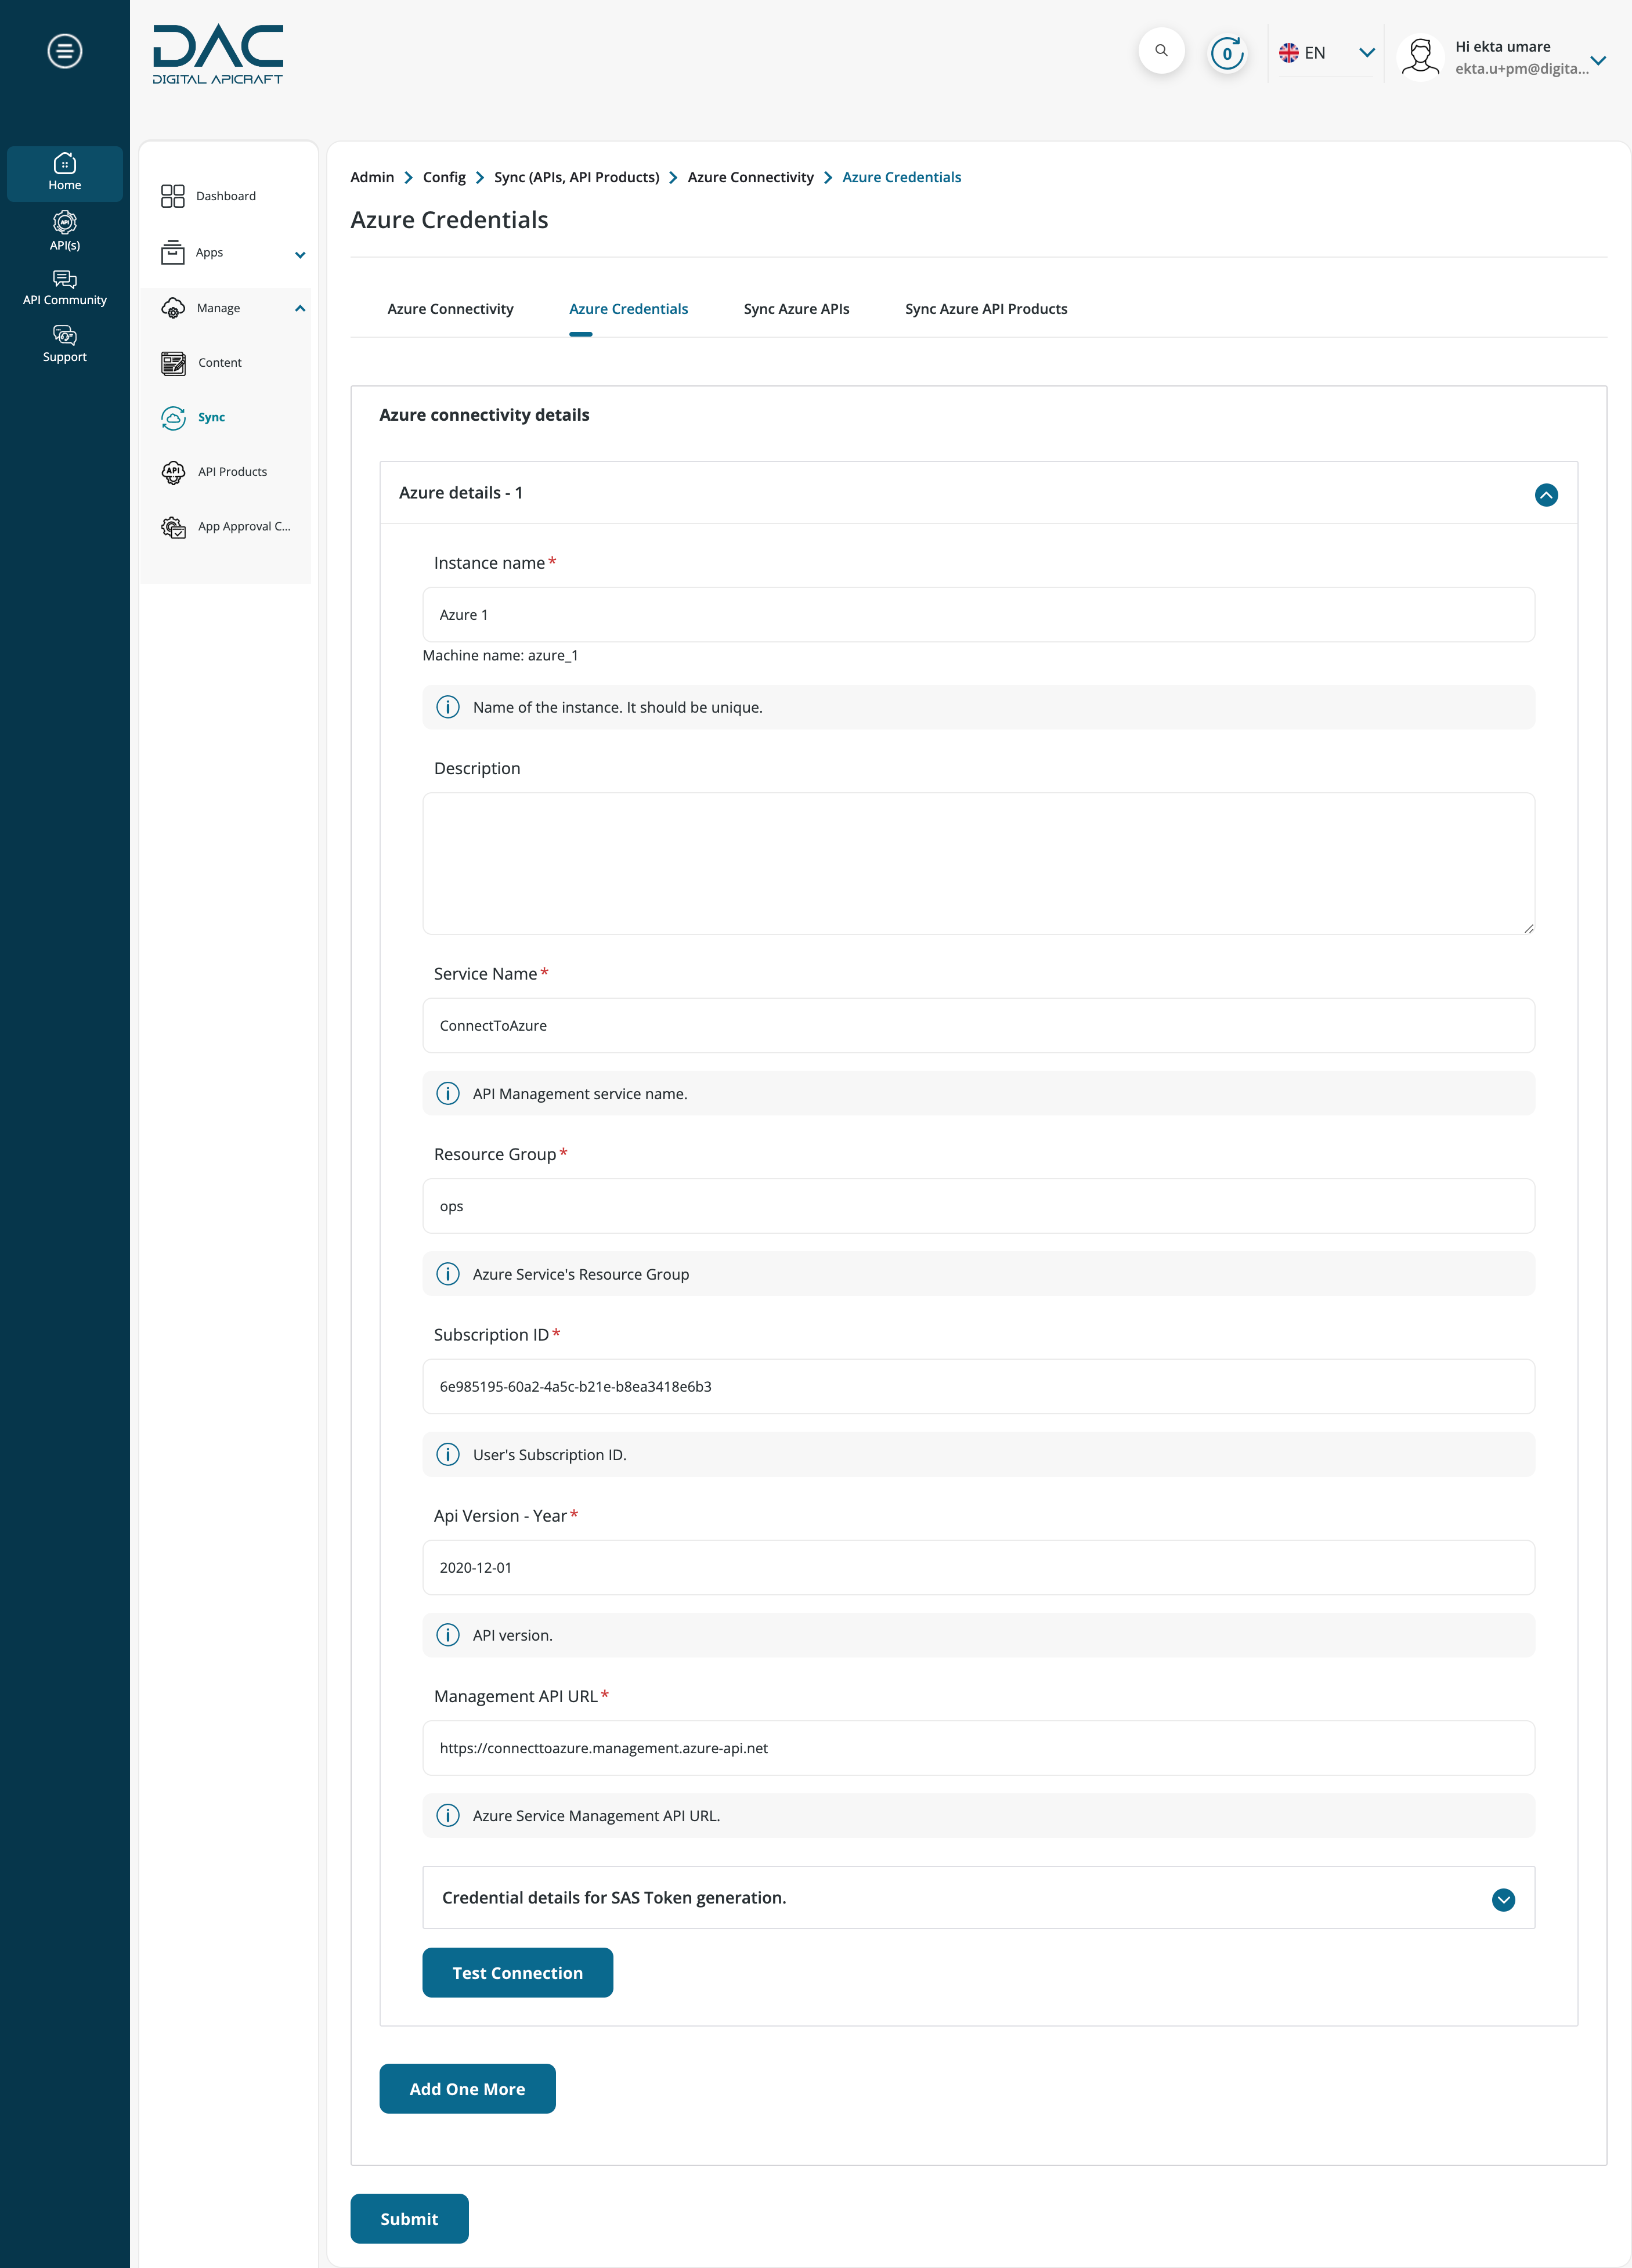
- Navigate to Home > Manage > Sync from the left sidebar menu & select Azure.
- Select Azure Credentials, fill in the relevant data in the fields (instance name, description, Service Name, Resource Group, Subscription ID, API Version - Year, Management API URL, Identifier, key) and click Test Connection.
- To sync APIs, click Sync Azure APIs.
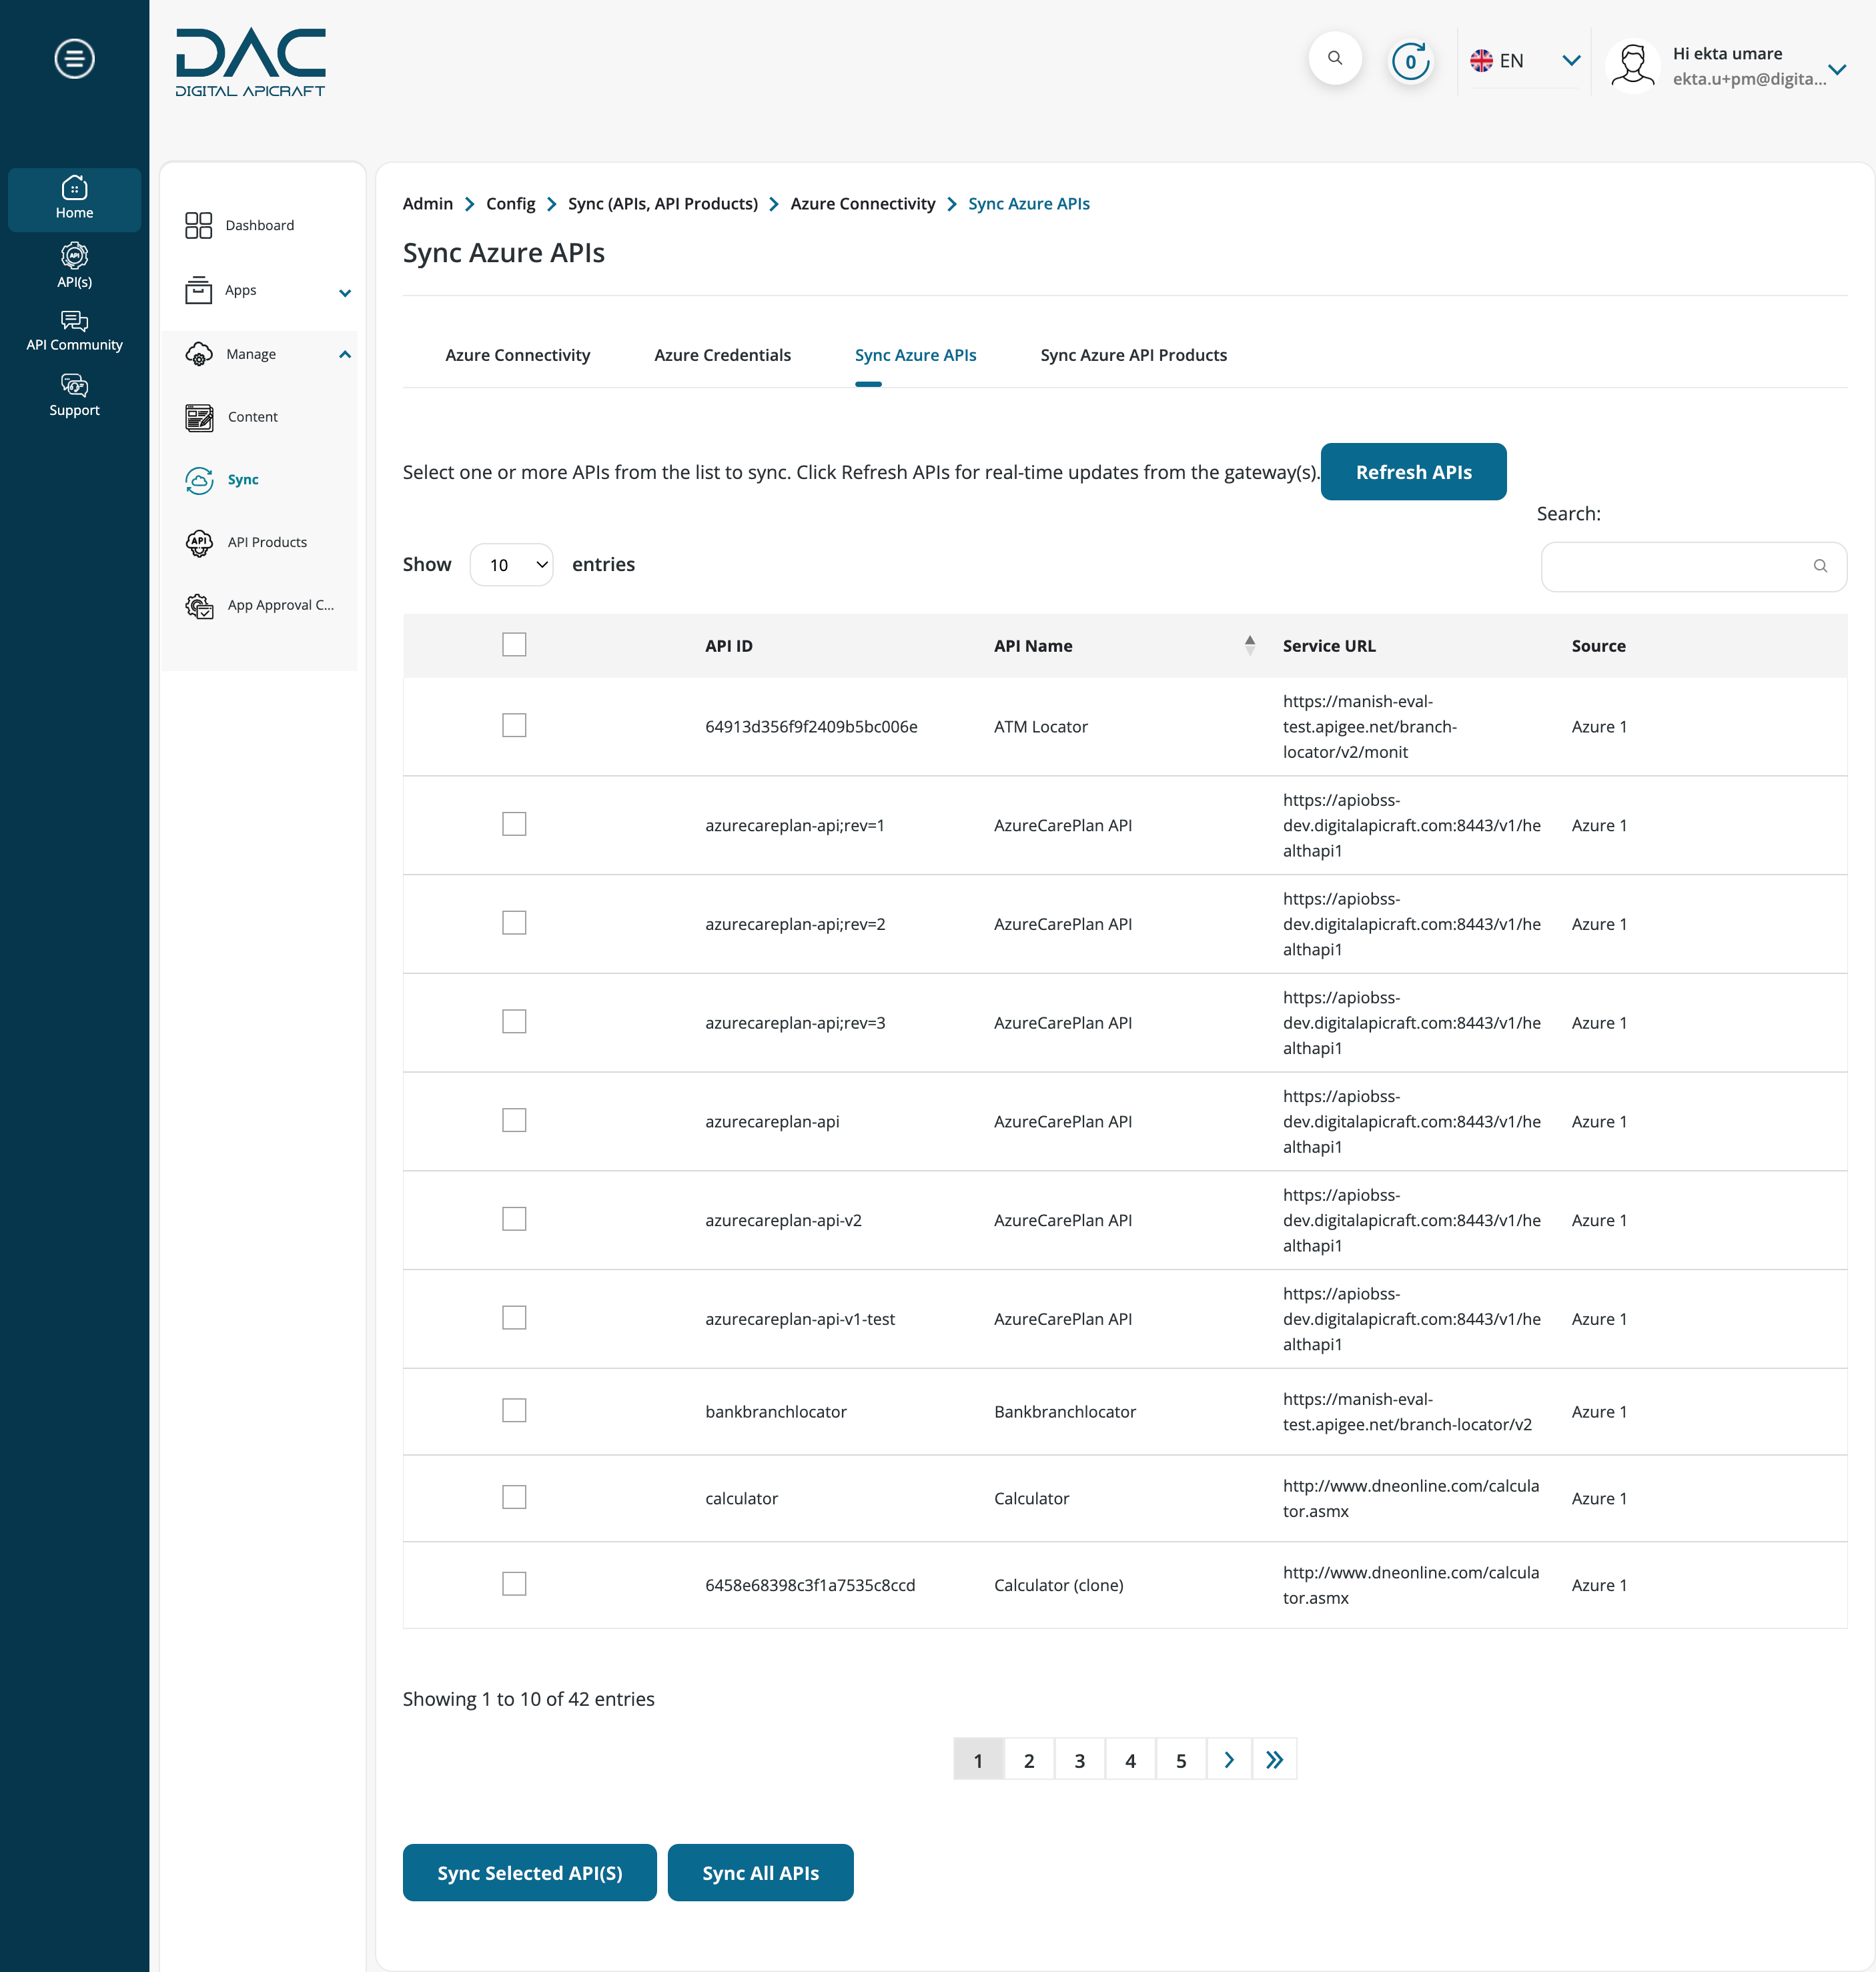
- A list of APIs will then be displayed, along with details such as API ID, API Name, Service URL and Source.To sync a specific set of APIs, select them and click Sync selected API(s). To sync all APIs, click Sync all APIs. A success message will appear once the syncing process is complete.
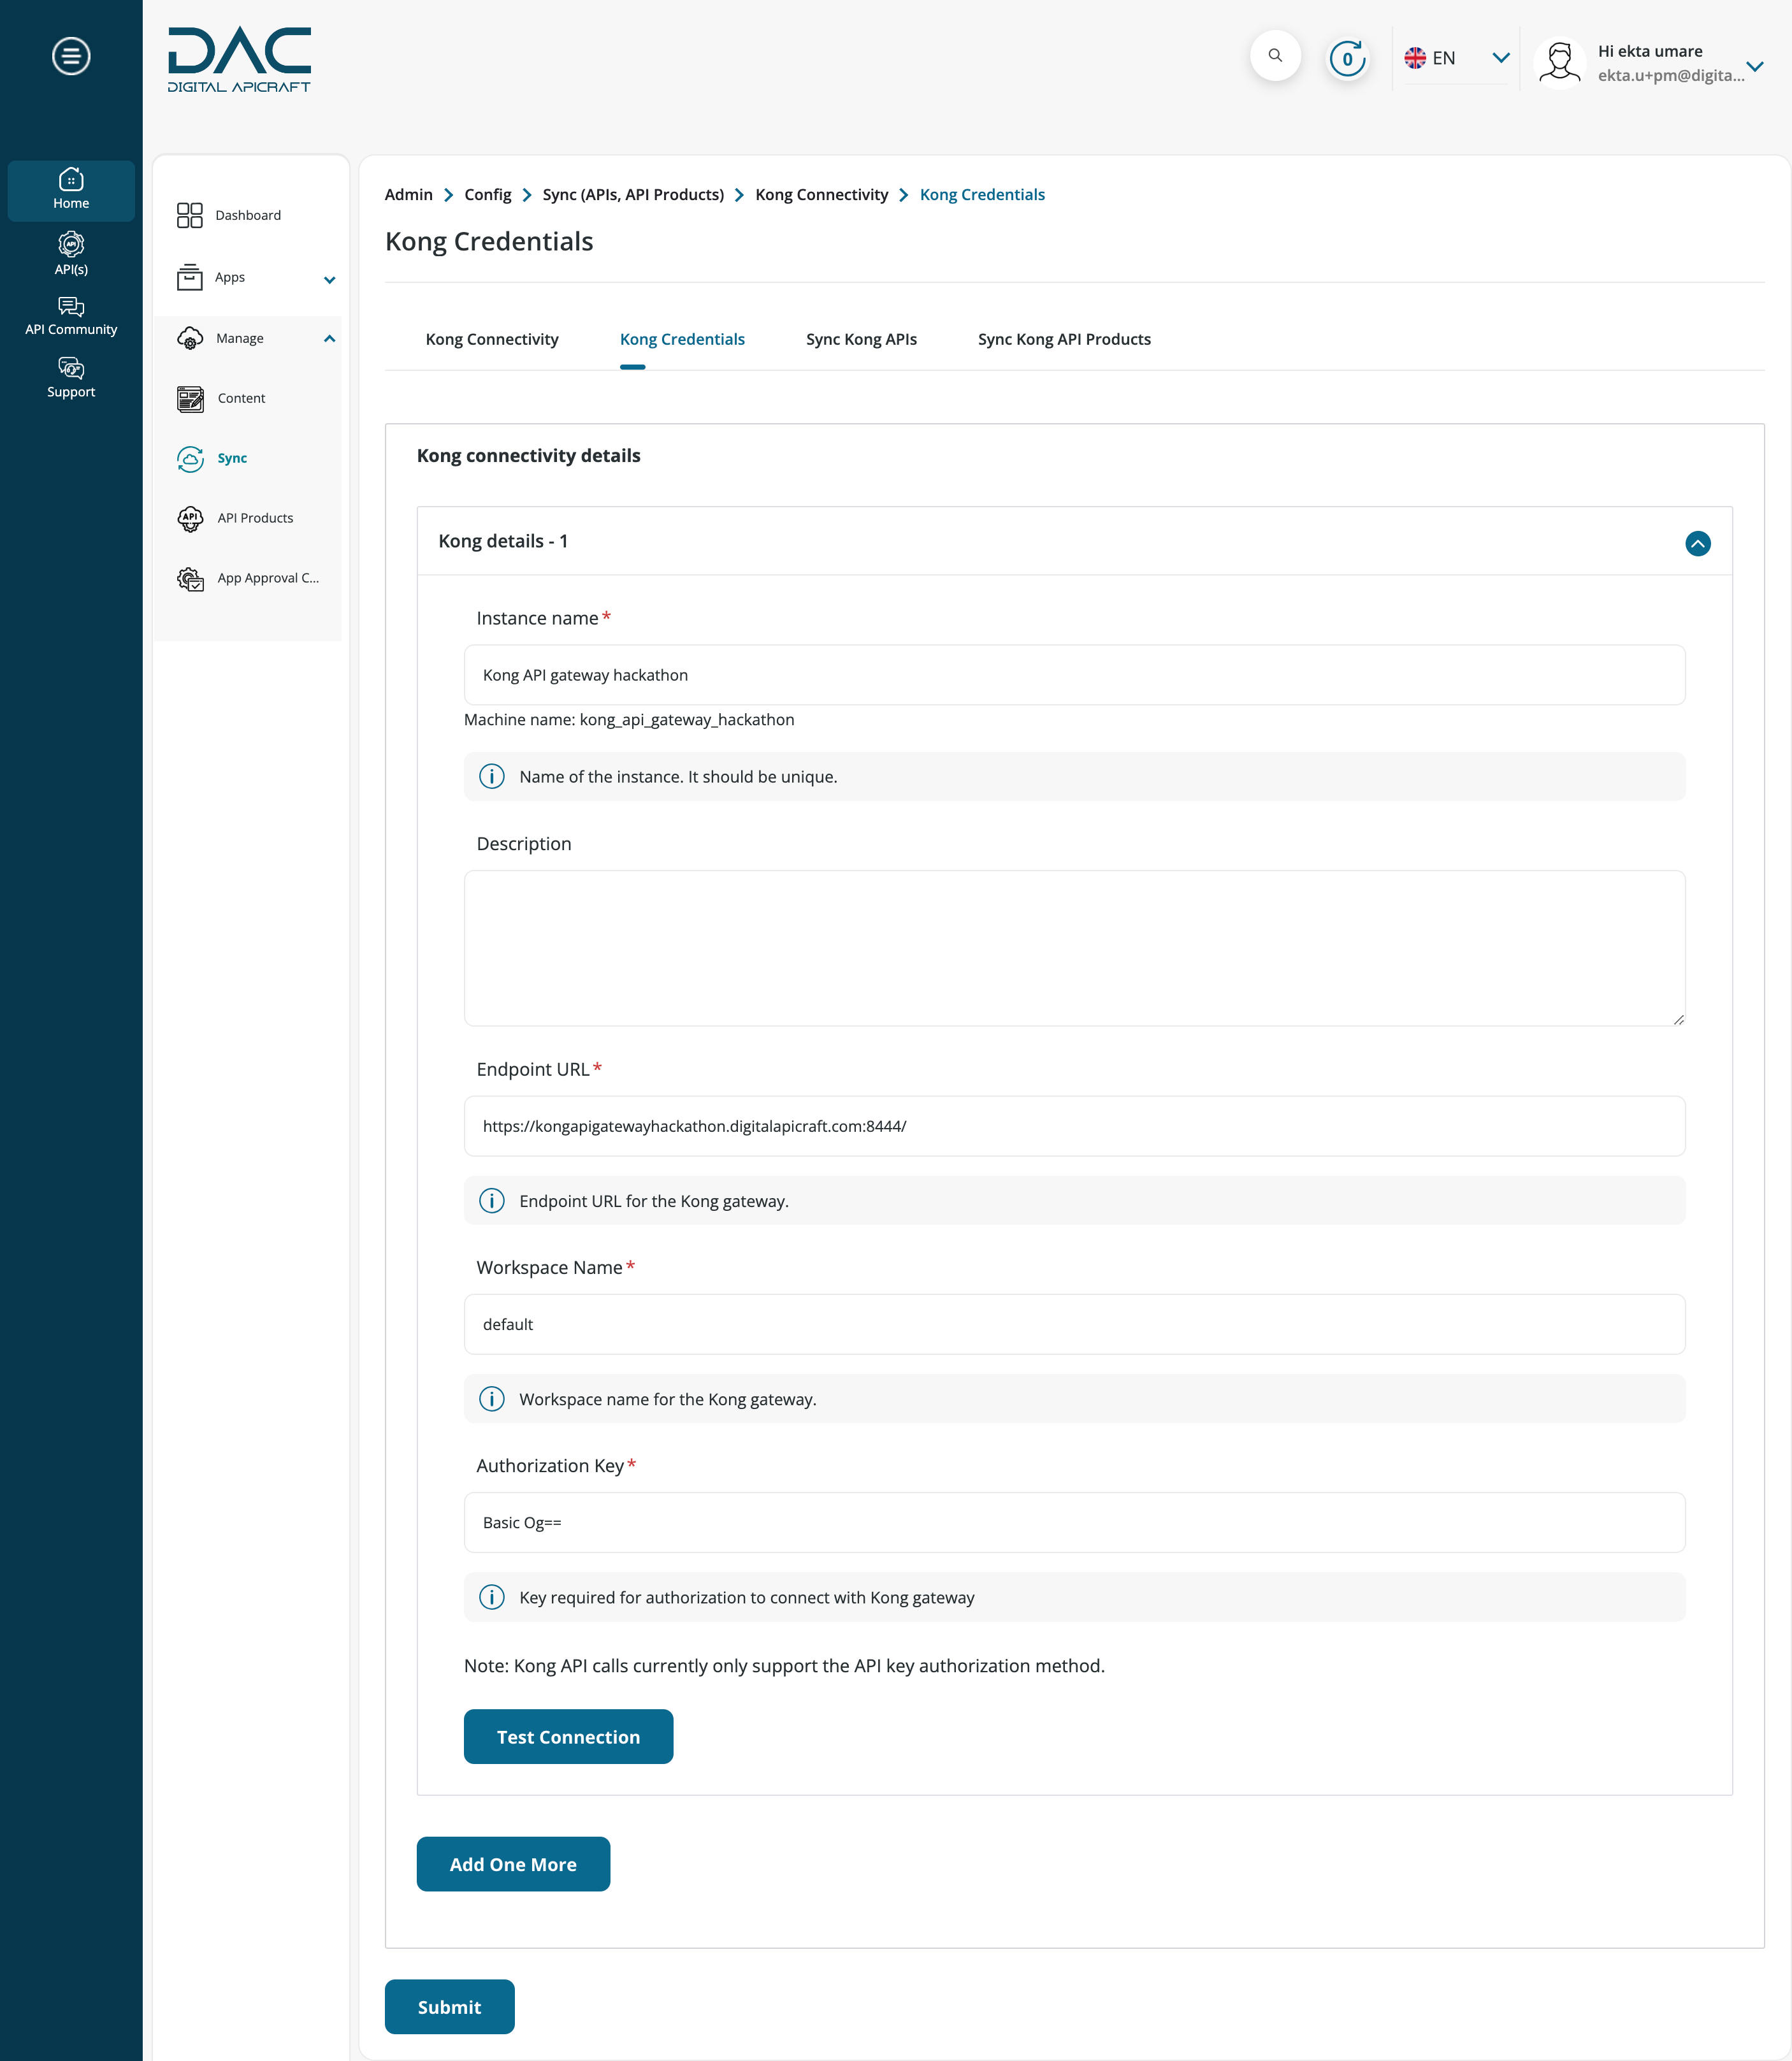
- Navigate to Home > Manage > Sync from the left sidebar menu & select Kong.
- Select Kong Credentials, fill in the relevant data in the fields (instance name, description, Endpoint URL, Workspace Name, Authorization Key) and click Test Connection.
To sync APIs, click Sync Kong APIs.
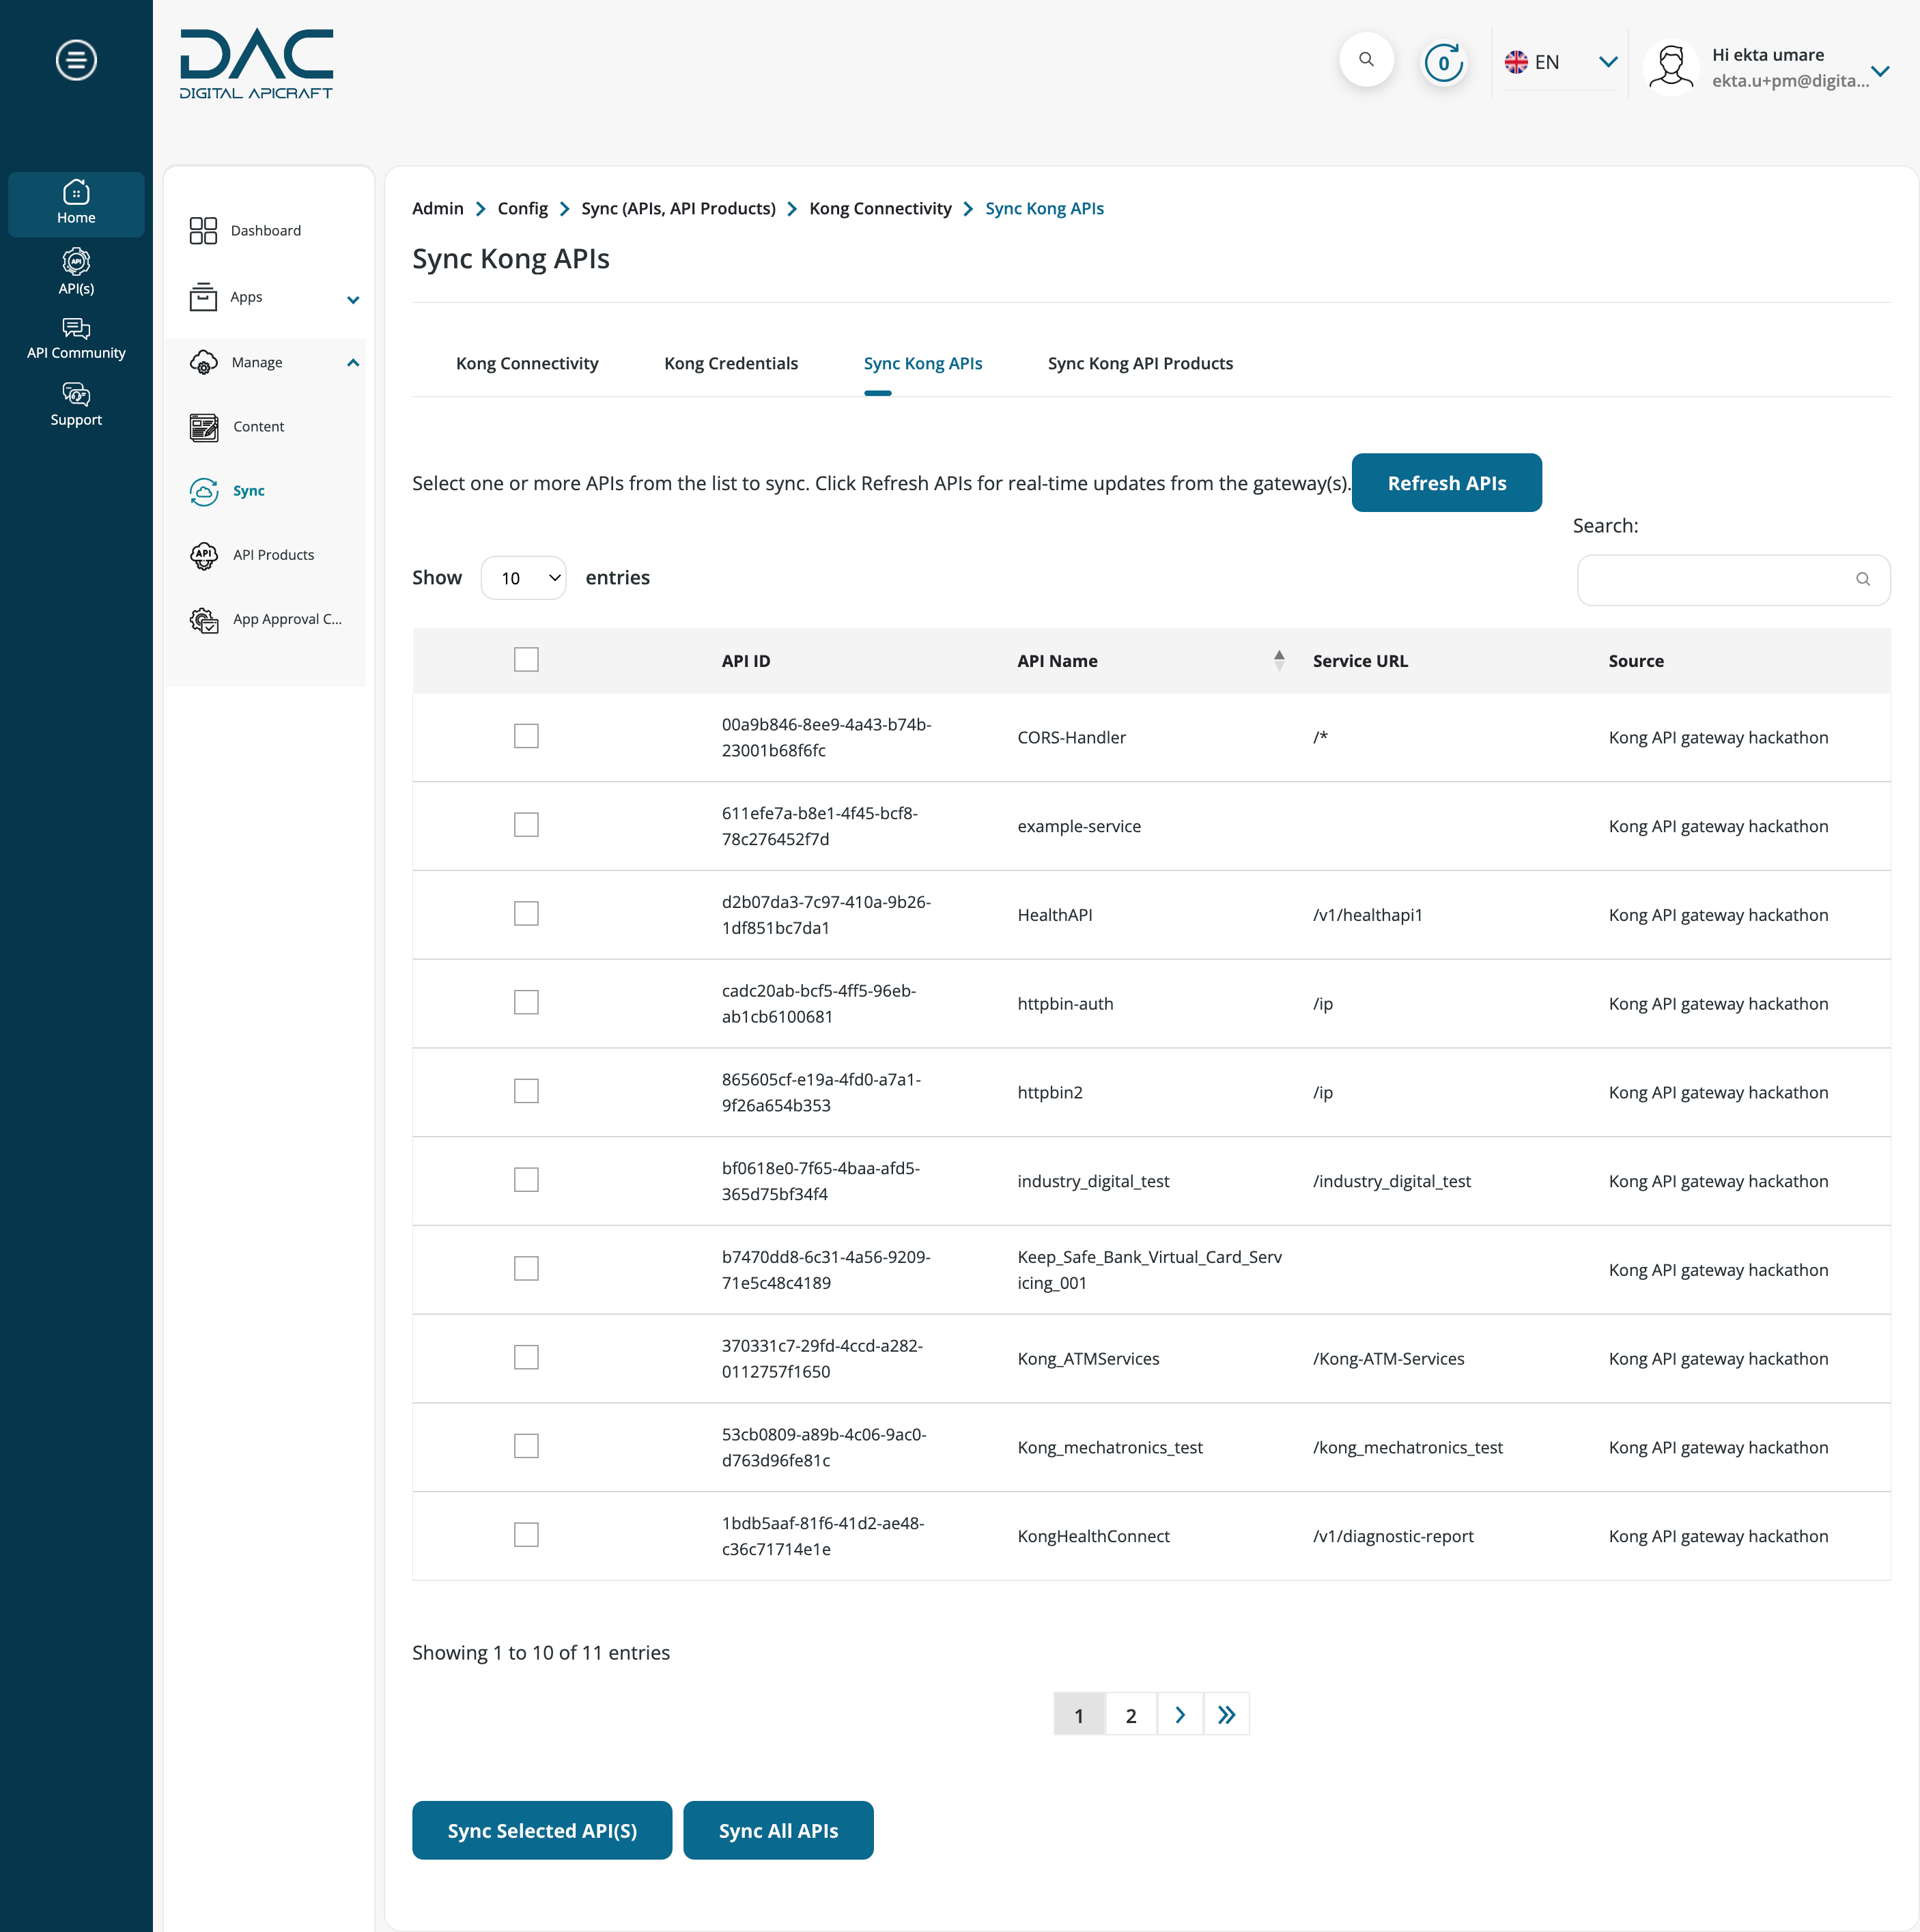
- A list of APIs will then be displayed, along with details such as API ID, API Name, Service URL and Source.To sync a specific set of APIs, select them and click Sync selected API(s). To sync all APIs, click Sync all APIs. A success message will appear once the syncing process is complete.
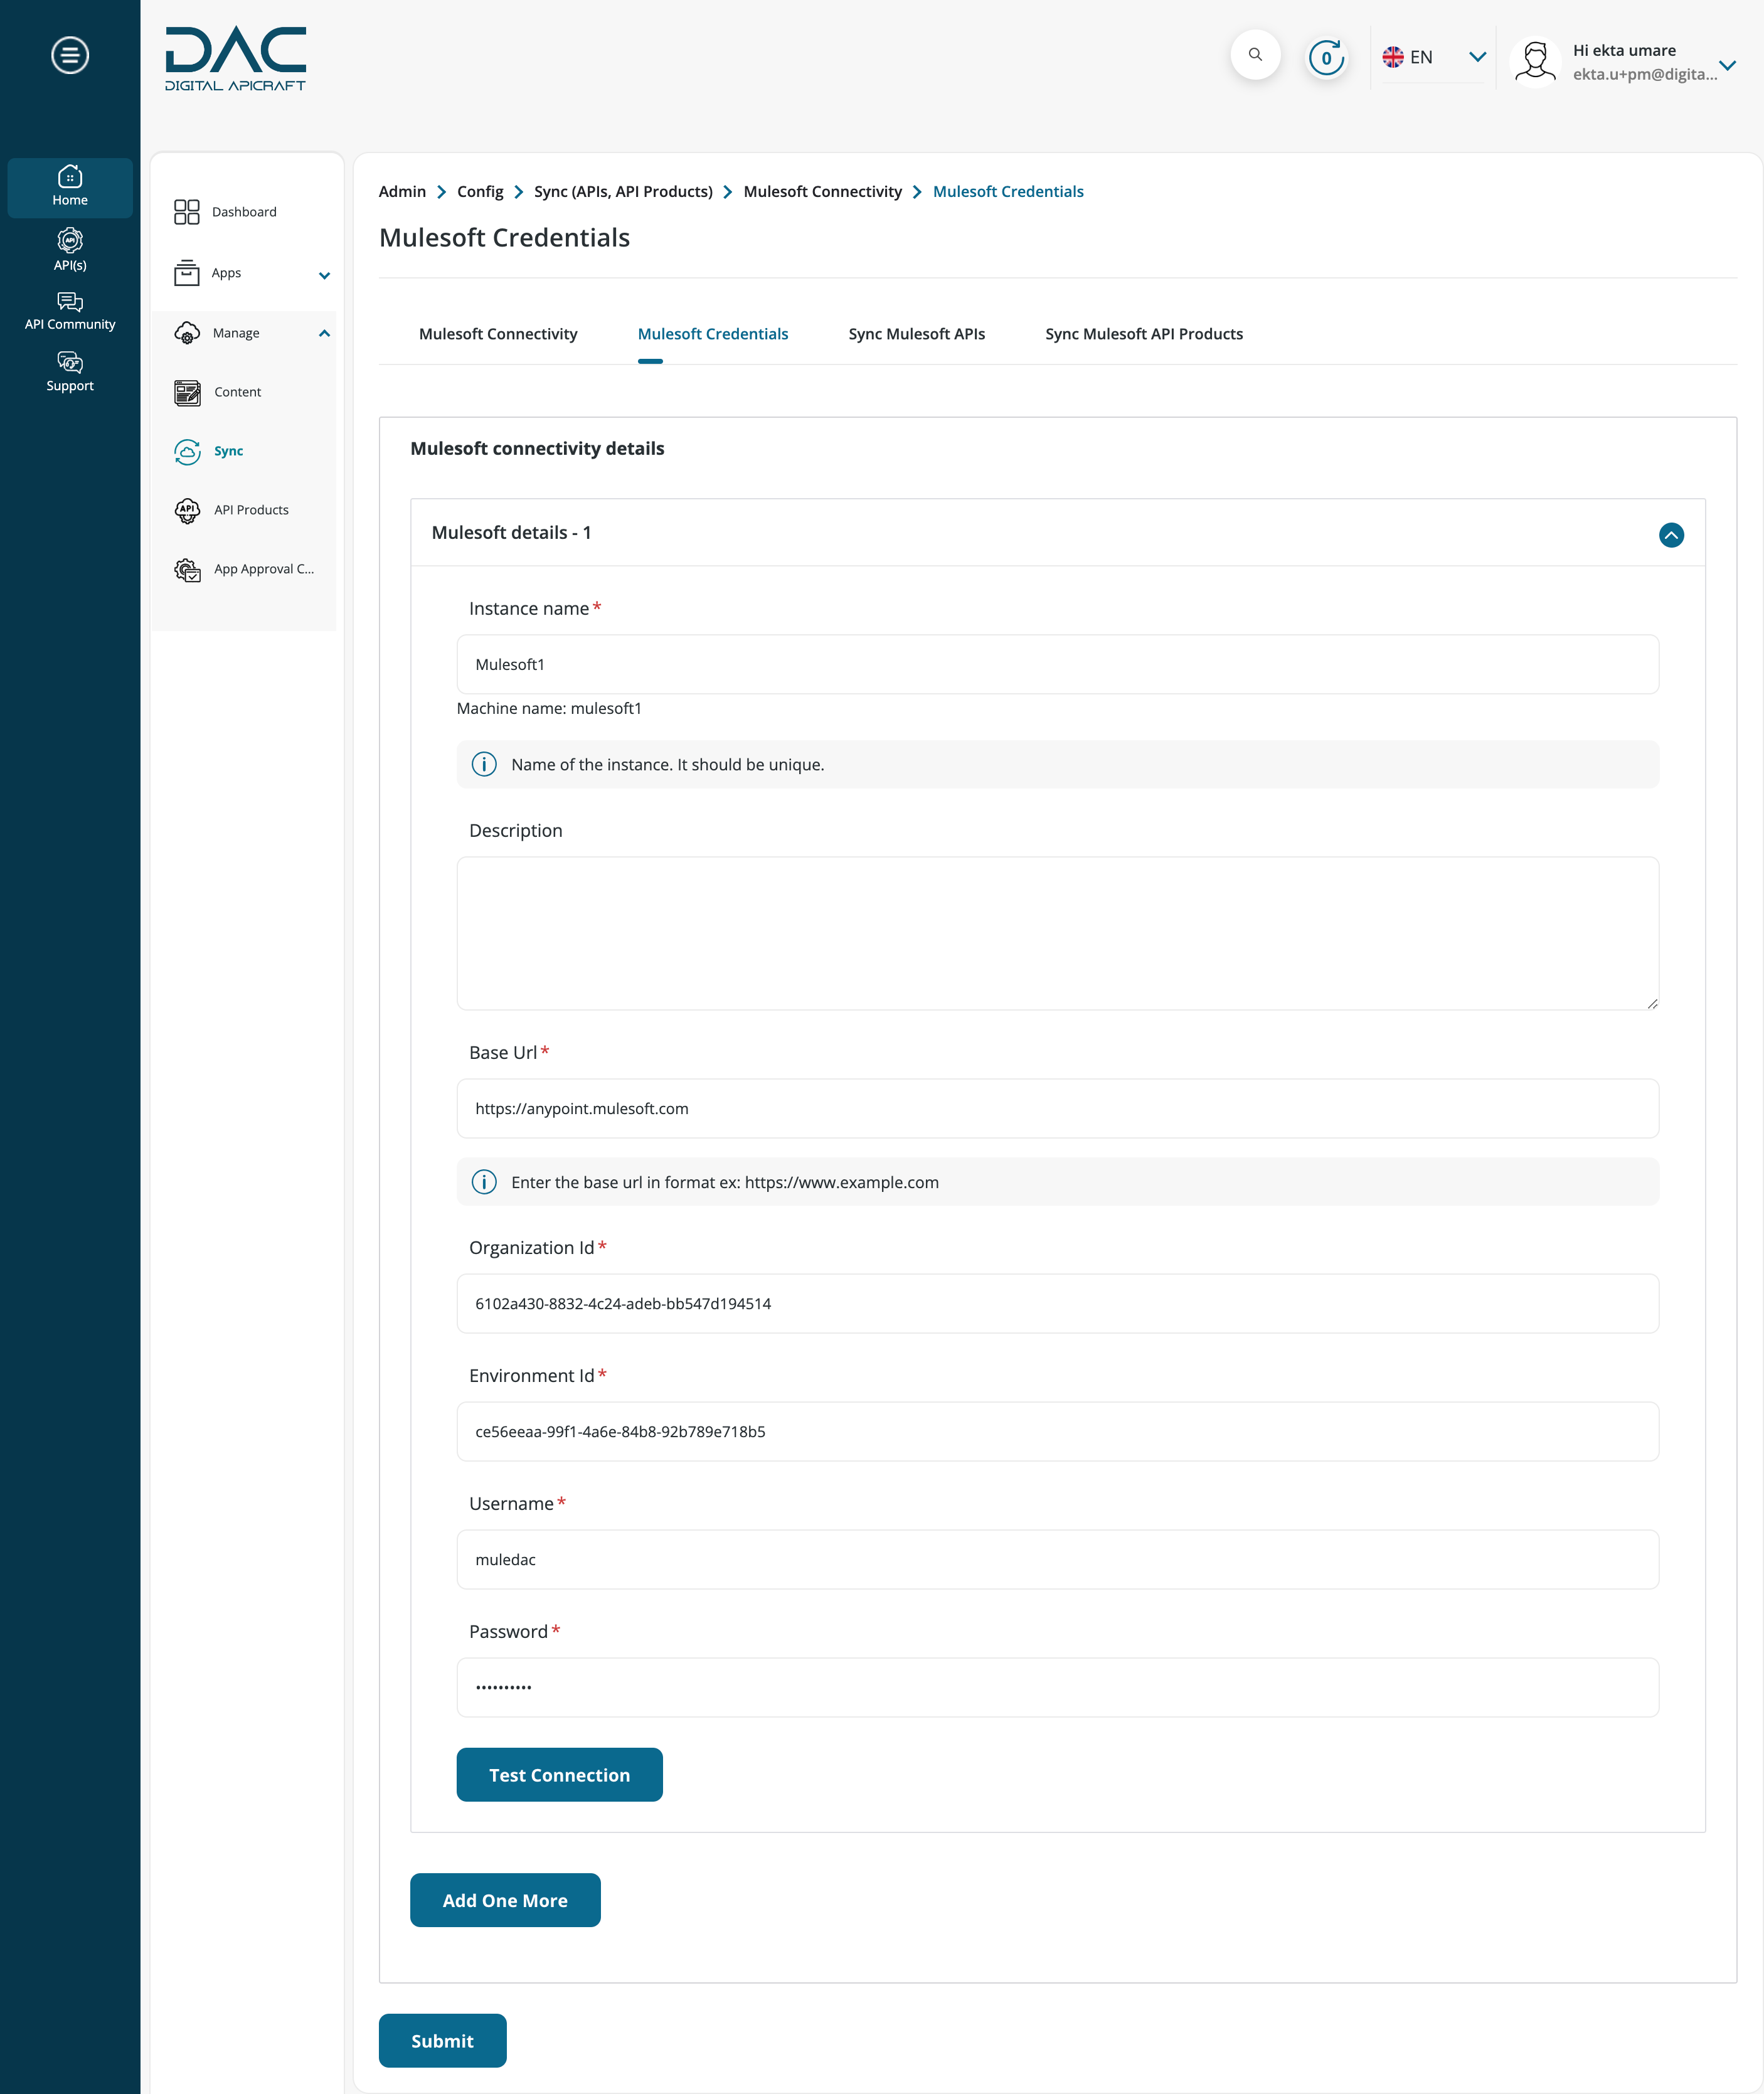
- Navigate to Manage > Sync from the left sidebar menu & select Mulesoft.
- Select Mulesoft Credentials, fill in the relevant data in the fields (instance name, description, Base URL, Organization ID, Environment ID, Username, Password) and click Test Connection.
To sync APIs, click Sync Mulesoft APIs.
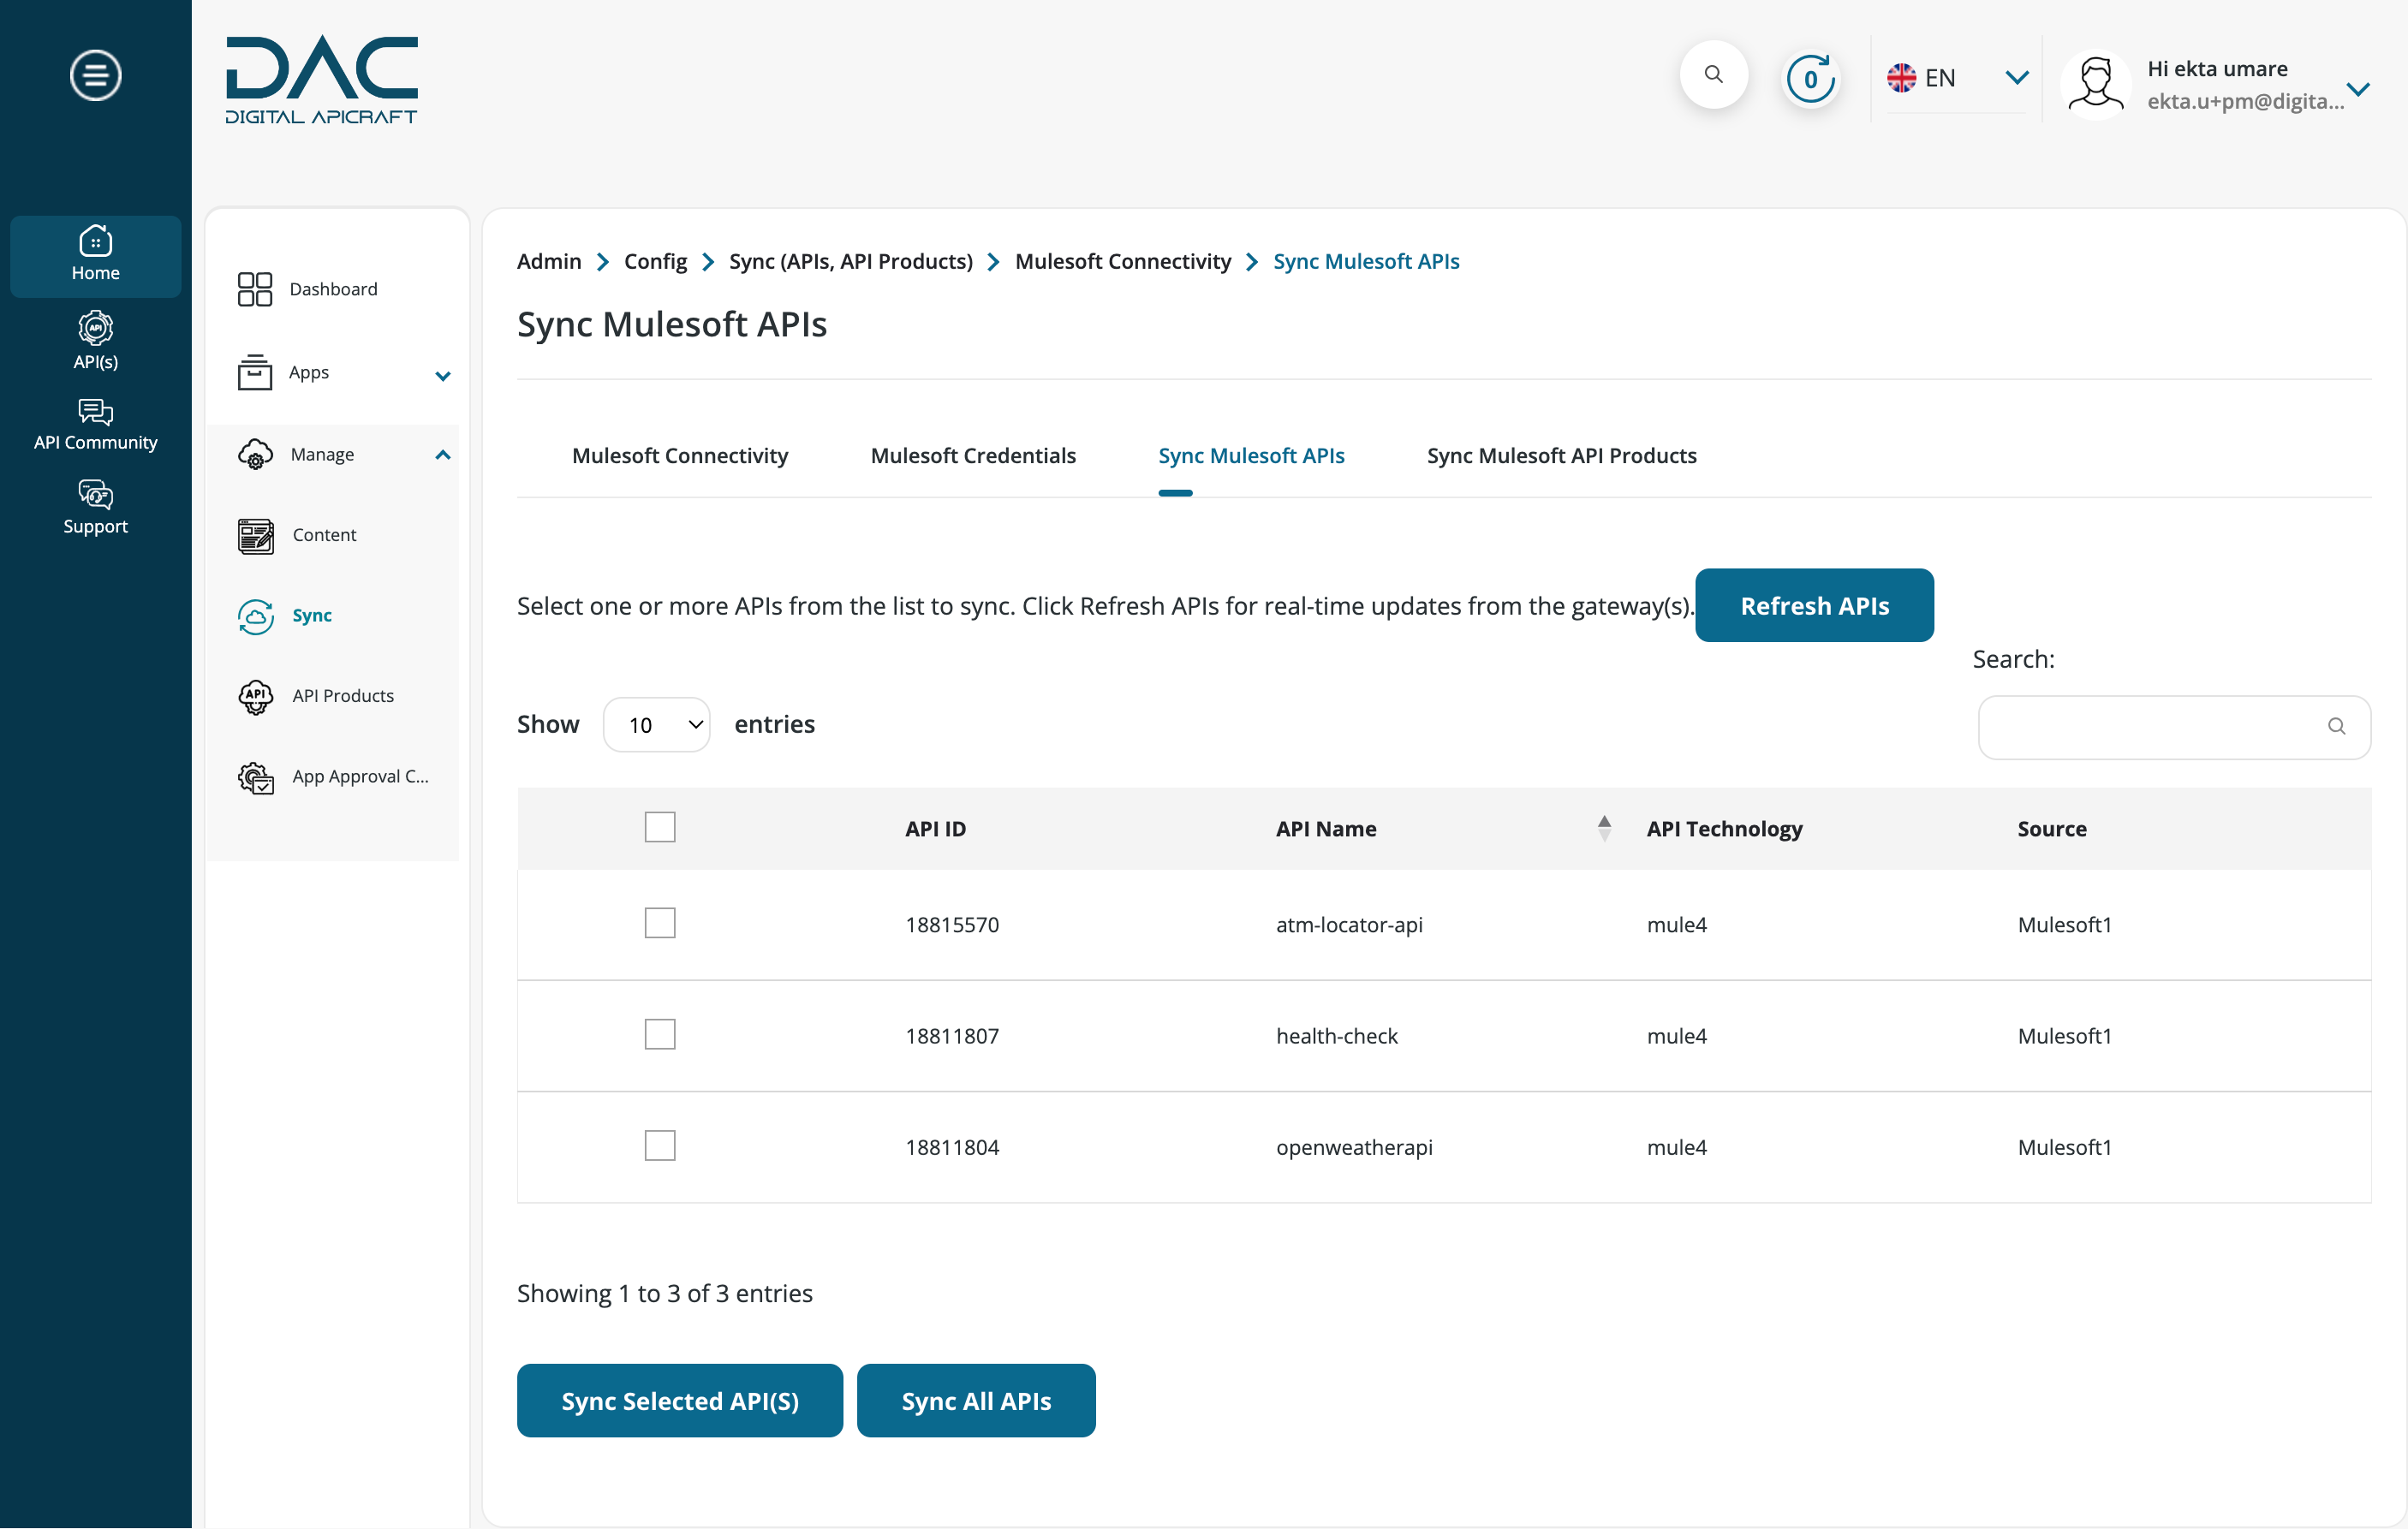
- A list of APIs will then be displayed, along with details such as API ID, API Name, Service URL and Source.To sync a specific set of APIs, select them and click Sync selected API(s). To sync all APIs, click Sync all APIs. A success message will appear once the syncing process is complete.
Sync API Products
- Login to the site as an APIM Administrator / Product Manager.
- Navigate to Home > Manage > Sync from the left sidebar menu.
- Select the relevant API gateway to be synced from the list, which shows the number of previously synced APIs and API products for each gateway.
- Choose Sync AWS API Products. It will display a list of API products, including information such as ID, API ID(s), name, and quota.
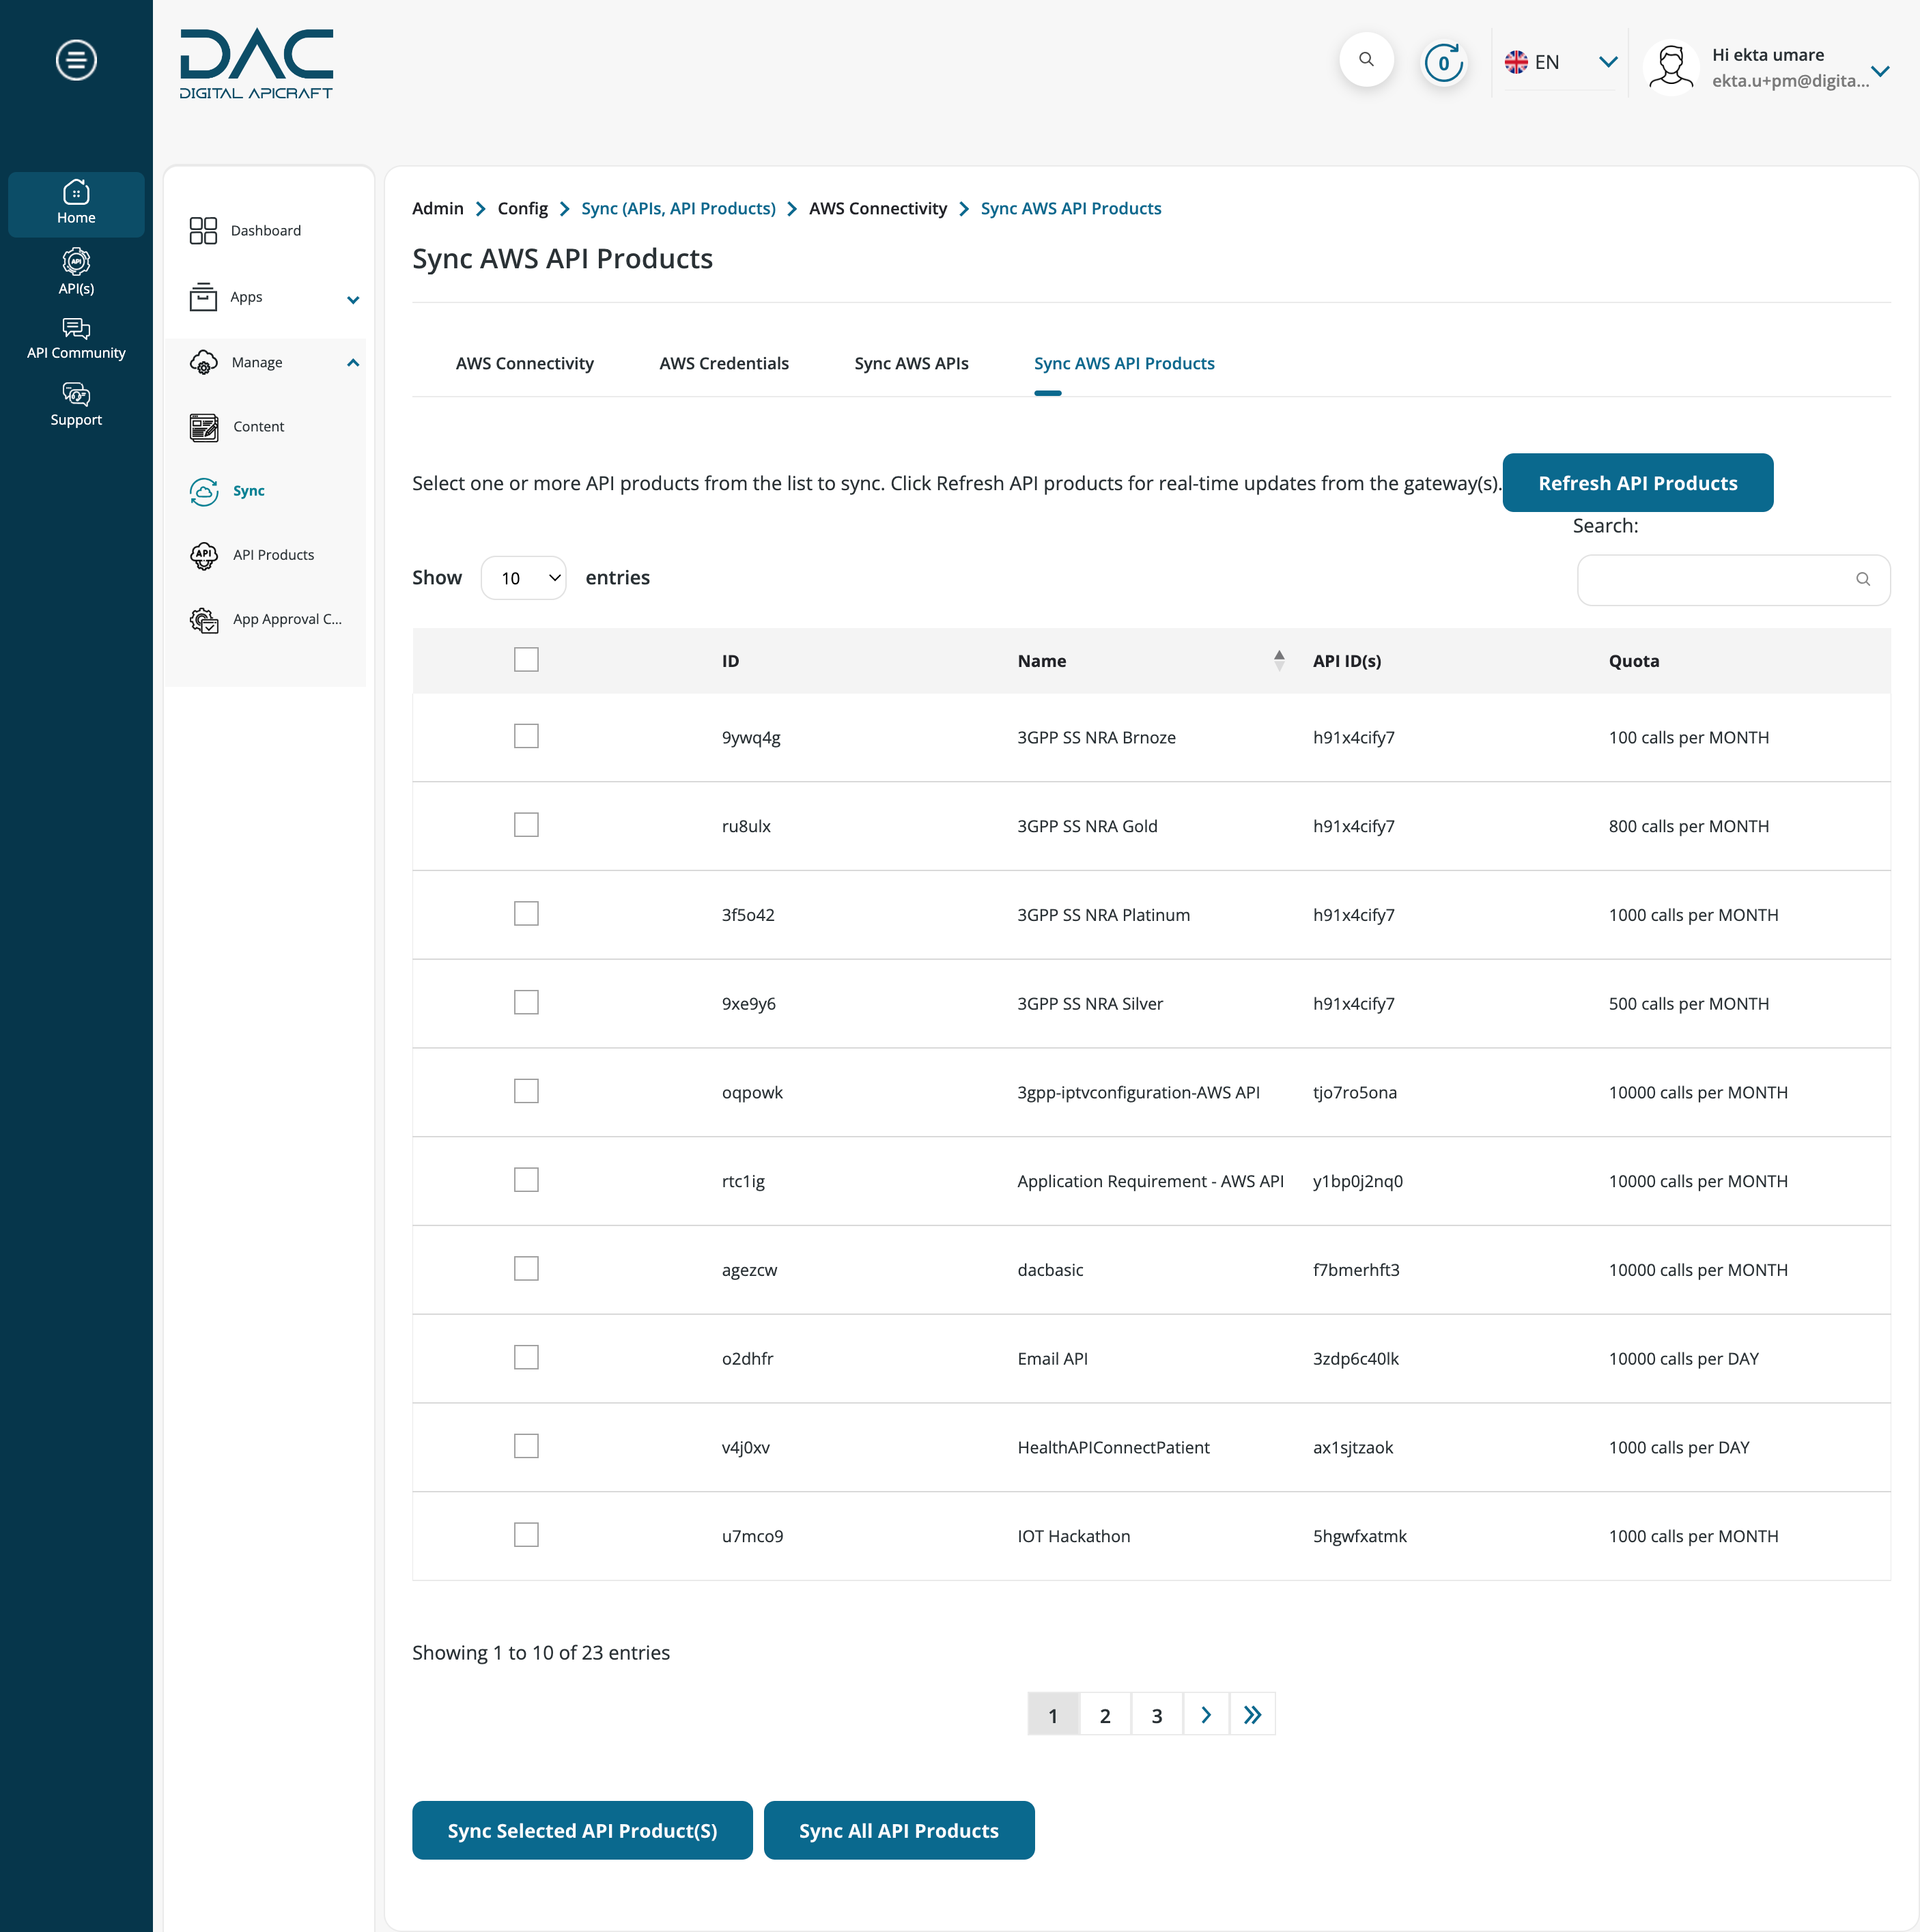
- To sync specific API products, select them and click Sync selected product(s).
- To sync all API products, click Sync All Products. A success message will appear once the API products have been successfully synced.
- Navigate to Home > Manage > Sync from the left sidebar menu.
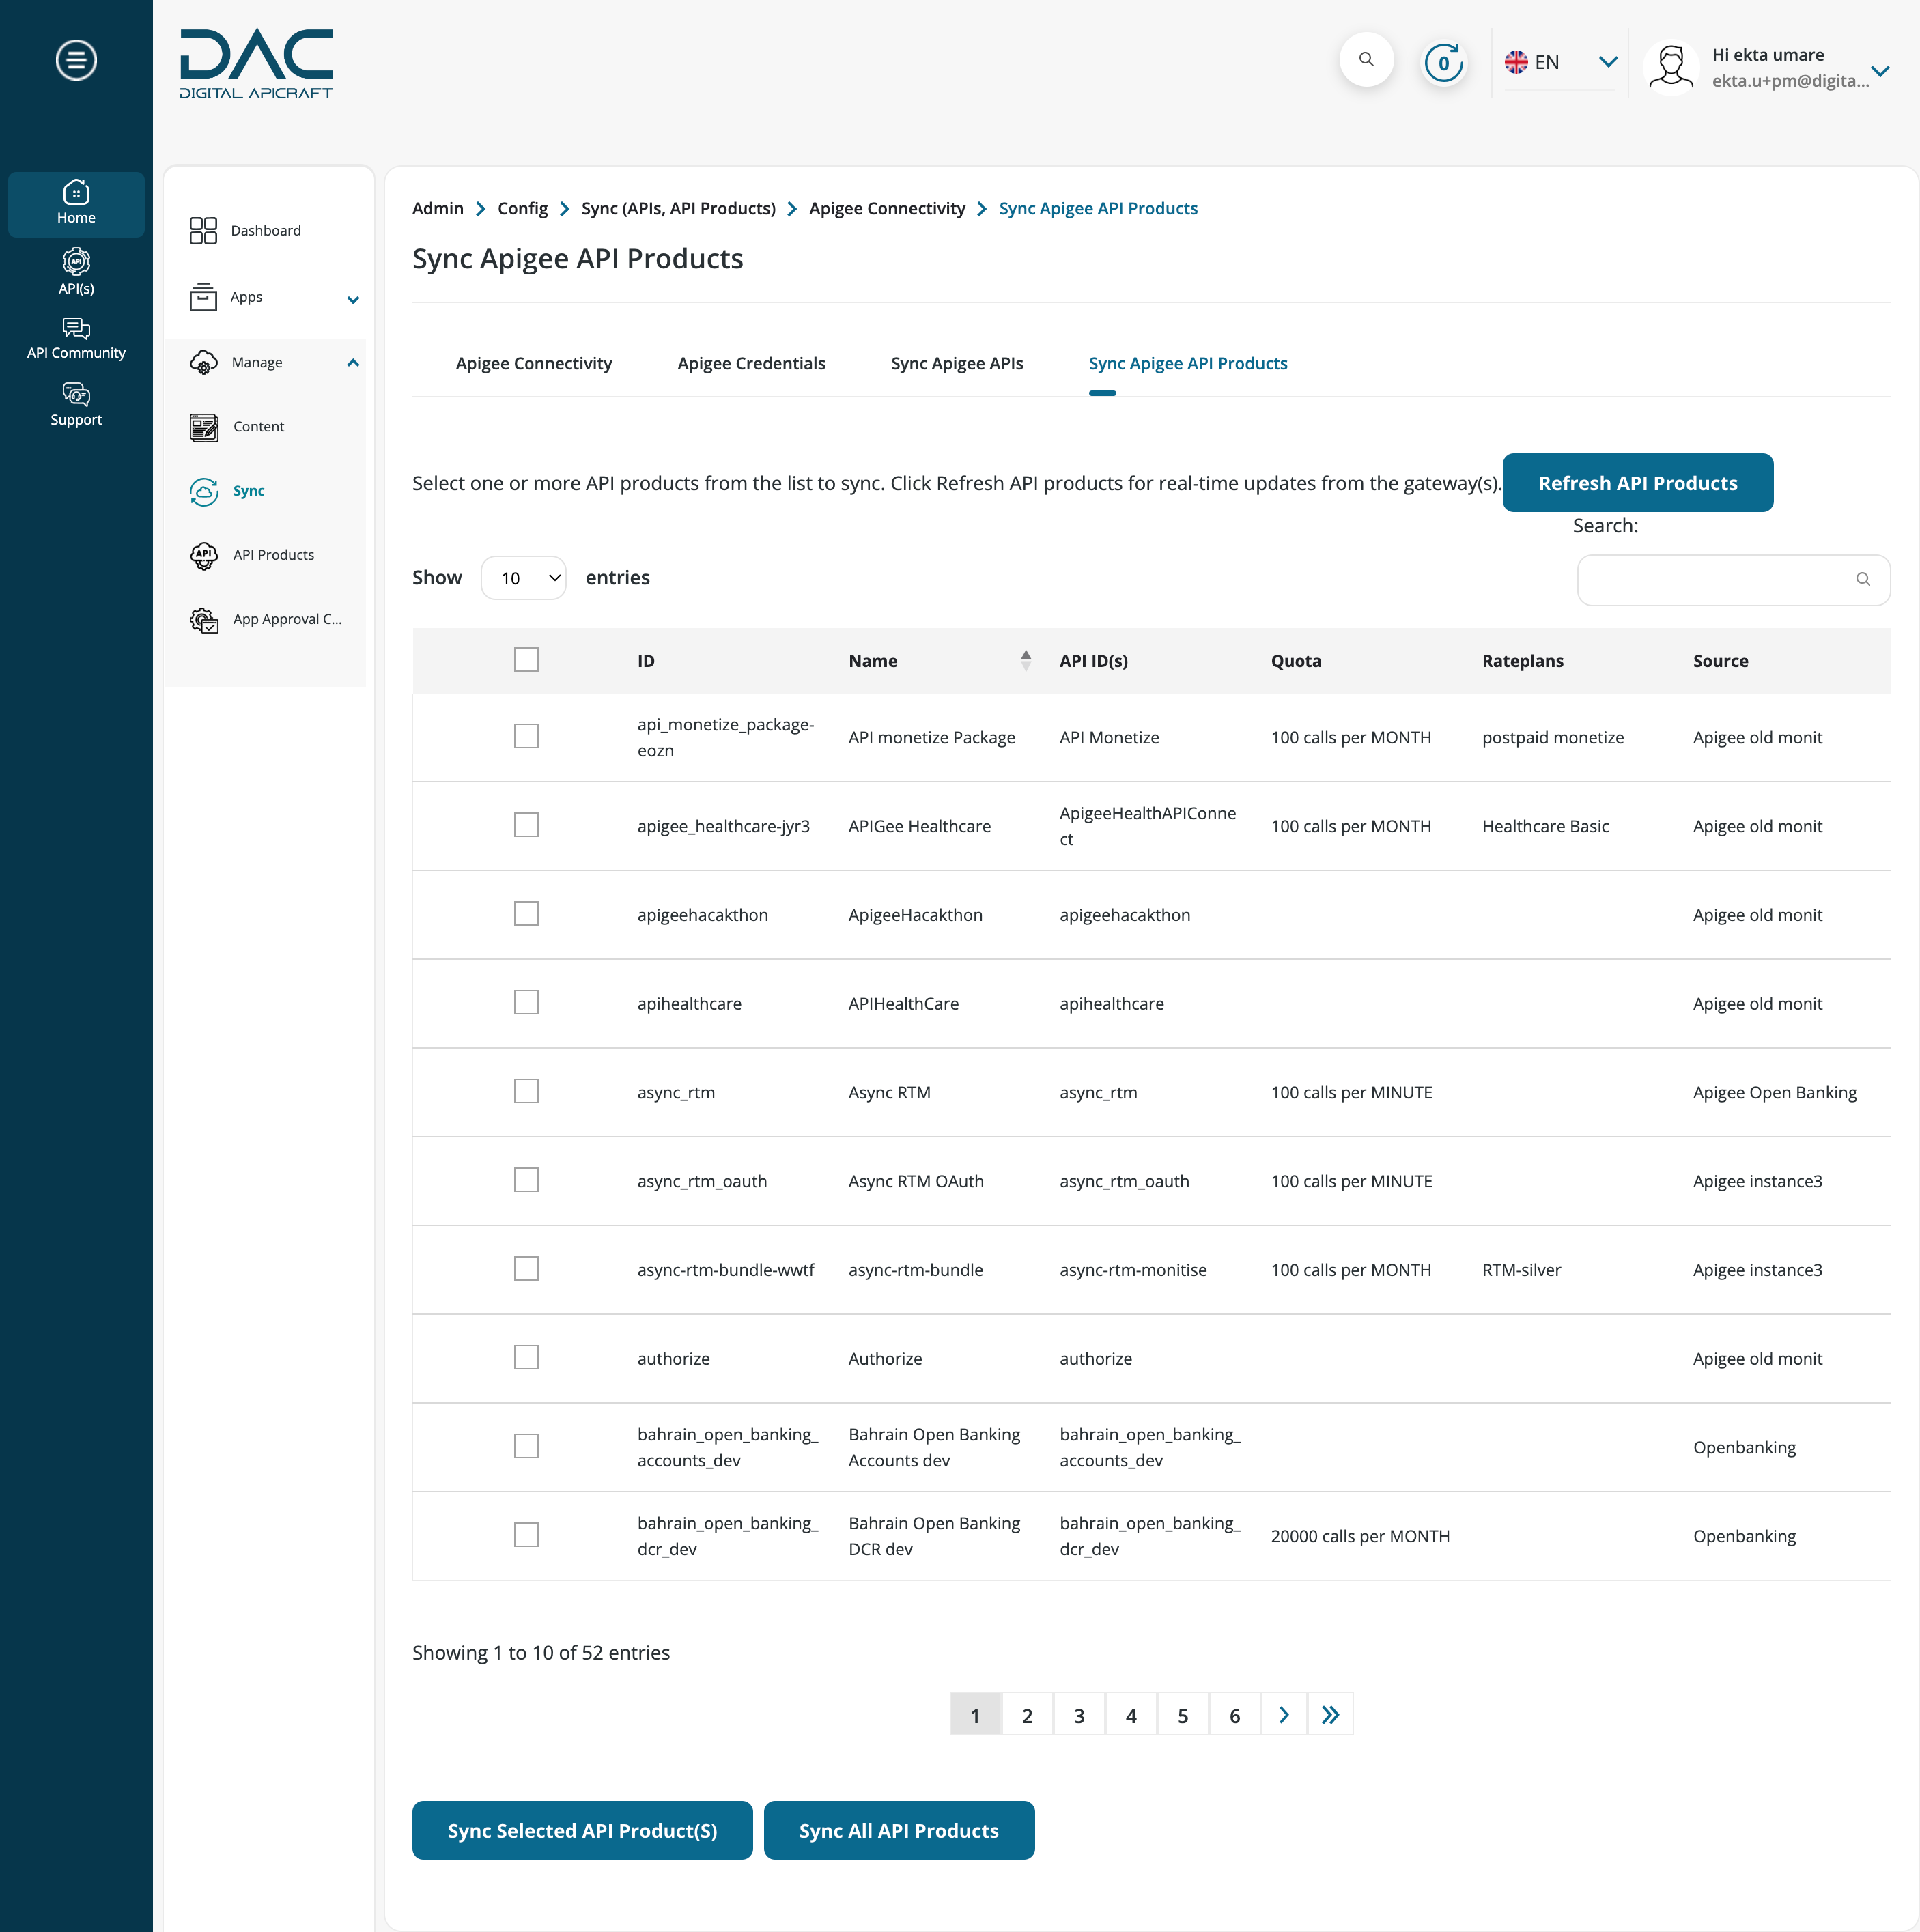
- Select Apigee and Choose Sync Apigee API Products. It will display a list of API products, including information such as ID, API ID(s), Name, Quota, Rateplans and Source.
-
To sync specific API products, select them and click Sync selected product(s).
- To sync all API products, click Sync All Products. A success message will appear once the API products have been successfully synced.
-
Navigate to Home > Manage > Sync from the left sidebar menu.
-
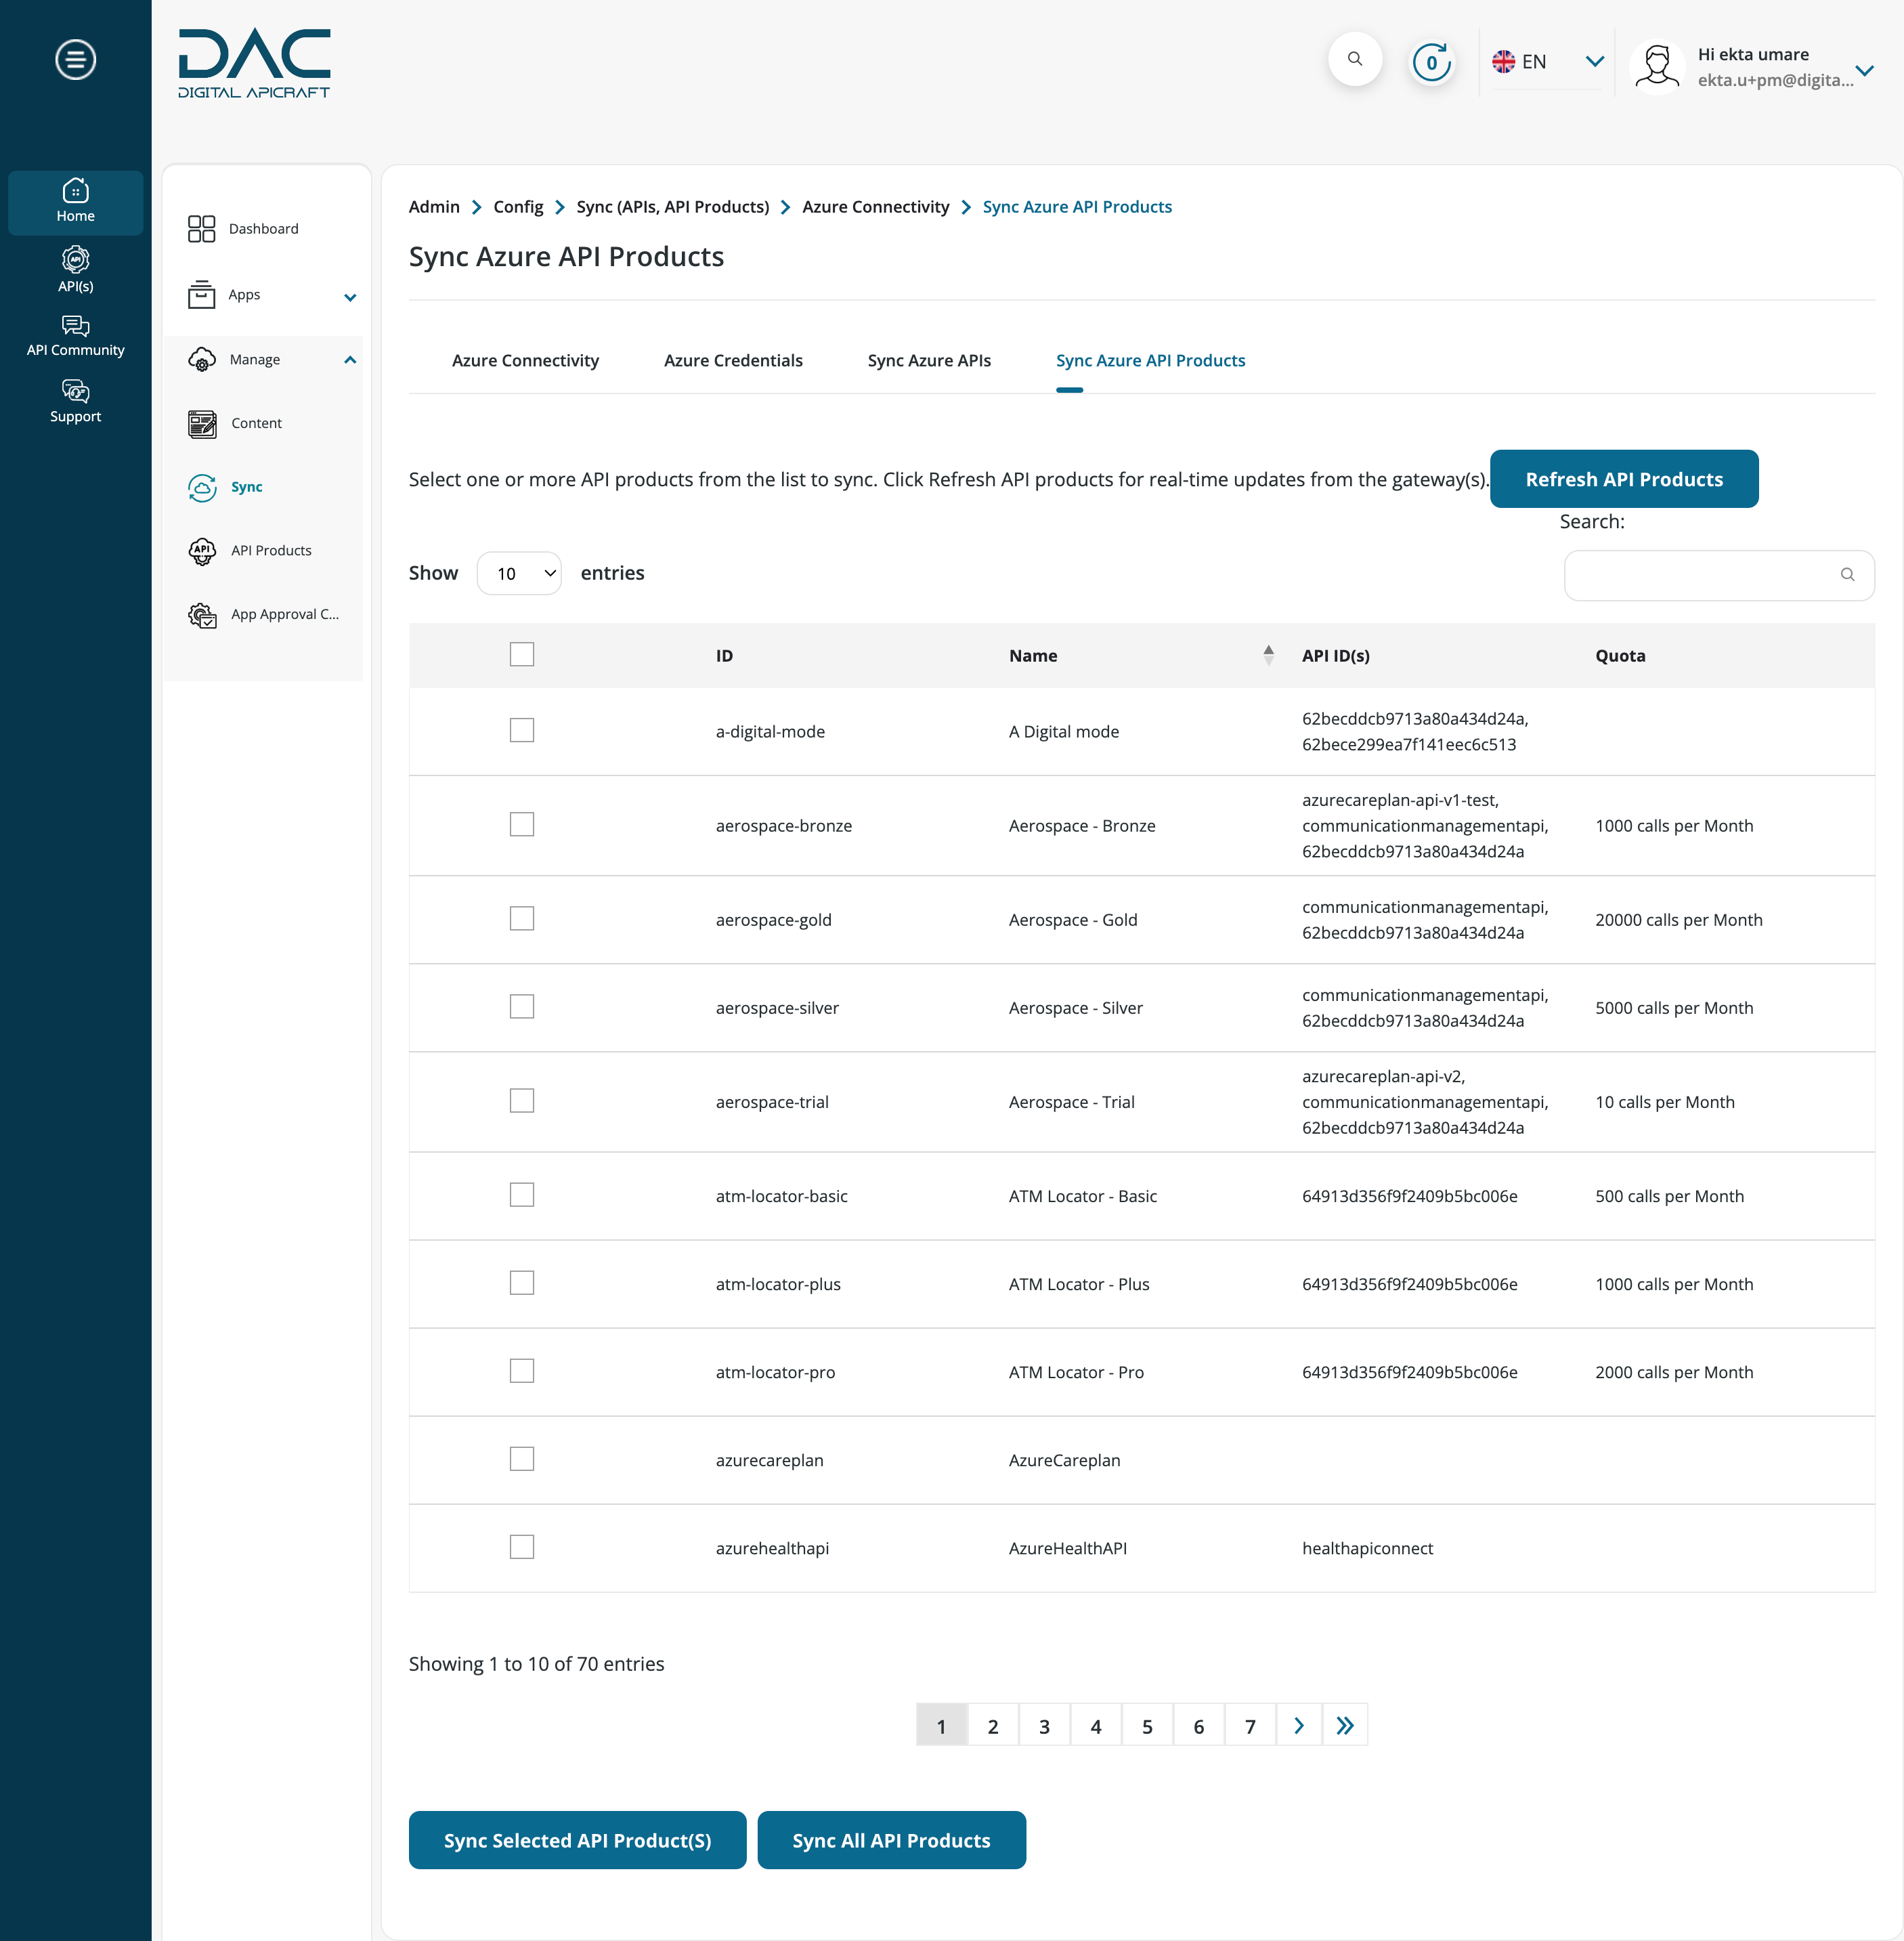
Select Azure and Choose Sync Azure API Products. It will display a list of API products, including information such as ID, Name, API ID(s) and quota.
-
To sync specific API products, select them and click Sync selected product(s).
- To sync all API products, click Sync All Products. A success message will appear once the API products have been successfully synced.
-
Navigate to Home > Manage > Sync from the left sidebar menu.
-
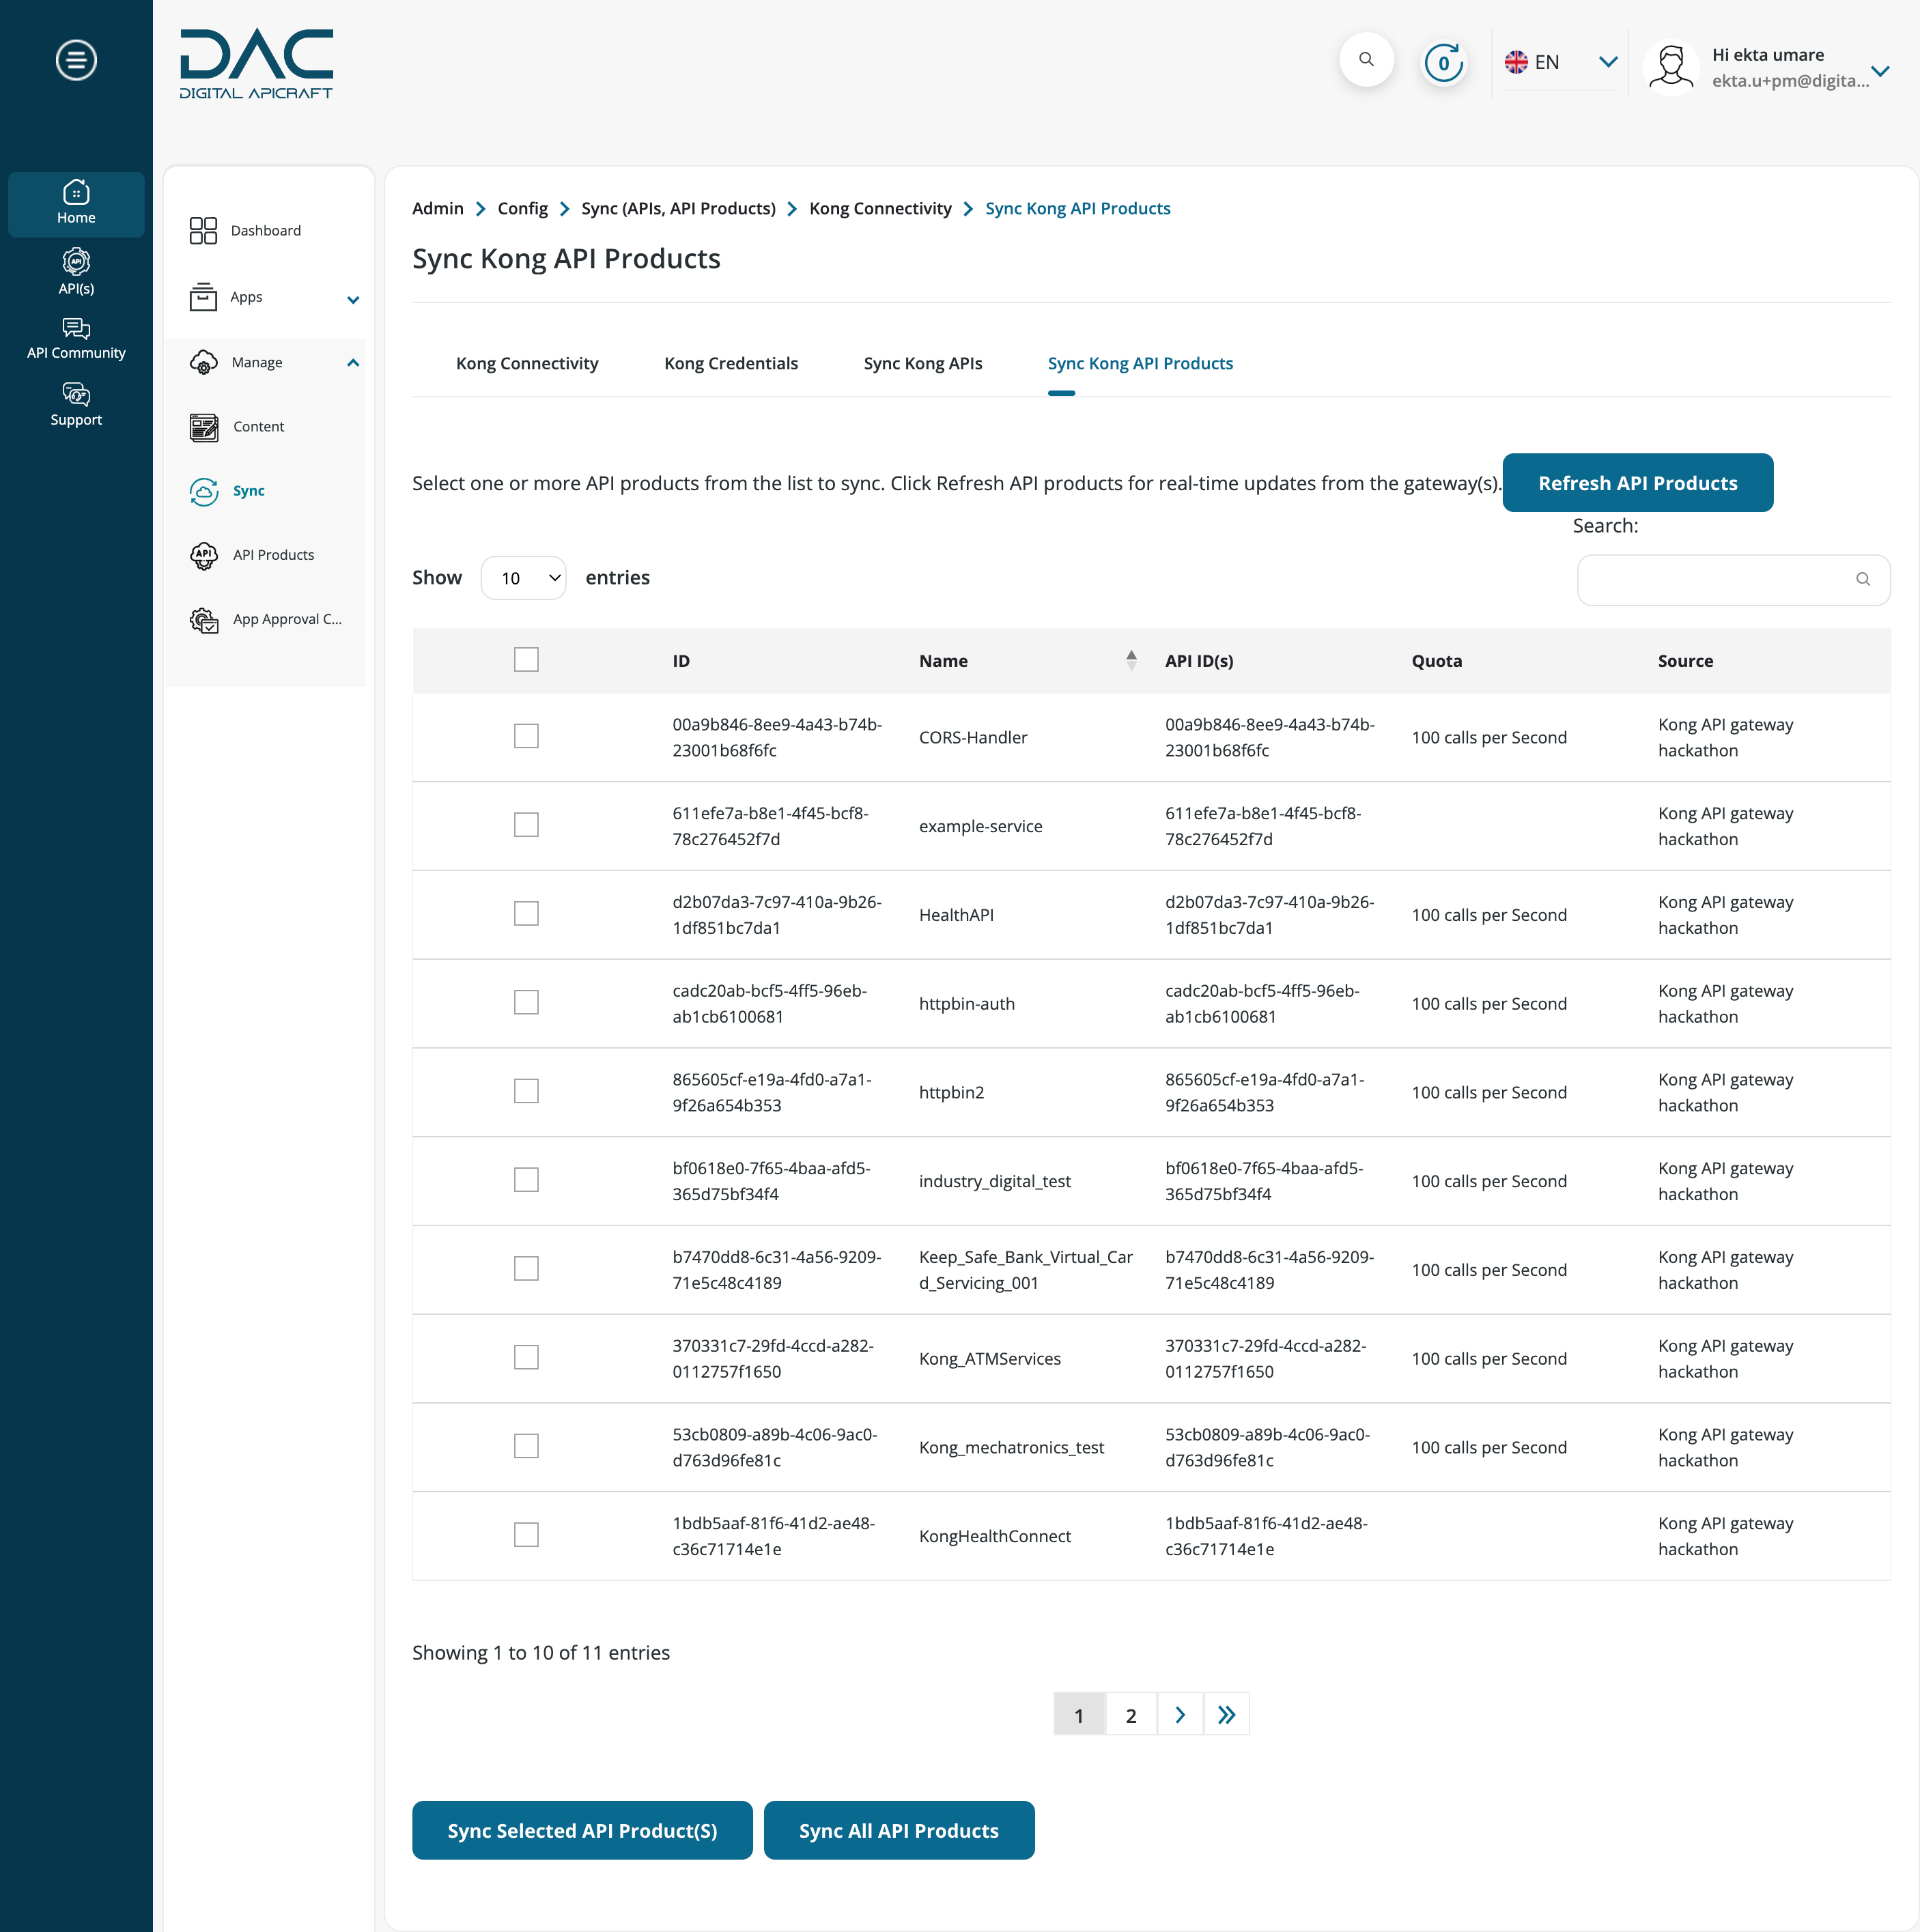
Select kong and Choose Sync Kong API Products. It will display a list of API products, including information such as ID, Name, API ID(s), Quota and source.
-
To sync specific API products, select them and click Sync selected product(s).
- To sync all API products, click Sync All Products. A success message will appear once the API products have been successfully synced.
-
Navigate to Home > Manage > Sync from the left sidebar menu.
-
Select Mulesoft and Choose Sync Mulesoft API Products. It will display a list of API products, including information such as ID, Name, API ID(s) and Source.
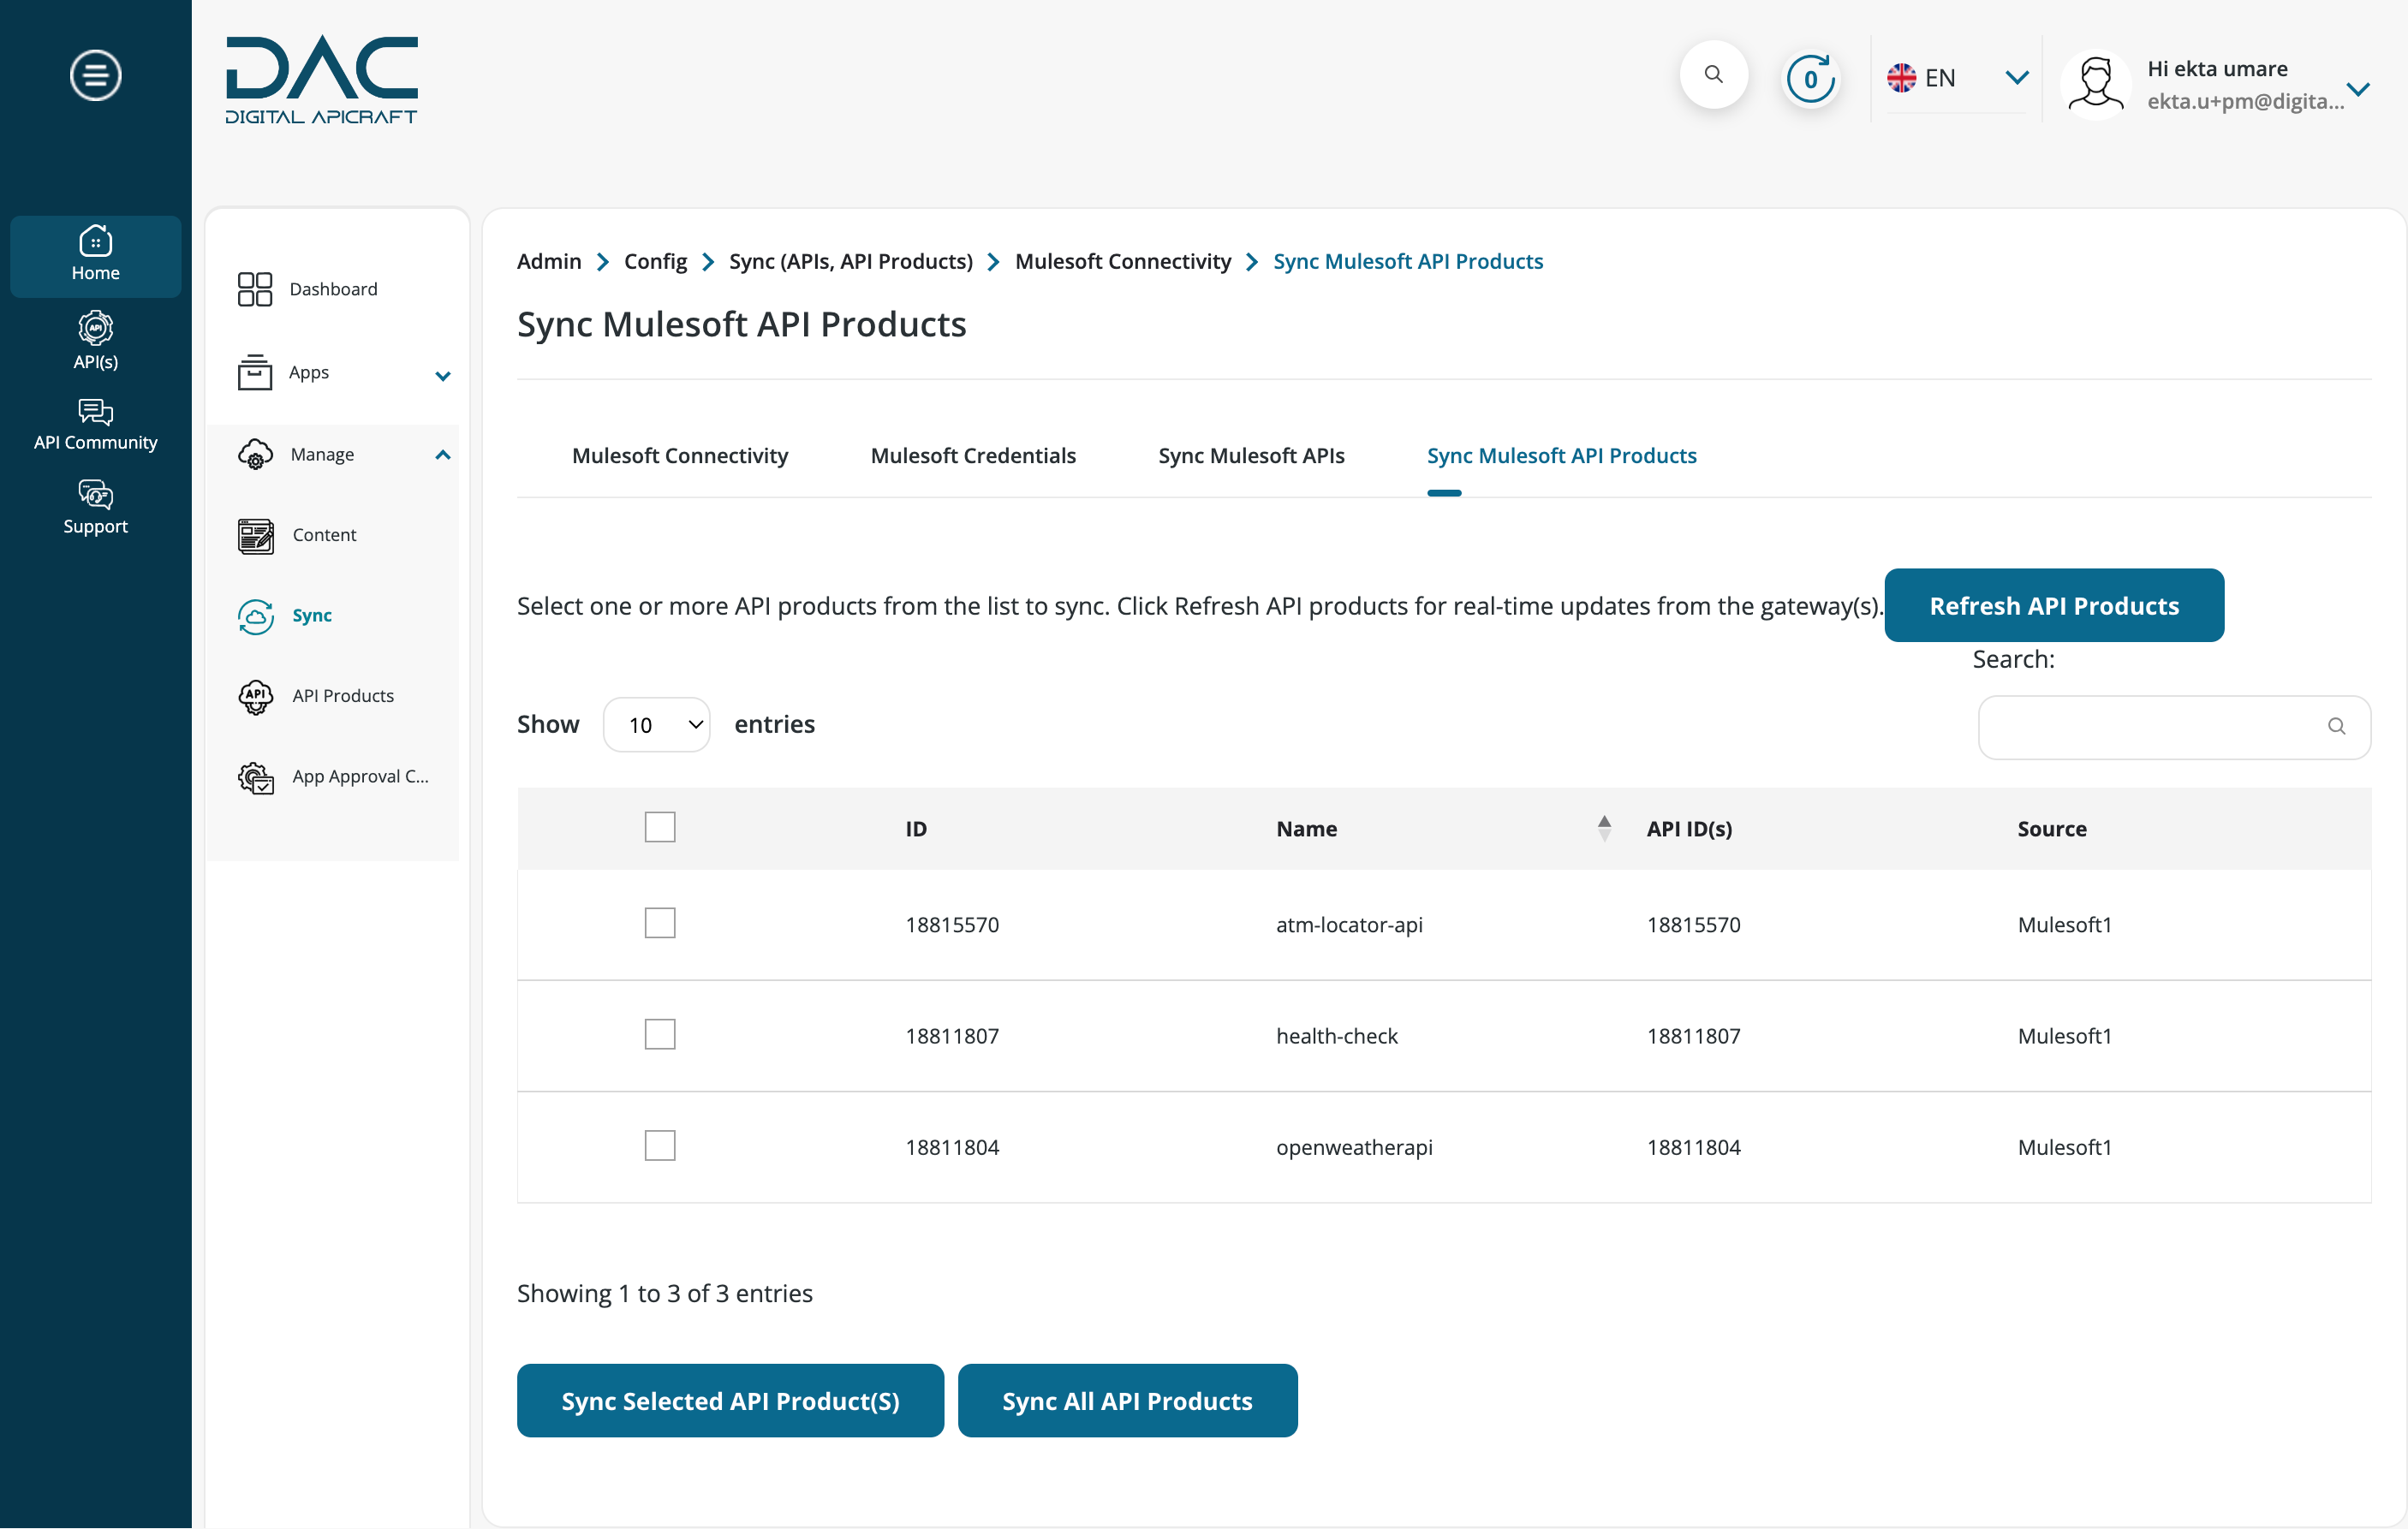
-
To sync specific API products, select them and click Sync selected product(s).
- To sync all API products, click Sync All Products. A success message will appear once the API products have been successfully synced.
Manual Creation
- Login to the site as a Portal Administrator or Product Manager.
- Navigate to Home > Manage > Content > Add Content > APIs.

- Add the following fields:
- Title
- API Version
- API Environment
- While creating an API, users can add a new field for marking it as deprecated.

- The deprecation applies to the current version of the API.
- Products associated with a deprecated API cannot be used.
- Users can create a new version of a deprecated API.
- Users are notified when an API is deprecated.
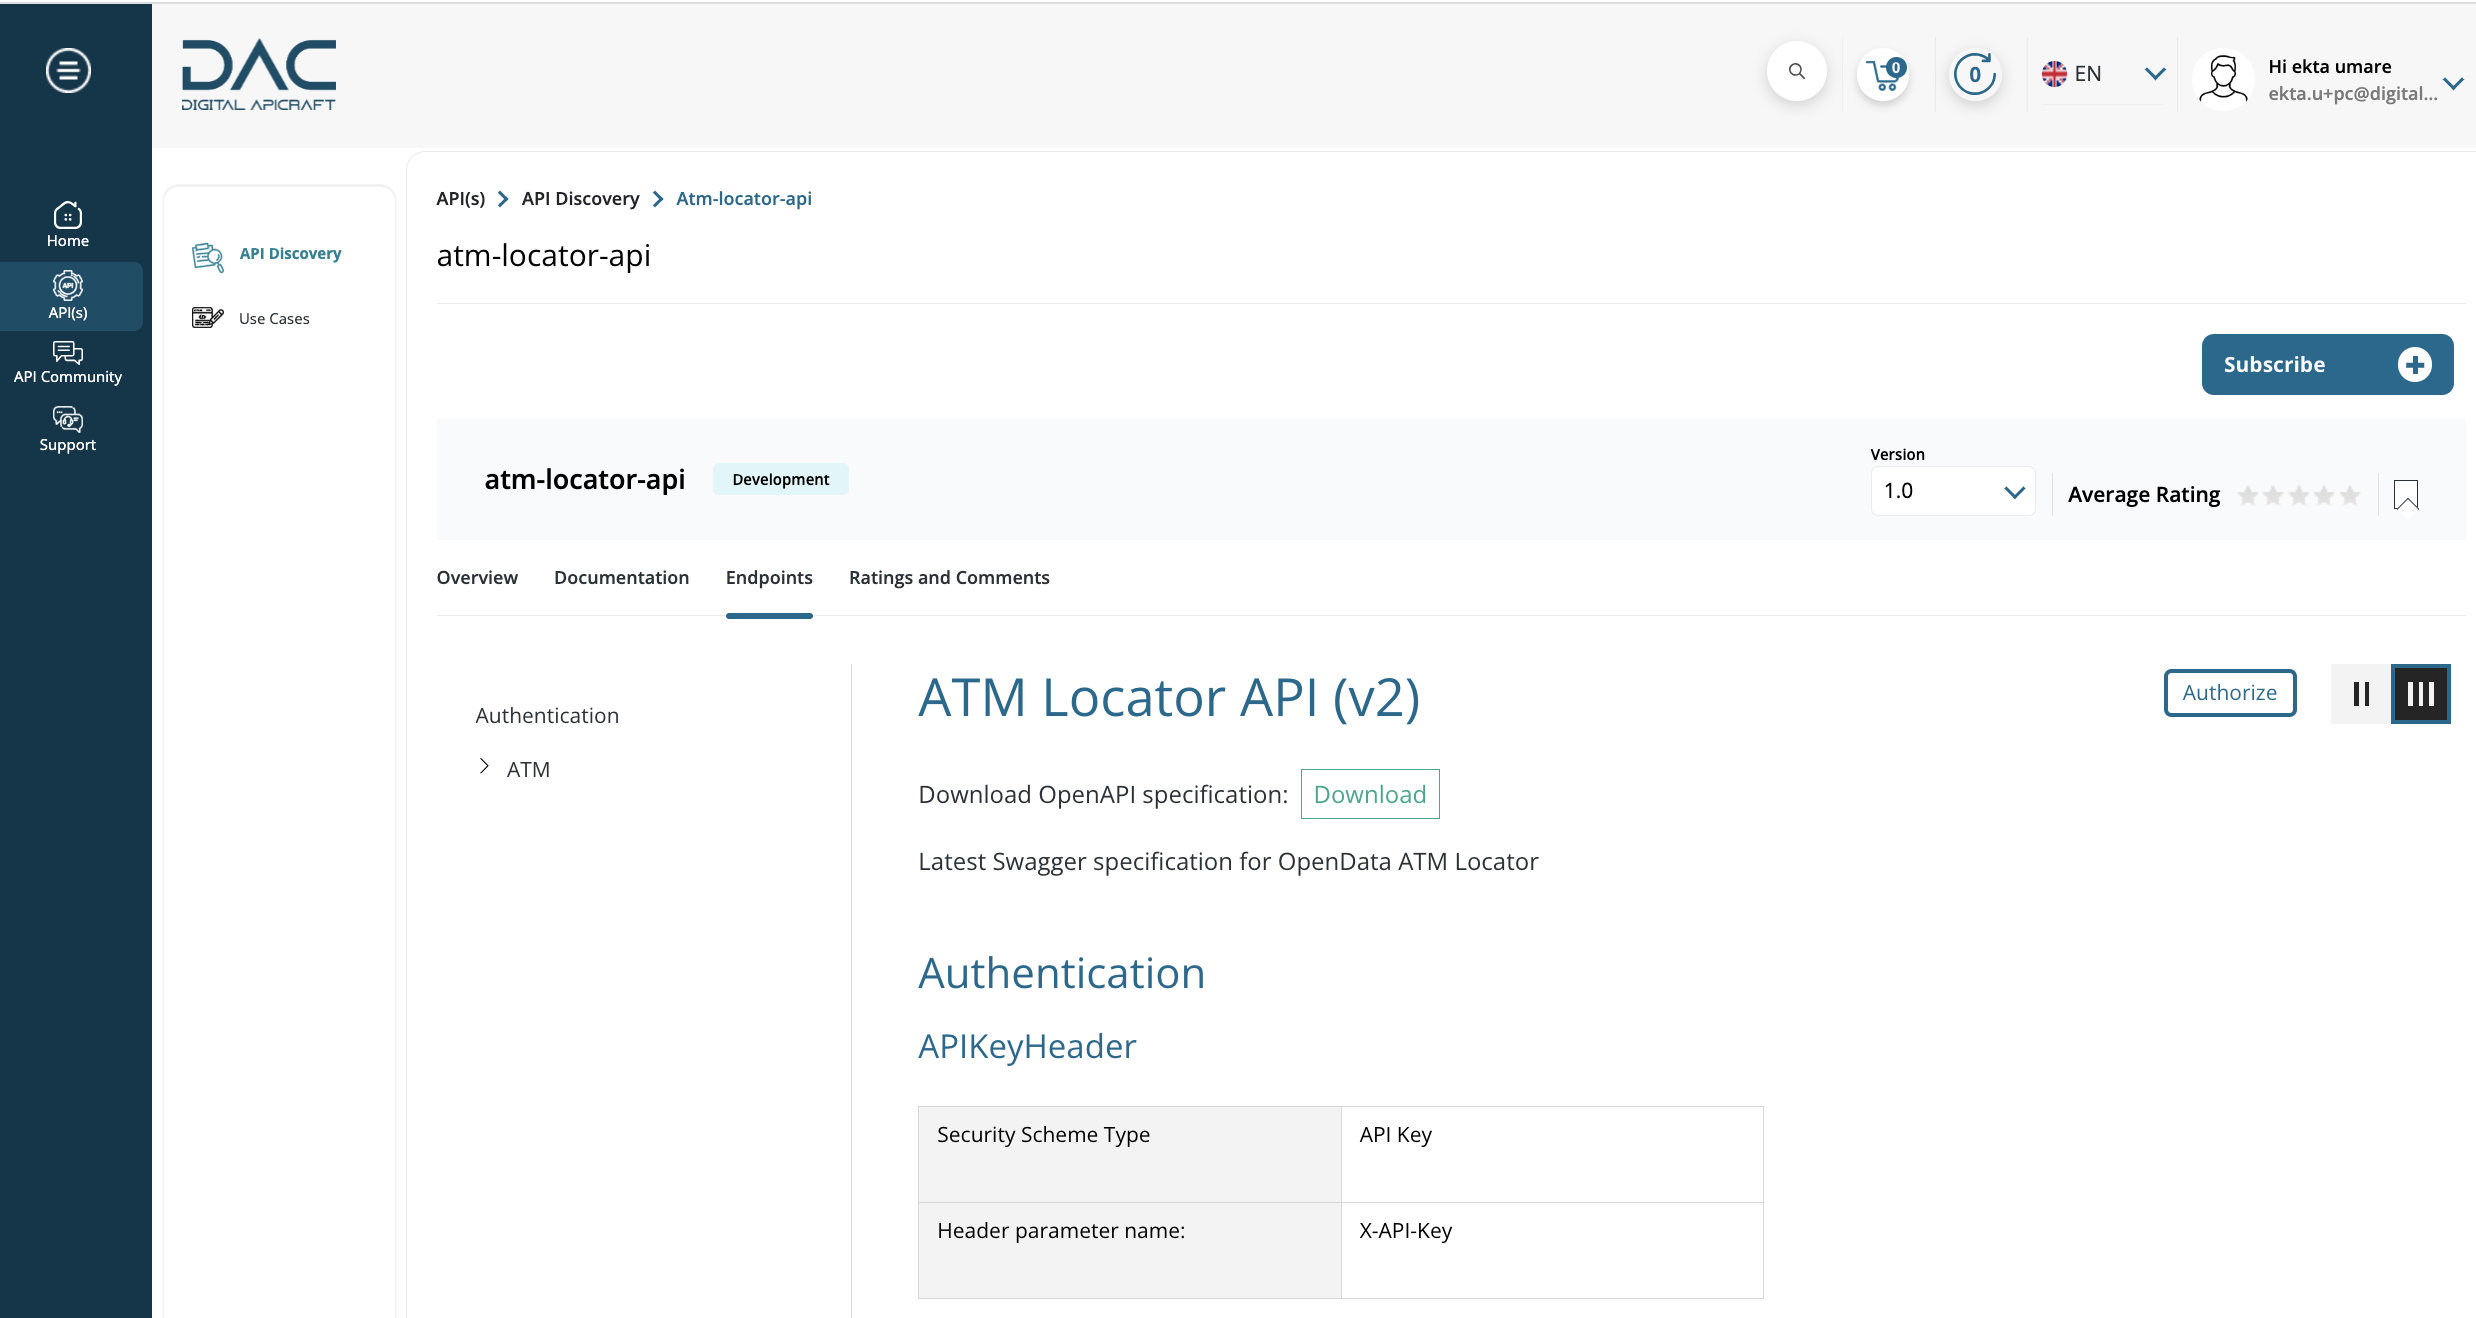
- Navigate to API(s) > API Discovery in the main menu.
- Users can see the API Deprecated label value on the API Discovery page.

- While creating an API, users can add a new field for marking it as deprecated.
- API Images: The allowed image formats are png, gif, jpg, and jpeg, and the maximum number of values allowed is 1.
- Markets and Regions
- Domain: Unlimited terms
- Tags : Unlimited terms
- Solutions: Unlimited terms
- Overview: The allowed components are:

- Two column Layout
- Video
- Static Content
- Documentation: Select documentation content.

- Title
- Documentation Content: The allowed components are:
- FAQ
- Static Content
- Two Column Layout
- Video
- Endpoint: Select any one of the components.

- Async API Documentation To upload Async: Click Add Media and upload Aync file. The allowed types are txt, yml and json and the maximum number of values allowed is 1.
- REST Documentation To upload Dapper/Swagger: Click Add Media and upload Dapper file.The allowed types are txt, yml and json and the maximum number of values allowed is 1.
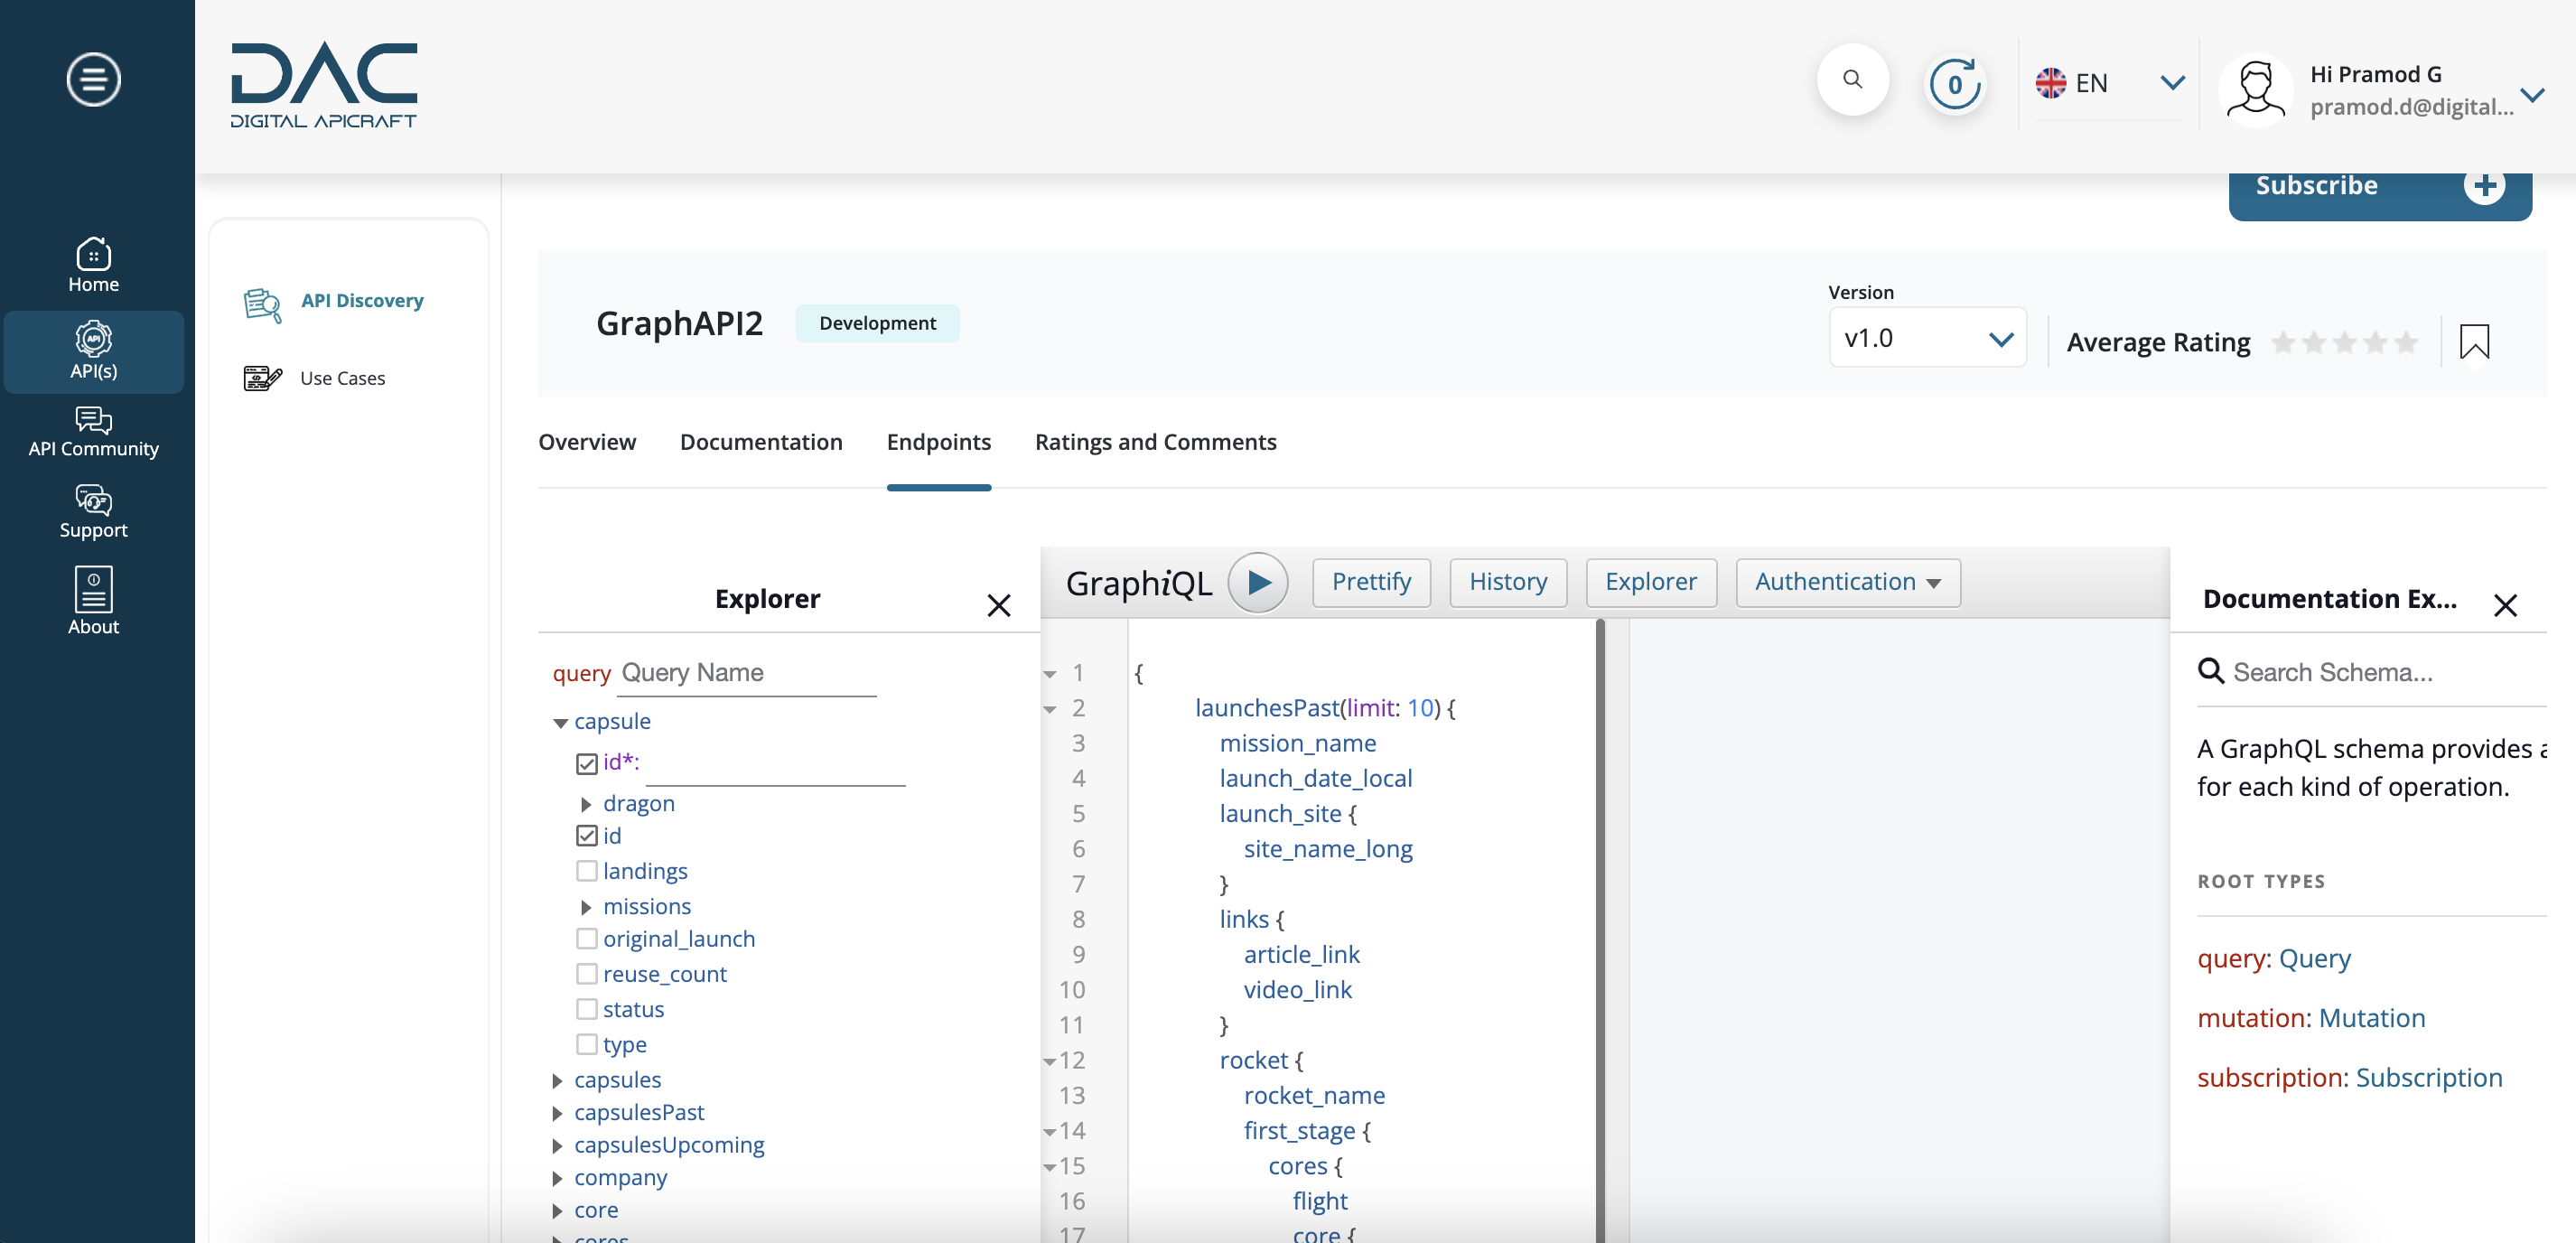
- GraphQL Documentation To upload the GraphQL: Click Add Media and upload GraphQL file.The allowed types are txt, yml and json and the maximum number of values allowed is 1.
- WSDL Documentation To upload the WSDL: Click Add Media and upload WSDL file.The allowed types are limited to XML and the maximum number of values allowed is 1.
- Save the content.
API Synchronisation
As an API Gateway admin utilizing the API developer portal, it is essential to have the means to synchronize API documentation with a continuous integration/continuous deployment (CI/CD) pipeline. This functionality enables users to effectively manage and deploy updates to their APIs' documentation with ease. By integrating the CI/CD pipeline, the API documentation can be automatically updated and deployed, ensuring that it remains synchronized and reflects the latest changes made to the APIs.
The developer portal provides access to the REST endpoints, allowing developers to interact with the API programmatically. By exposing the REST endpoints in the developer portal, users can add and update the APIs seamlessly.
The REST endpoints are designed to consume zipped or compressed data in an encoded format. This means that when interacting with the endpoints, users can send data that has been compressed or zipped, ensuring efficient data transmission.
Upon successful validations, the corresponding API is created or updated in the portal. Once the necessary checks and validations have been passed, the API will be successfully added or updated and made available within the portal for further utilization.
We employ SimpleSAML OAuth Authentication as our chosen method for authenticating the REST endpoints within the portal. By leveraging SimpleSAML OAuth Authentication, we ensure that only authorized individuals or systems can interact with the REST endpoints, enhancing the overall security of our portal and the APIs it exposes.
Simple OAuth Configuration
To authenticate APIs before executing any REST endpoints, it is necessary to set up the Simple OAuth configuration. The portal administrator has the ability to configure Simple OAuth for this purpose easily.
-
Login as a Portal Administrator.
-
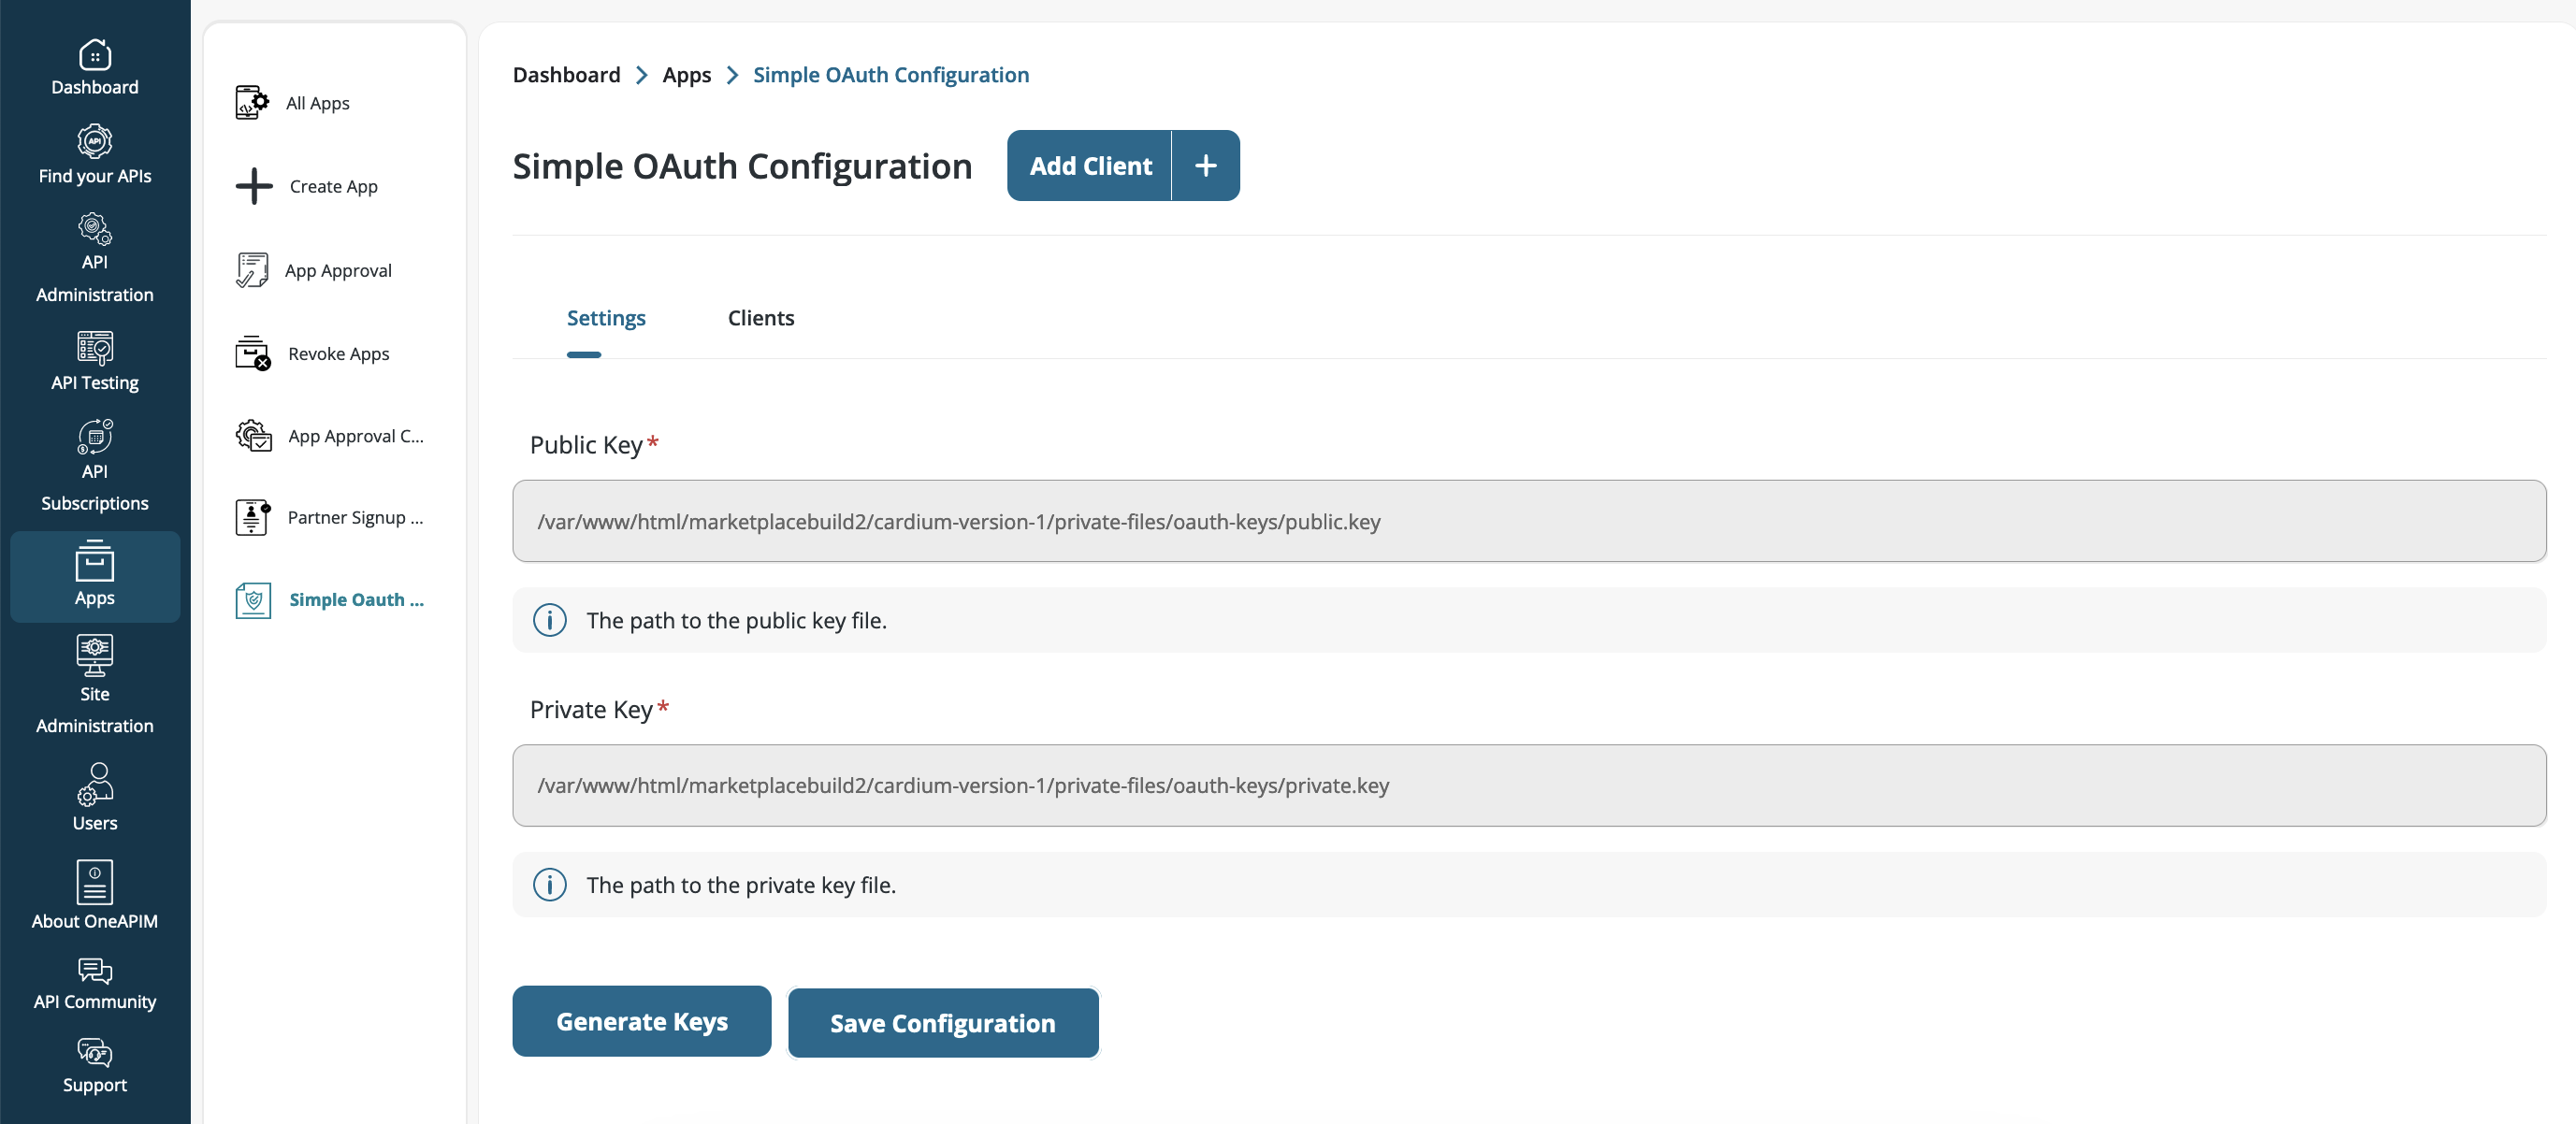
Navigate to Home > Apps > Simple OAuth Configuration

-
As part of the Simple OAuth configuration, users must set up both private and public keys. These keys are crucial for the authentication process.
-
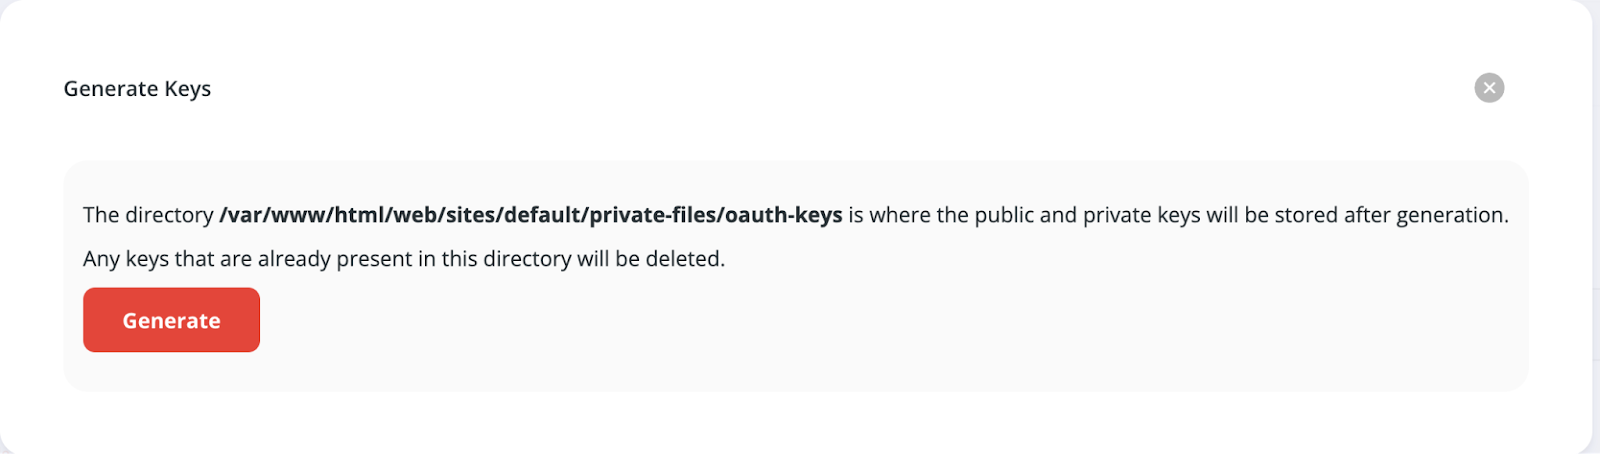
Click the Generate Keys button to create the required keys. Upon clicking, a popup will appear with information about the storage location for the keys.
-
After clicking the Generate Keys button, the keys will be generated. Click Save Configuration to save them in their respective locations.
-
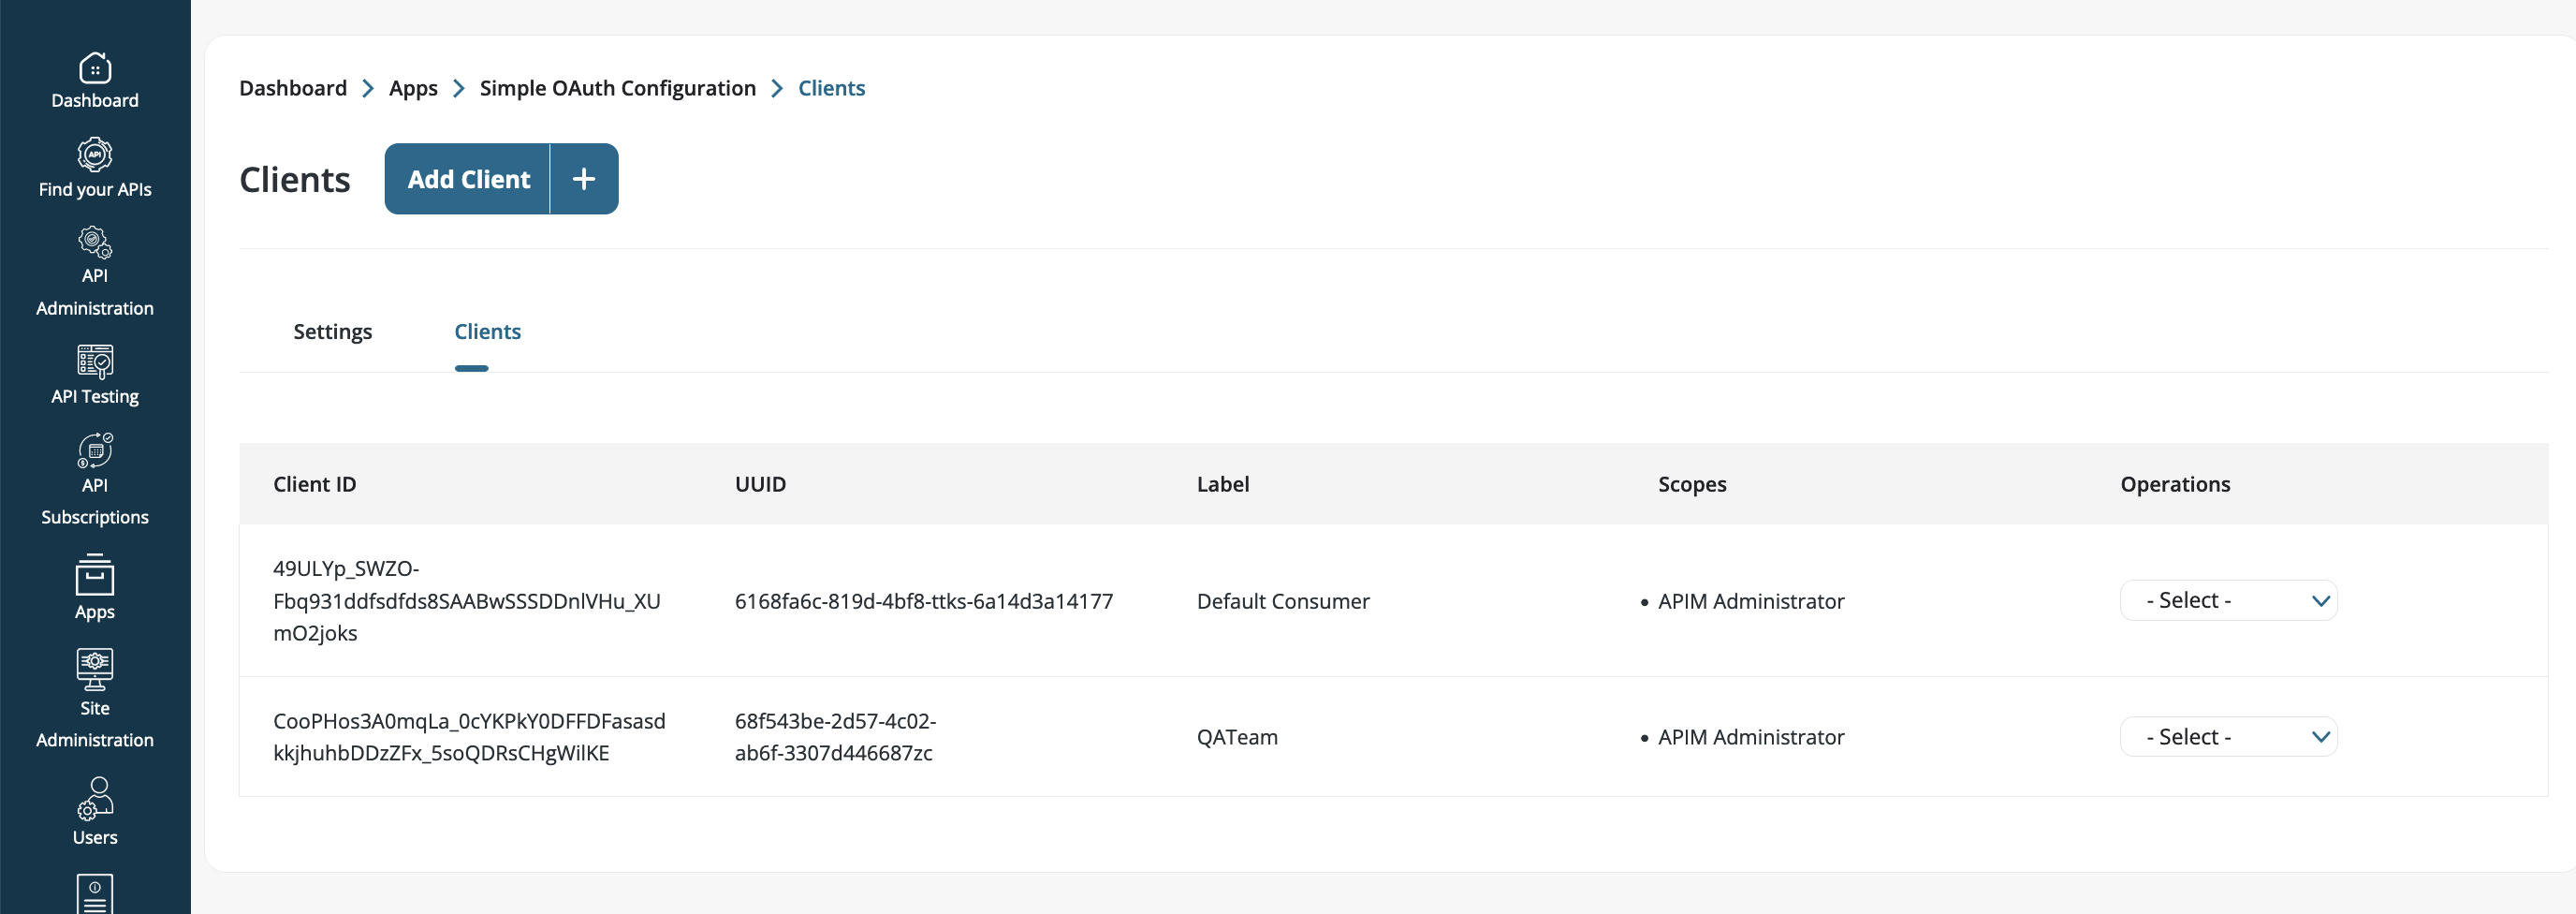
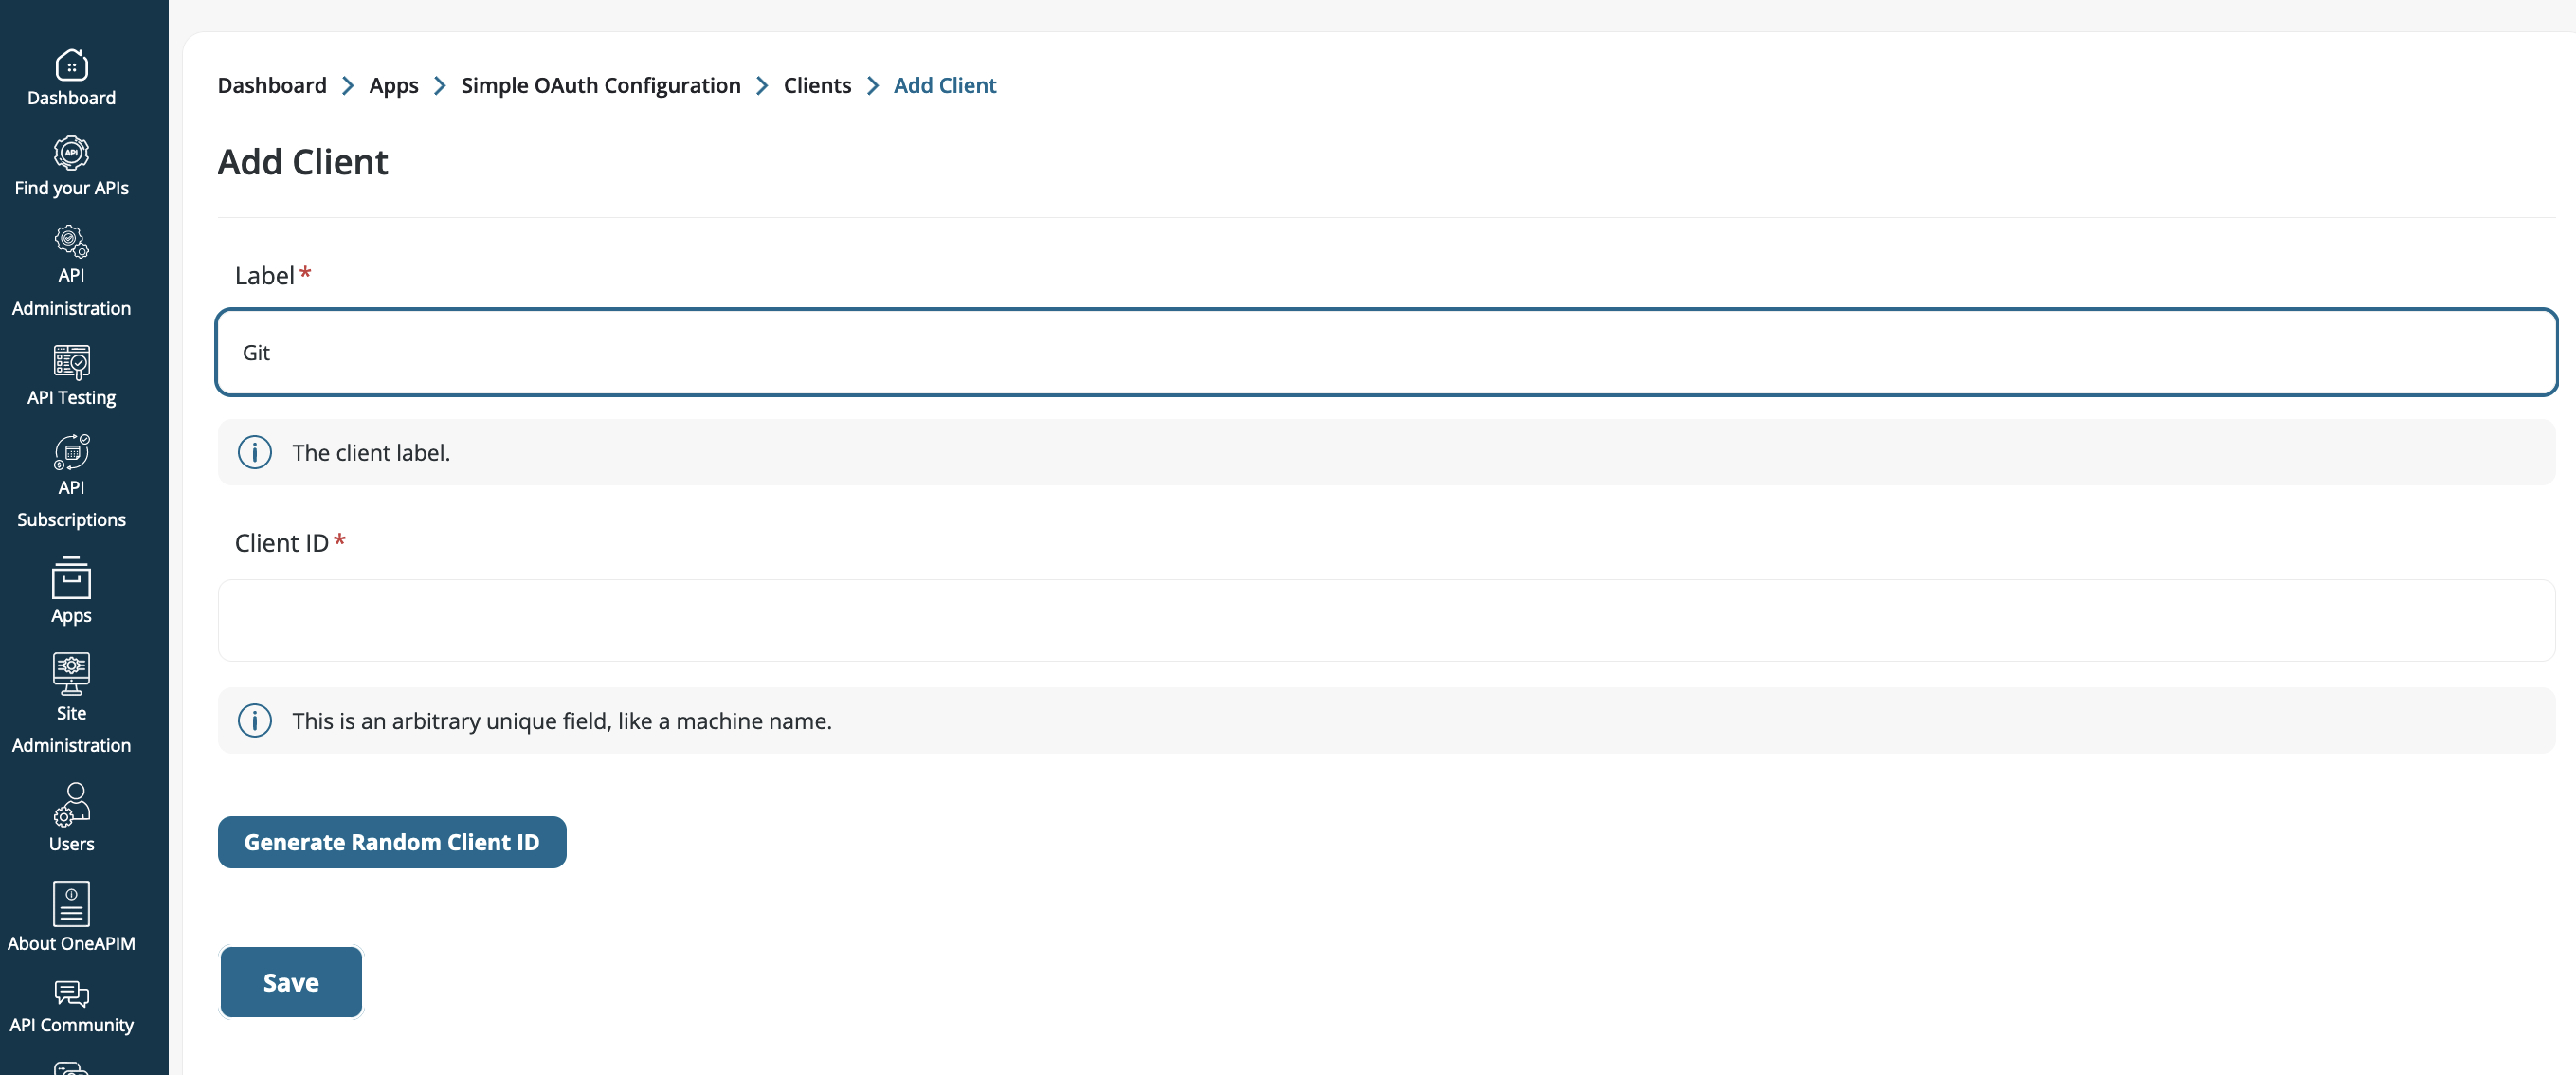
The next step is to set up the client. There is one default client available by default, and users can create multiple clients as needed.
-
If users wish to add a new client, click Add Client button on the right side of the screen.
-
The Client ID will be a randomly generated key.
Payload Structure
Sample_Payload
-
petstore.yaml
-
api.meta
-
overview.md
-
api_documentation
-
documentation.md
-
security.md
-
Payload Structure File purpose
-
petstore.yaml : This is a swagger file. It may be WSDL, GraphQL, YML etc., a file which will appear in the endpoints page.
-
api.meta : This is an important file that consists of JSON data which includes the API fields data. As of now, we are considering the following data.
-
apiVersion
-
apiName
-
apiDescription
-
apiType : graphql, async, WSDL, rest [These are the possible values in API type]
-
uuid : The unique identifier to which API will be tagged.
-
-
overview.md : This is the file that possesses the overview for the API and will be shown under the overview tab of the API
-
*.md : There can be an ‘n’ number of md files under the api_documentation directory which will be shown in the Documentation tab of API.
REST Endpoints
-
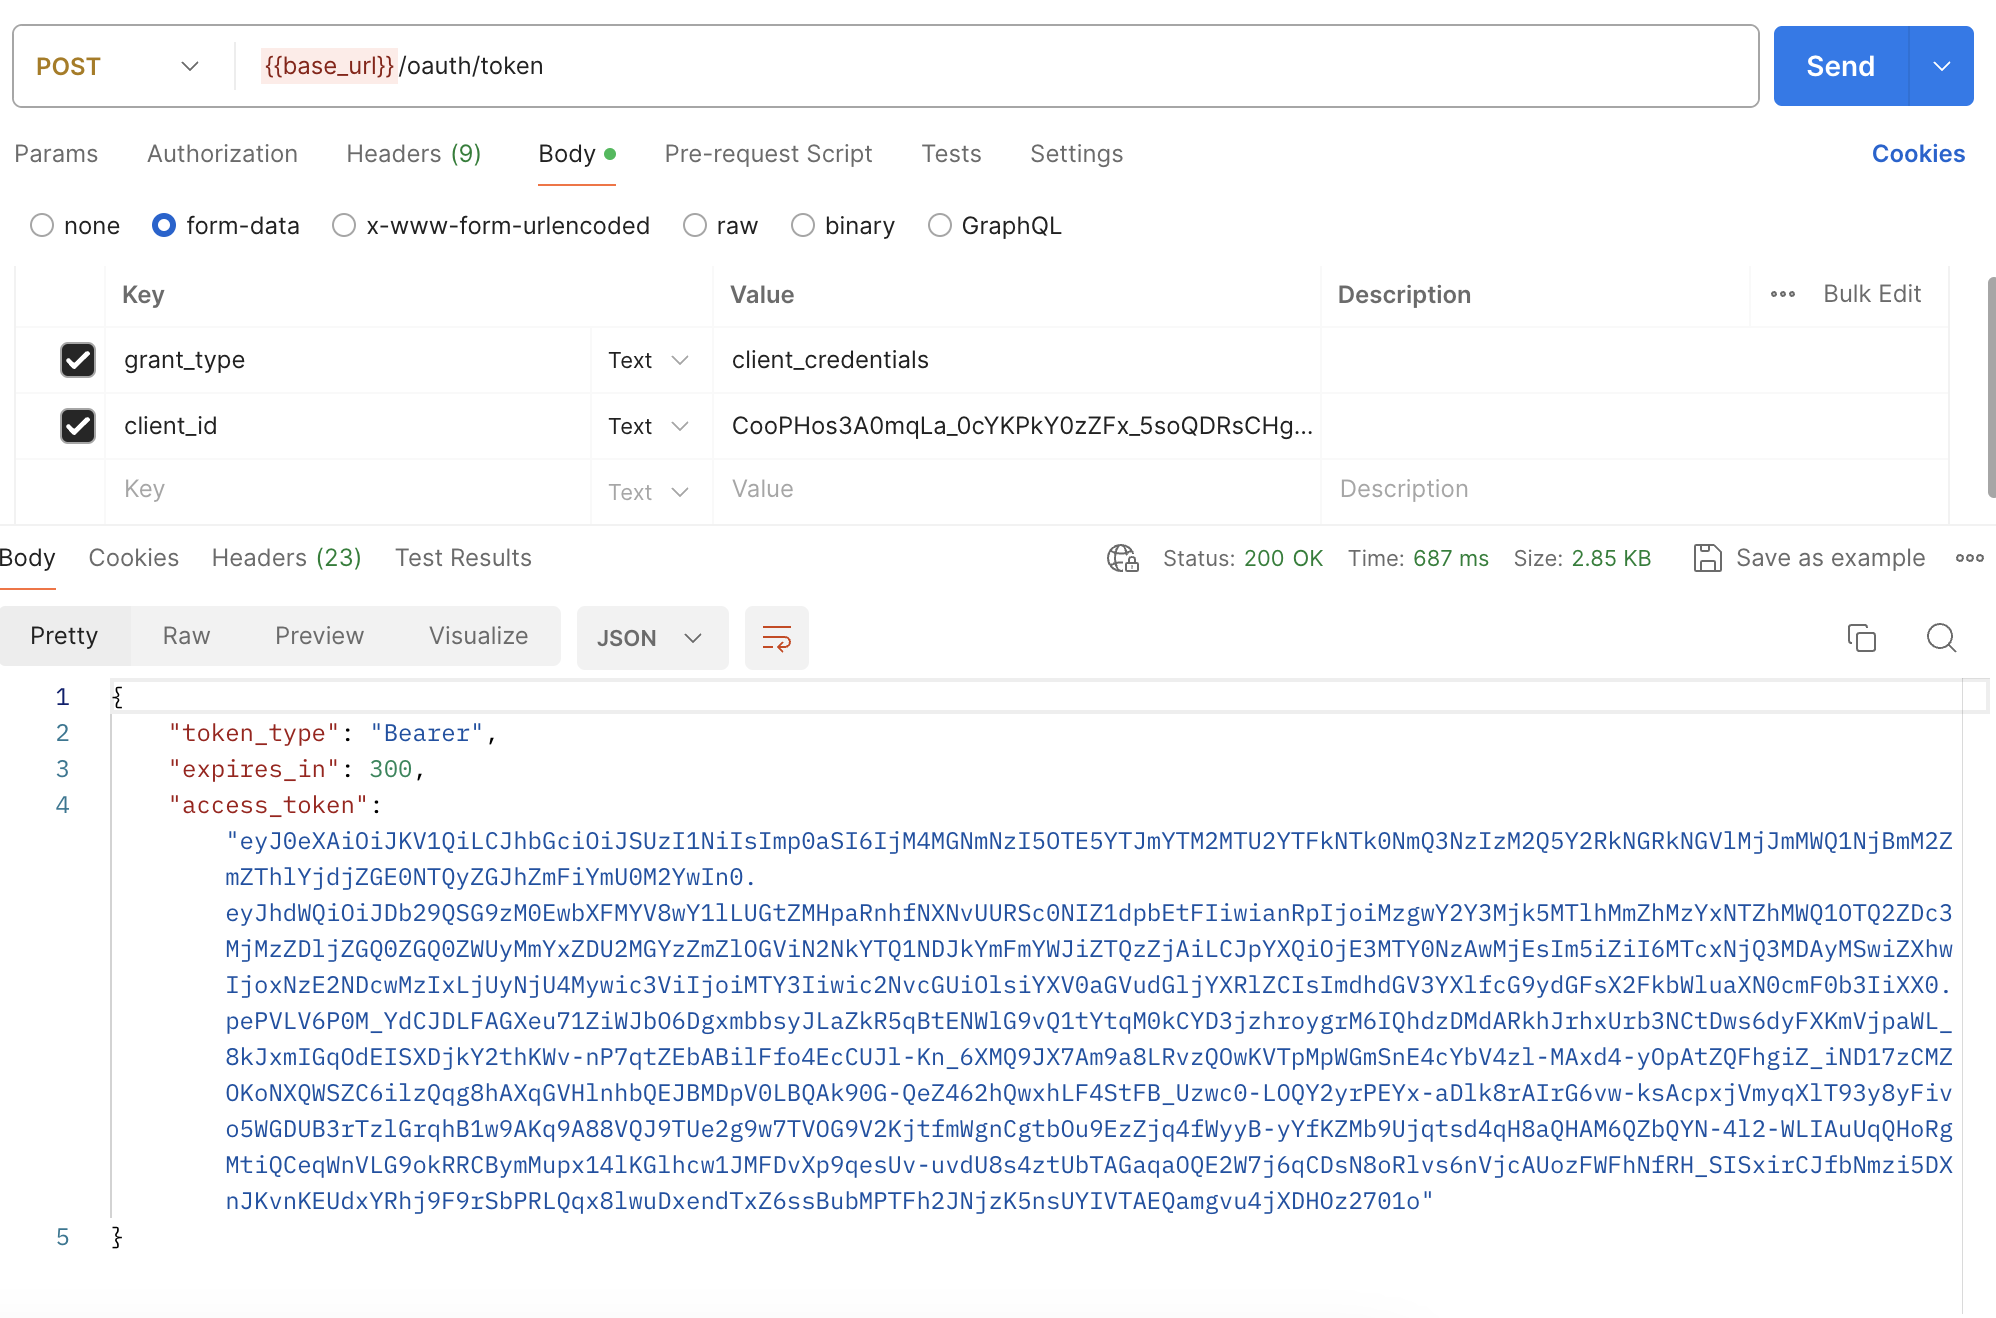
Access Token Generation : {{base_url}}/oauth/token
-
Method – POST
-
Form Parameters –
-
grant_type : client_credentials
-
client_id : {{ client_unique_id }}
-
-
The access token endpoint returns the access token, which is then utilized for creating and updating APIs.
-
-
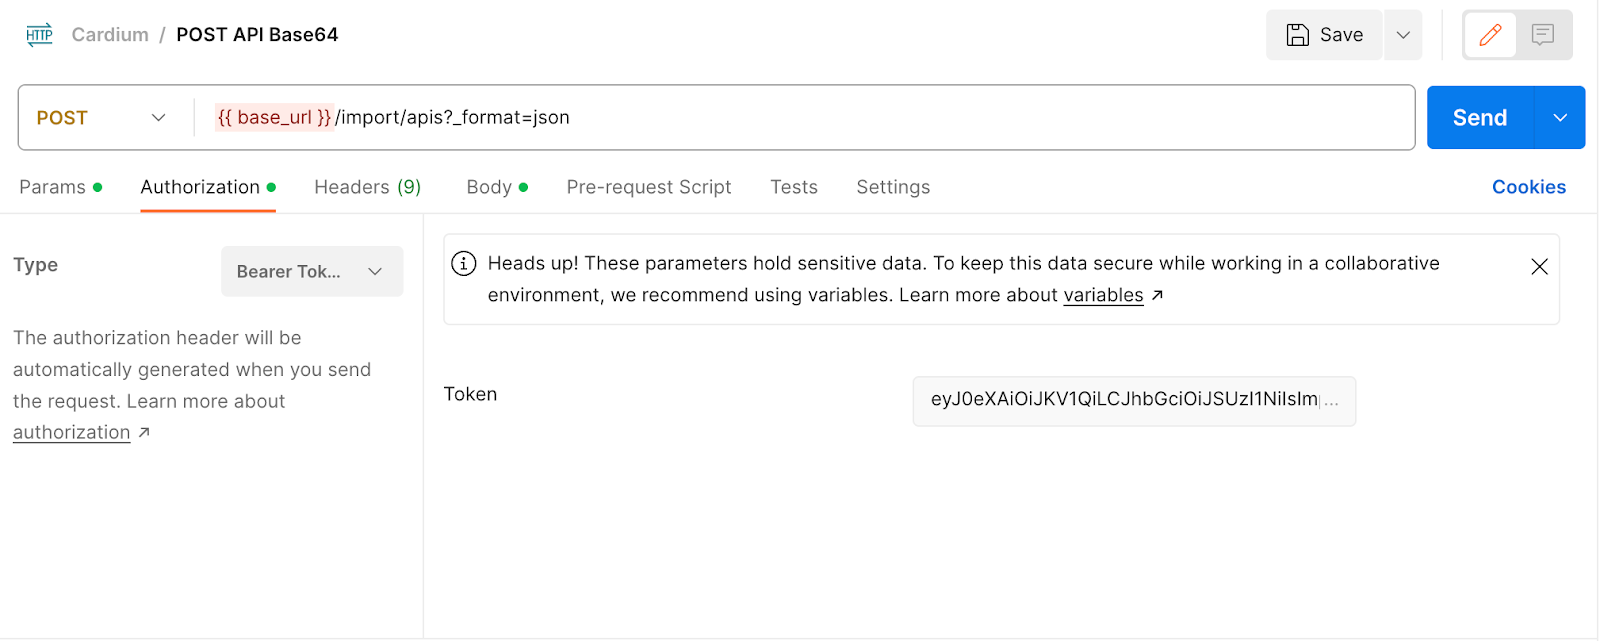
Create API Endpoint : {{base_url}}/import/apis?_format=json
-
Method – POST
-
For authentication, users need to pass the access token as a bearer token, which can be generated using the {{base_url}}/oauth/token endpoint.
-
-
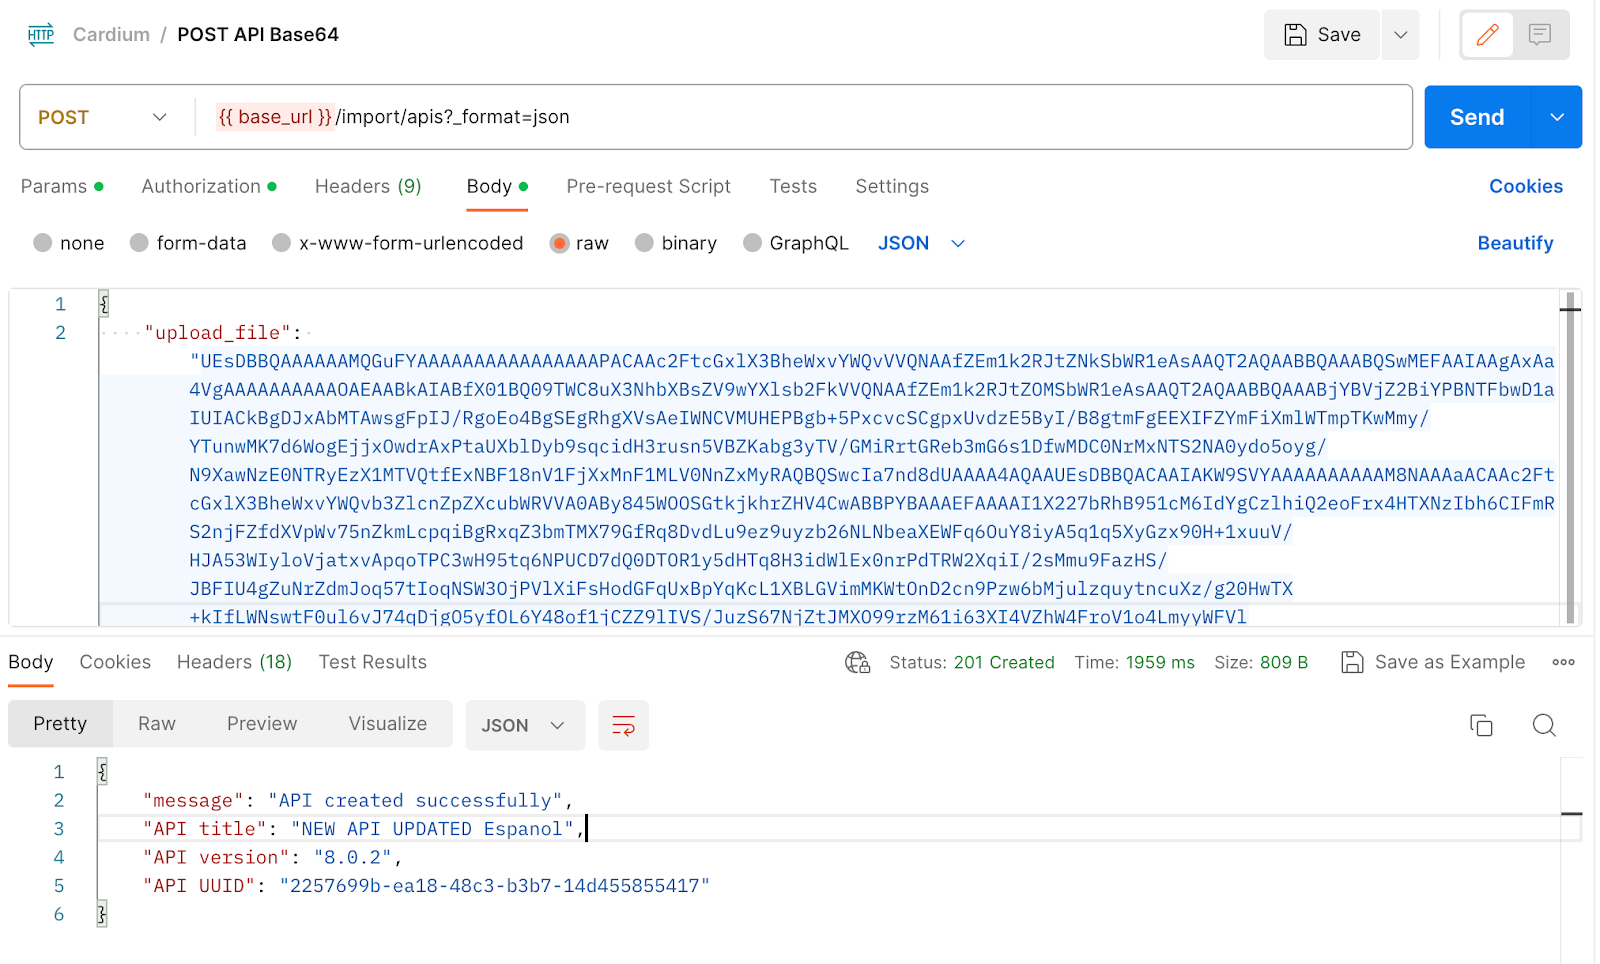
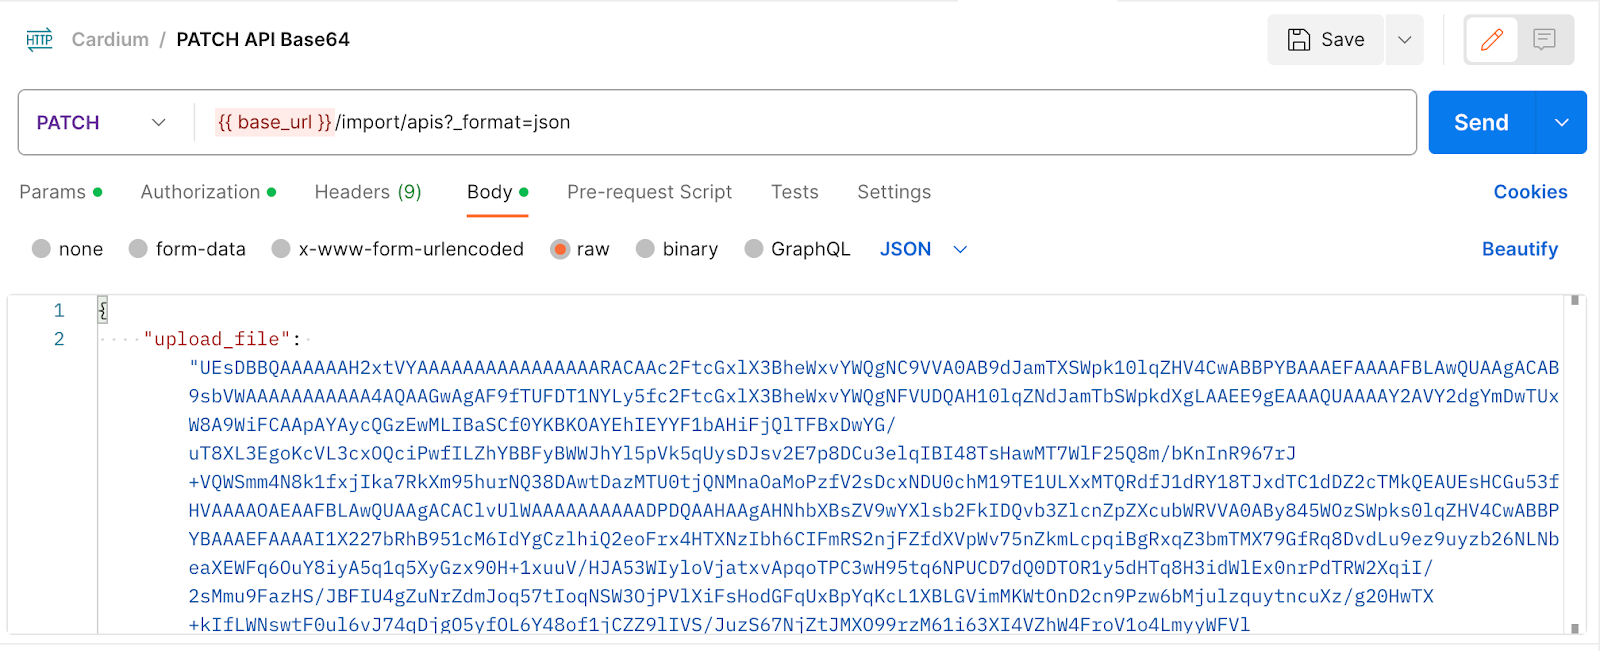
To process the API payload, users are required to pass the ZIP file in base64 format.
-
Once the encoded API passes all the required validations, it will be created in the backend.
-
Once the request is successfully processed, it will return a response with the status in the following format –
-
Message: This is the status message indicating that the API was created successfully.
-
API Title: The title of the newly created API.
-
API Version: The version of the newly created API.
-
API UUID: This is a unique number assigned to each API for uniquely identifying the API.
-
-
Update API Endpoint : {{base_url}}/import/apis?_format=json
-
Method – PATCH
-
For authentication, users need to pass the access token as a bearer token, which can be generated using the {{base_url}}/oauth/token endpoint.
-
-
For updating the existing API it is mandatory to specify the UUID and version in the meta file.
Response Message Syntax
{
"type": "/problems/api-already-exists",
"title": "API already exists in the system.",
"detail": "API with UUID 7c1a88d8-4301-4d4e-b77c-5705195cebfc and version v1.0.1 is already available, please use PATCH method to update existing API."
}
-
type: Tells the user type of problem/response
-
title: A one-liner about the problem/response
-
detail: Give the user brief details
API Validations
The following is the list of validations that needs to be taken care of while building or executing the endpoints –
-
POST & PATCH :
-
The APIM Administrator role is mandatory for users who wish to execute the APIs.
-
The UUID passed in the .meta file is validated.
-
If an API with the same UUID and version is not allowed.
-
The encoded JSON data passed in the "upload_file" parameter is not valid.
-
The "overview.md" file is mandatory file.
-
The "api_documentation" directory should not be empty and it is a mandatory file.
-
The markdown file name can only support alphabets, numbers, underscore, and hyphens.
-
The YAML file is mandatory and a swagger file should be present.
-
The API specification file must be WSDL, GraphQL and YML
-
Multiple API specification files cannot be uploaded.
-
Metadata file should contain a valid JSON file and all the fields like “API version”,API name” and “API type” is validated in meta file.
-
-
PATCH :
-
API with new UUID will not be allowed and version should be present in meta file to execute PATCH.
-
-
POST & PATCH :
-
The API Administrator role is mandatory for users who wish to execute the APIs.
-
The UUID passed in the .meta file is not valid.
-
Checking if an API with the same UUID and version already exists.
-
The encoded JSON data passed in the "upload_file" parameter is not valid.
-
The "overview.md" file is missing.
-
The "api_documentation" directory is empty.
-
The "api_documentation" directory is missing.
-
The markdown file name contains illegal characters. Only alphabets, numbers, underscore, and hyphens are supported.
-
The YAML file is invalid.
-
The specification file is missing. (i.e swagger file missing)
-
The API specification file is unsupported.
-
Multiple API specification files have been found.
-
The metadata is invalid. (If provided, "api.meta" does not contain valid JSON.)
-
The "apiVersion" is missing in the meta file.
-
The "apiName" is missing in the meta file.
-
The "apiType" is missing in the meta file.
-
The file extension is invalid based on the "apiType" specified in the meta file.
-
-
PATCH :
-
The API with the specified UUID was not found.
-
The API with the specified version was not found.
-
The UUID is missing in the meta file.
-
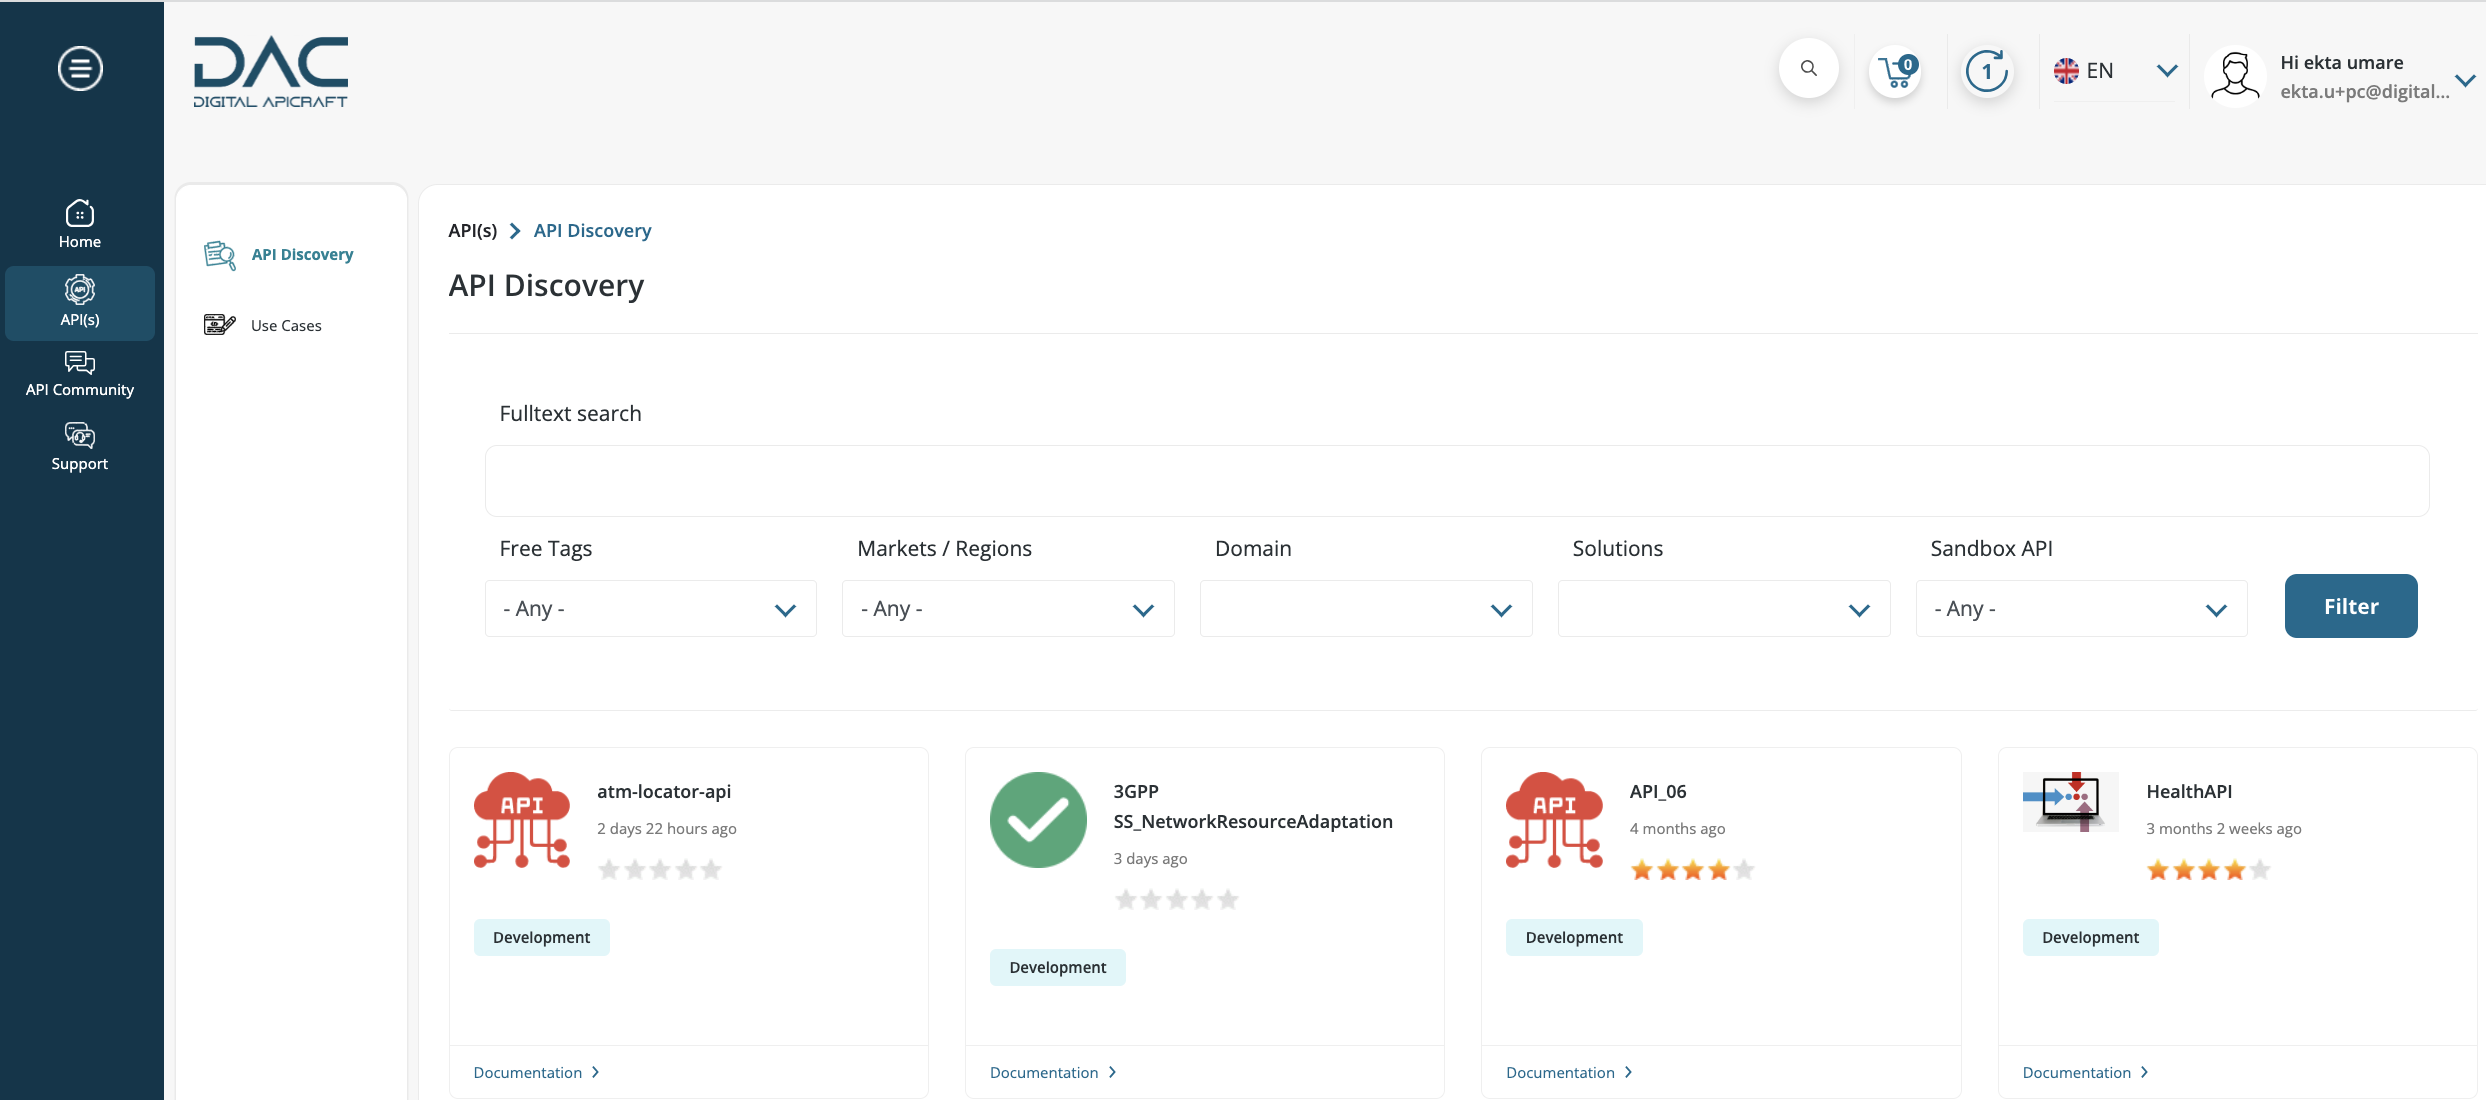
API Catalog Search Features
- Navigate to API(s) > API Discovery from the main menu.
- APIs can be filtered based on country, tags, domain, and solution. The search bar can be used to filter the APIs by name.
- Filter keywords are displayed at the top of the list. To remove the filter criteria, click the X button or uncheck/remove them from the left filter section dropdown menu.

API Subscription
With One APIMarketplace , Developers can easily create and manage applications that access and integrate with your APIs. One APIMarketplace provides a range of tools and resources to help you build and deploy powerful and innovative applications that meet the needs of your users.
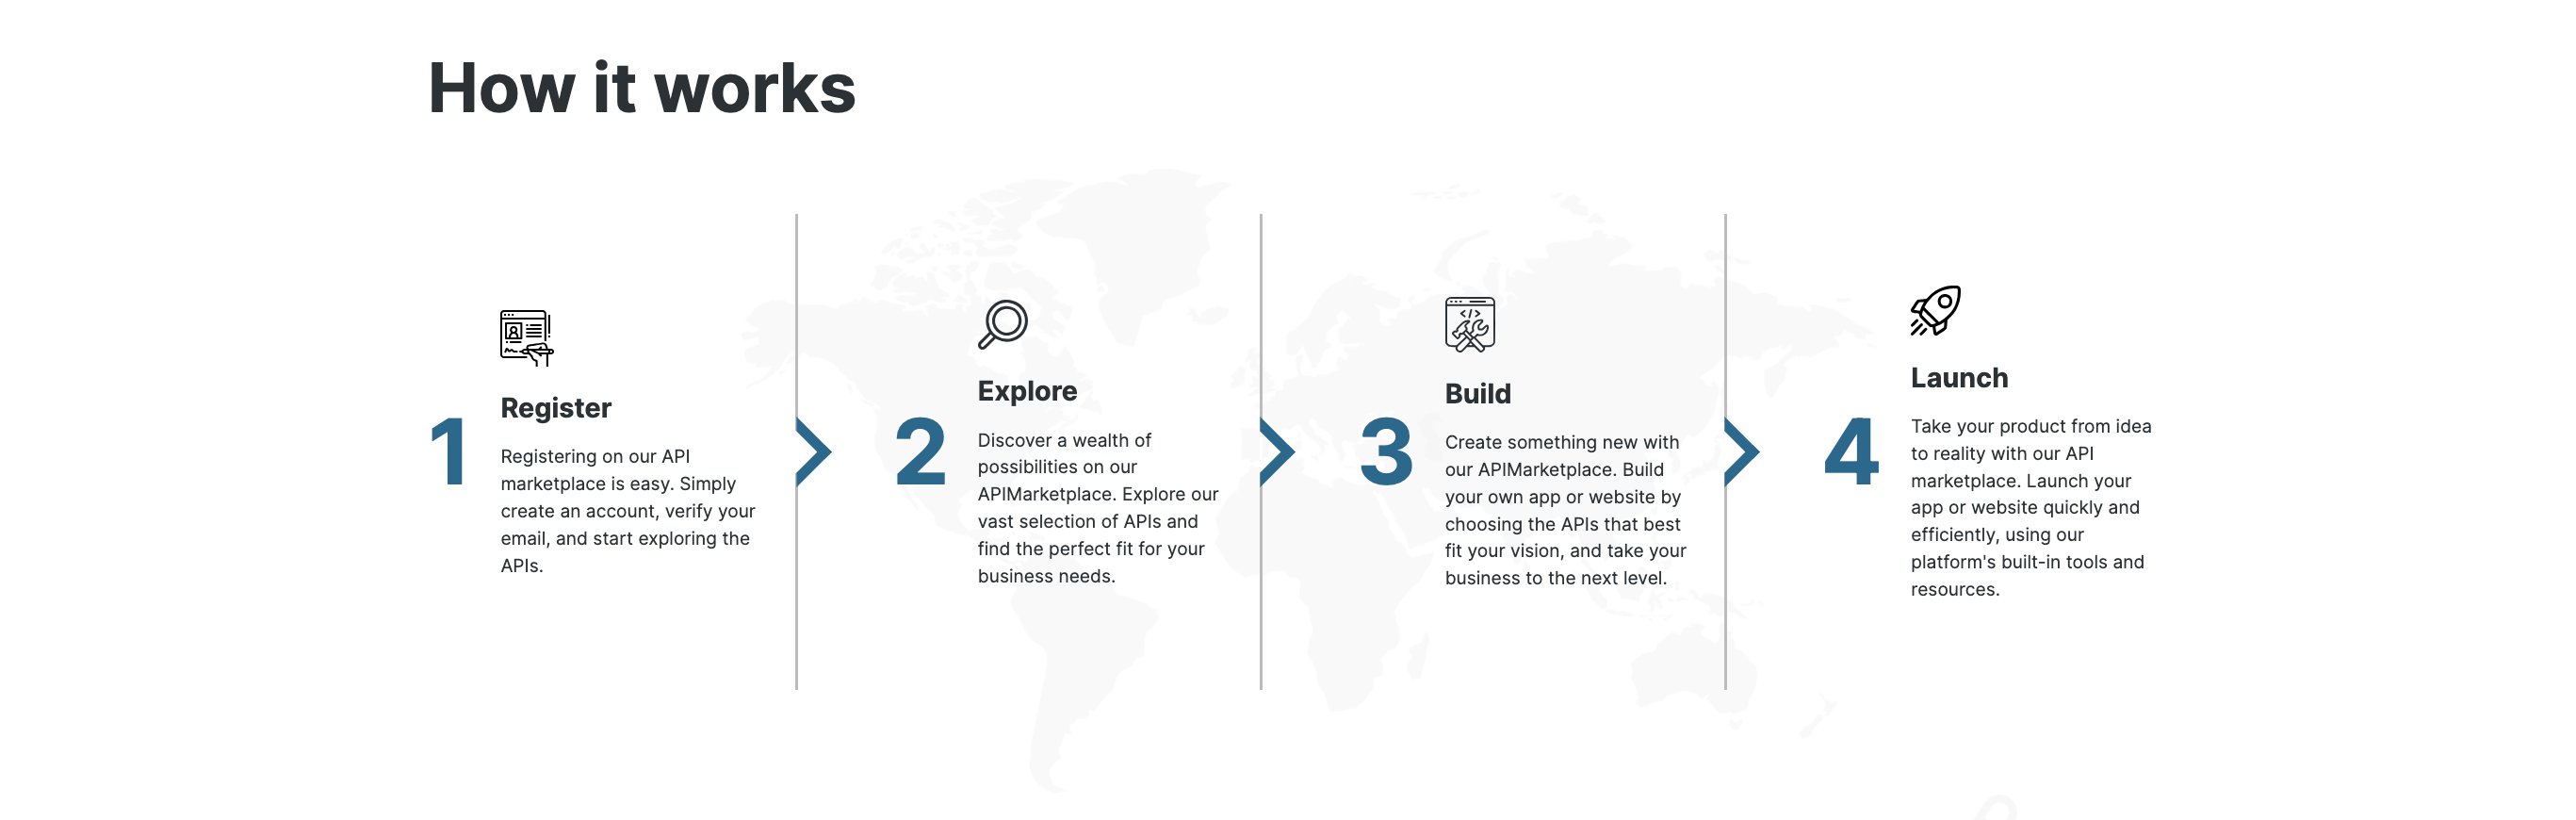
To get started, developers need to create an account and subscribe to the APIs they wish to access. Once developers are subscribed to an API, they can create an application by following the steps explained below.
Once developers have created their application, they will be provided with an API key or access token that they can use to authenticate your API requests. They can then use the API key or access token in their application code to make API calls to your APIM Gateway and access the data and functionality provided by your APIs.
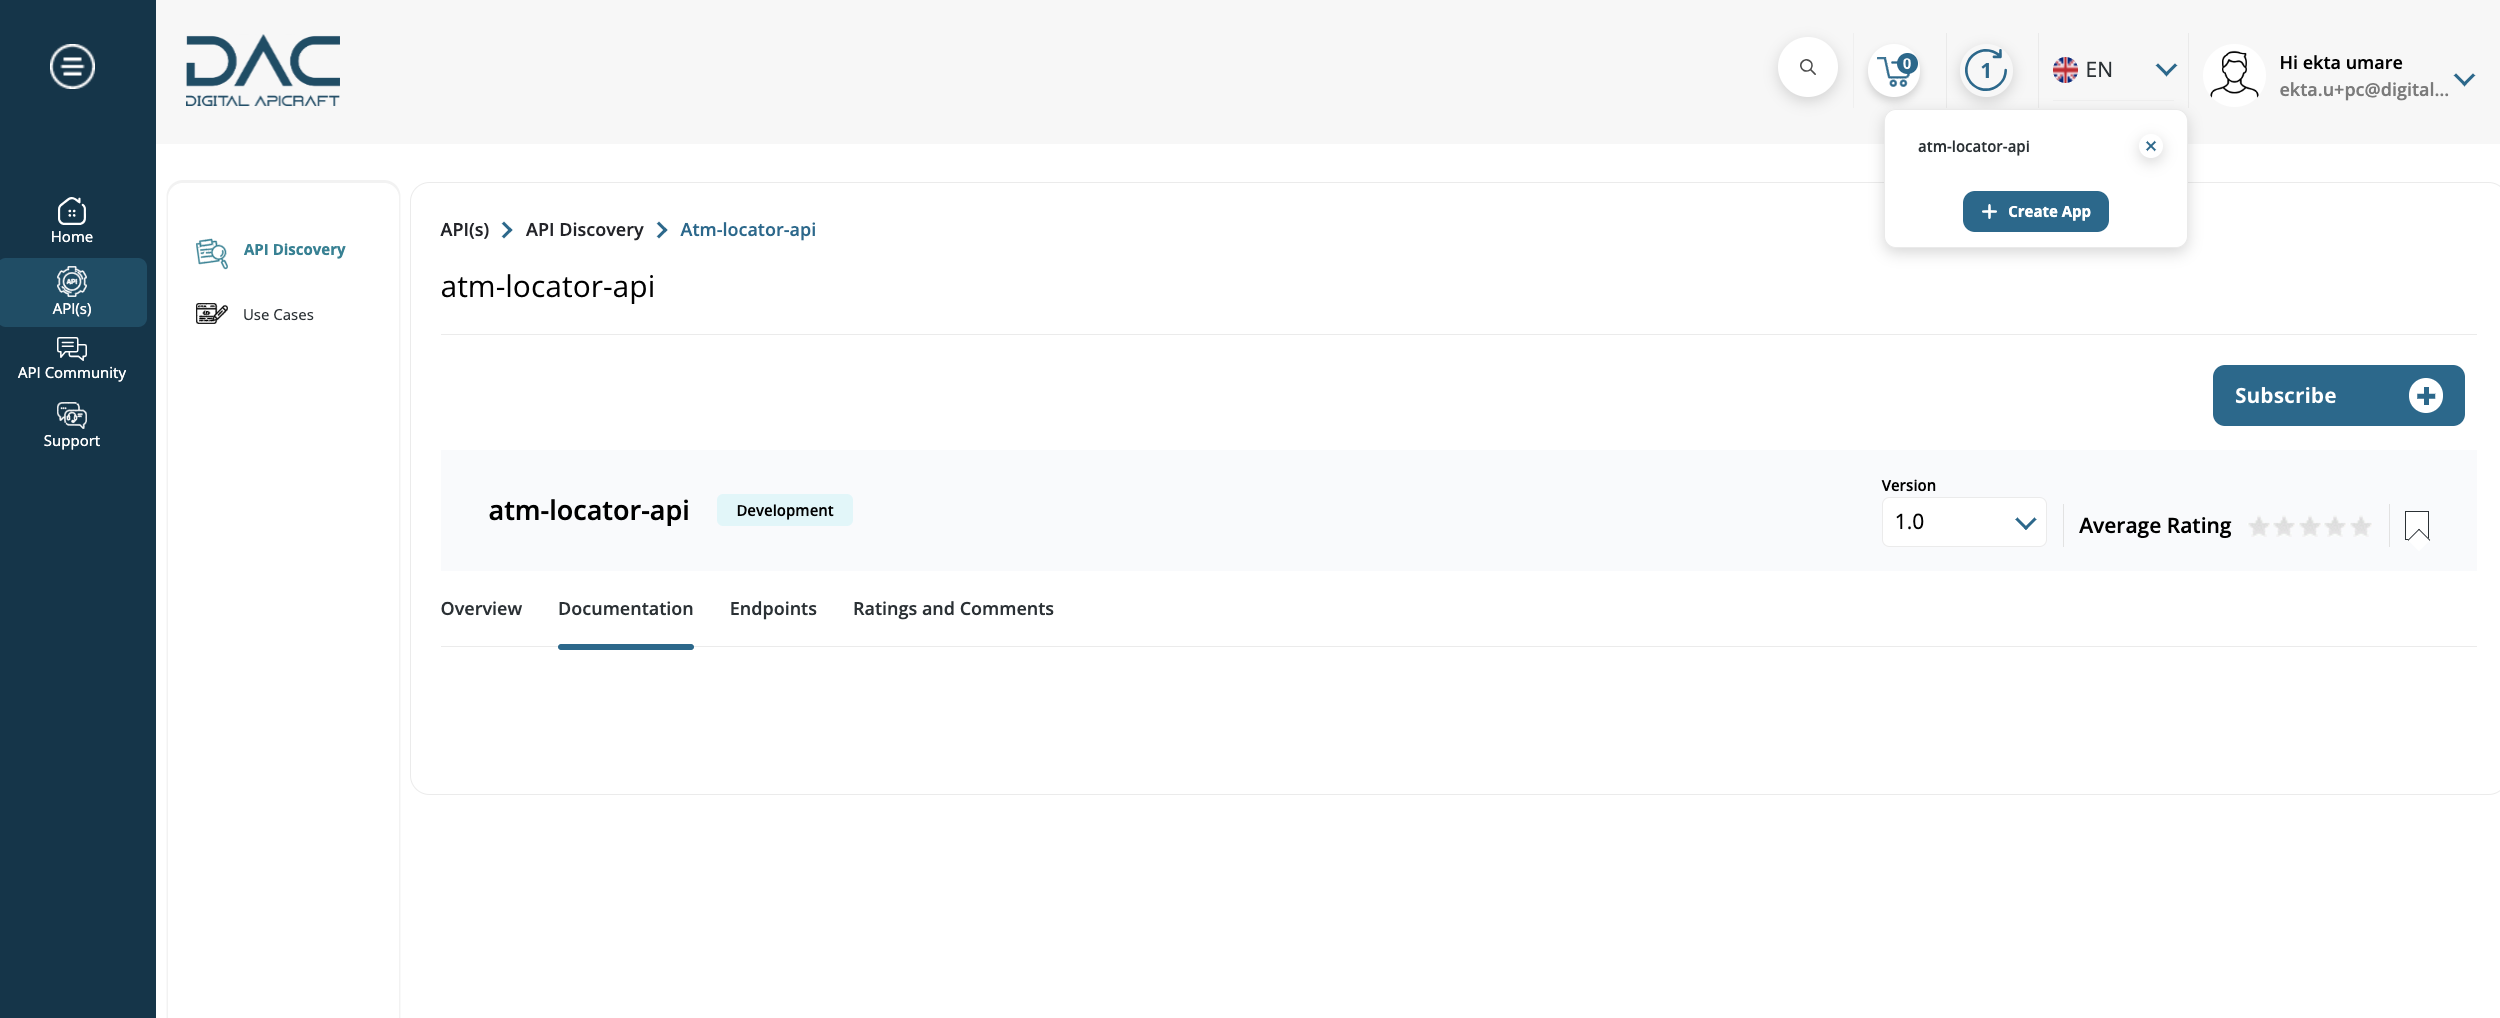
Subscribe to an API
- Login to the site as a Portal Consumer, APIM Administrator, Product Manager, or Portal Administrator.
- Navigate to API(s) > API Discovery from the main menu.
- Click Documentation on API to subscribe.
- Add to List :
- Click Subscribe button.
- To add API Products to subscription list, click Subscribe button. Repeat for other required APIs.
- View API list by clicking Subscriptions List and to create an app with Subscribe API click Create App button.
- Remove from List :
- Click Subscriptions List to view the list of subscribed APIs.
- To remove the API from the subscription list, click the cross icon beside the API name. Repeat for other required APIs.

Create App
- Navigate to Home > Apps > Create App from the left sidebar menu.
- On the Create App page, fill in the relevant data in the fields (App name, business email, description, etc.).
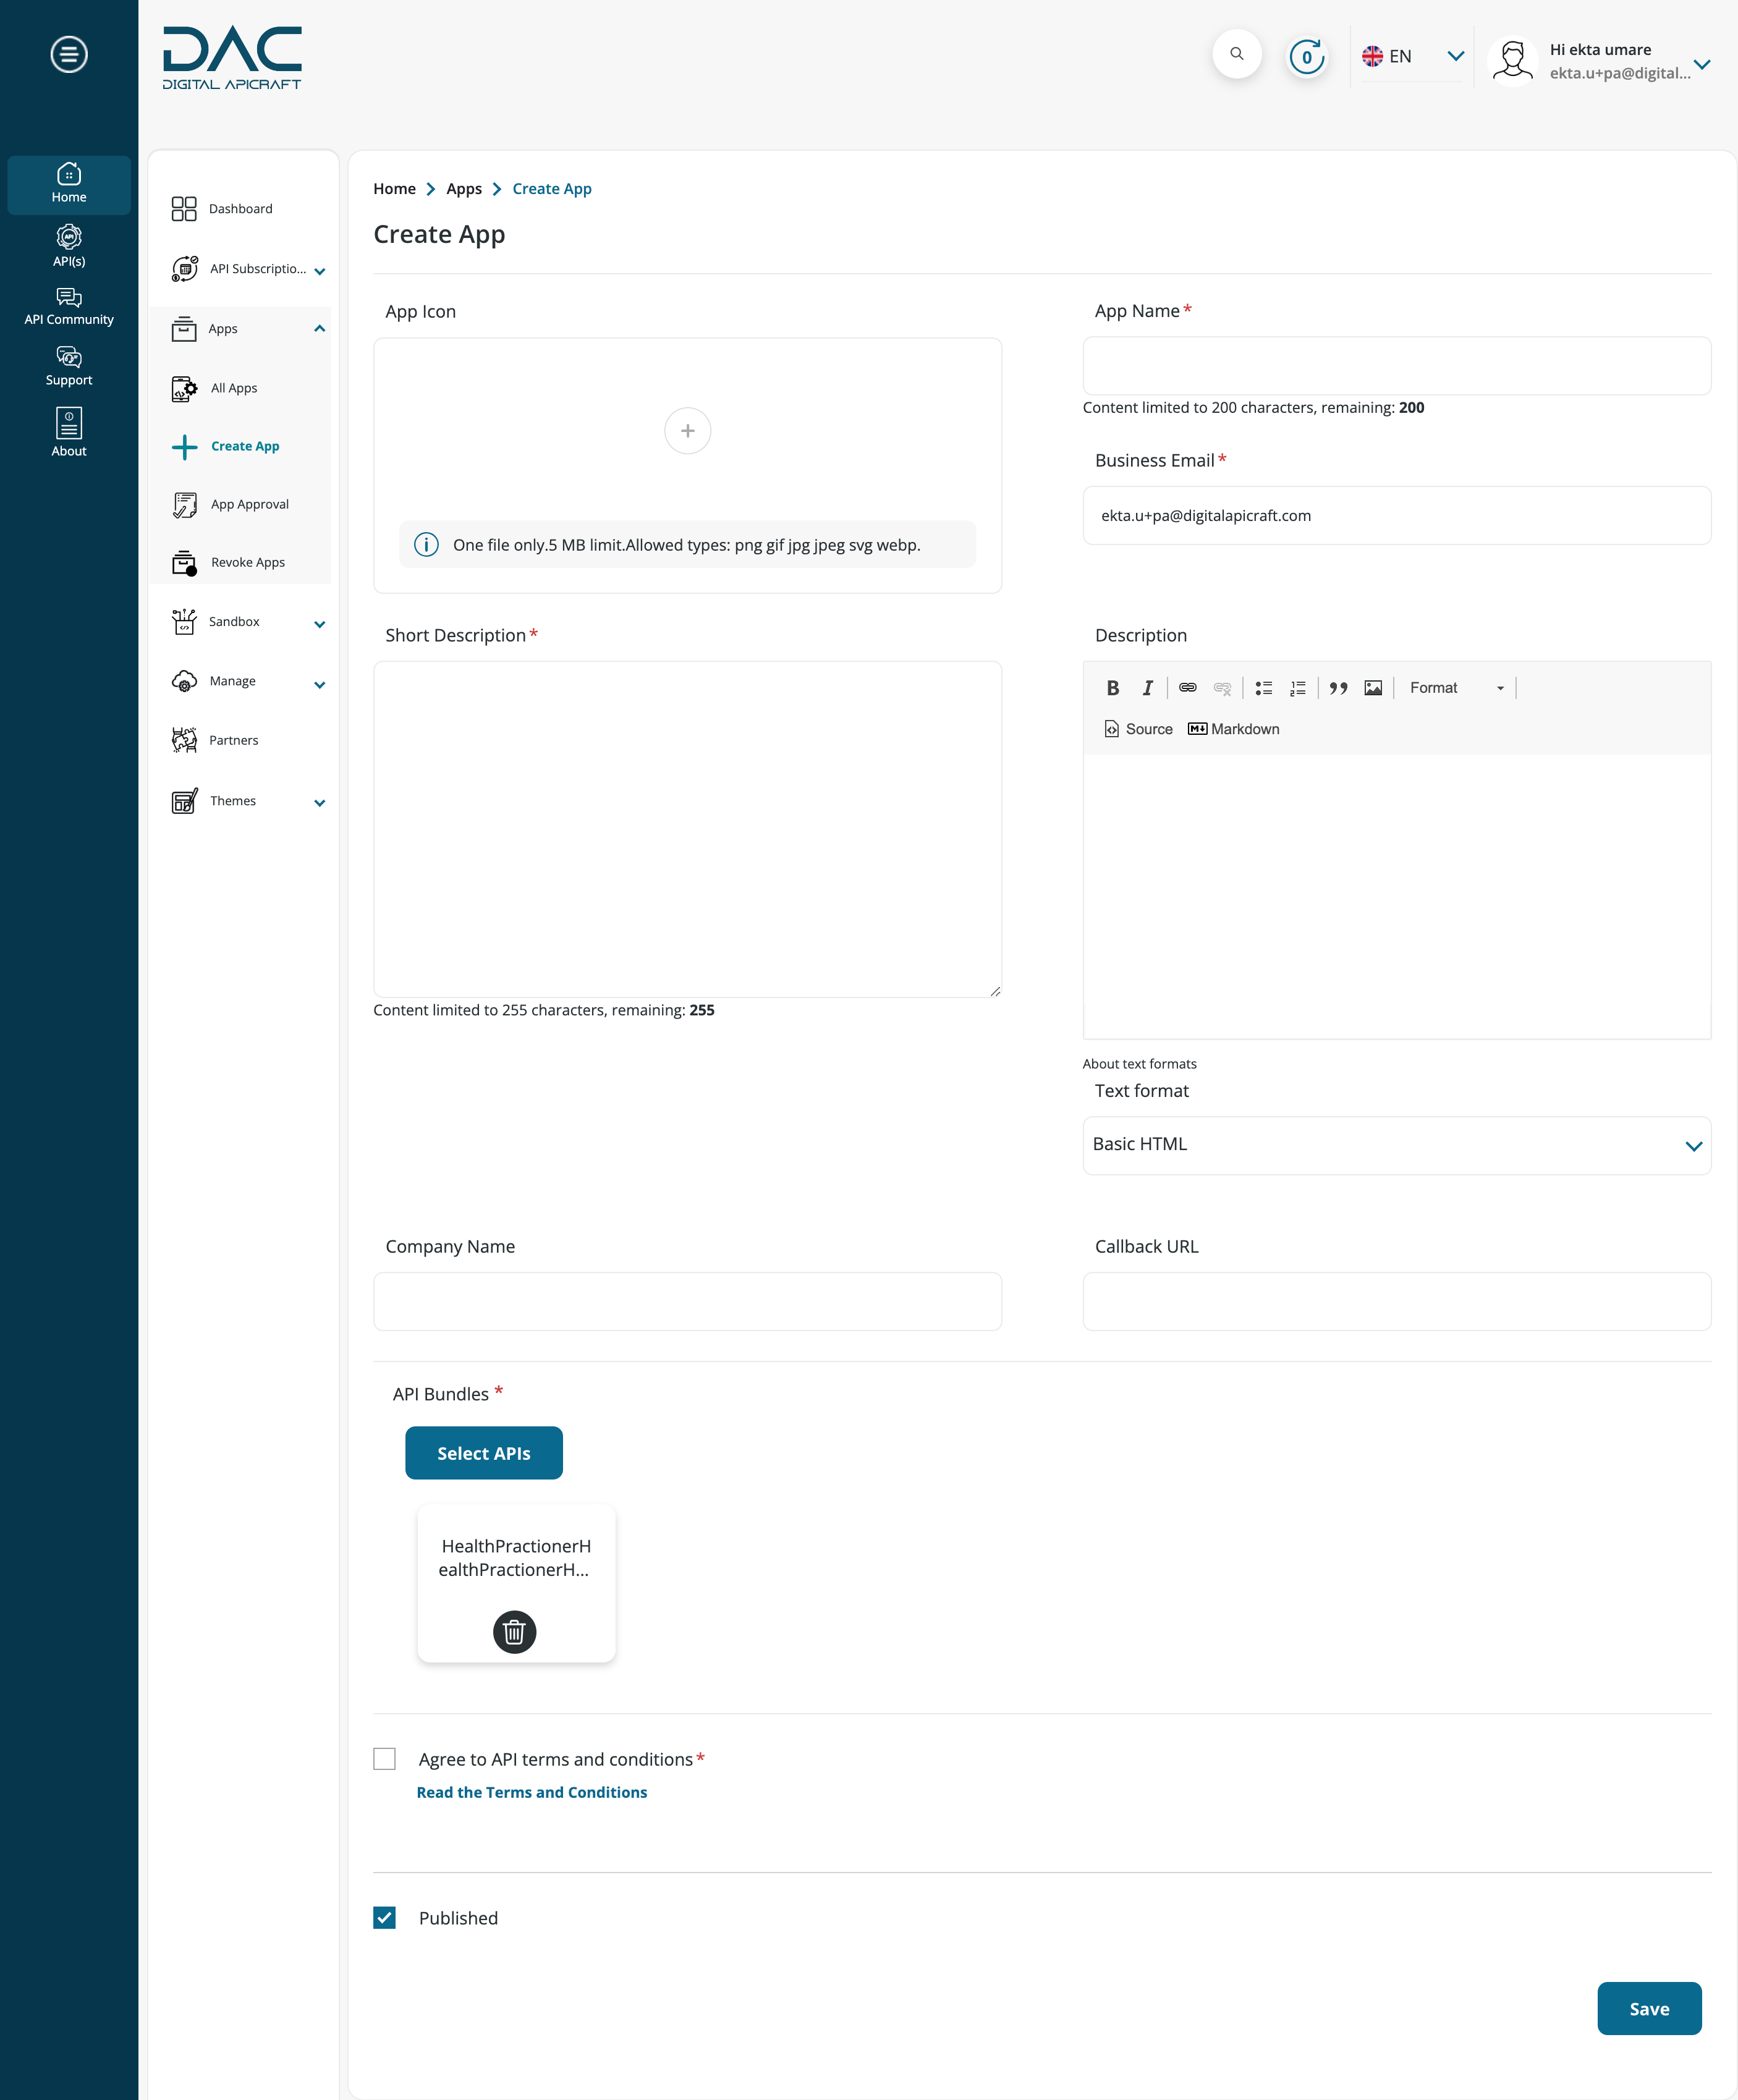
- The Subscribed API bundles will be pre selected.
- Click the Select API Bundles button, and select the APIs from the list, if you have not added any API to Subscription list.
- Check the I agree to the API terms and conditions checkbox and click Save.
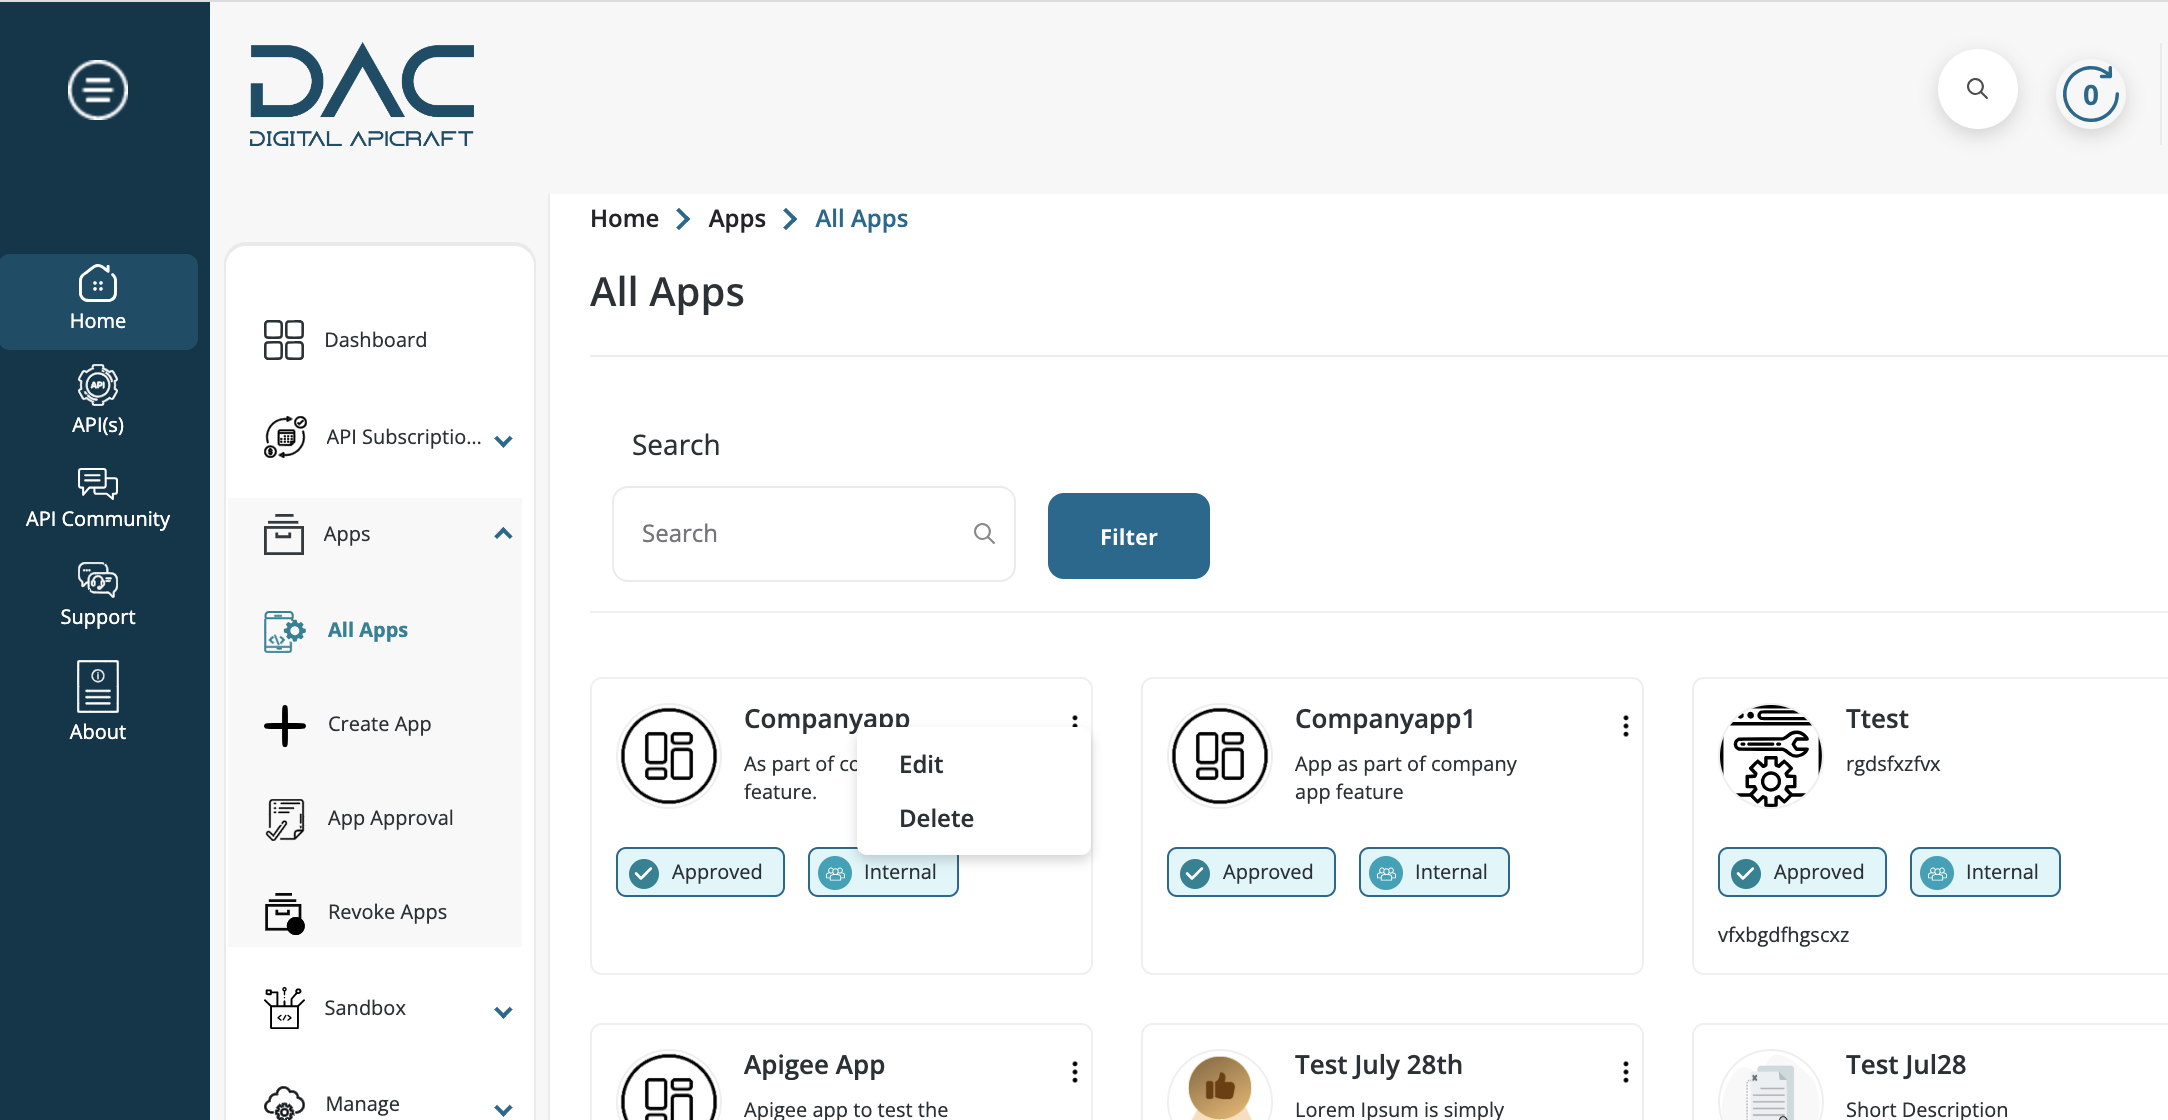
Edit App
- Navigate to Home > Apps > All Apps from the left sidebar menu.
- A list of all the apps created by you will be displayed.
- Click the three dot icon to edit an app. Make the necessary changes and click Save.
- Portal Administrators and Product Mangers can edit any app from Home > Manage > Content.
Delete App
- Navigate to Home > Apps > All Apps from the left sidebar menu.
- A list of all the apps created by you will be displayed.
- To delete an app, click the three dot icon and click on delete.
- Popup will appear for confirmation.
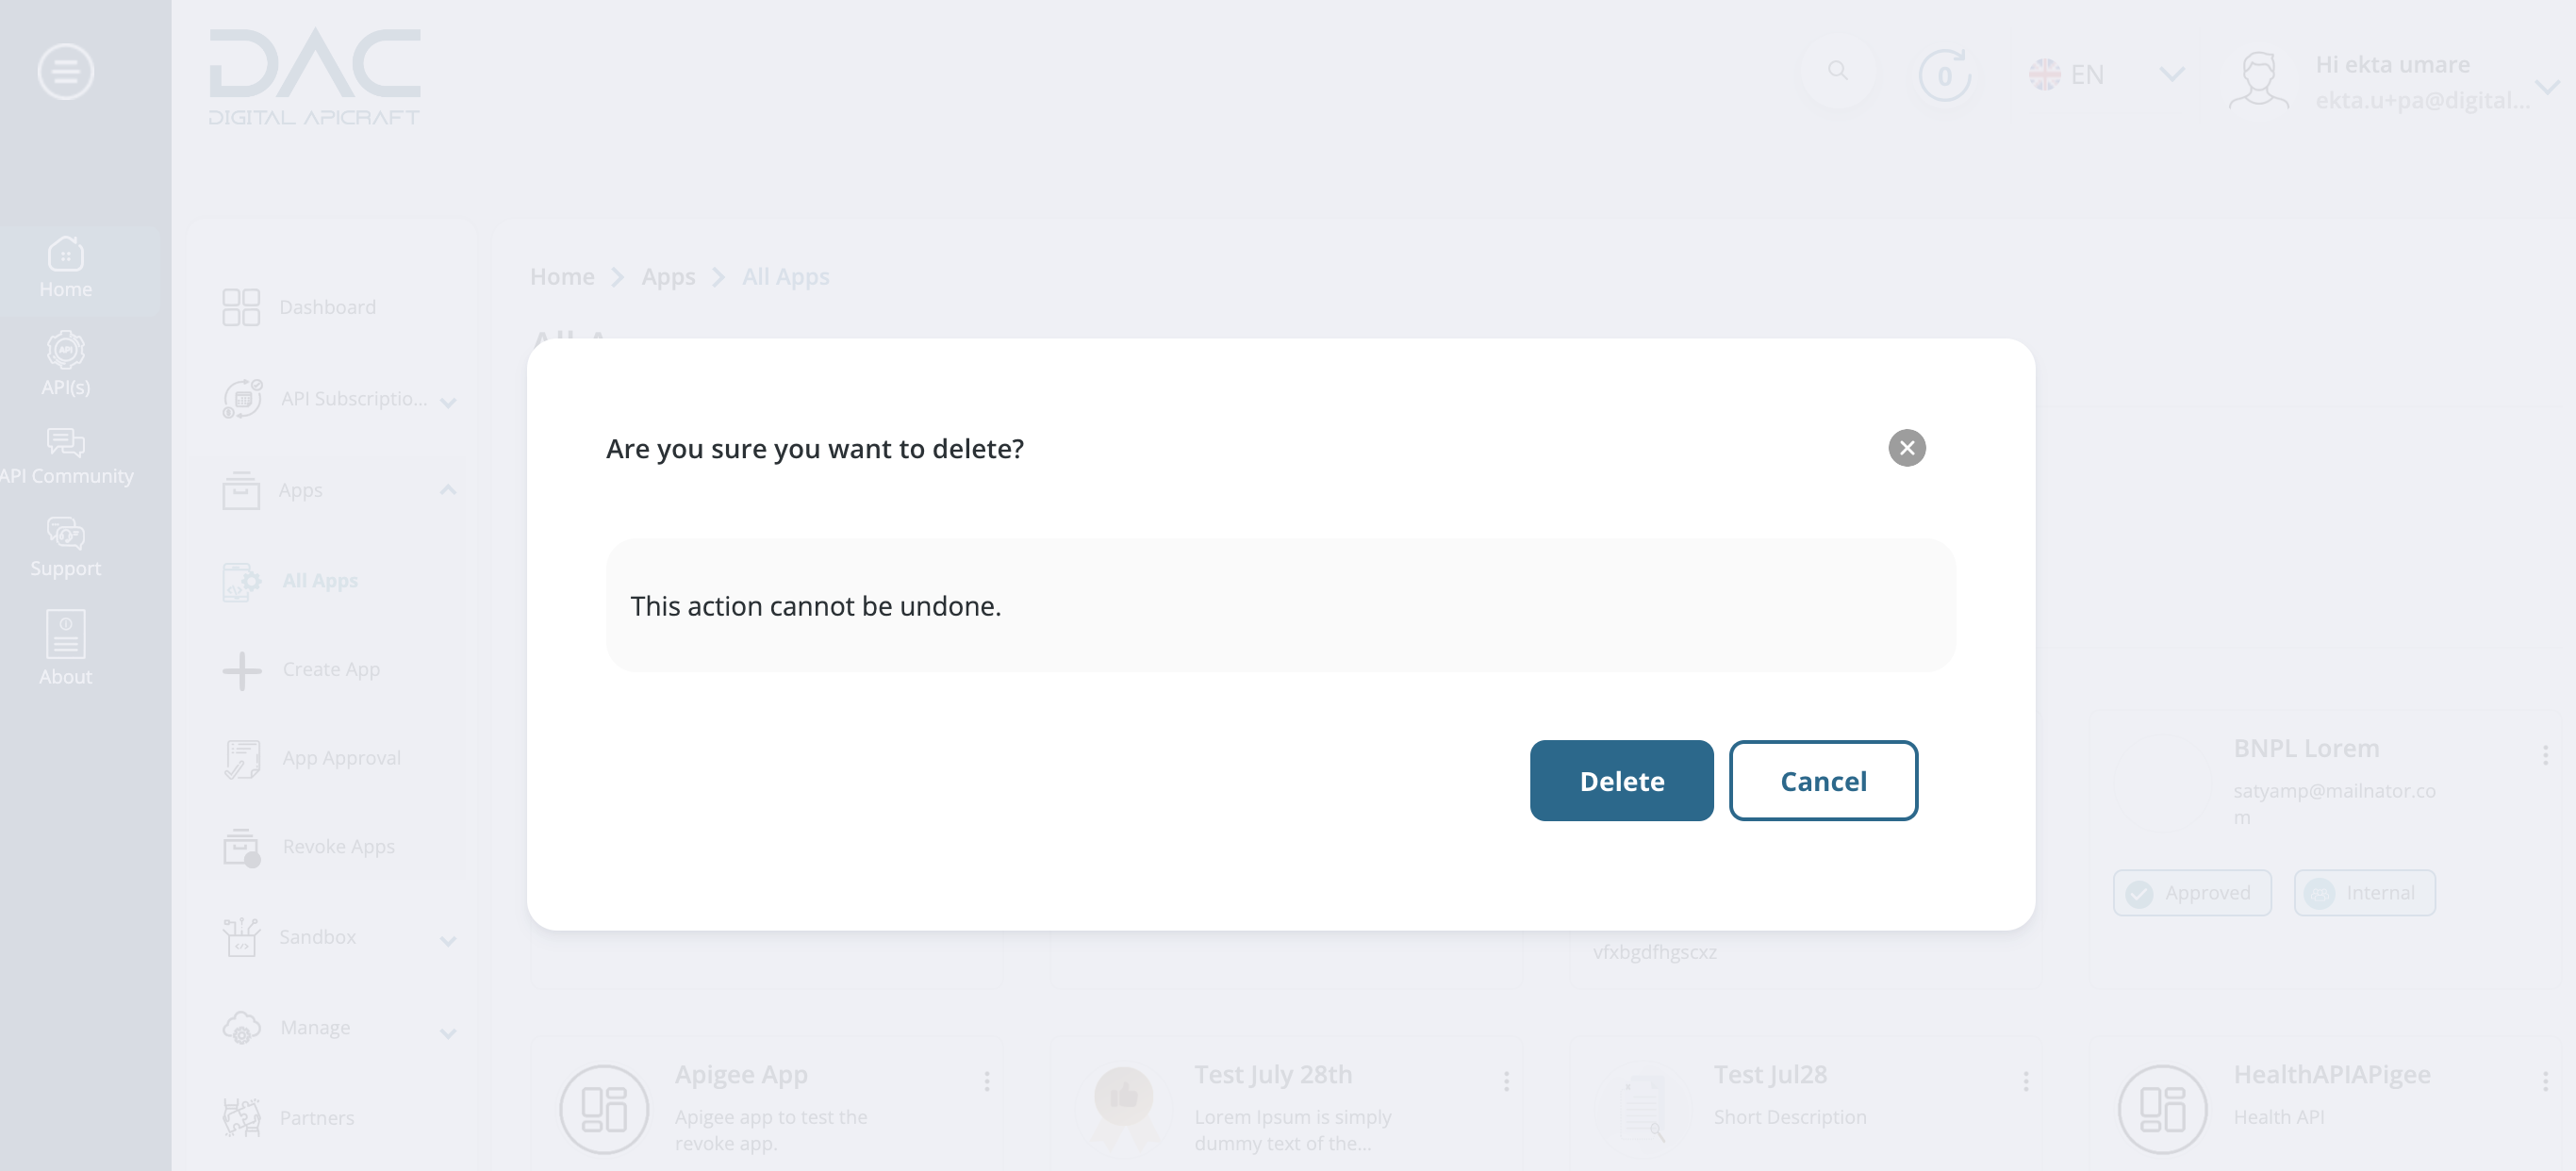
- To permanently delete the app, click Delete.
- To keep the app, click Cancel.
- Portal Administrators and Product Mangers can delete any app from Home > Manage > Content.

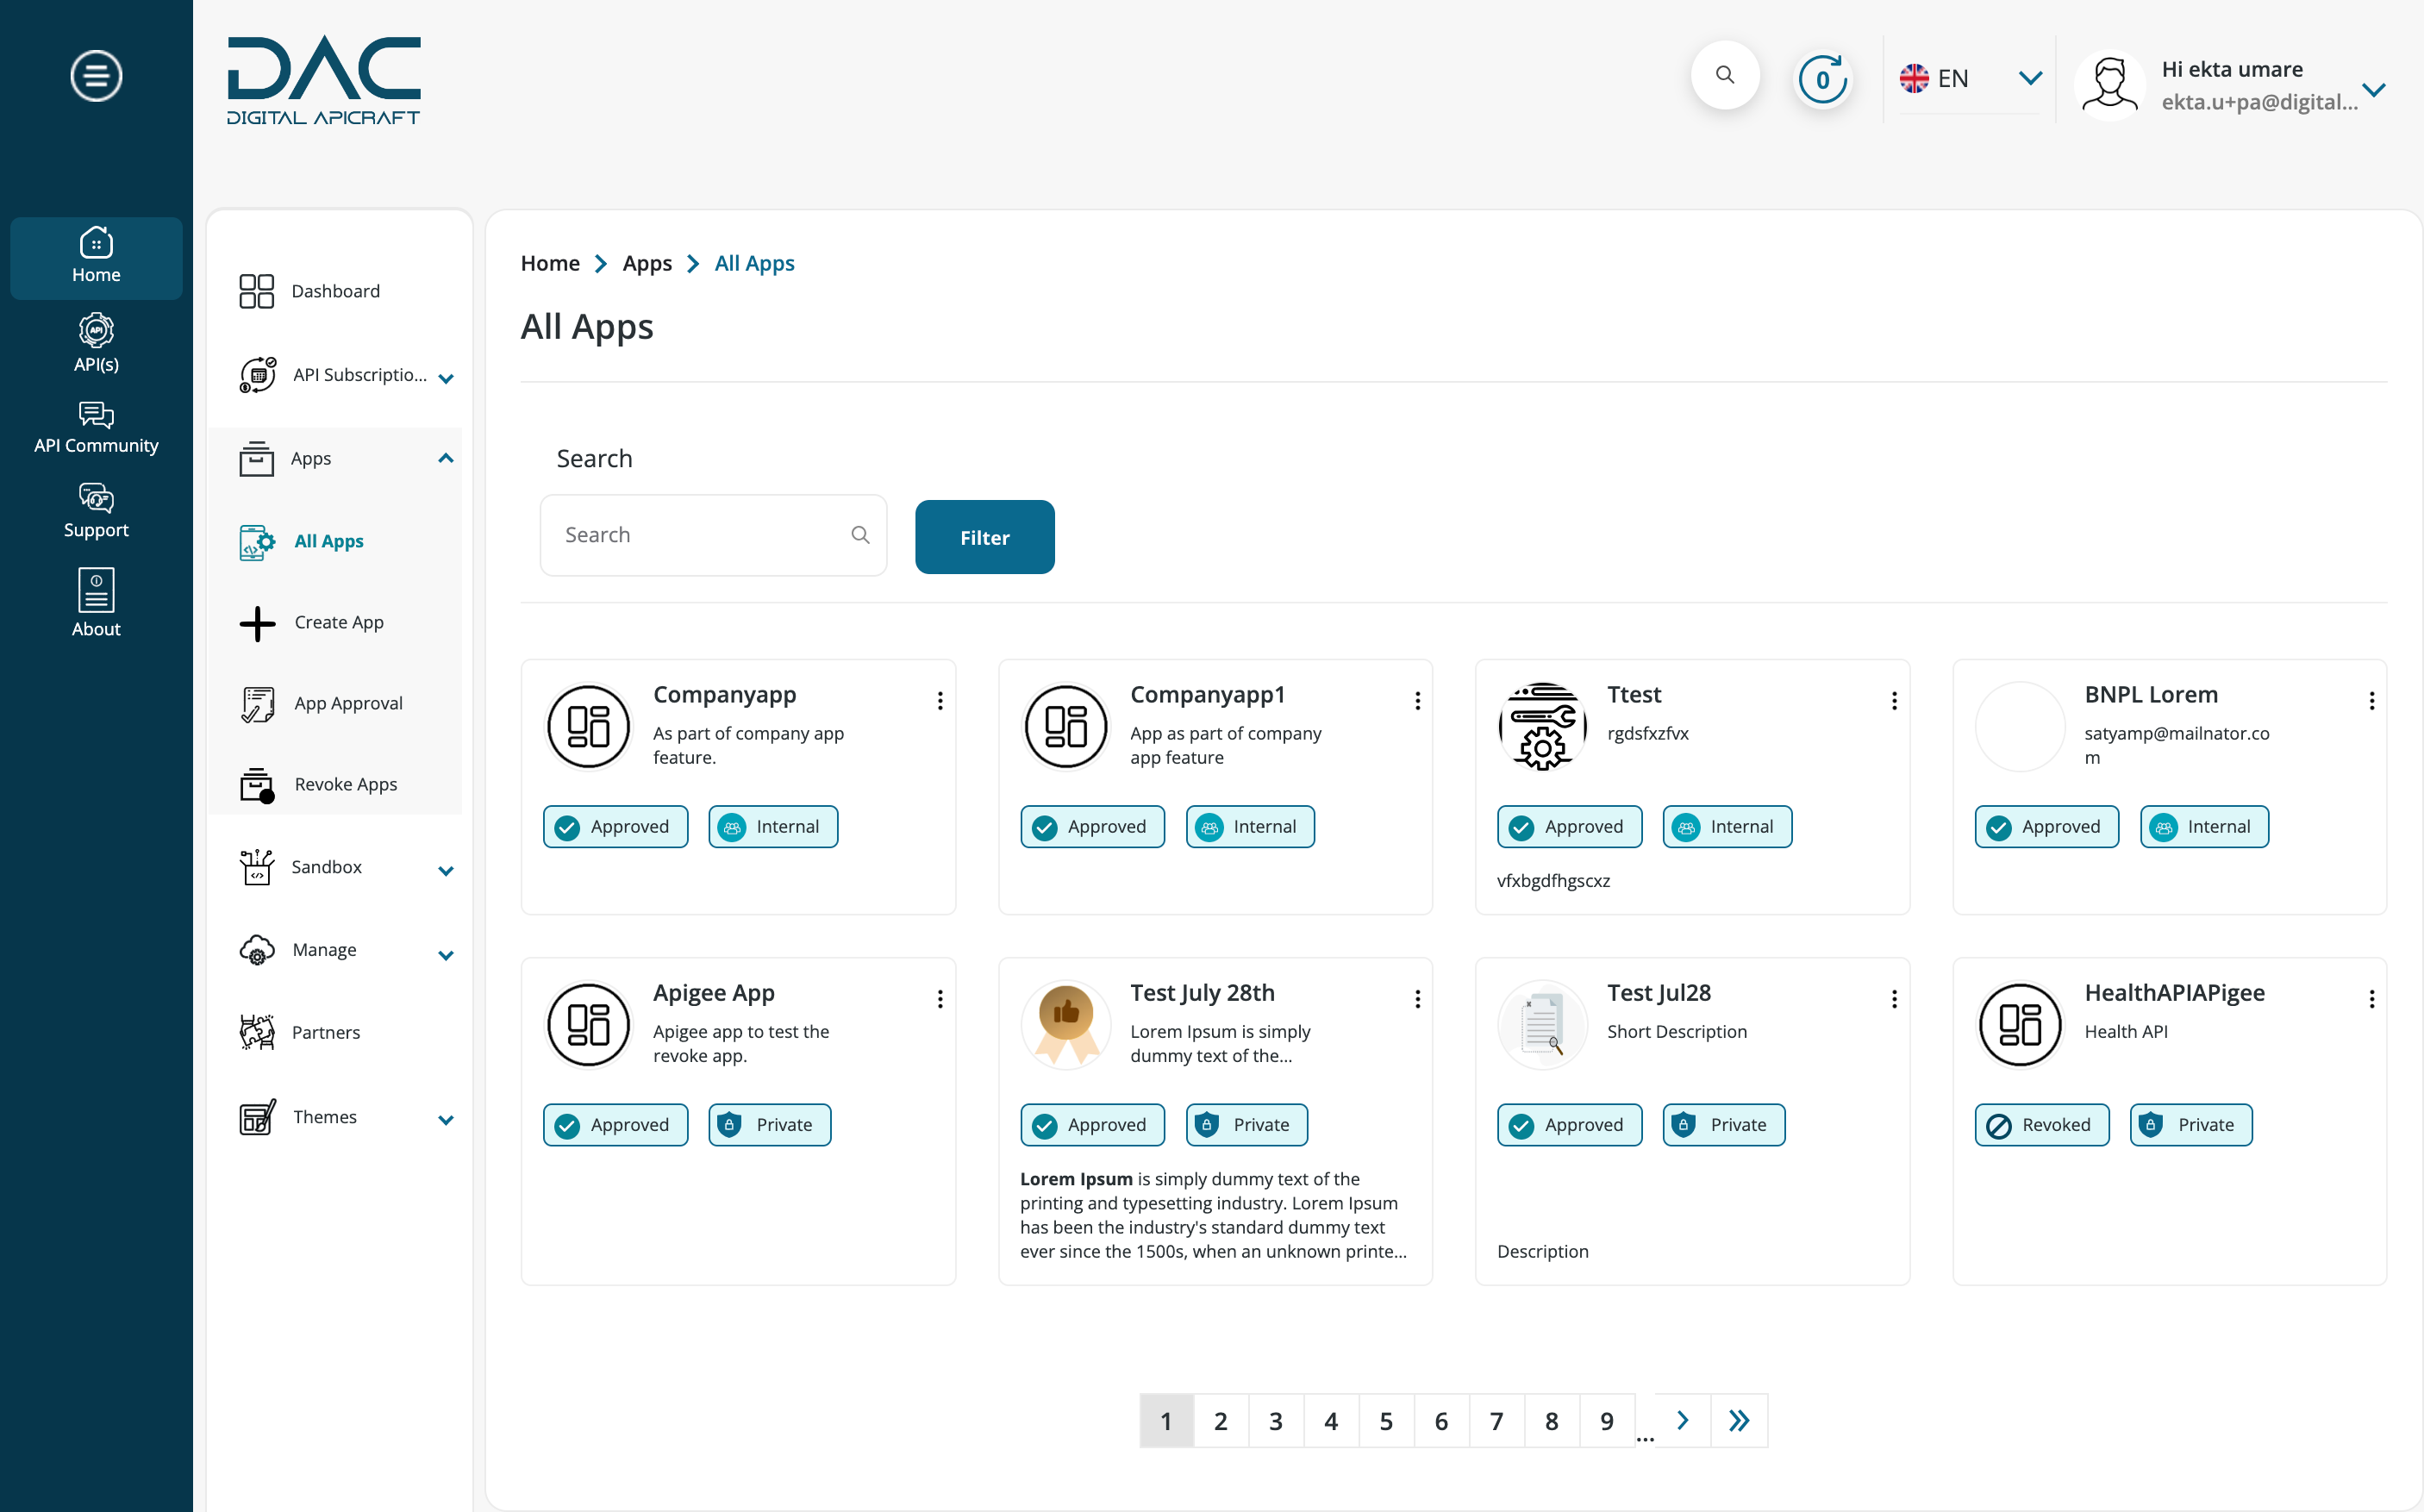
View All Apps
- Navigate to Home > Apps > All Apps from the left sidebar menu.
- A list of all the apps created by you will be displayed.

Try out APIs
API try-out feature is a valuable functionality for API developers that allows them to interactively test their APIs and experiment with different input parameters and configurations, without needing to write any code or deploy their API to a live environment.
With One APIMarketplace, the Try-it-out feature has been enabled directly on the documentation tools so that while developers learn about various endpoints, they can also perform a try-it-out to see the actual responses.
Test subscribed APIs
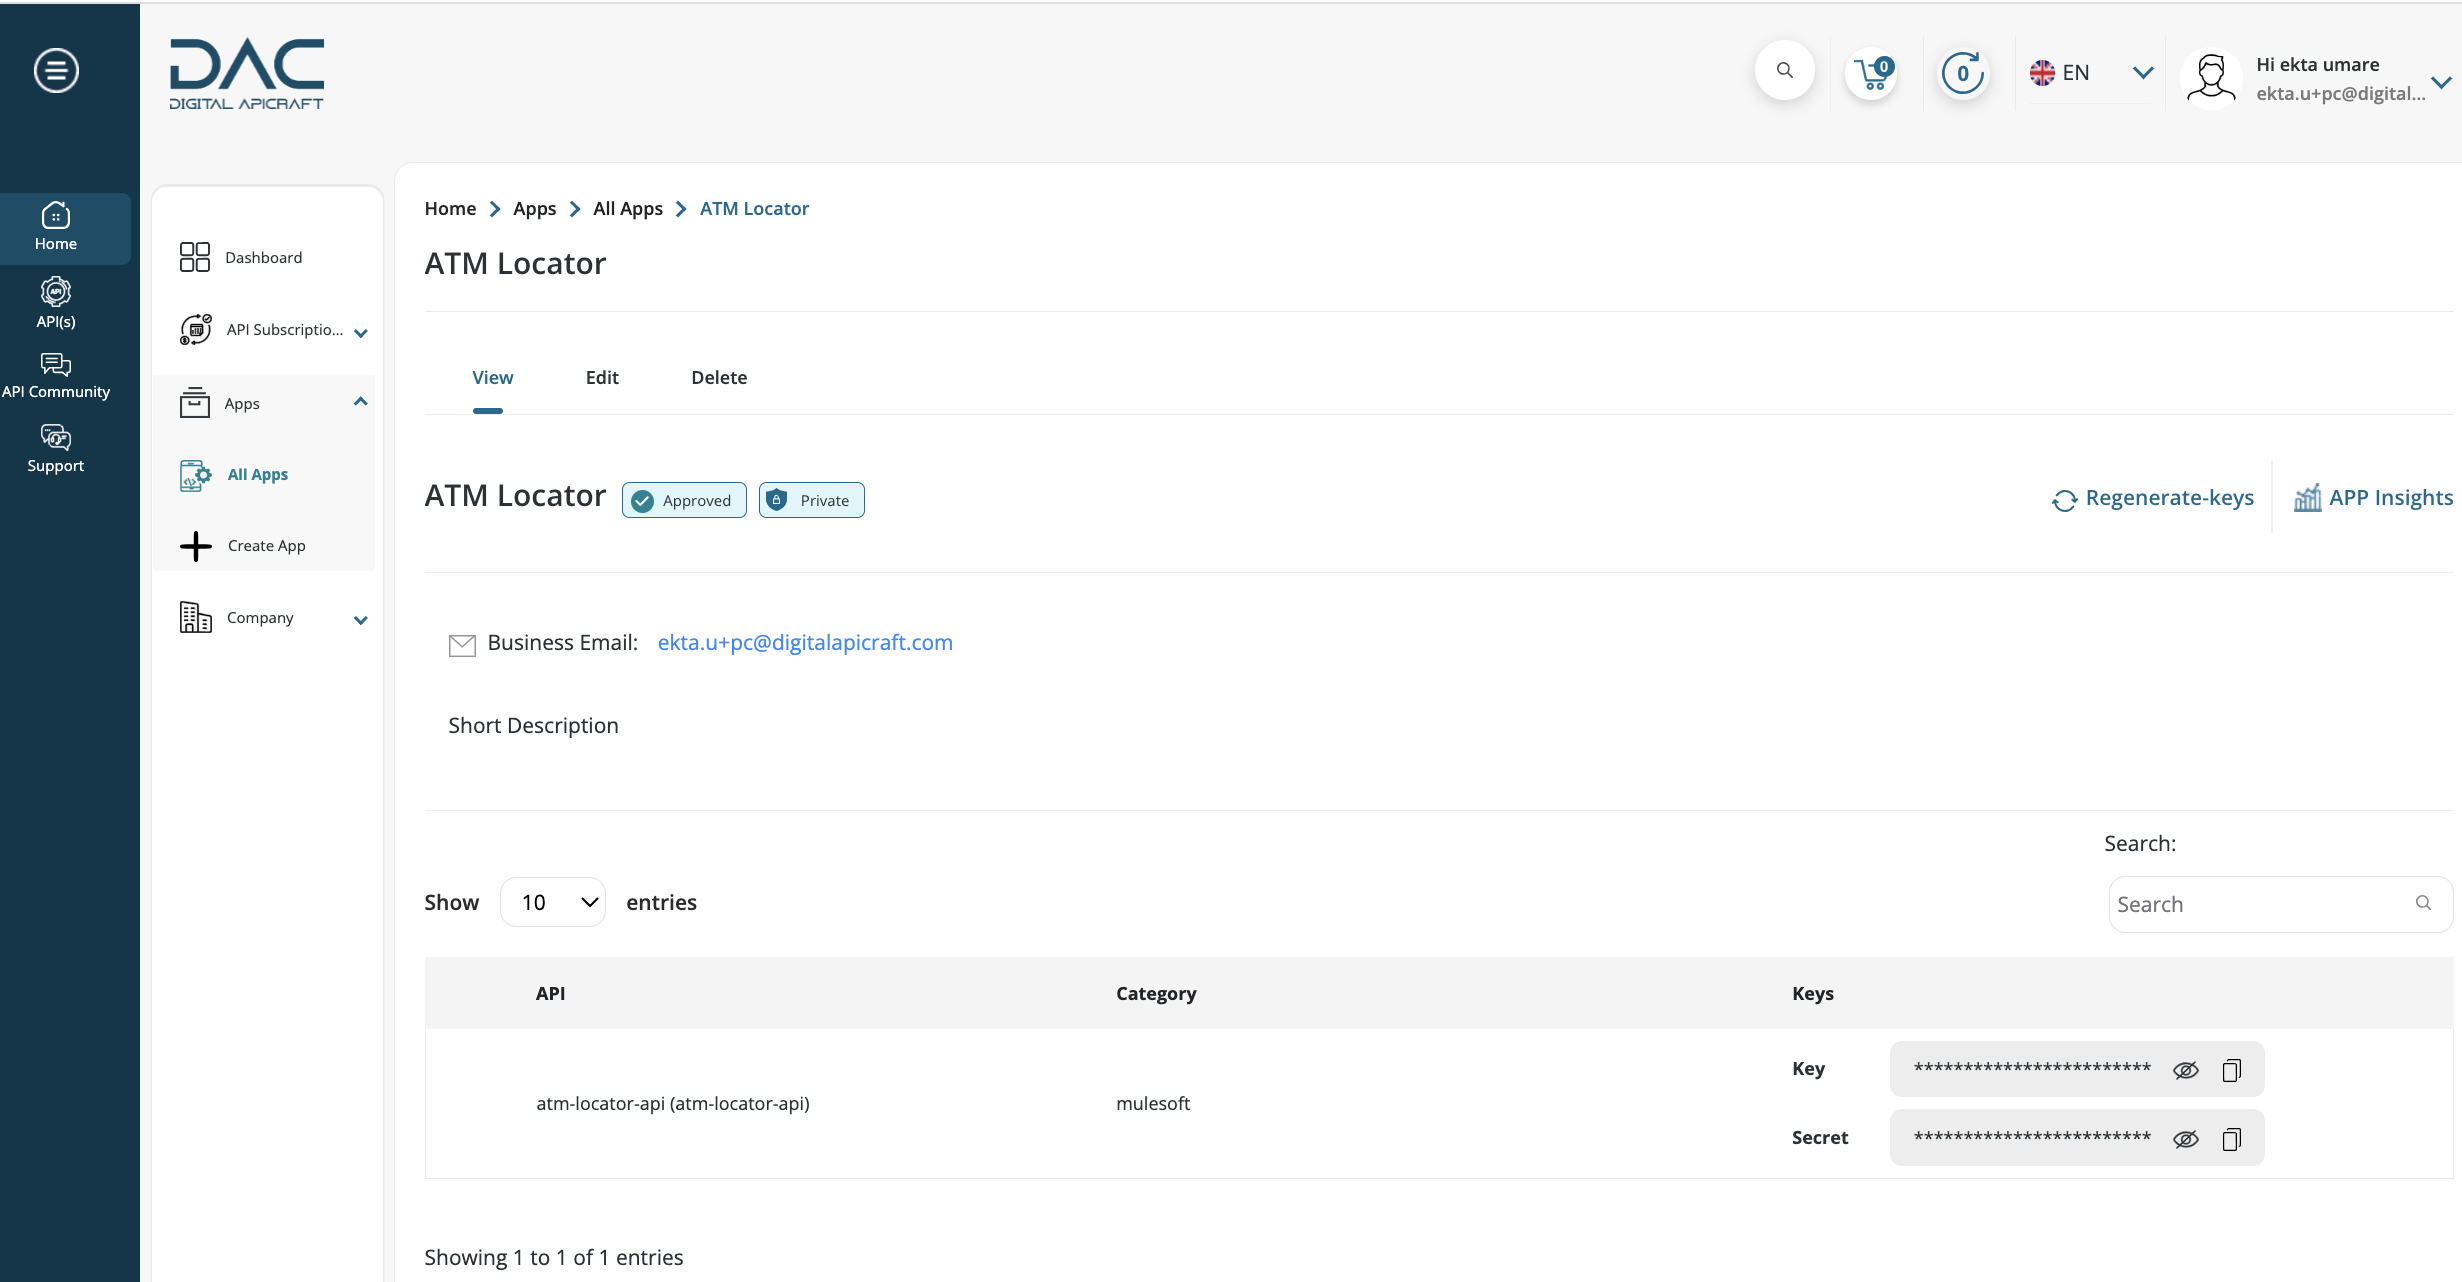
- After subscribing to the API, on the app page you can see details like Consumer key, Consumer secret.

- Copy Consumer Key and click API name to navigate to its doc page.
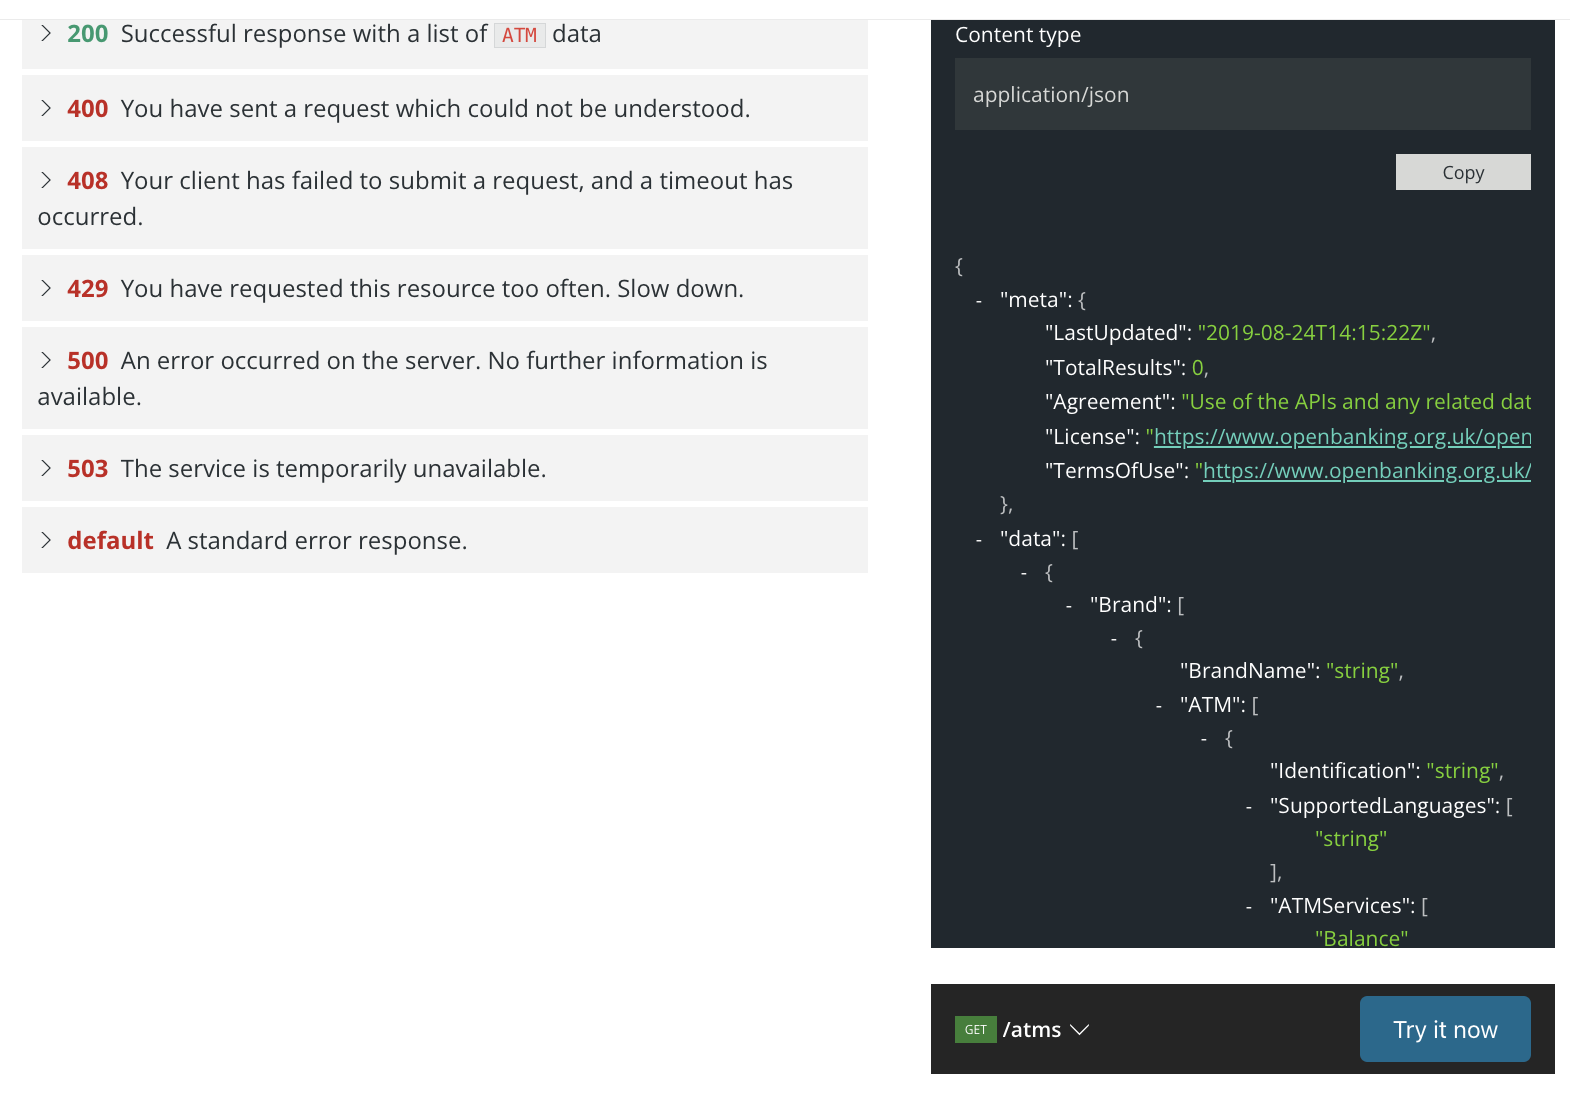
- Click the Endpoints tab.

- Click on Authentication and select API Key.
- Add consumer key in Value text area, click Authorize button.
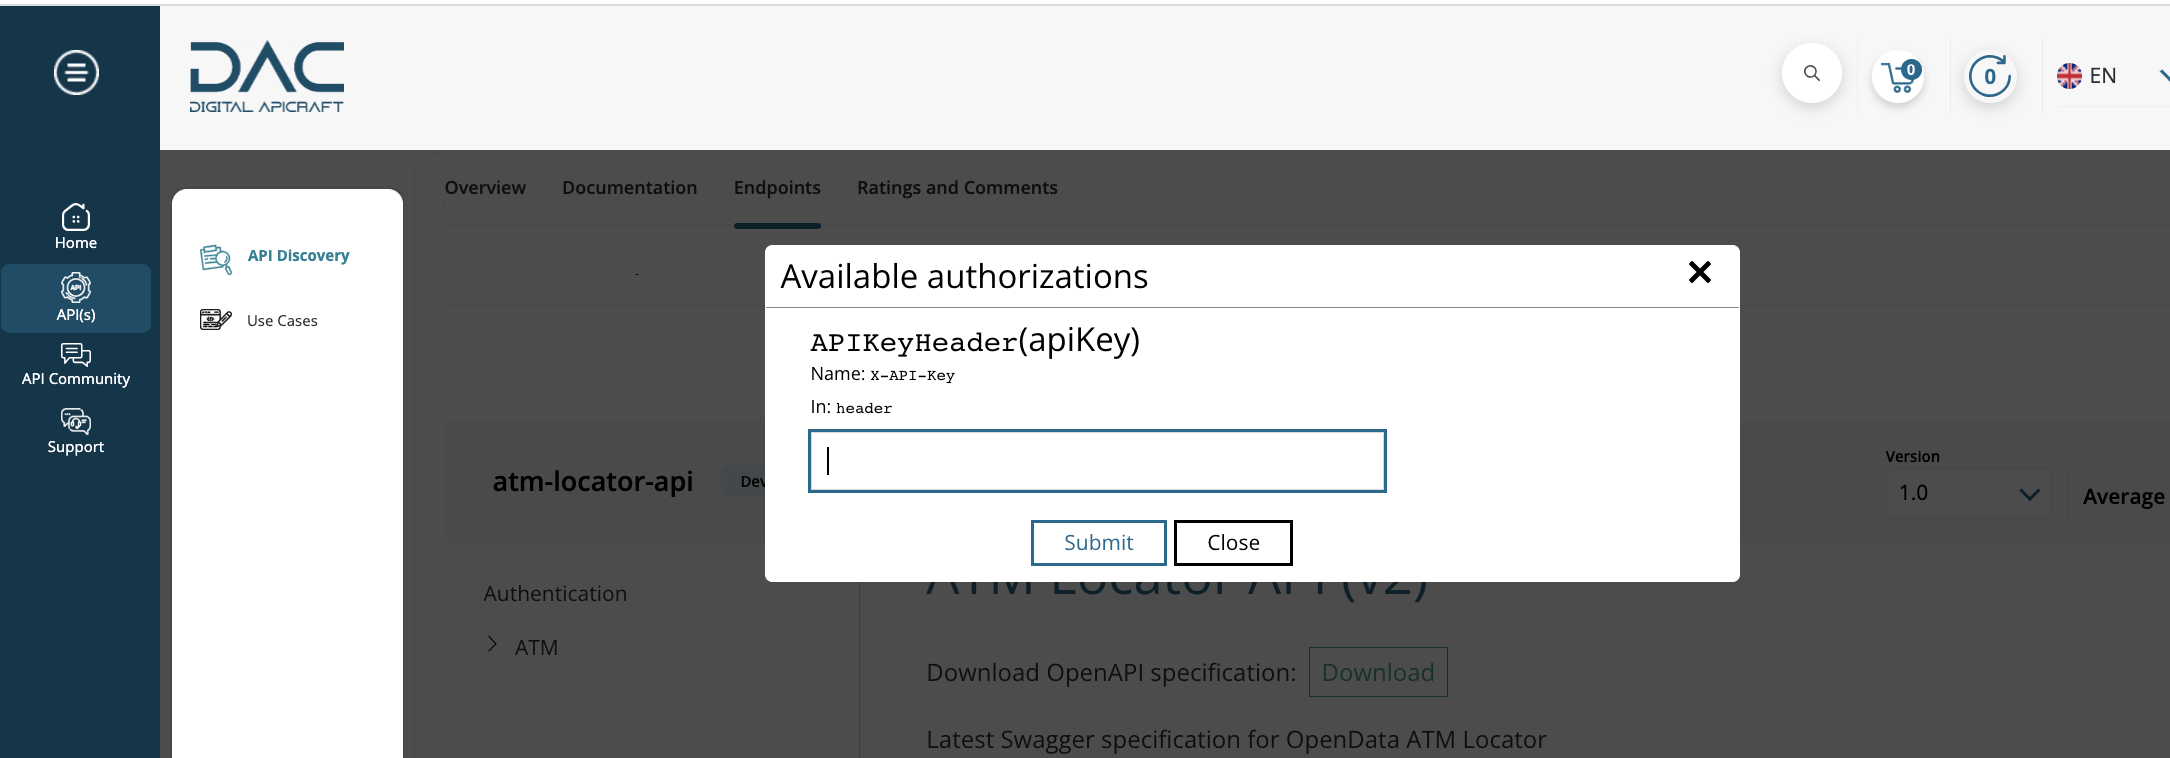
- Click on the Close button to come out of the window.
- Click on the Play button to test the API.
Test subscribed APIs Using Dapper:
- After subscribing to the API, on the app page you can see details like Consumer key.
- Copy Consumer Key and click API name to navigate to its doc page.
- Click the Endpoints tab.
- Click on Authorize Button.
-
Add consumer key in Value text area, click Authorize button.

- Click on the Close button to come out of the window.

- Click on the Try it now button to test the API.
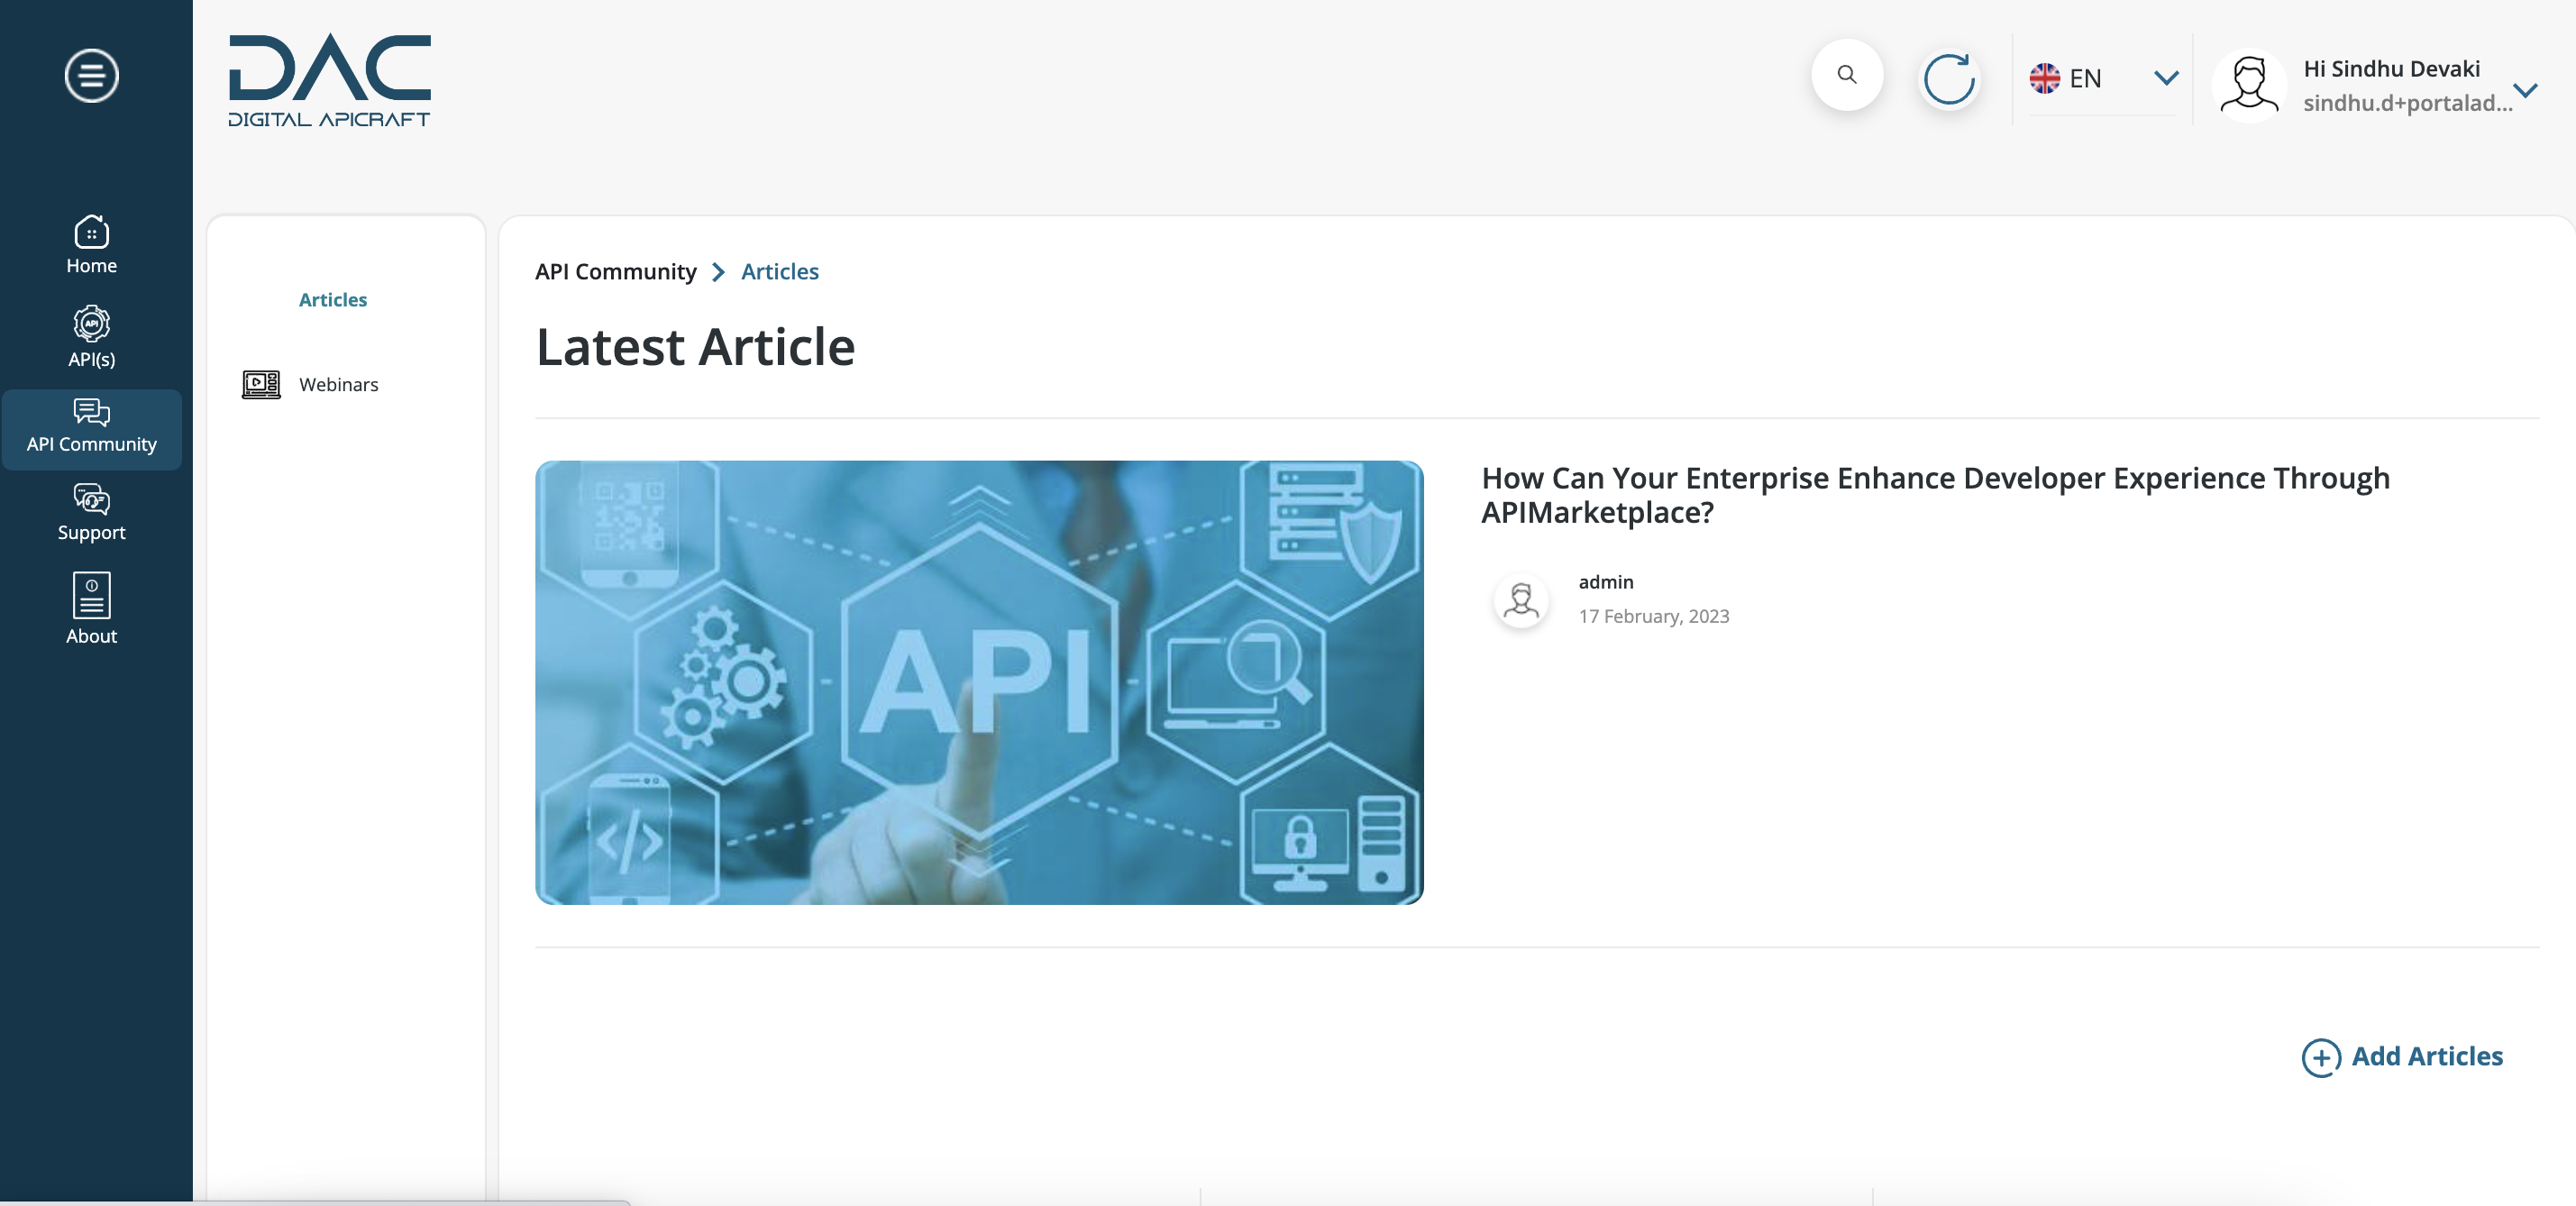
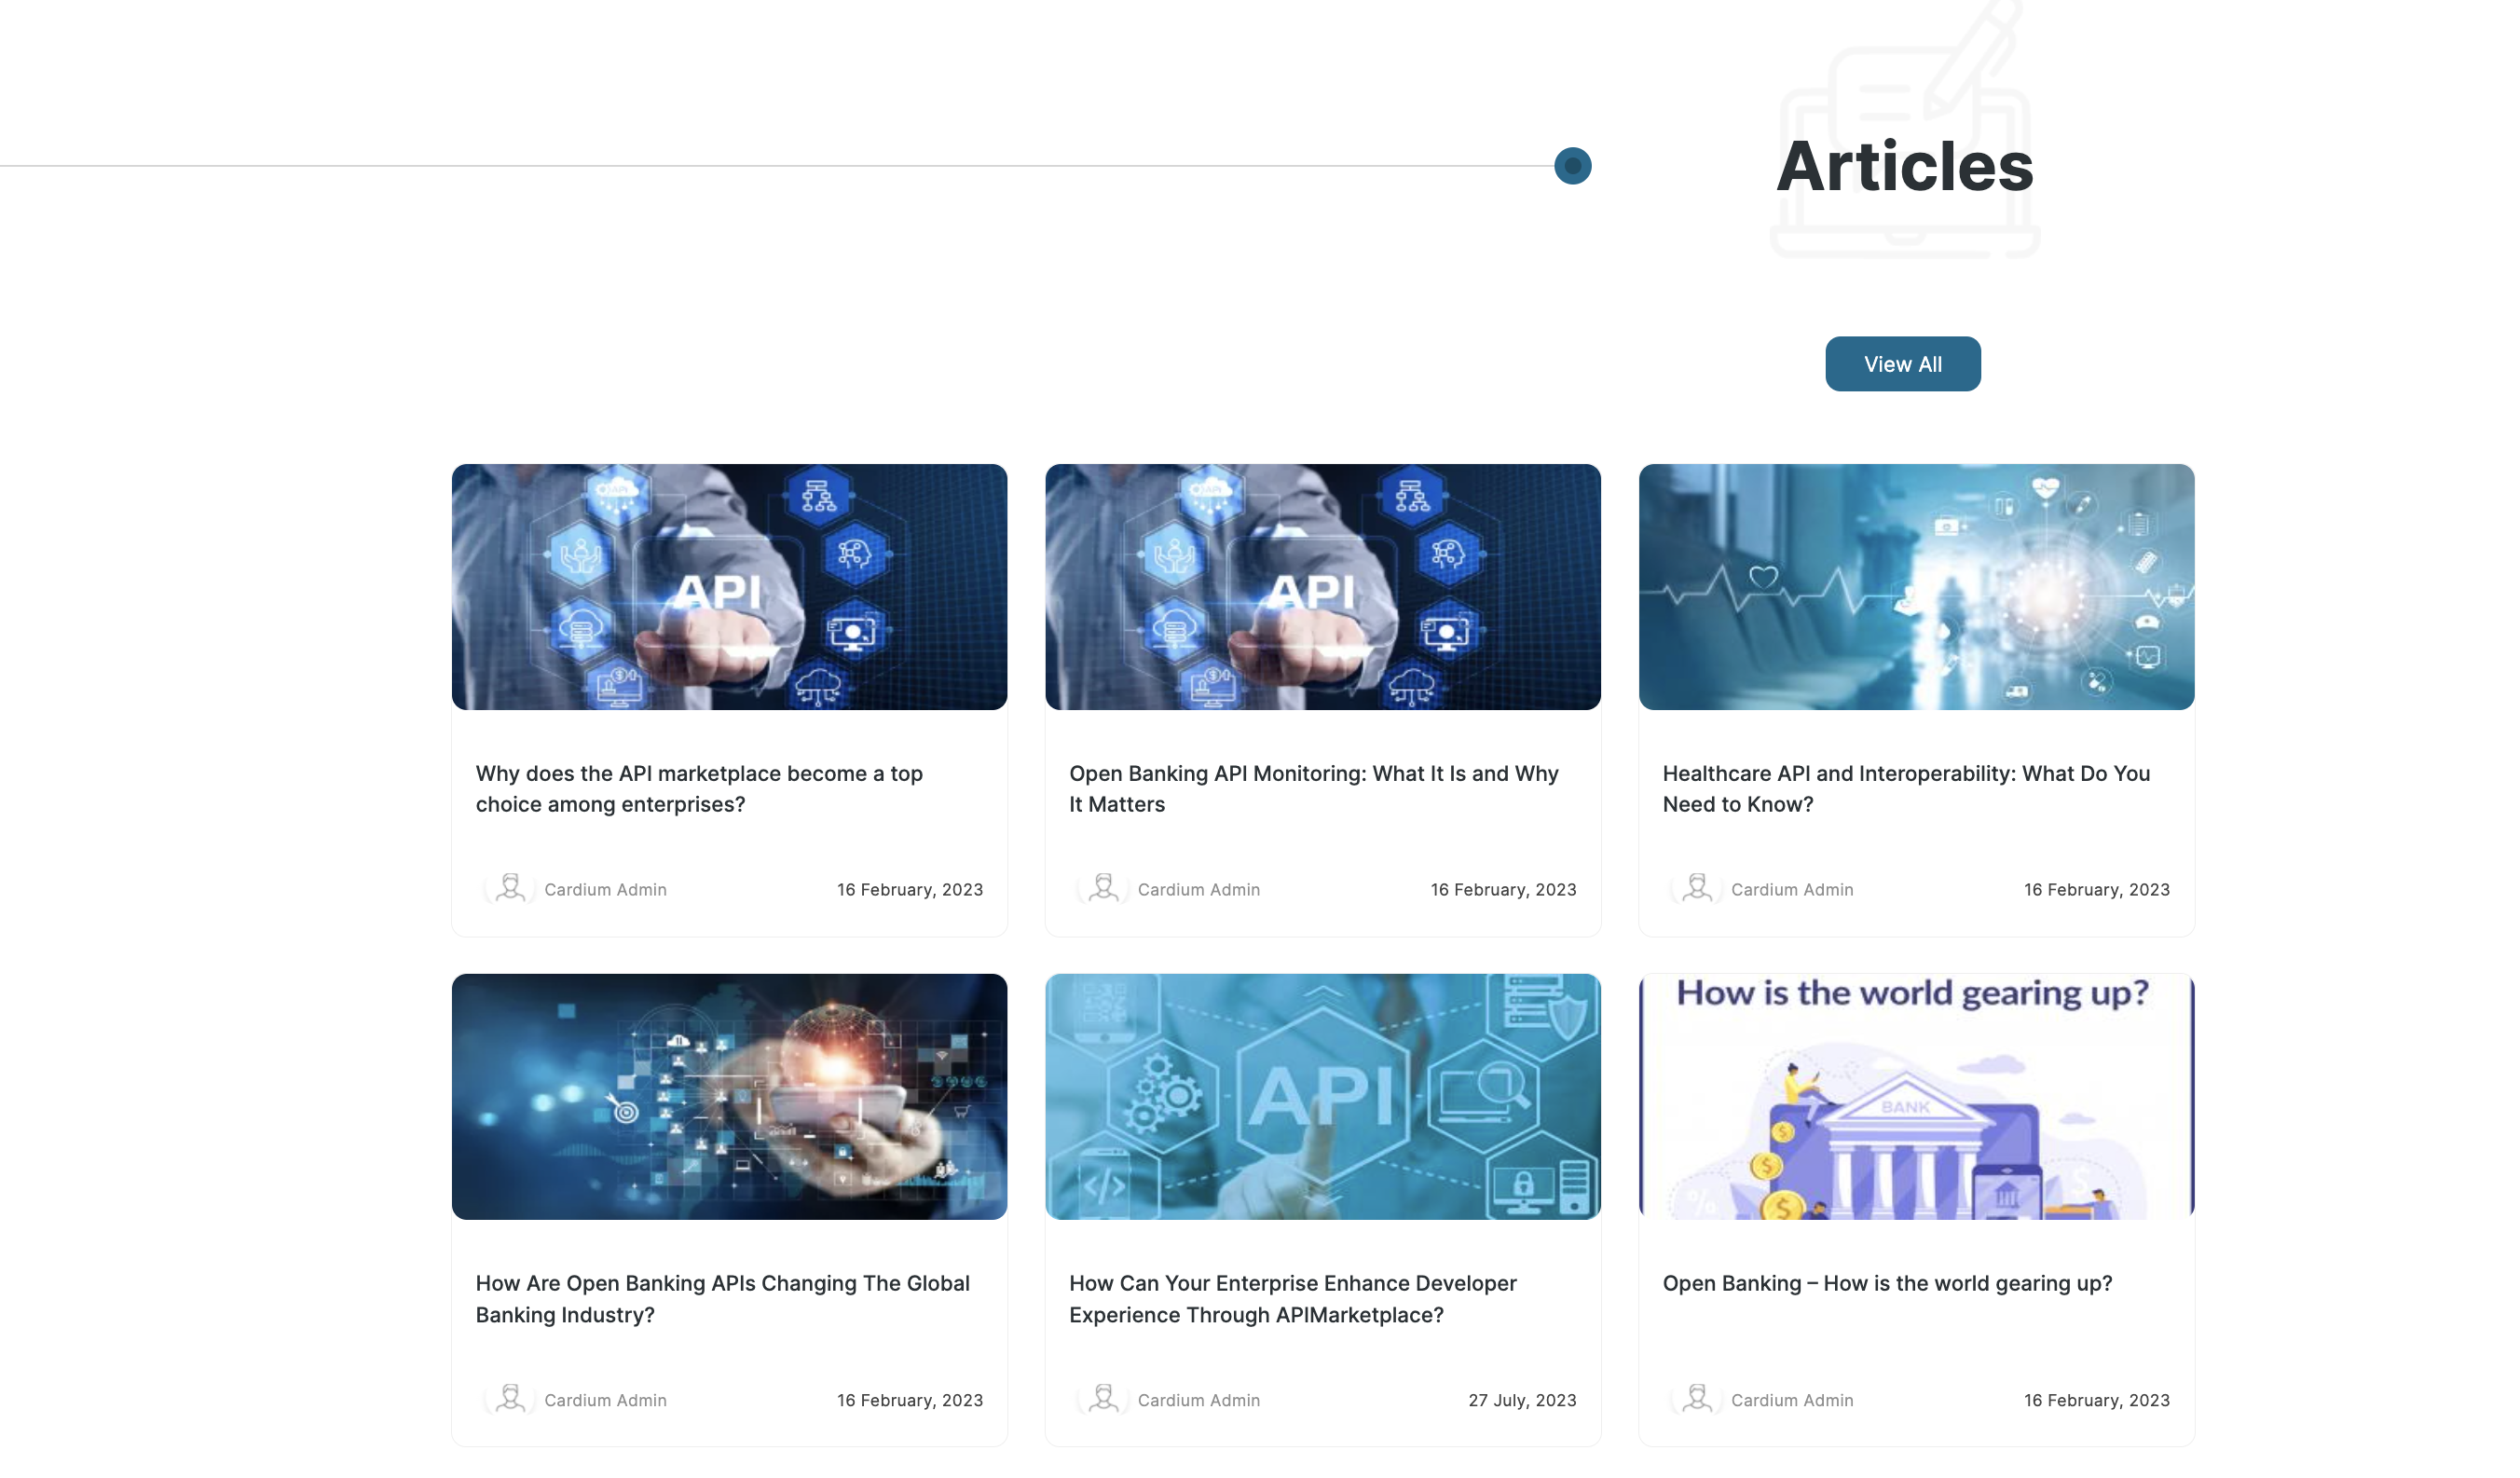
About Articles
The articles feature on One APIMarketplace is a section that contains educational and informative articles aimed at helping developers better understand the APIs and tools provided by the platform. These articles may cover a wide range of topics, including best practices for API development, code samples, tutorials, case studies, and other relevant content.
The articles feature is typically intended to provide developers with the resources they need to quickly and easily learn about the APIs and tools offered by the platform. By providing high-quality, informative articles that are well-written and easy to understand, the developer portal can help developers get up to speed on the platform's APIs and tools more quickly, and troubleshoot issues more effectively.
Create Articles
- Login to the site as a Portal Administrator / Product Manager.
- Navigate to Home > Manage > Content > Add Content > Articles.

- Navigate to API Community > Articles
- Add the below fields.
- Title
- Short Description
- Tile Image - The allowed file extensions are png, gif, jpg, and jpeg, and the maximum number of values allowed is 1.
- Article Image - The allowed file extensions are png, gif, jpg, and jpeg, and the maximum number of values allowed is 1.
- Description

- Save the content.
Edit Articles
- Login to the site as a Portal Administrator / Product Manager.
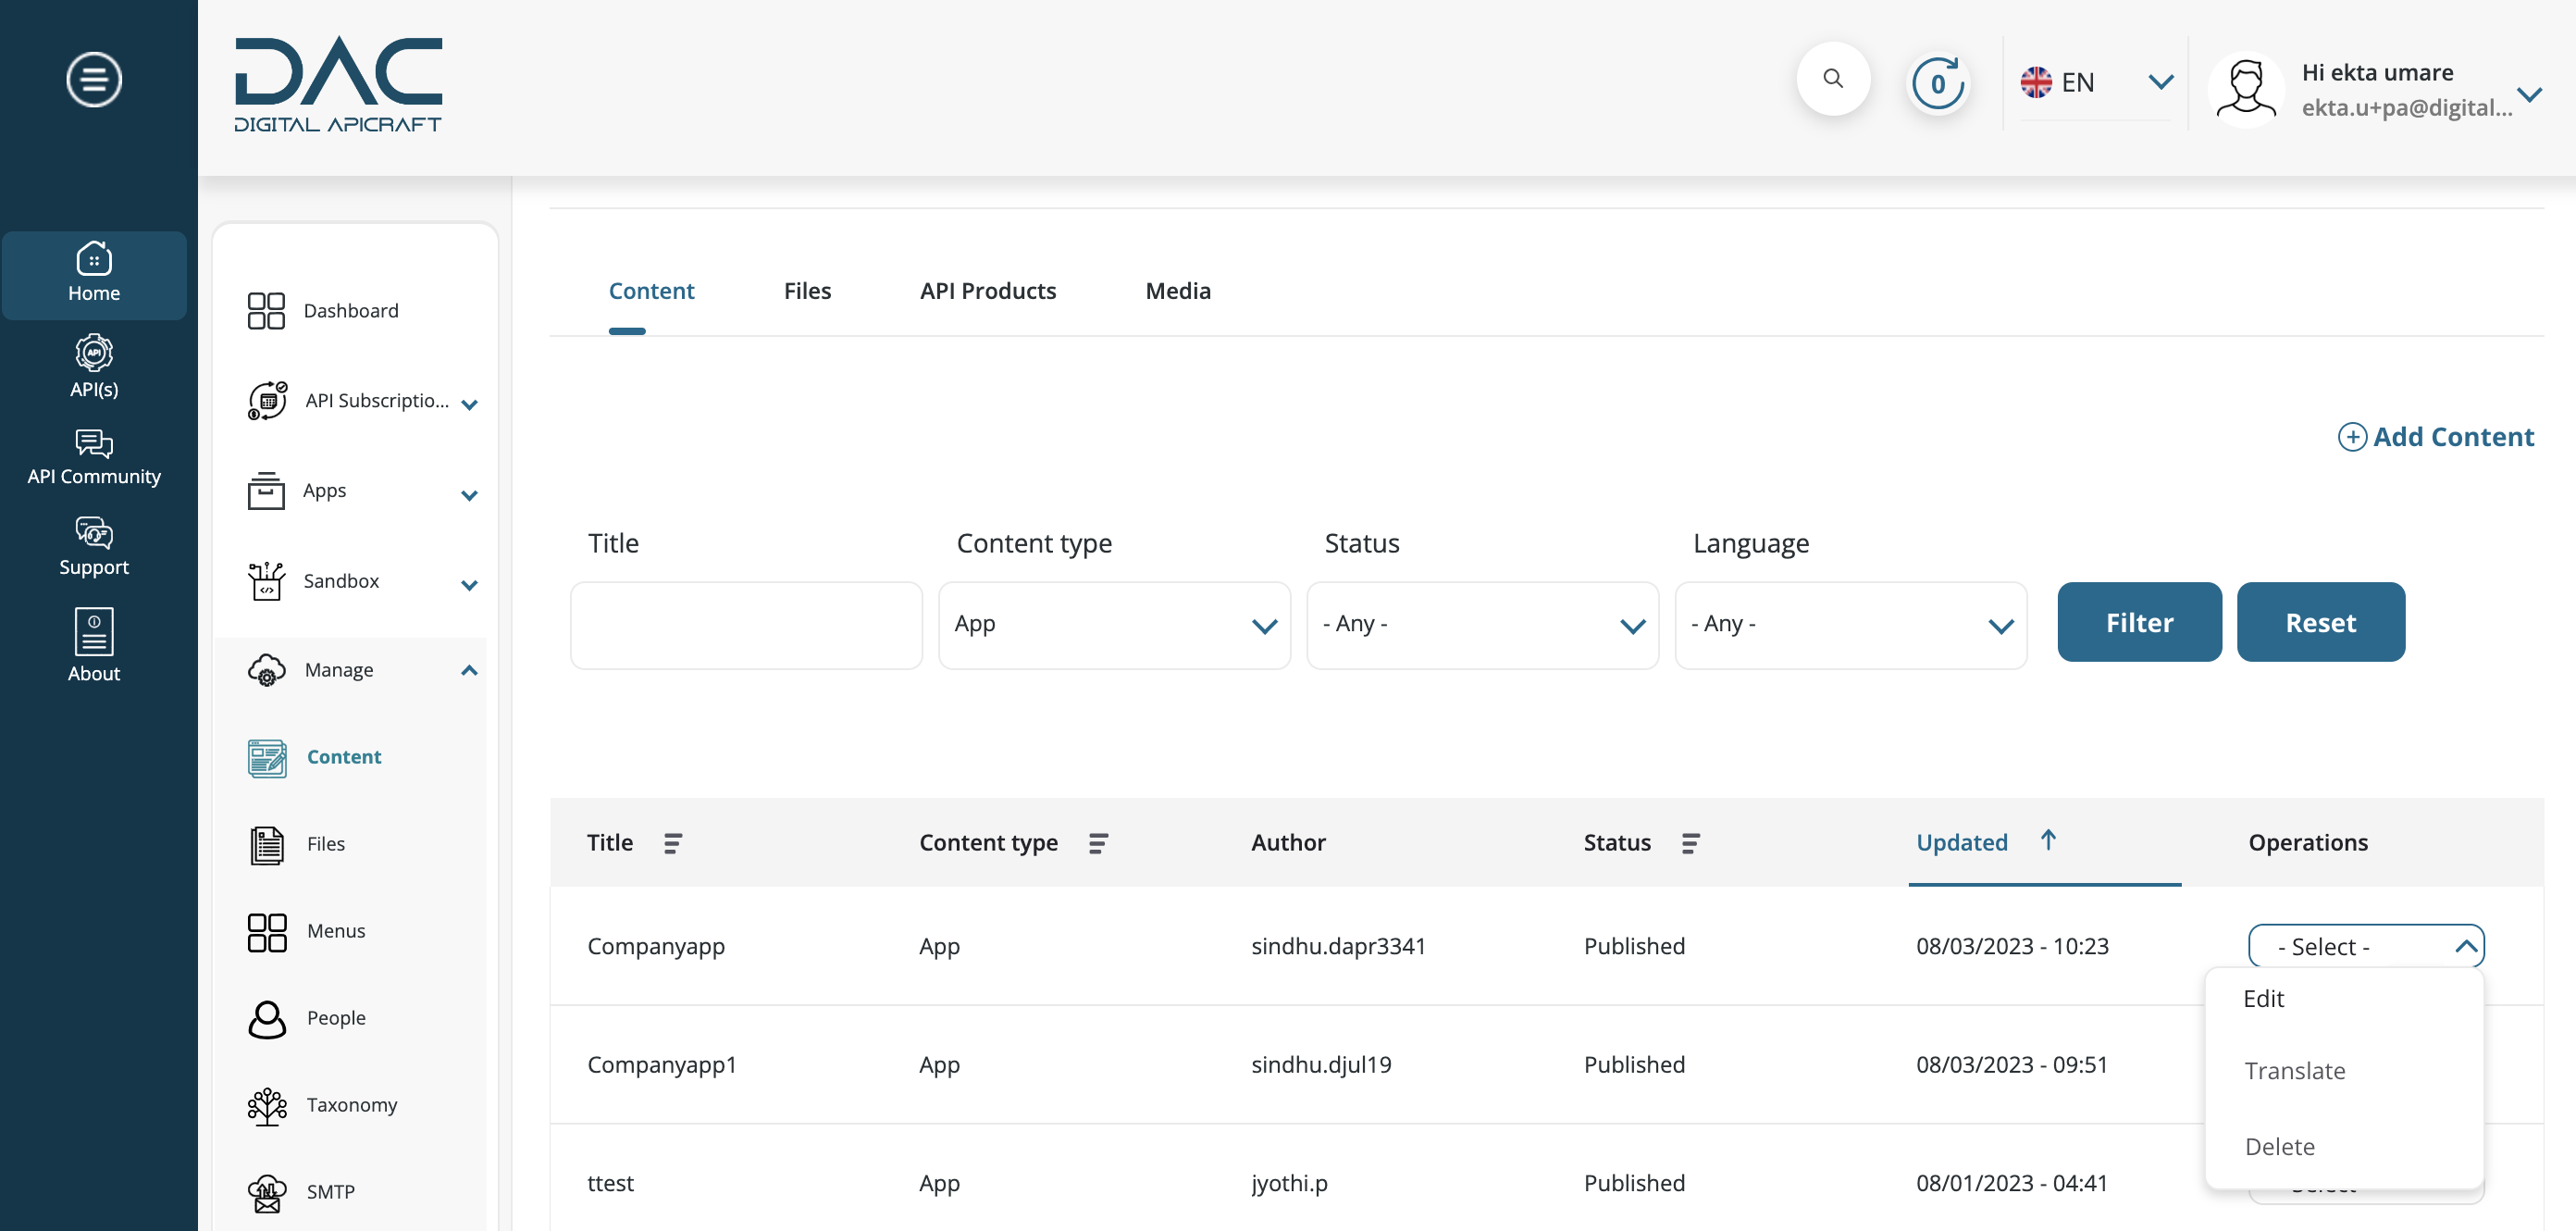
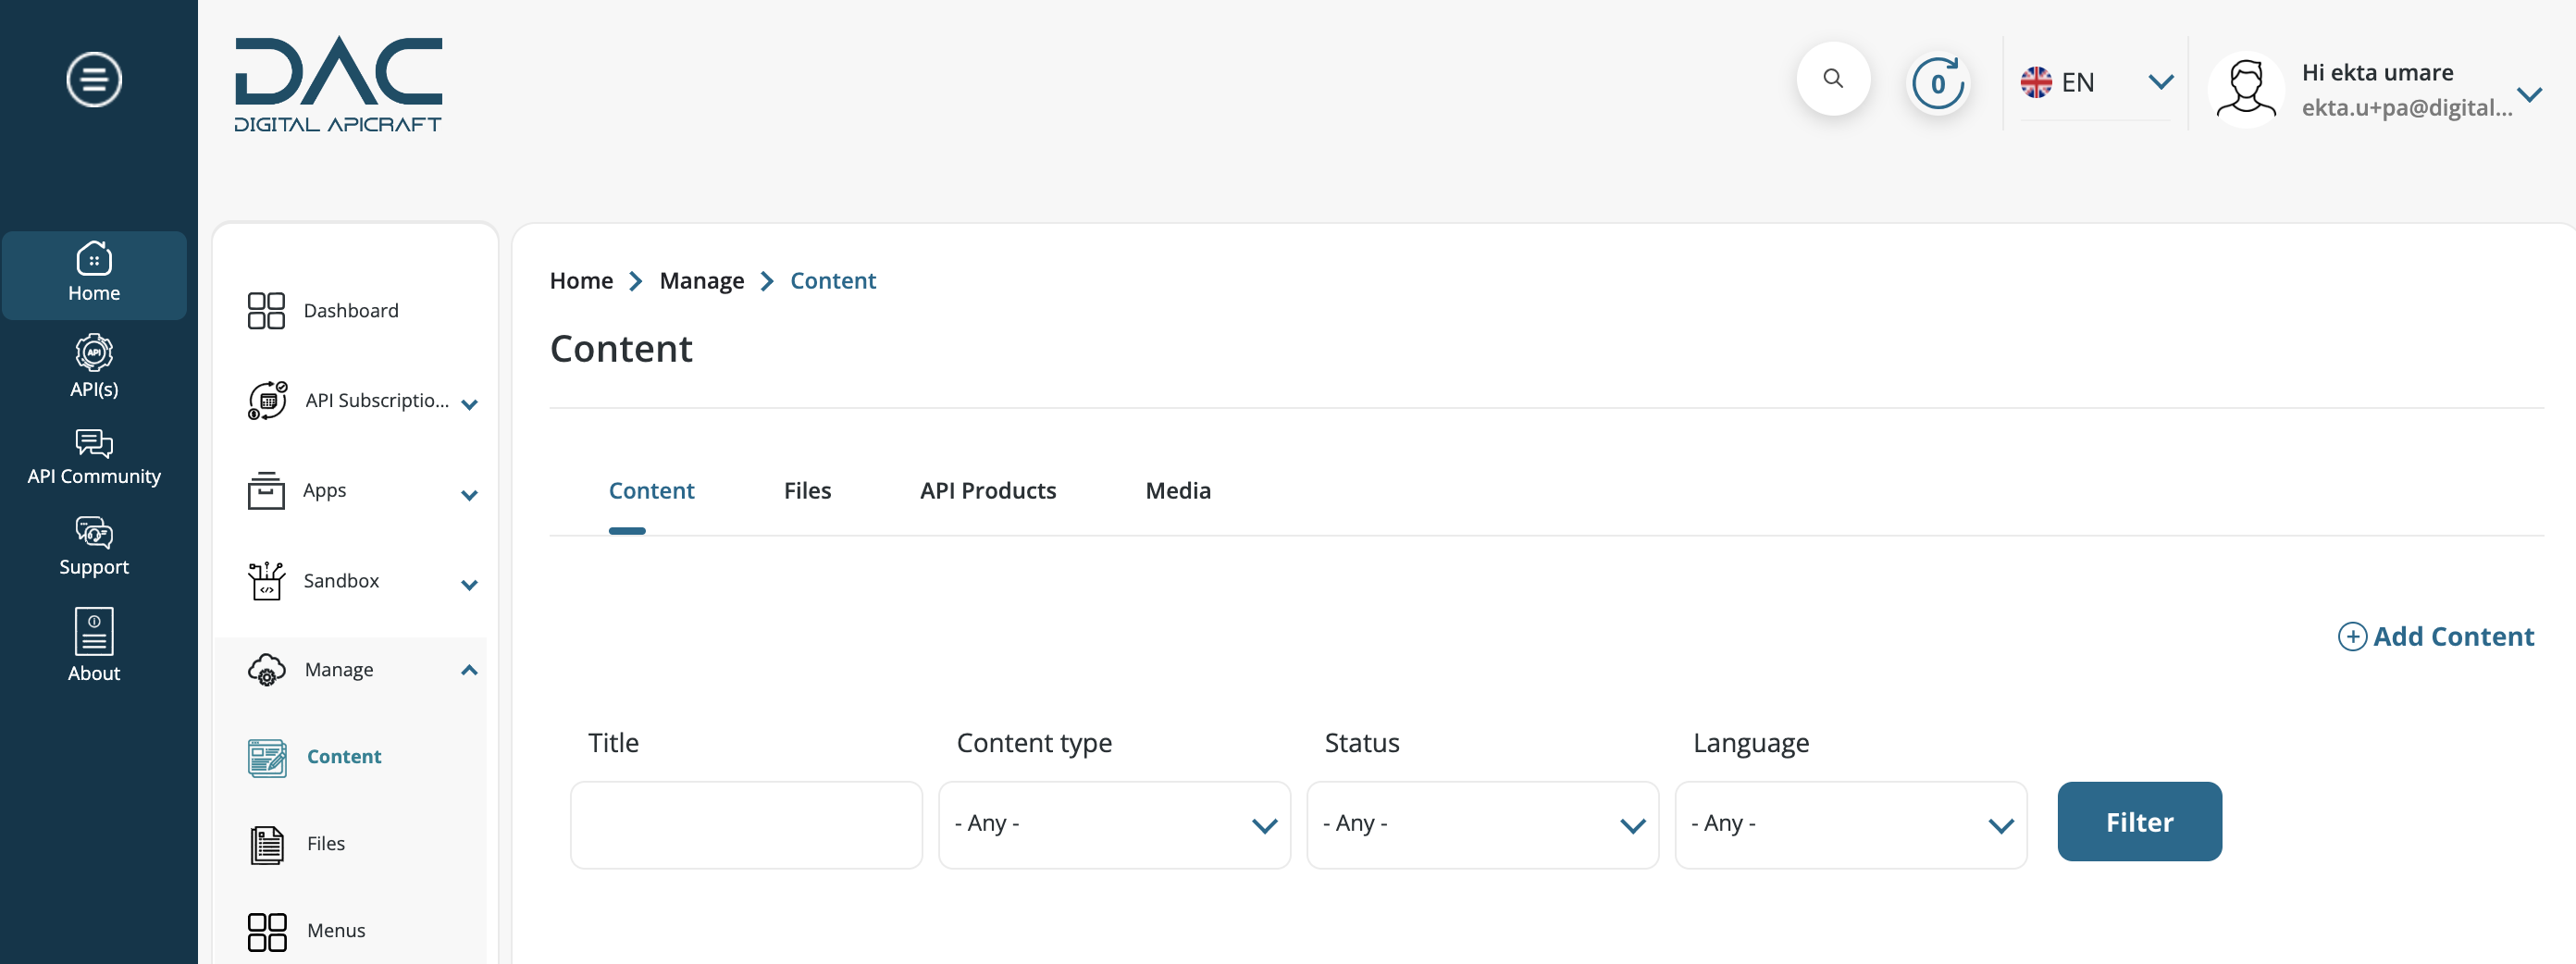
- Navigate to Home > Manage > Content.
- Filter content by title or article content type.
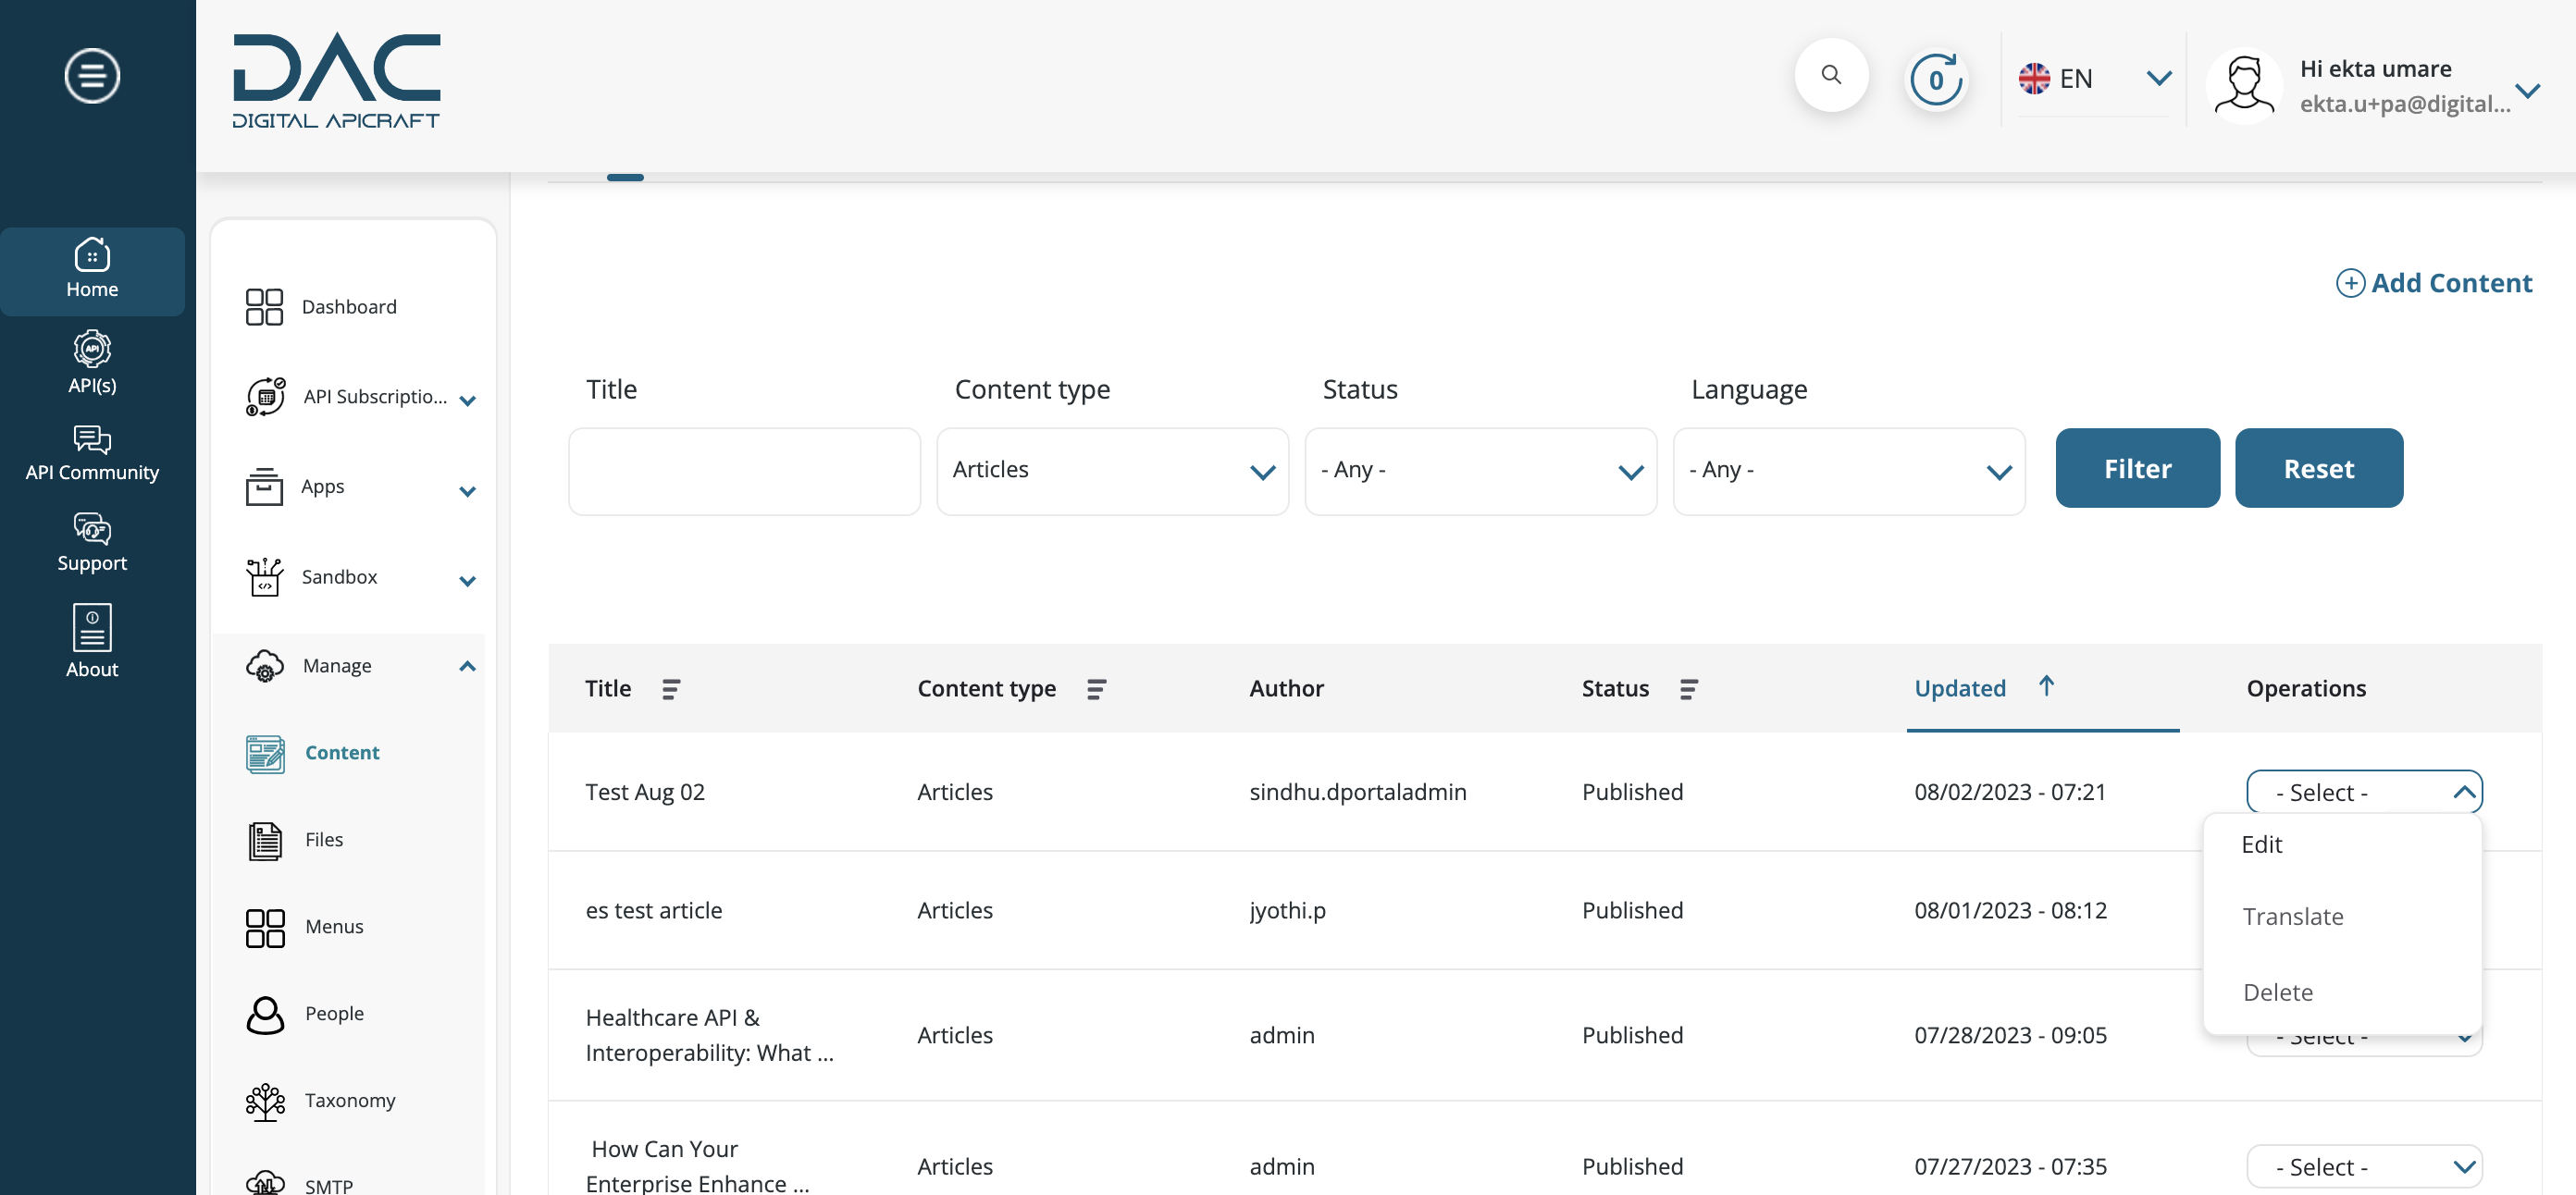
- Click on the Edit button.
- Make the changes and Save the content.
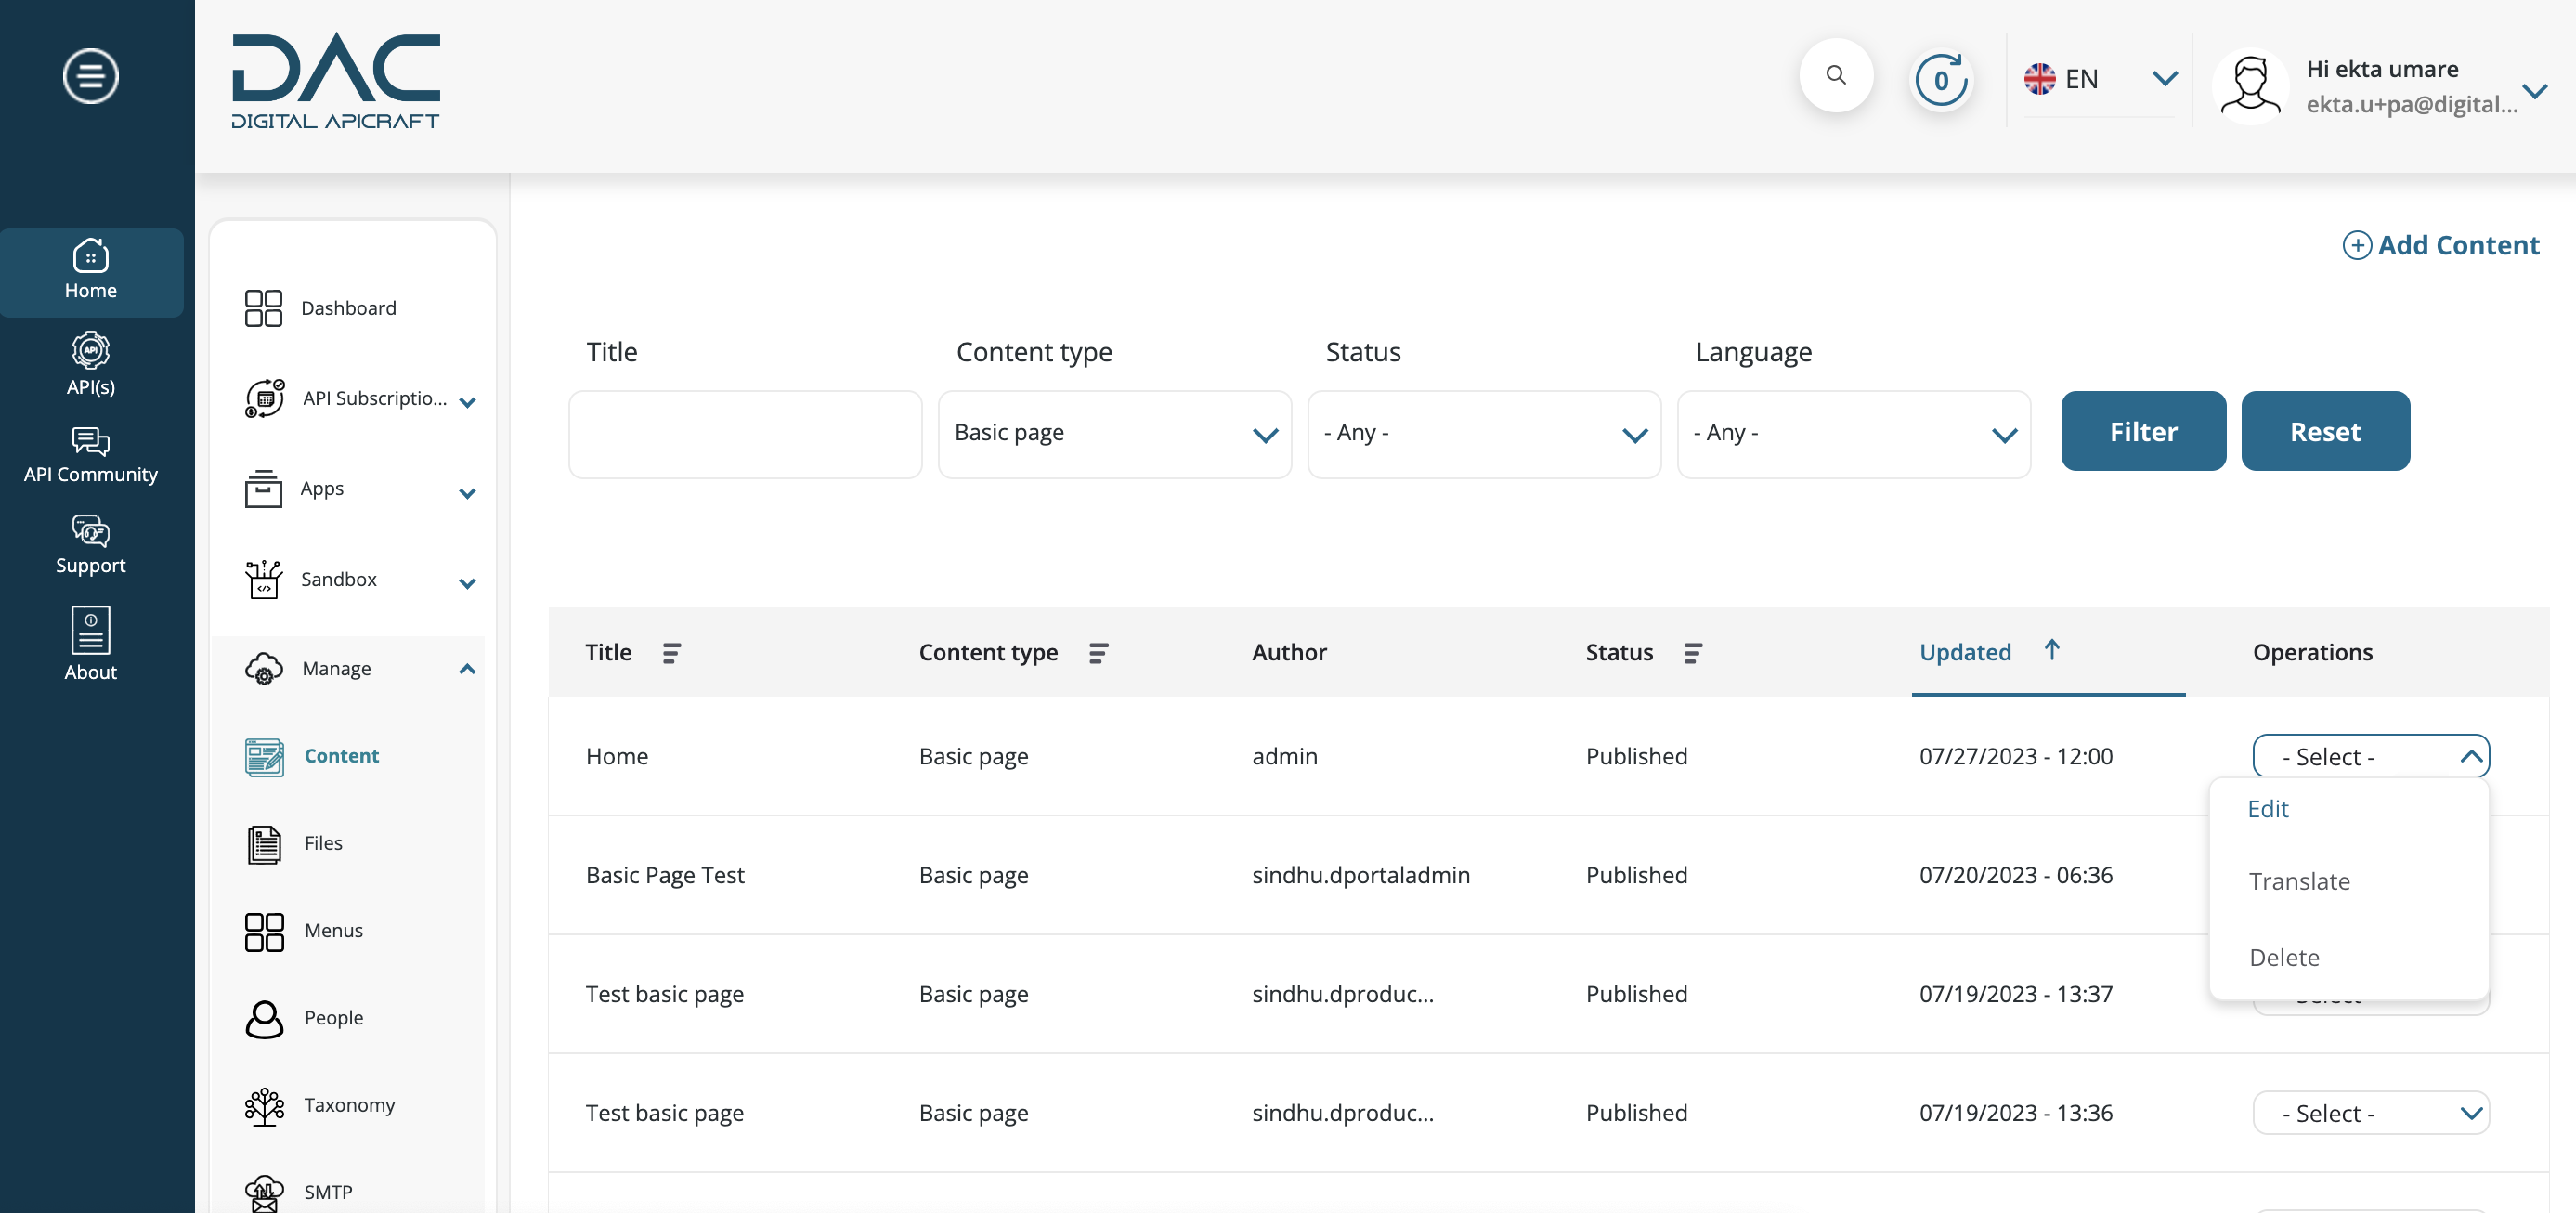
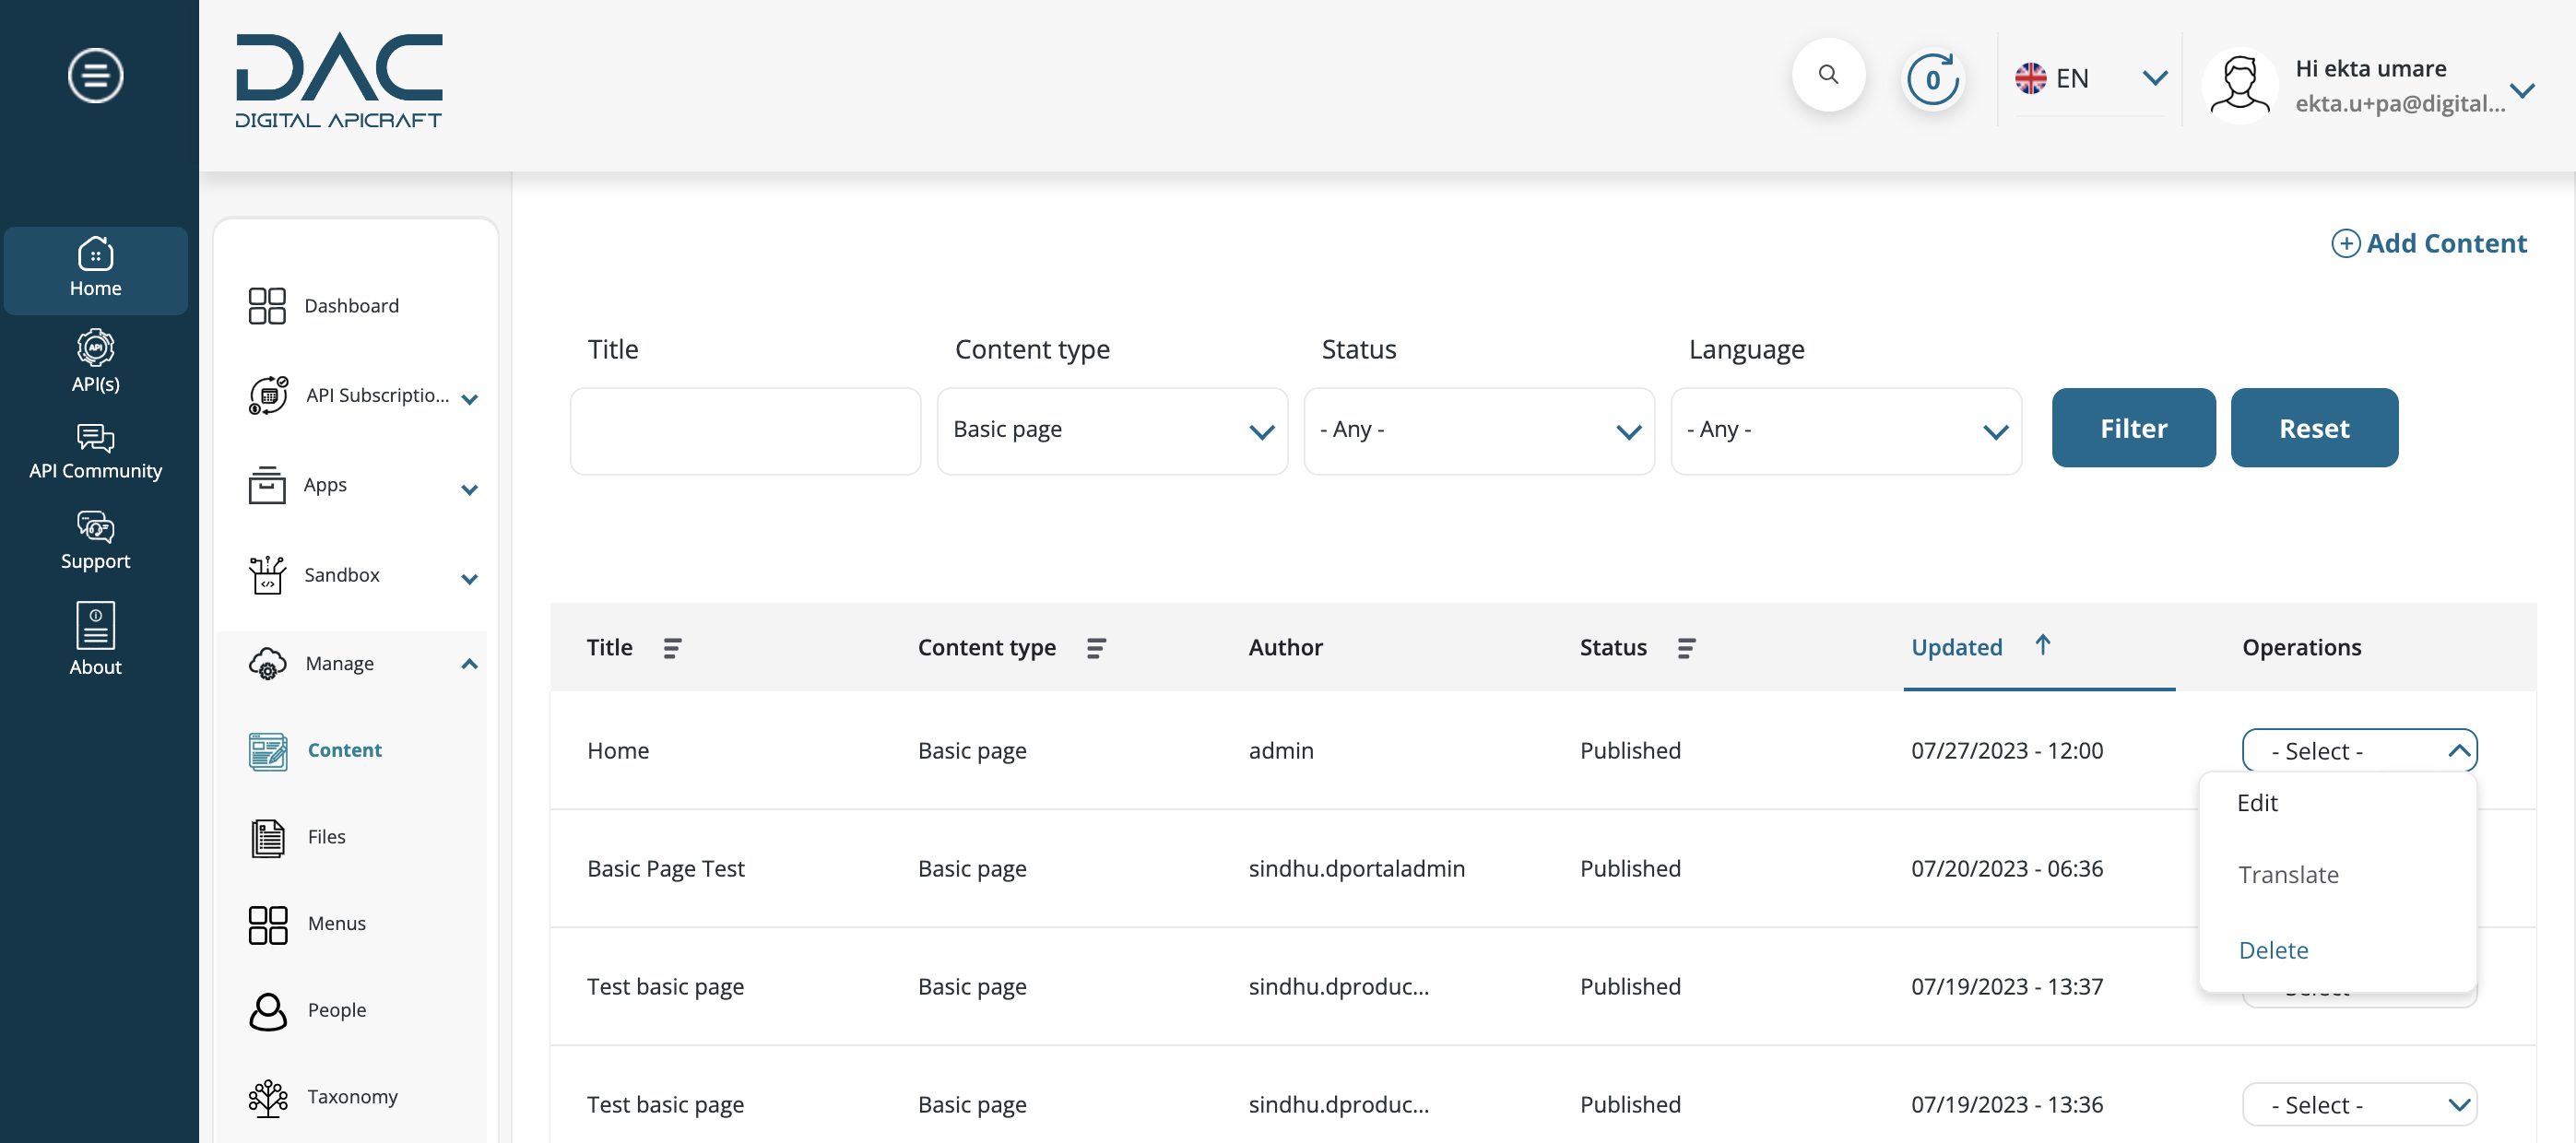
Delete Articles
- Login to the site as a Portal Administrator / Product Manager.
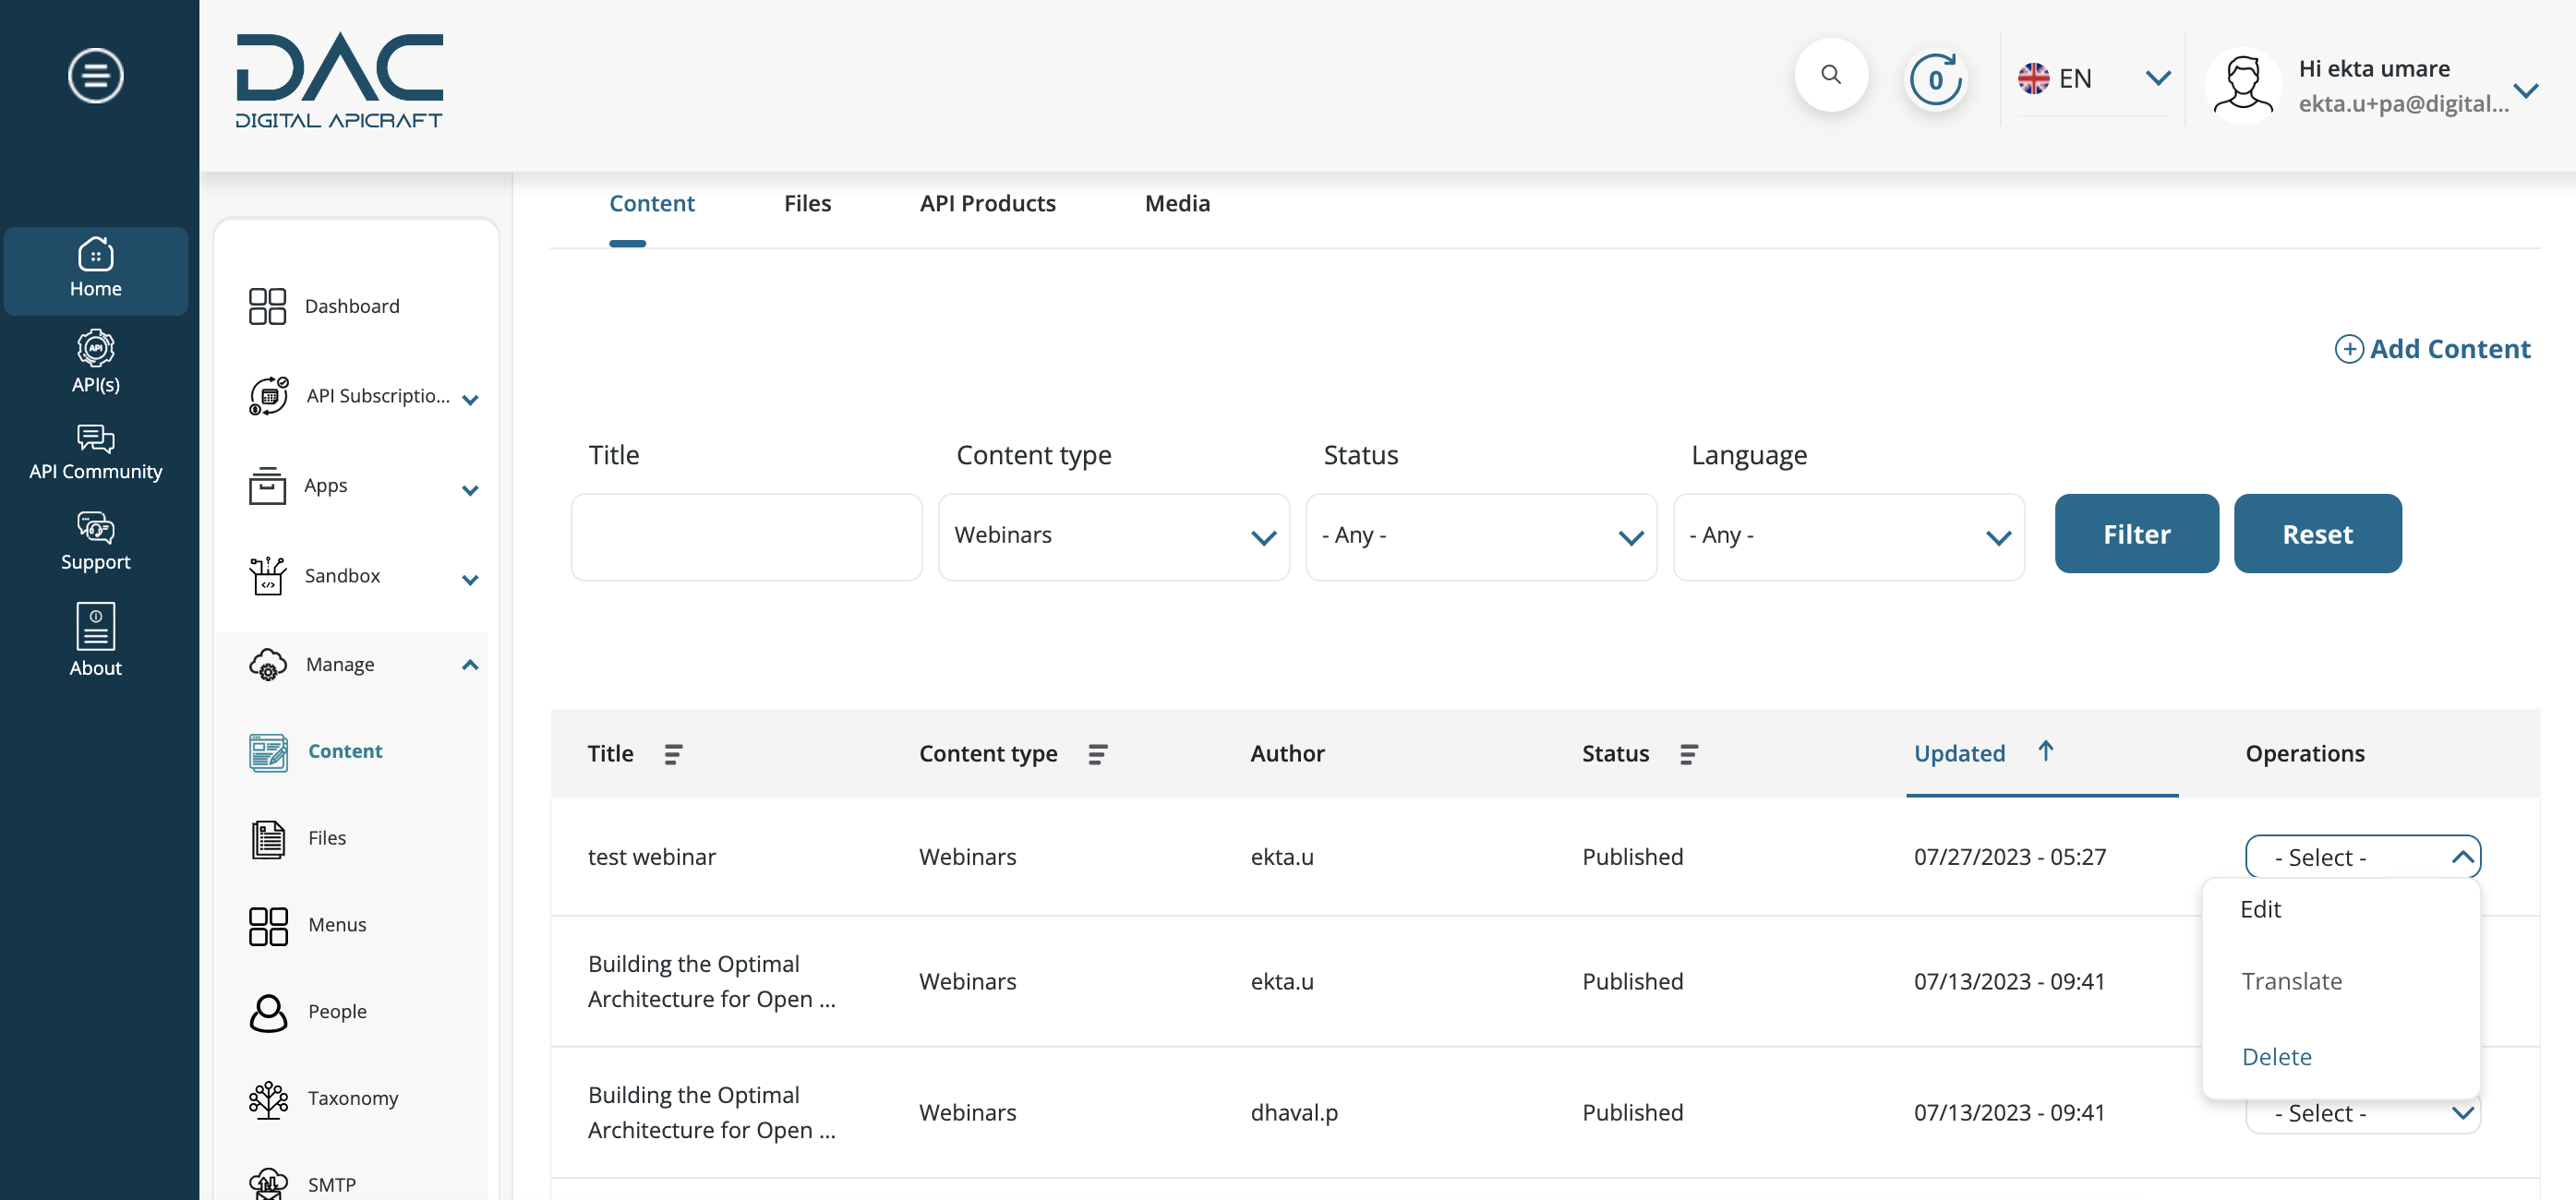
- Navigate to Home > Manage > Content.
- Filter the content by title or Articles content type.
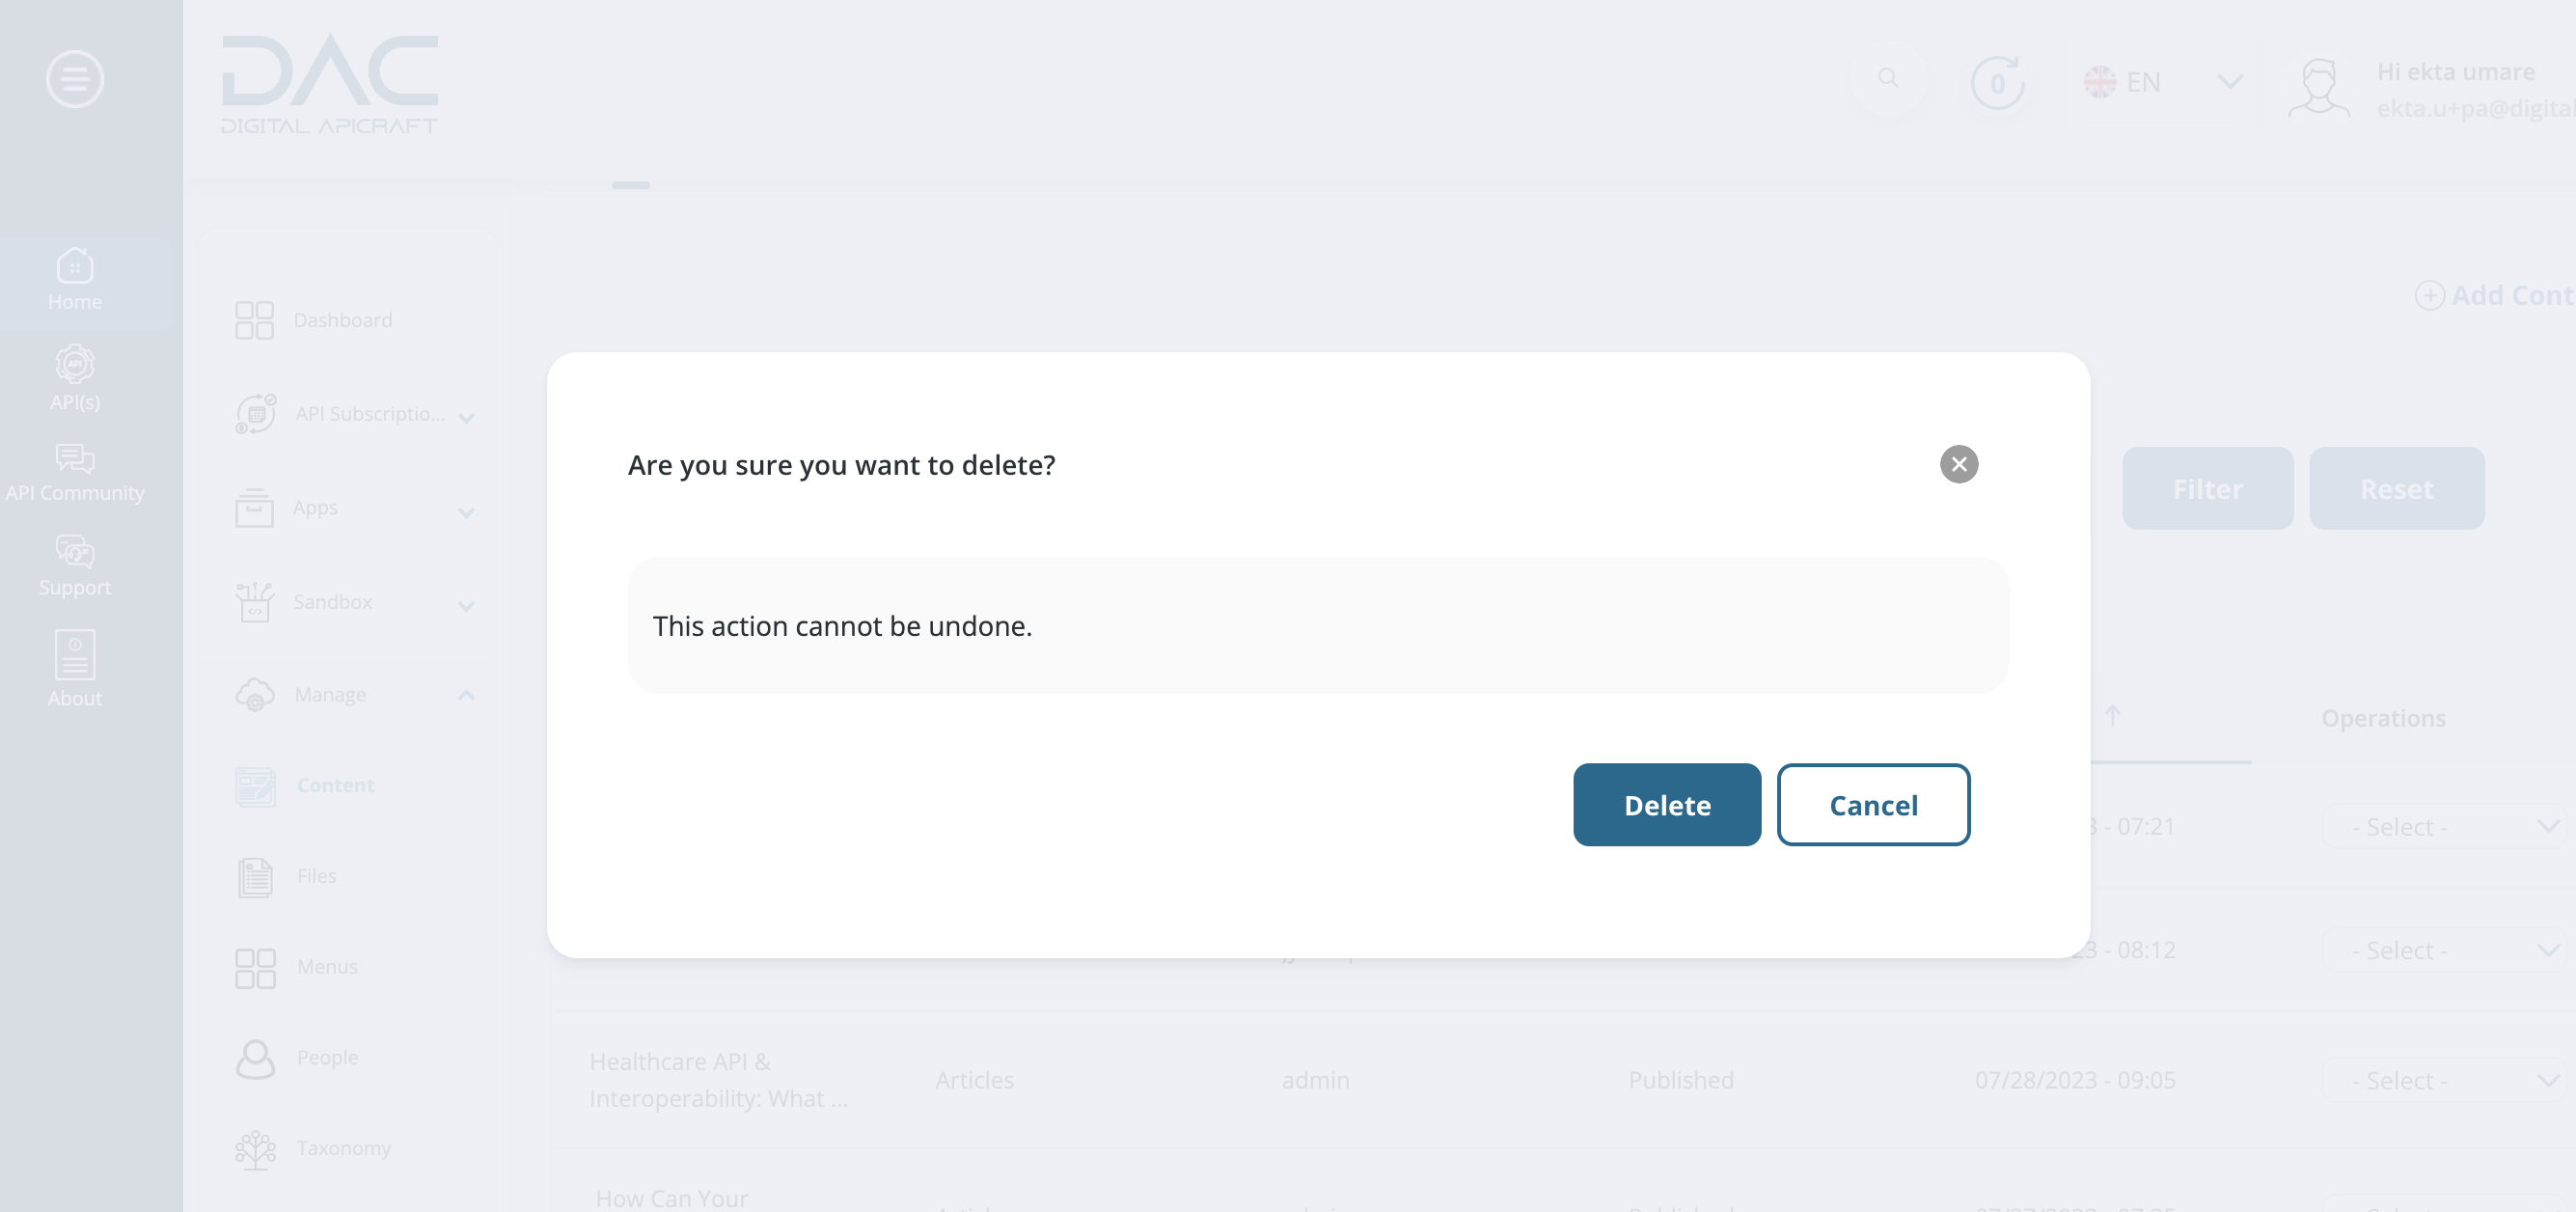
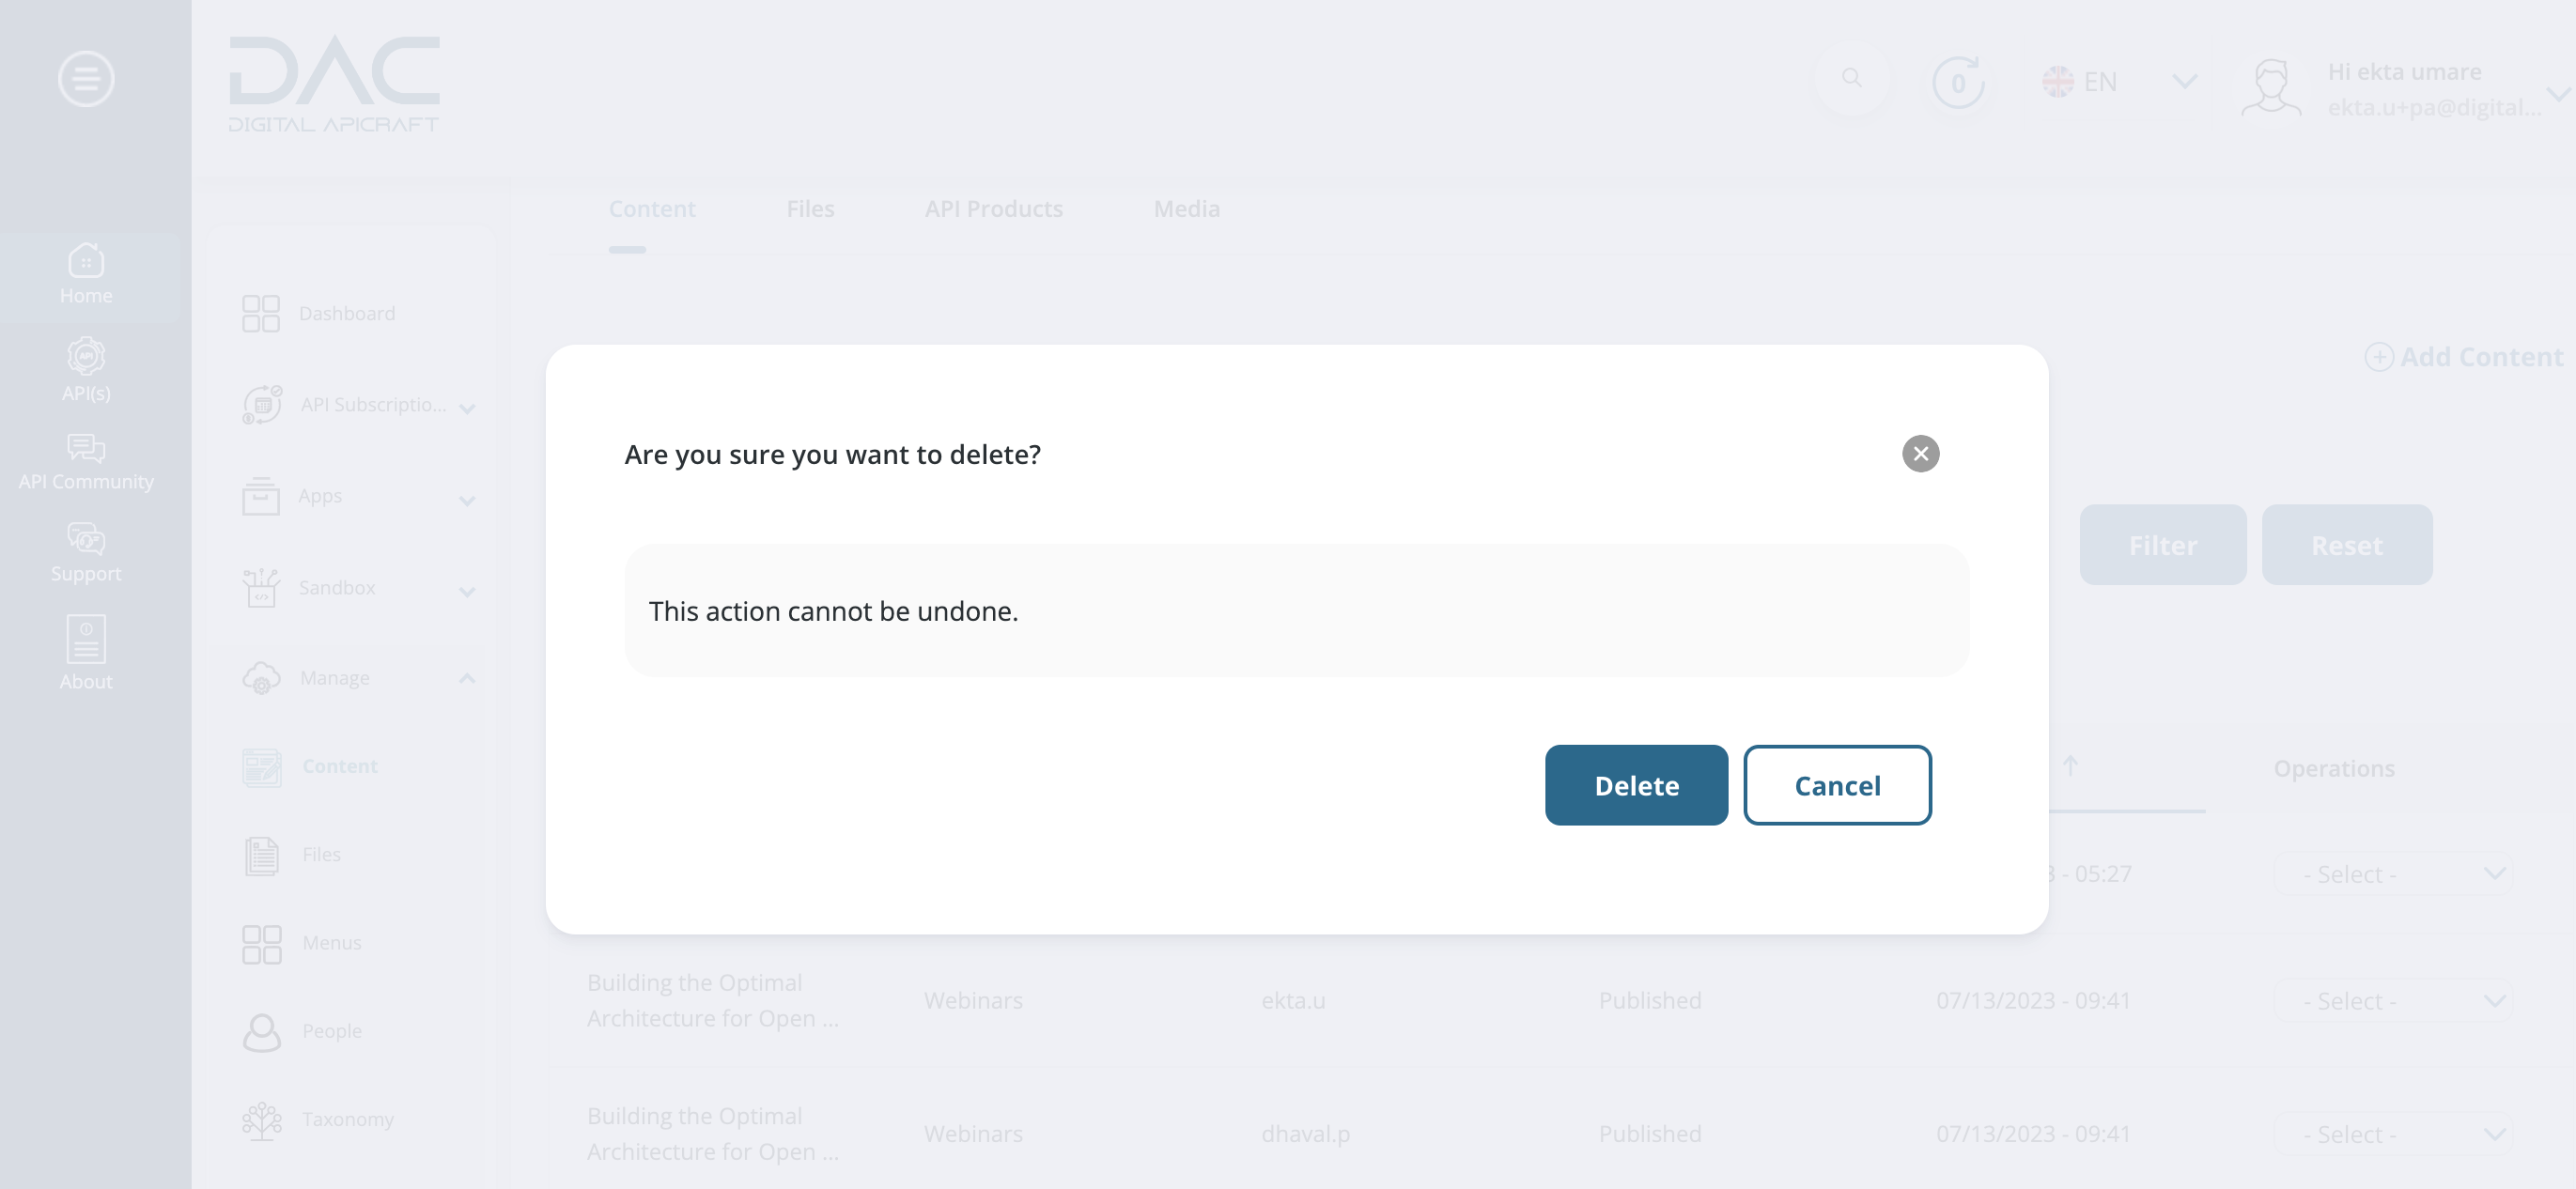
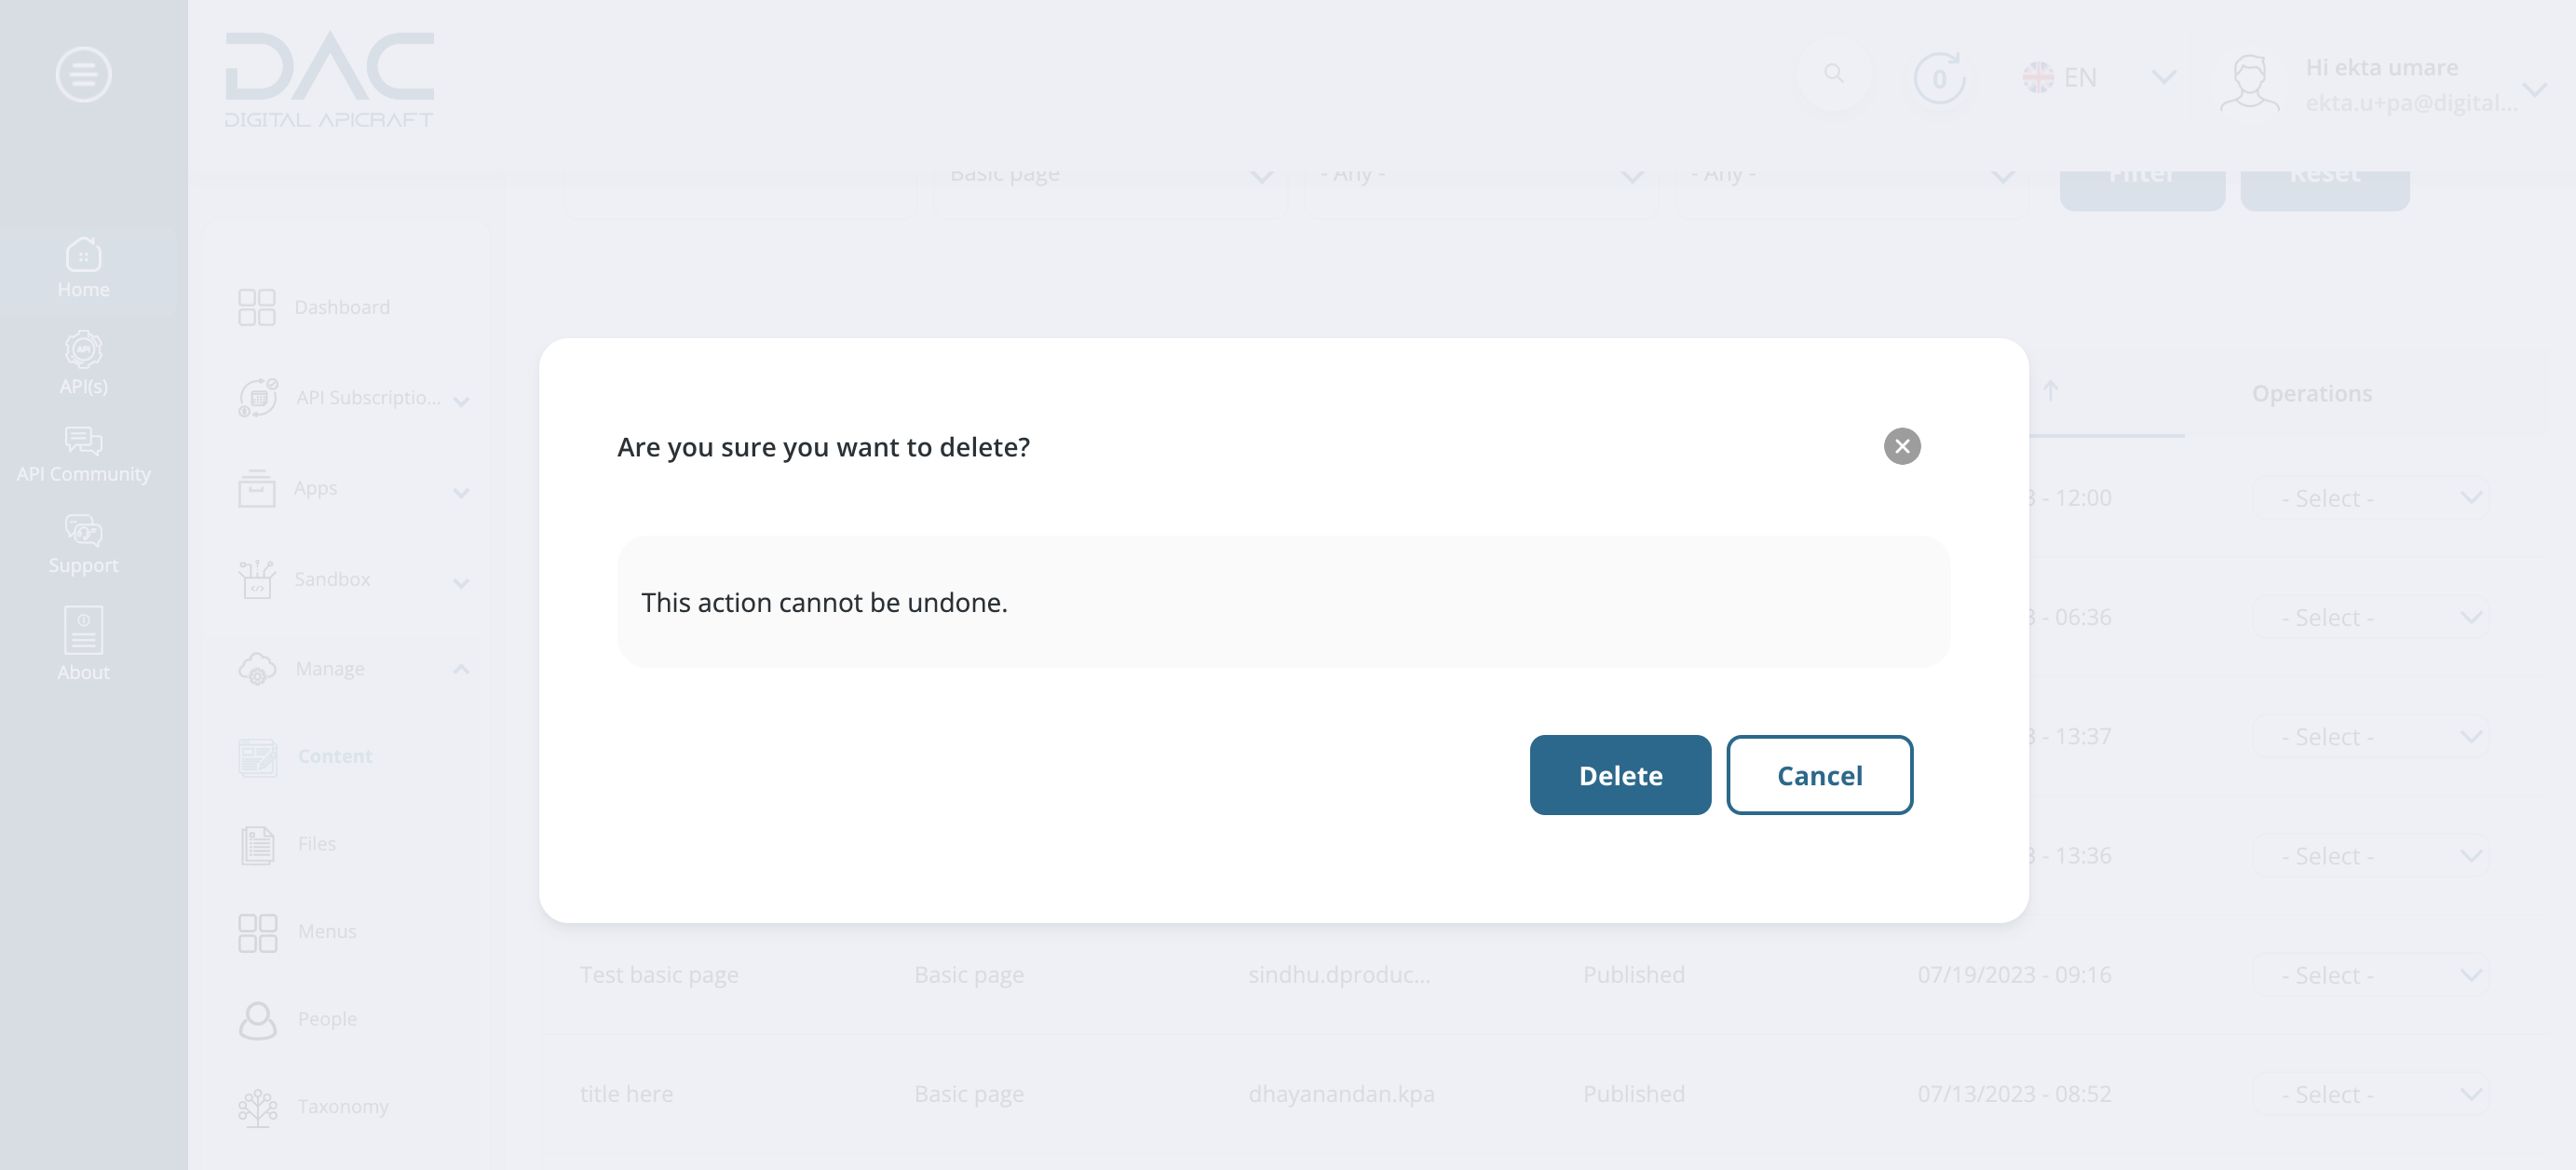
- Click on the Dropdown arrow and click the Delete button.

- To delete the app permanently, click Delete. To keep content, click Cancel.
- Two more options available: Delete content from View and Edit features under the content page.
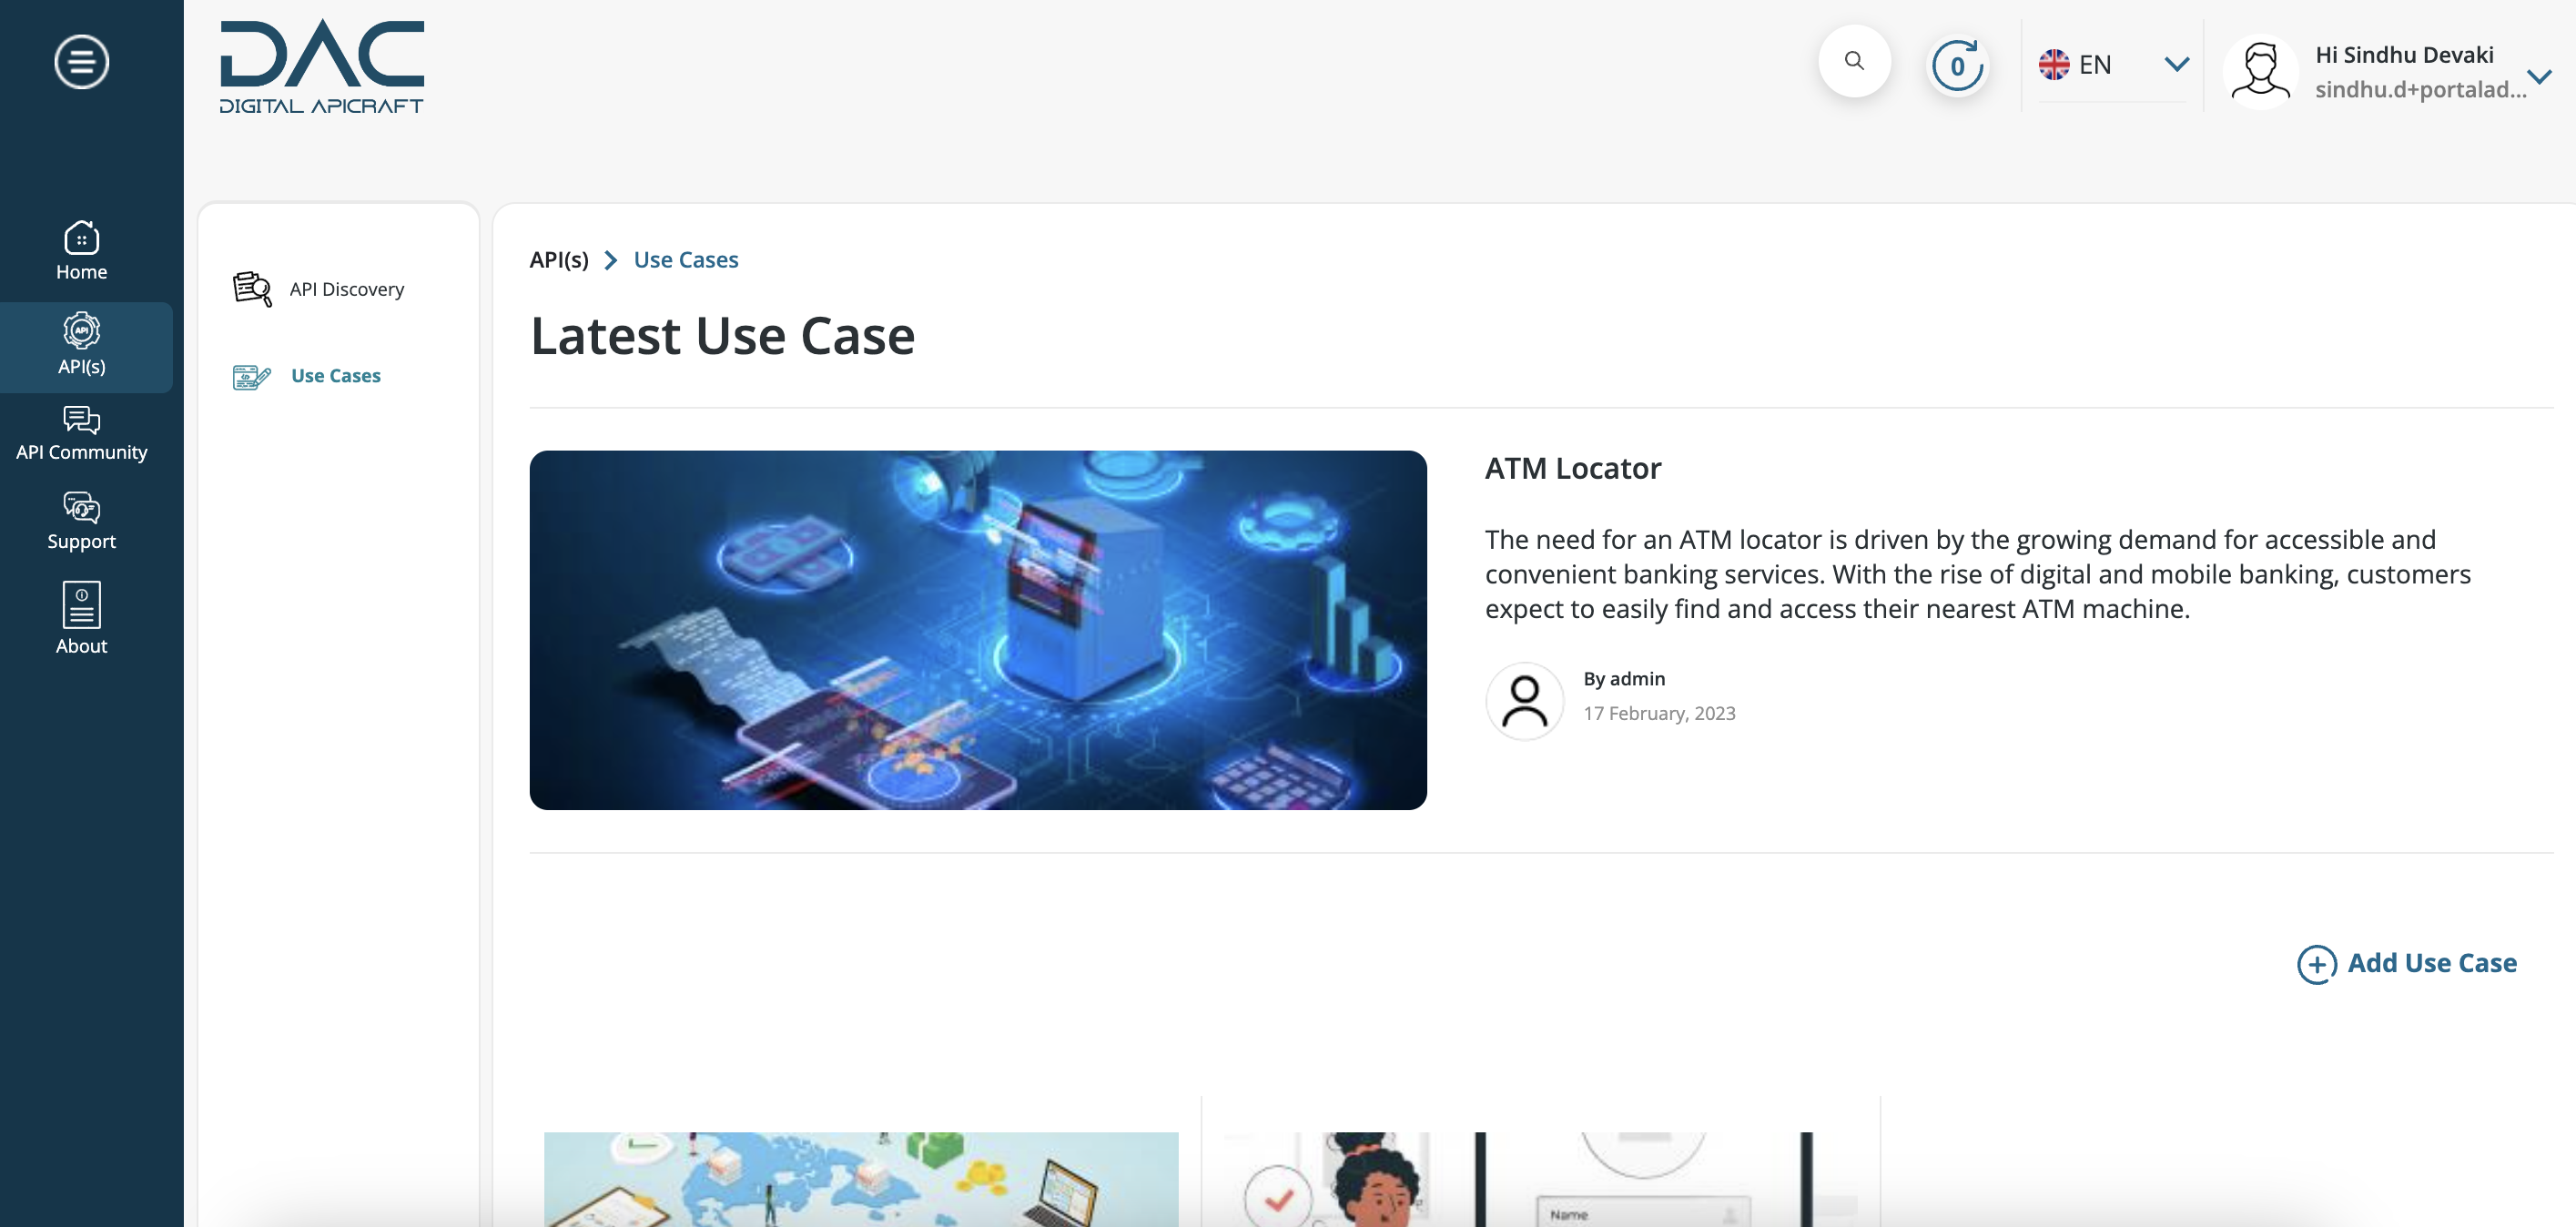
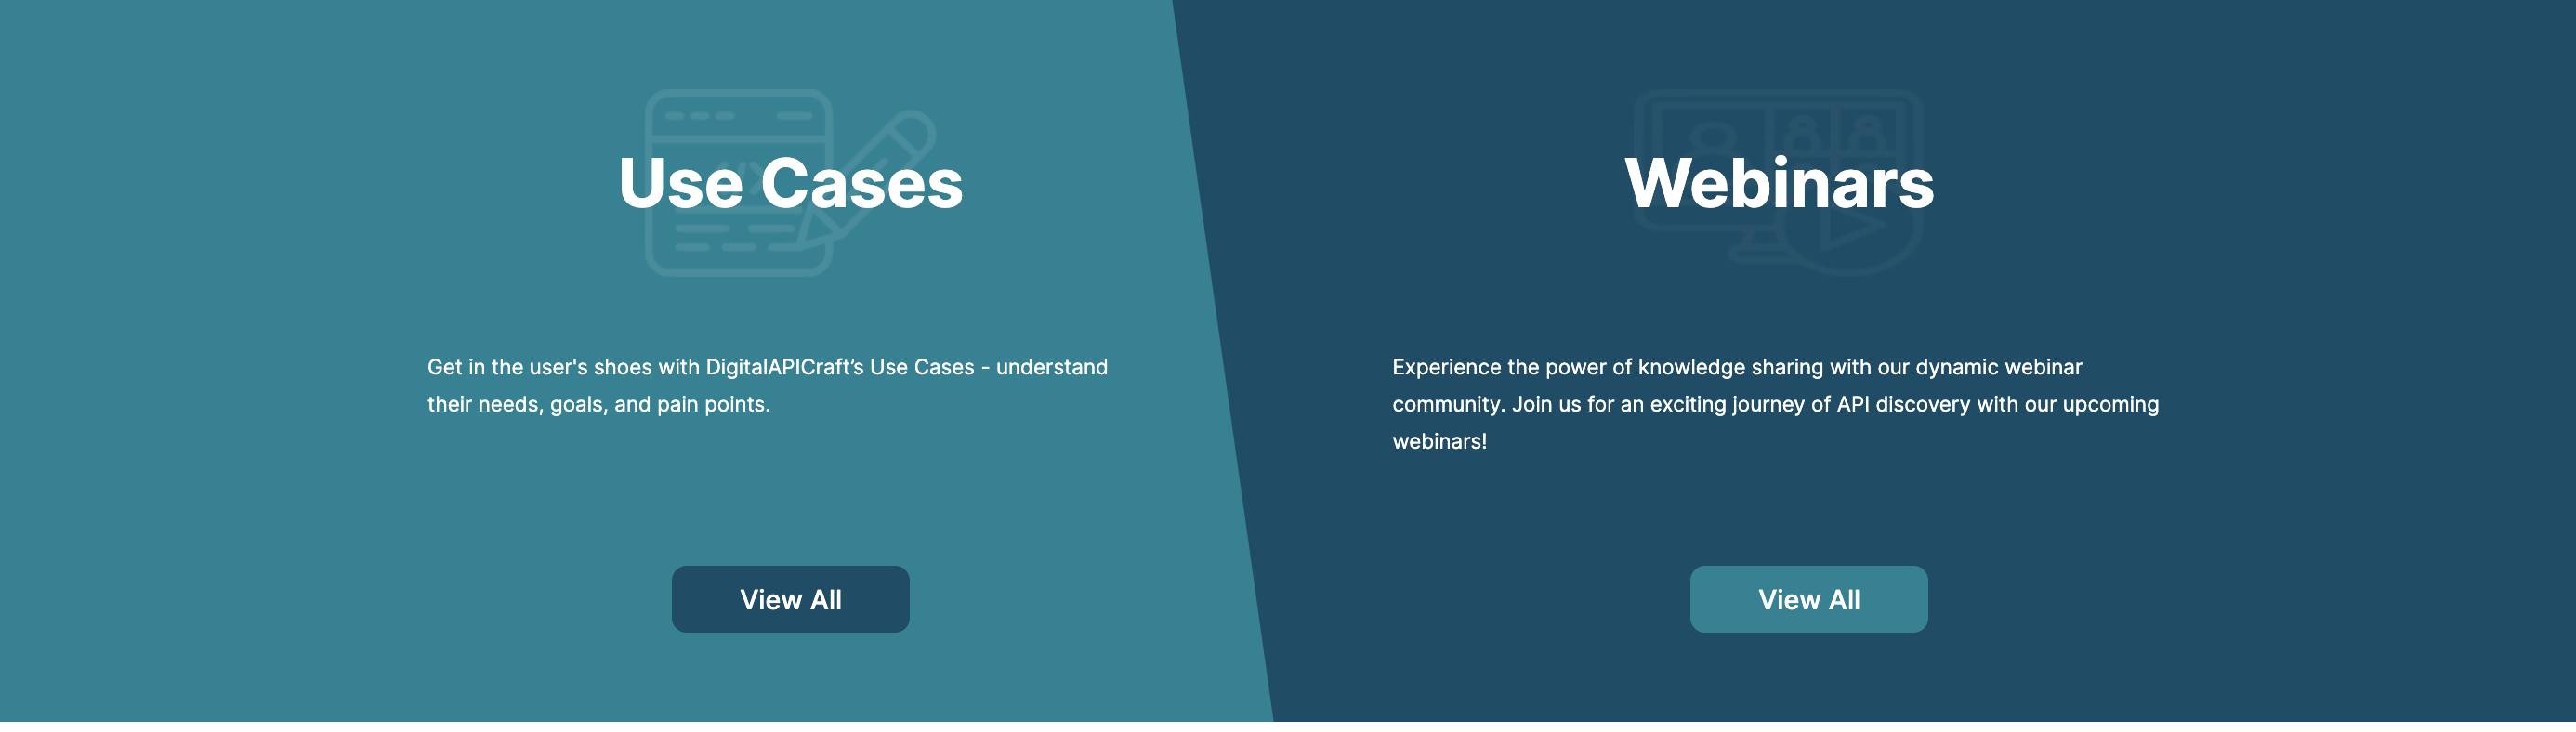
About API Use Cases
The API use cases feature on a One APIMarketplace is a section that showcases various ways in which the platform's APIs can be used to solve real-world problems or enhance existing applications. These use cases typically include detailed explanations of the problem being solved, the APIs and tools used to solve the problem, and the benefits gained from using the platform's APIs.
The API use cases feature is intended to demonstrate the practical applications of the platform's APIs and provide developers with inspiration and ideas for how they can use the APIs to solve similar problems or enhance their own applications. By showcasing the potential of the platform's APIs, the developer portal can help developers understand the value of the platform and encourage them to use the APIs in their own projects.
Create Use Cases
- Login to the site as a Portal Administrator / Product Manager.
- Navigate to Home > Manage > Content > Add Content > Use Cases.

- Navigate to API's > Use Cases
- Add the below fields.
- Title
- Tile Image - The allowed file extensions are png, gif, jpg, and jpeg, and the maximum number of values allowed is 1.
- Short Description
- Description
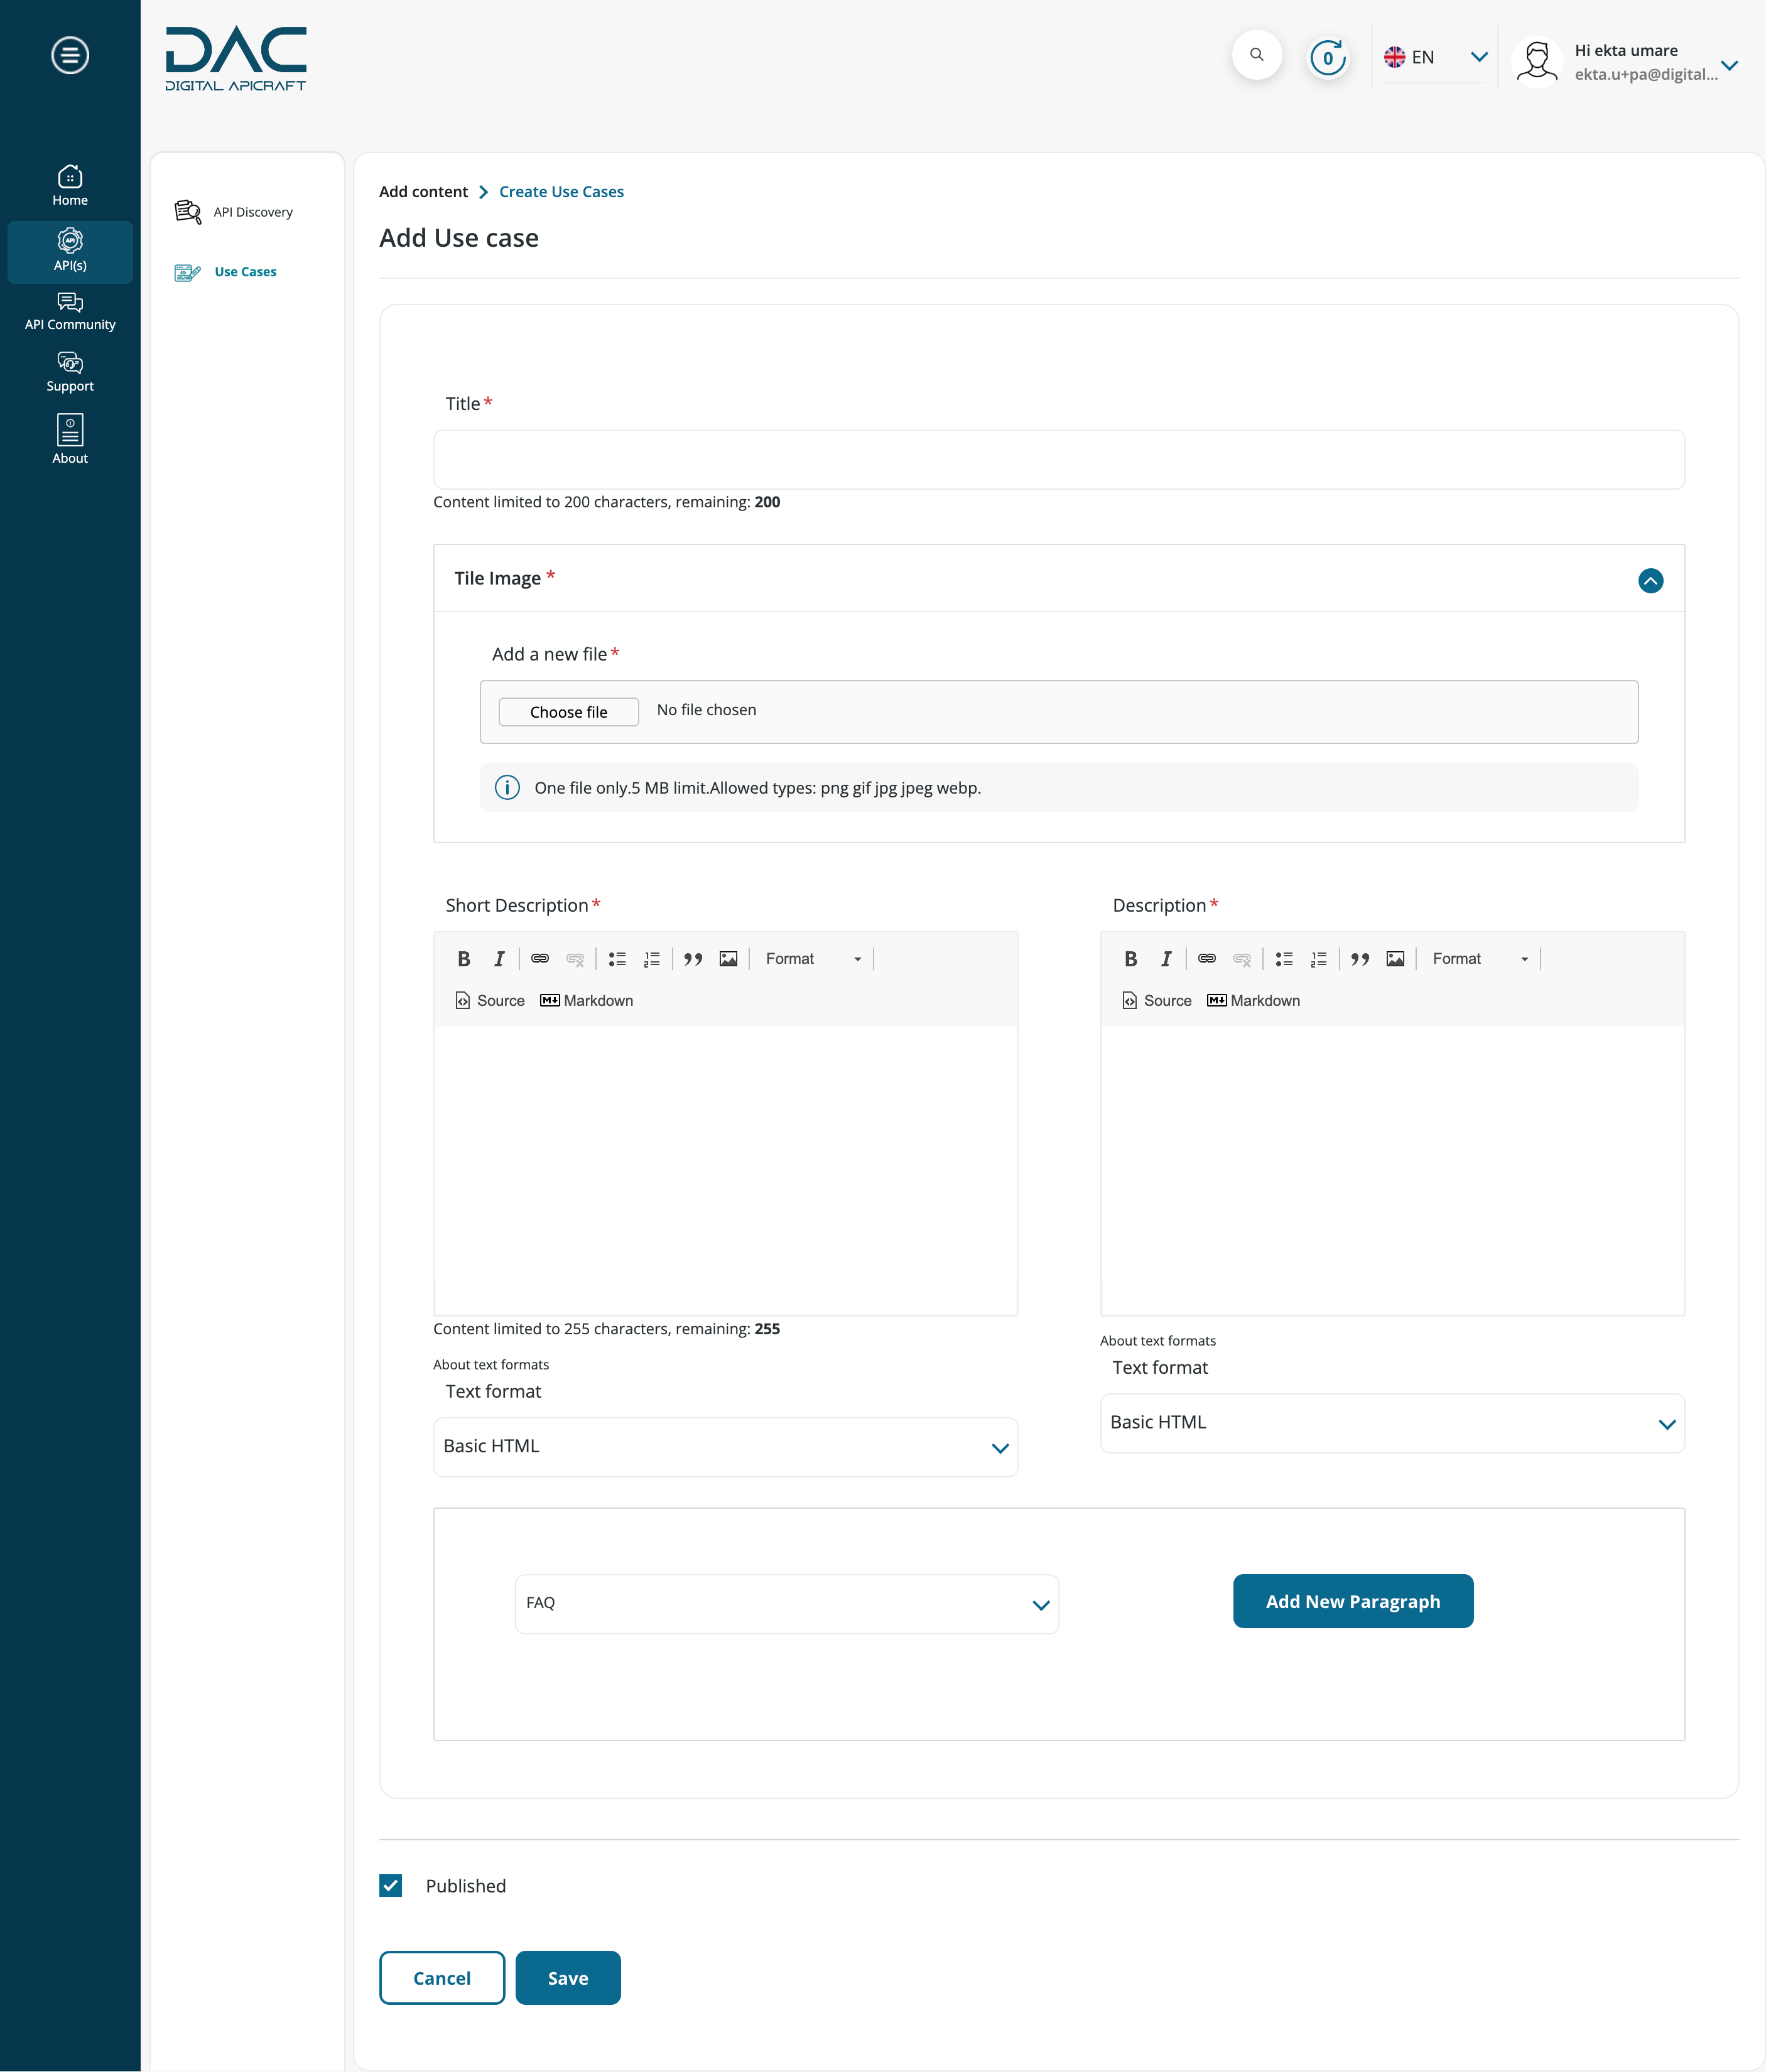
- Save the content.
Edit Use Cases
- Login to the site as a Portal Administrator / Product Manager.
- Navigate to Home > Manage > Content.
- Filter content by title or Use cases content type.
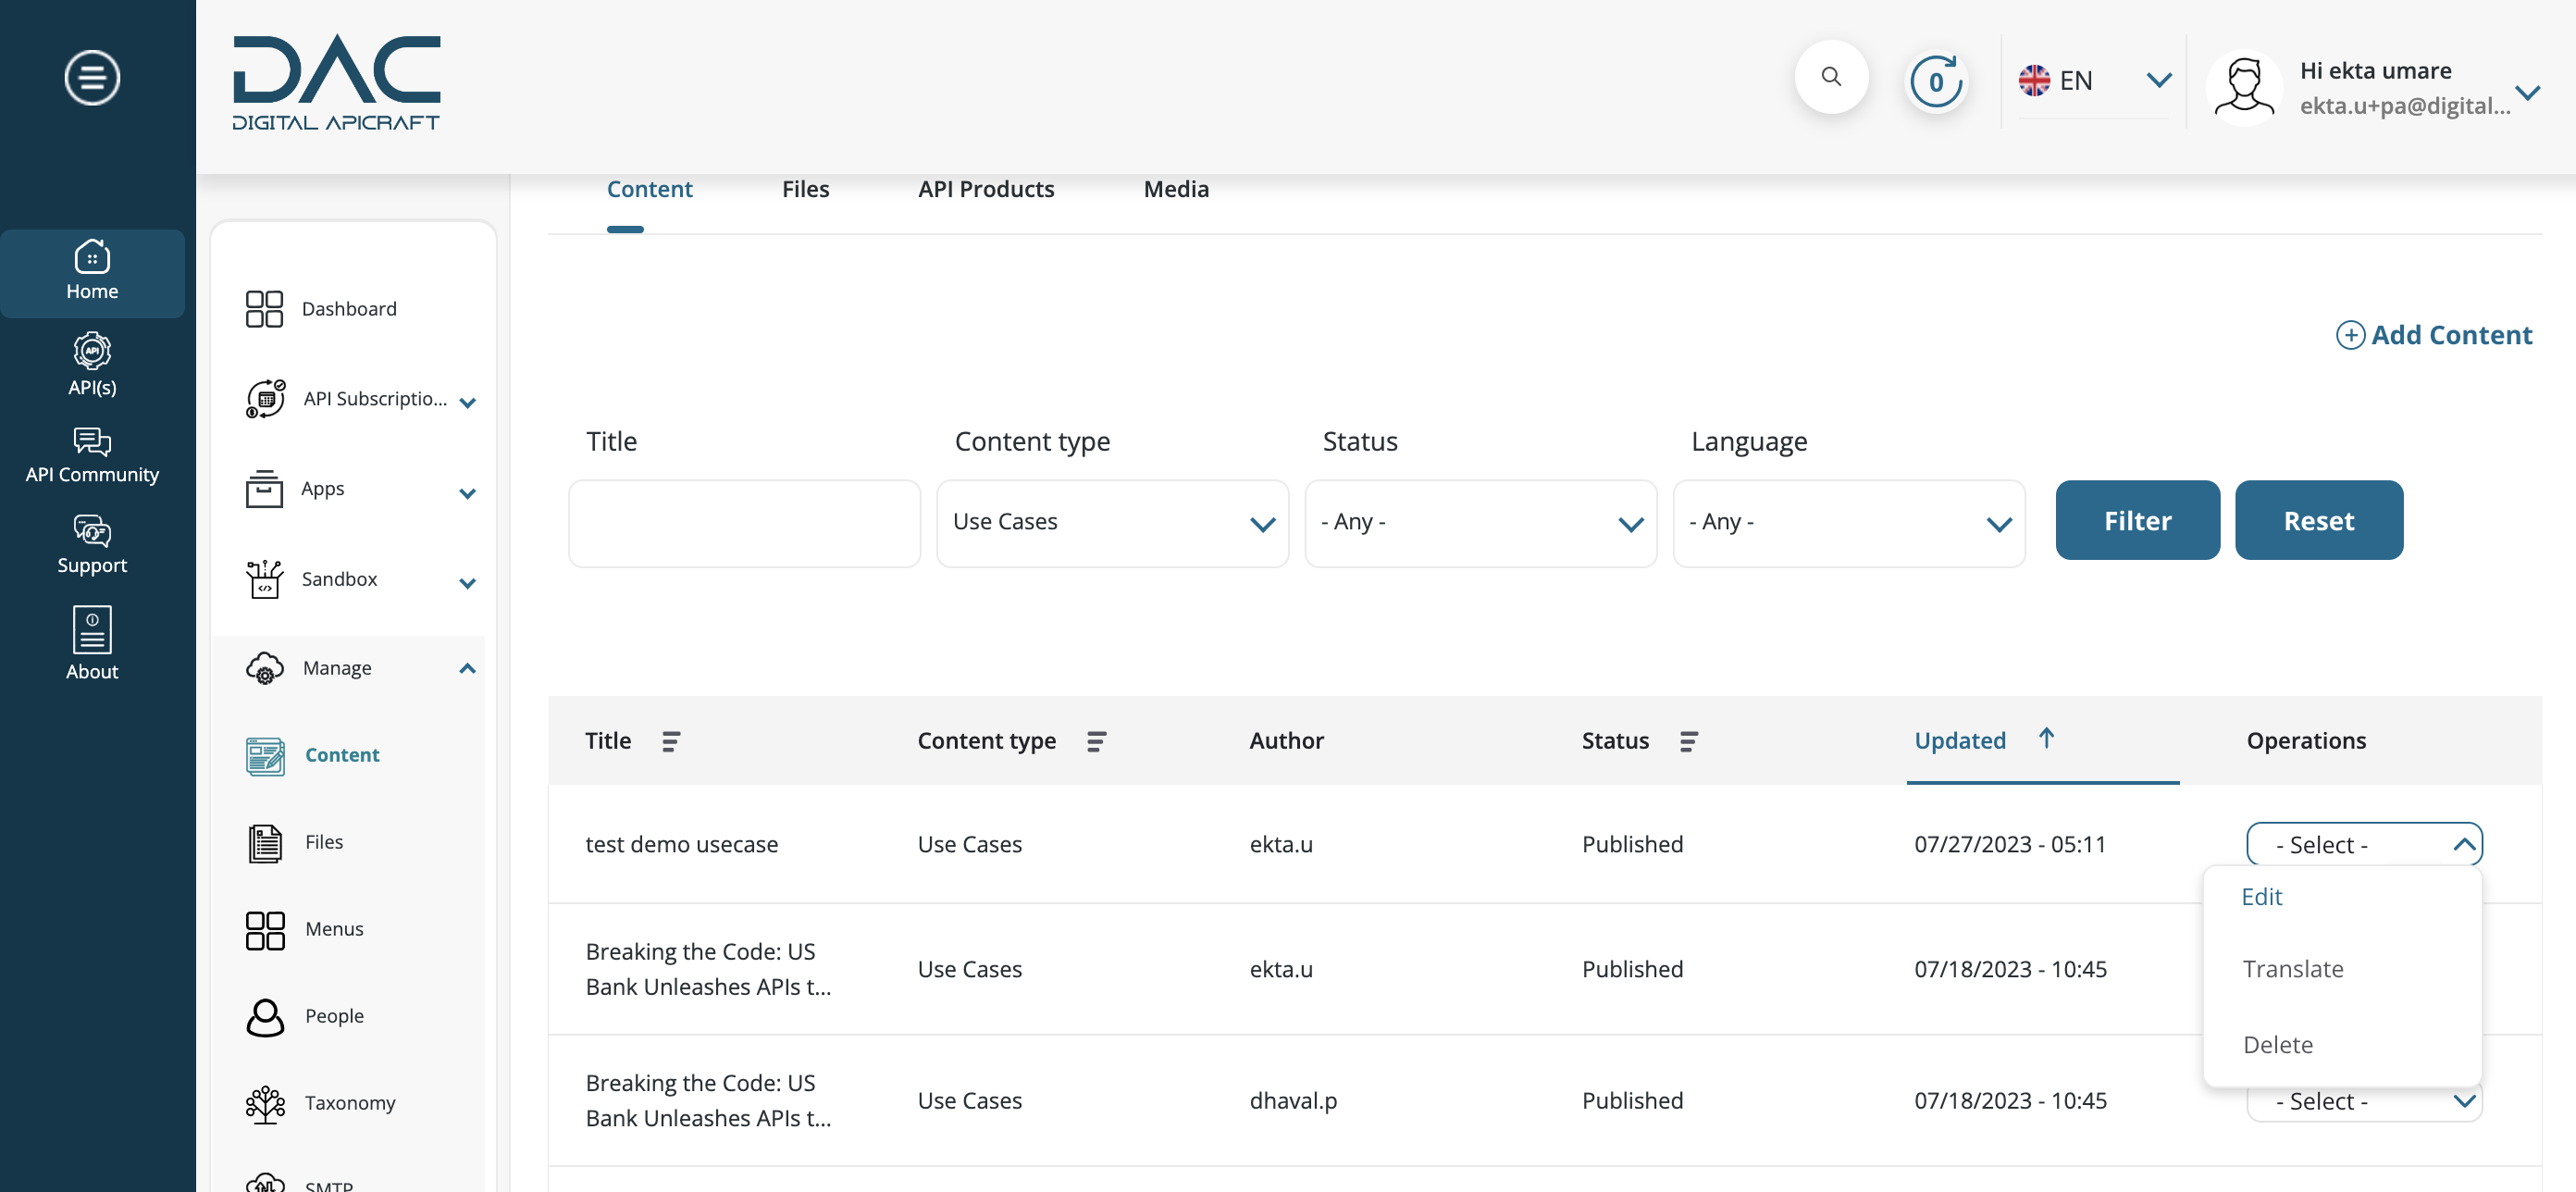
- Click on the Edit button.
- Make the changes and Save the content.
Delete Use Cases
- Login to the site as a Portal Administrator / Product Manager.
- Navigate to Home > Manage > Content.
- Filter the content by title or Use cases content type.

- Click on the Dropdown arrow and click the Delete button.
- To delete the app permanently, click Delete. To keep content, click Cancel.
- Two more options available: Delete content from View and Edit features under the content page.
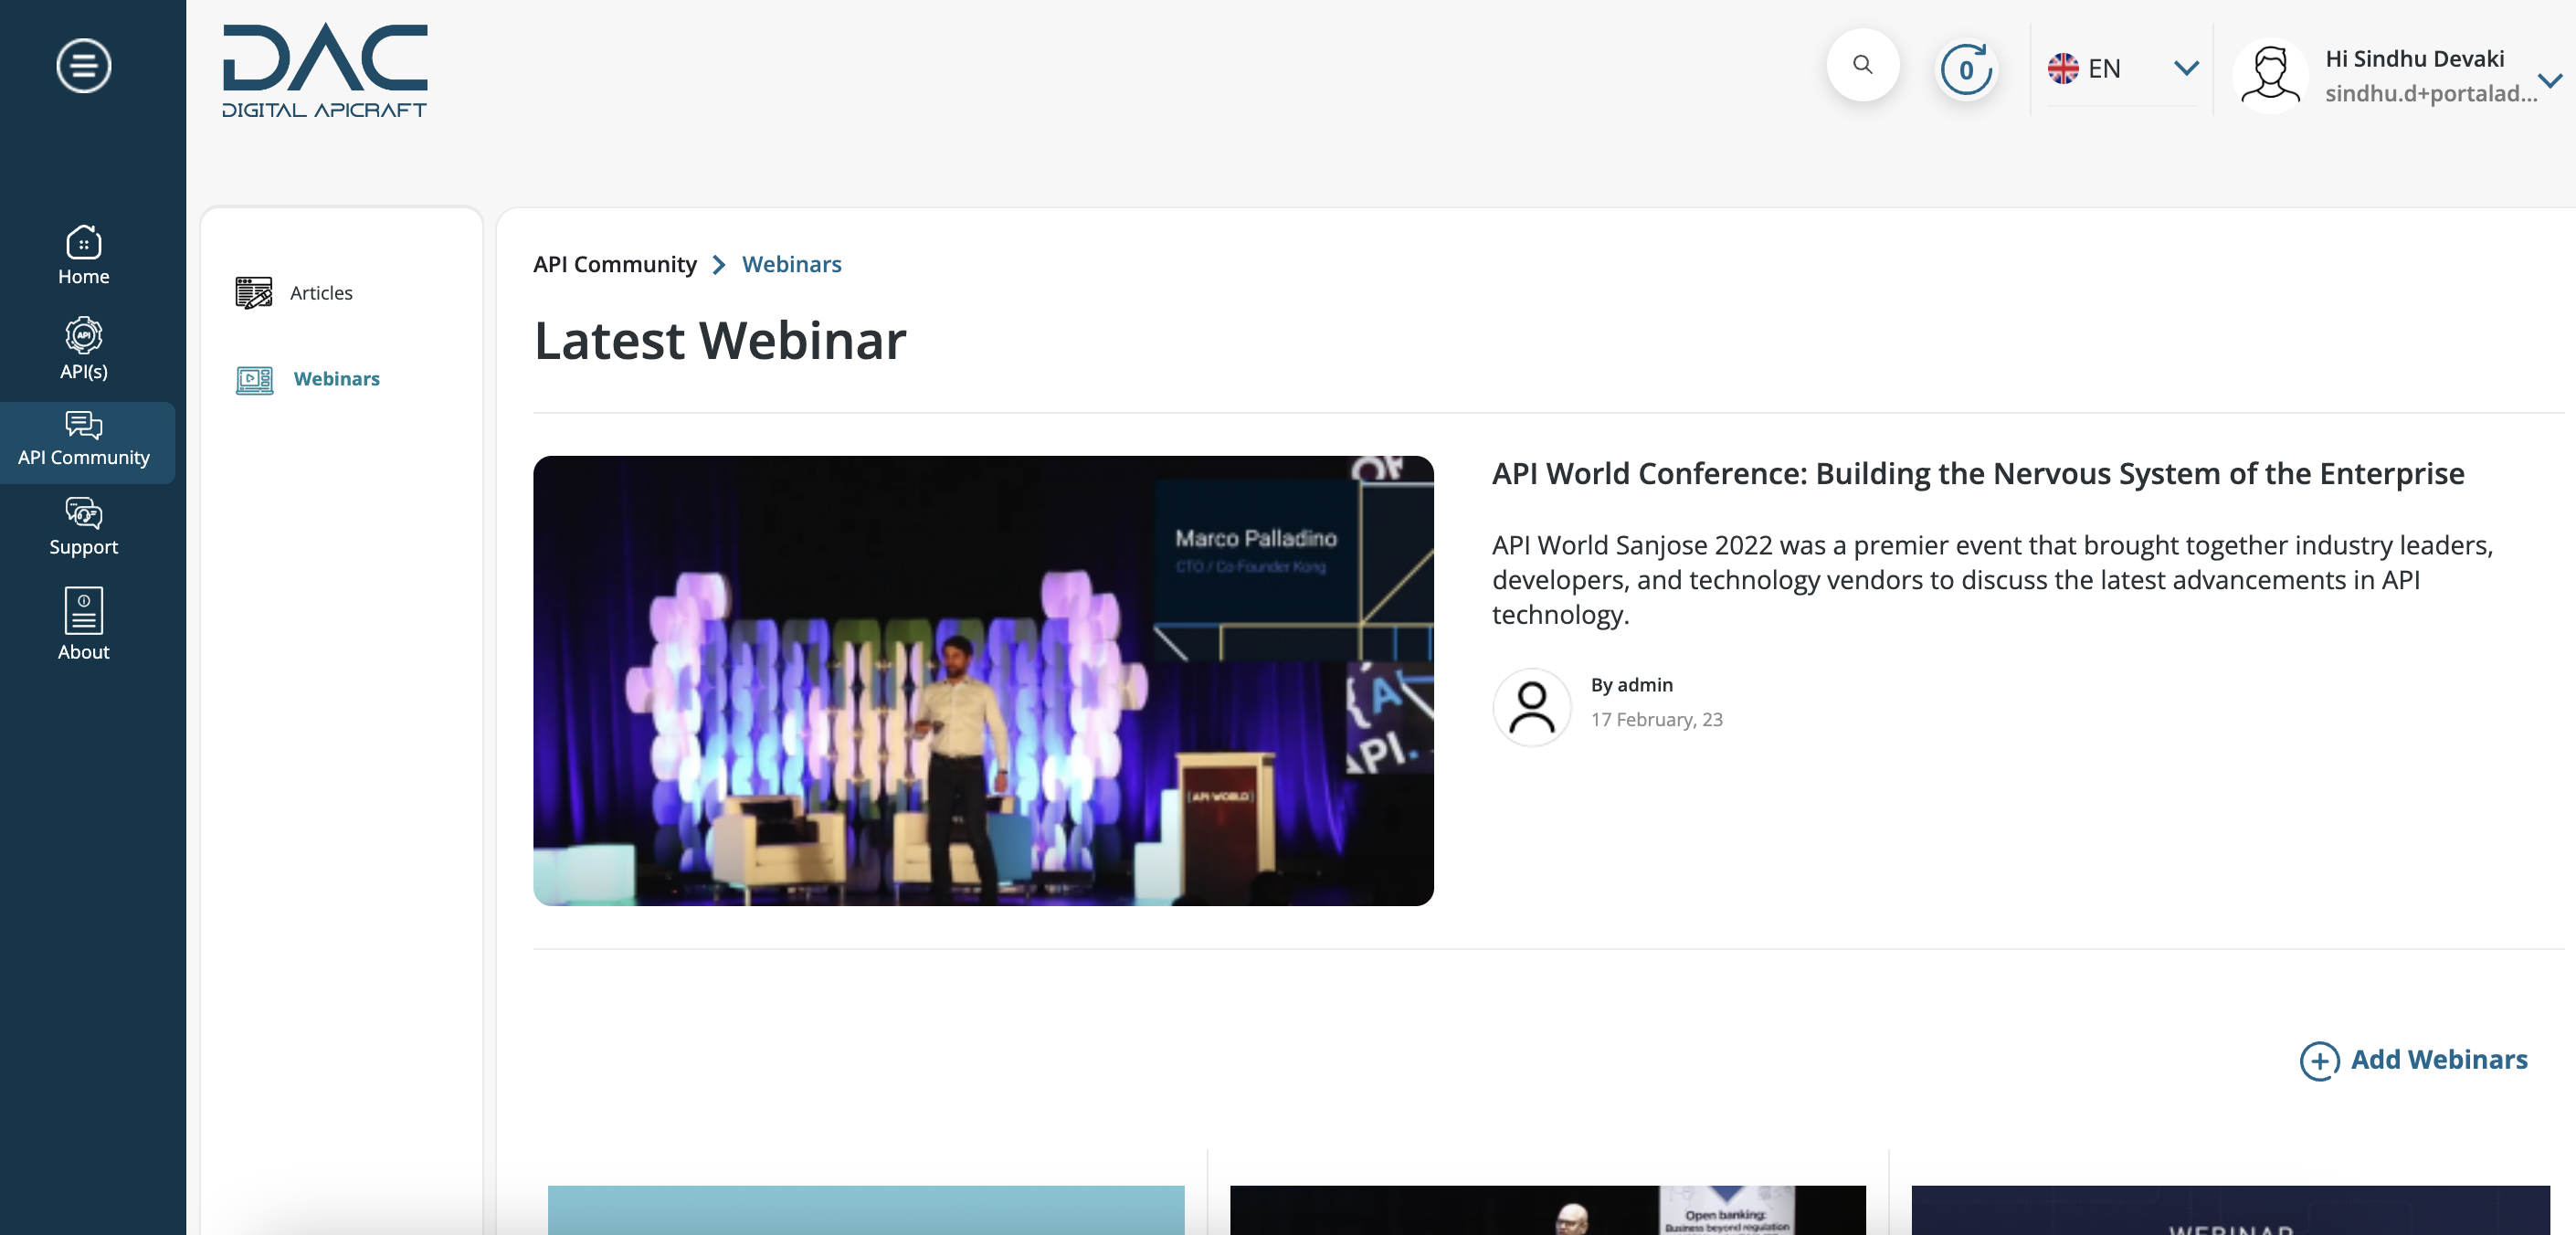
About Webinars
Webinars are a feature on One APIMarketplace that allows developers to view online recorded seminars or presentations. These webinars provide developers with a valuable opportunity to learn about new features, tools, and best practices related to the platform or service.
Webinars can be used to introduce new products or services, provide updates on existing features, and give developers an opportunity to ask questions and provide feedback.
Webinars are a valuable resource for developers looking to stay up-to-date on the latest developments in their field, and for platform providers looking to engage with their developer community and provide support and guidance.
Create Webinars
- Login to the site as a Portal Administrator / Product Manager.
- Navigate to Home > Manage > Content > Add Content > Webinars.

- Navigate to API Community > Webinars
- Add the below fields.
- Title
- Short Description
- Image - The allowed file extensions are png, gif, jpg, and jpeg, and the maximum number of values allowed is 1.
- Video Link: Remote Video, the allowed number of values is 1.
- Click "Add media" and provide Youtube/Vimeo video url and click on "Add" .
- Click on "Save" and click on "Insert Selected".
- Body
- Component
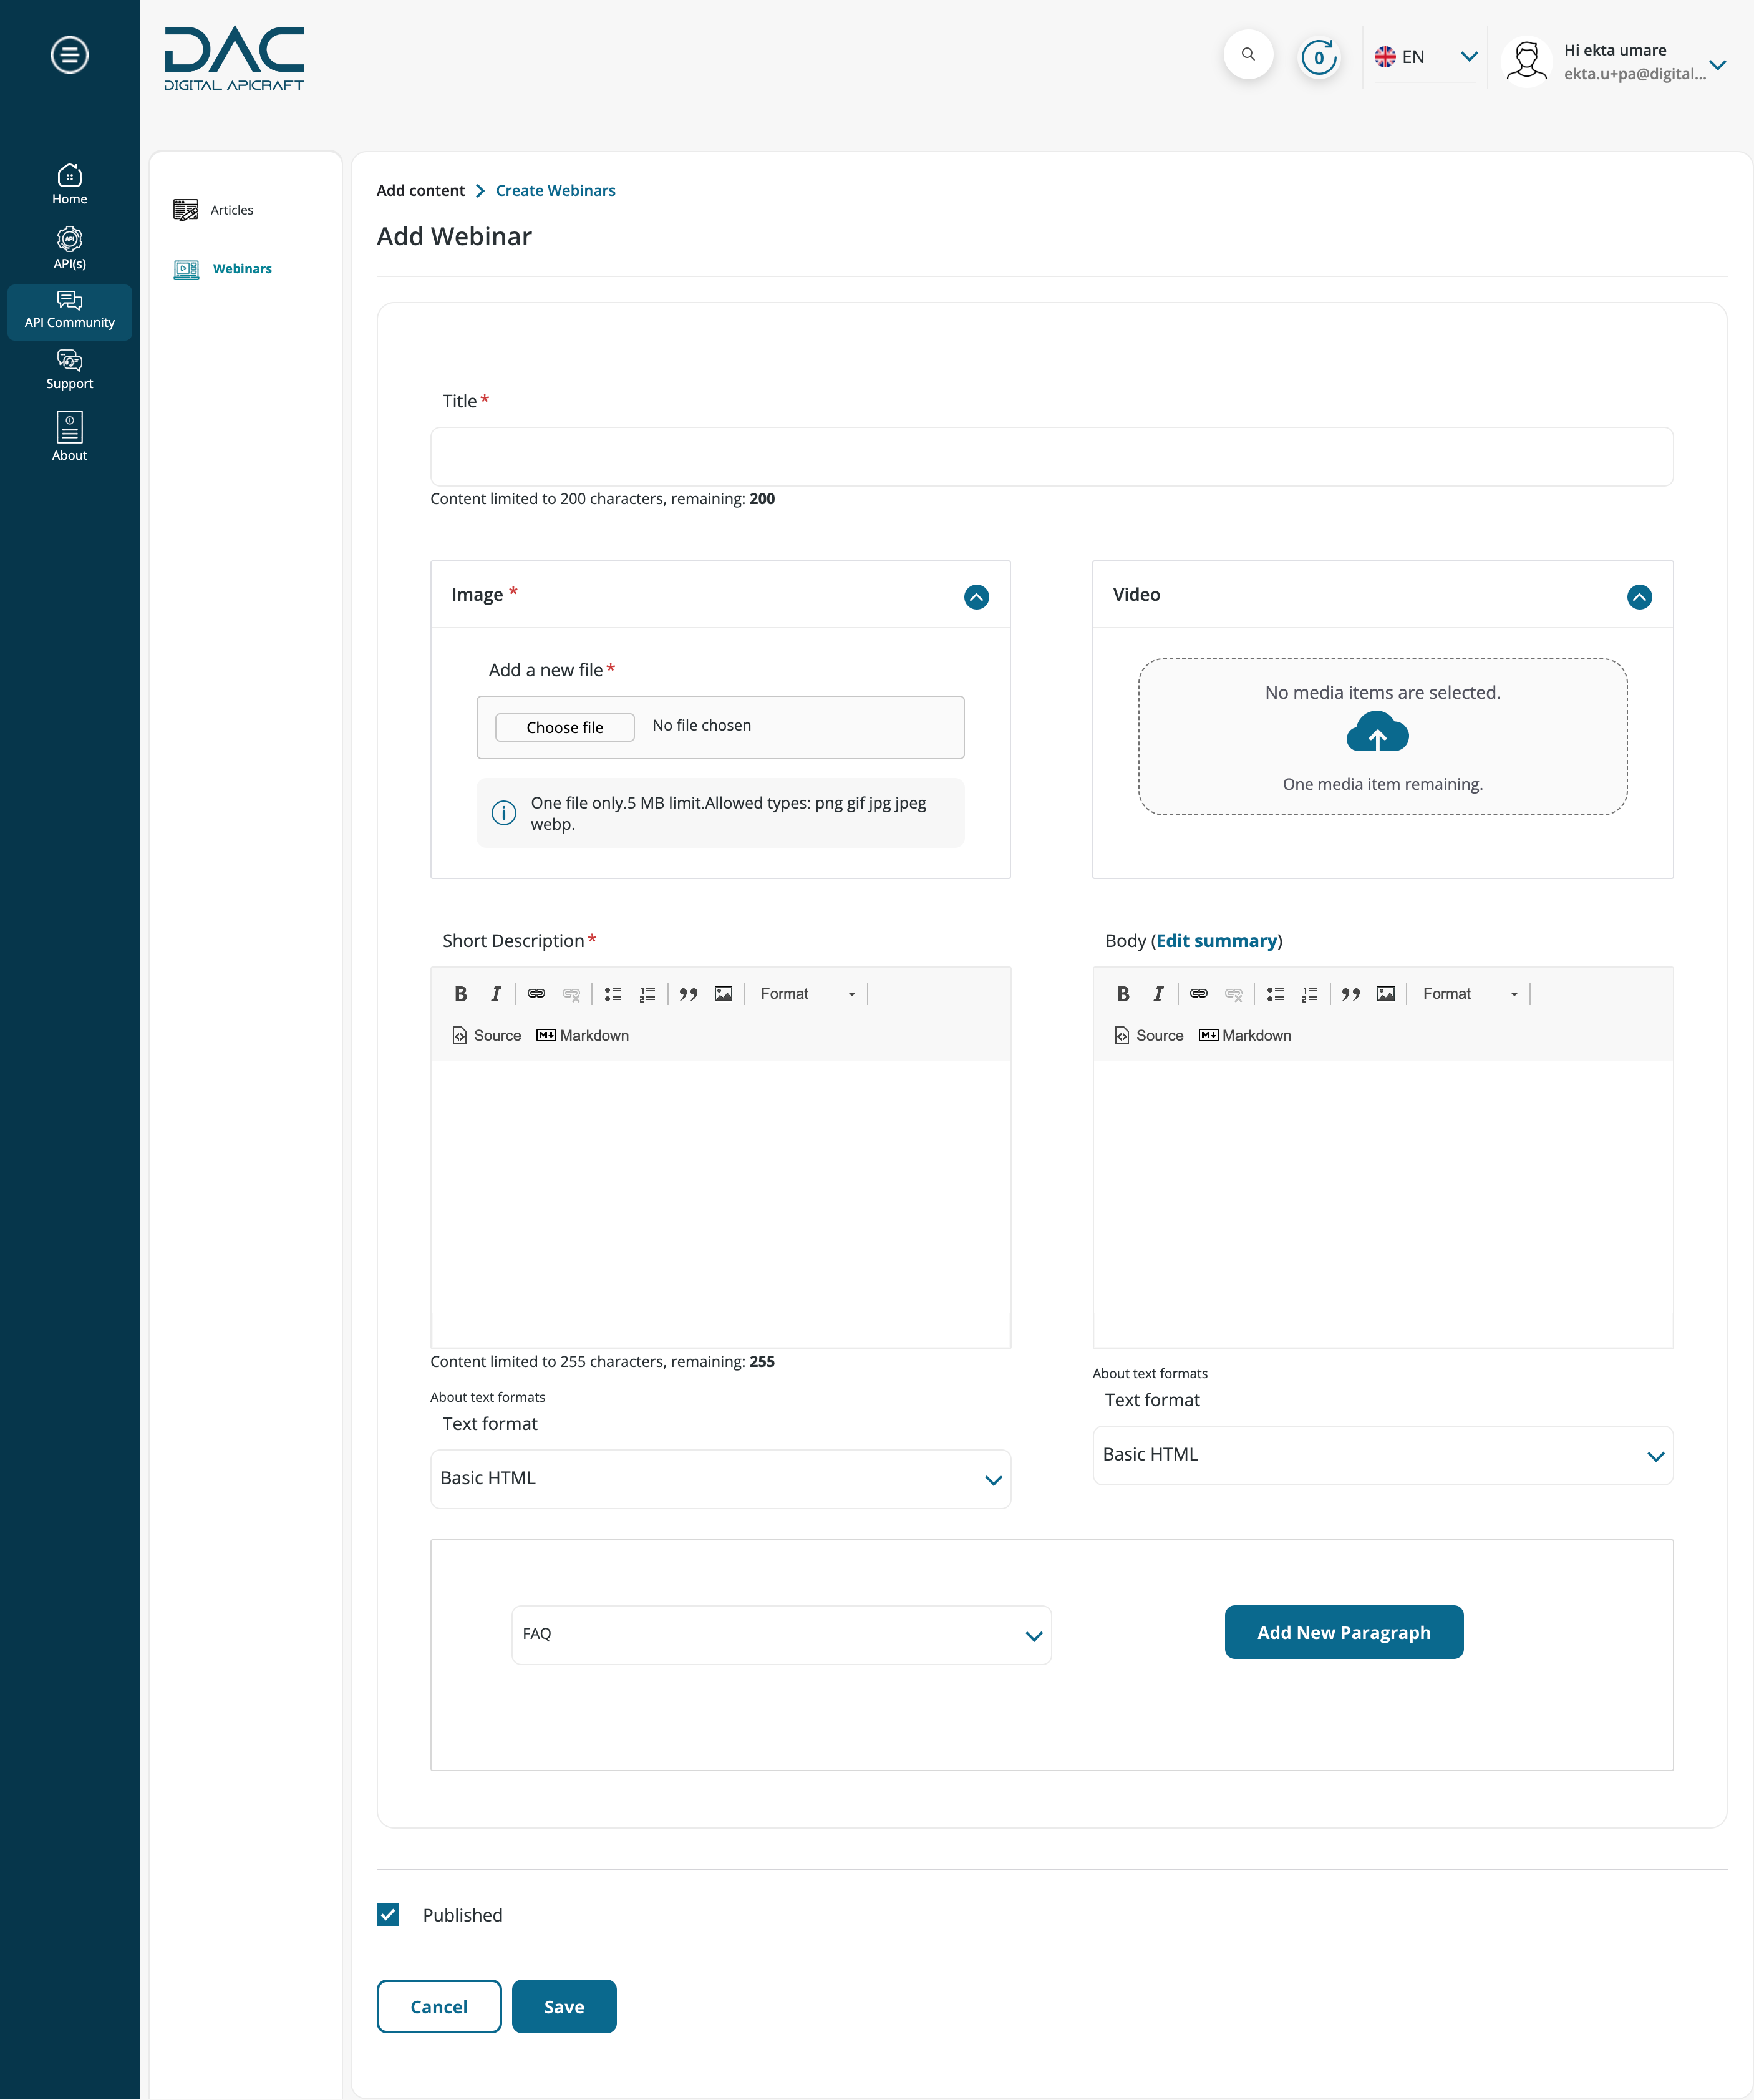
- Save the content.
Edit Webinars
- Login to the site as a Portal Administrator / Product Manager.
- Navigate to Home > Manage > Content.
- Filter content by title or Webinars content type.
- Click on the Edit button.
- Make the changes and Save the content.
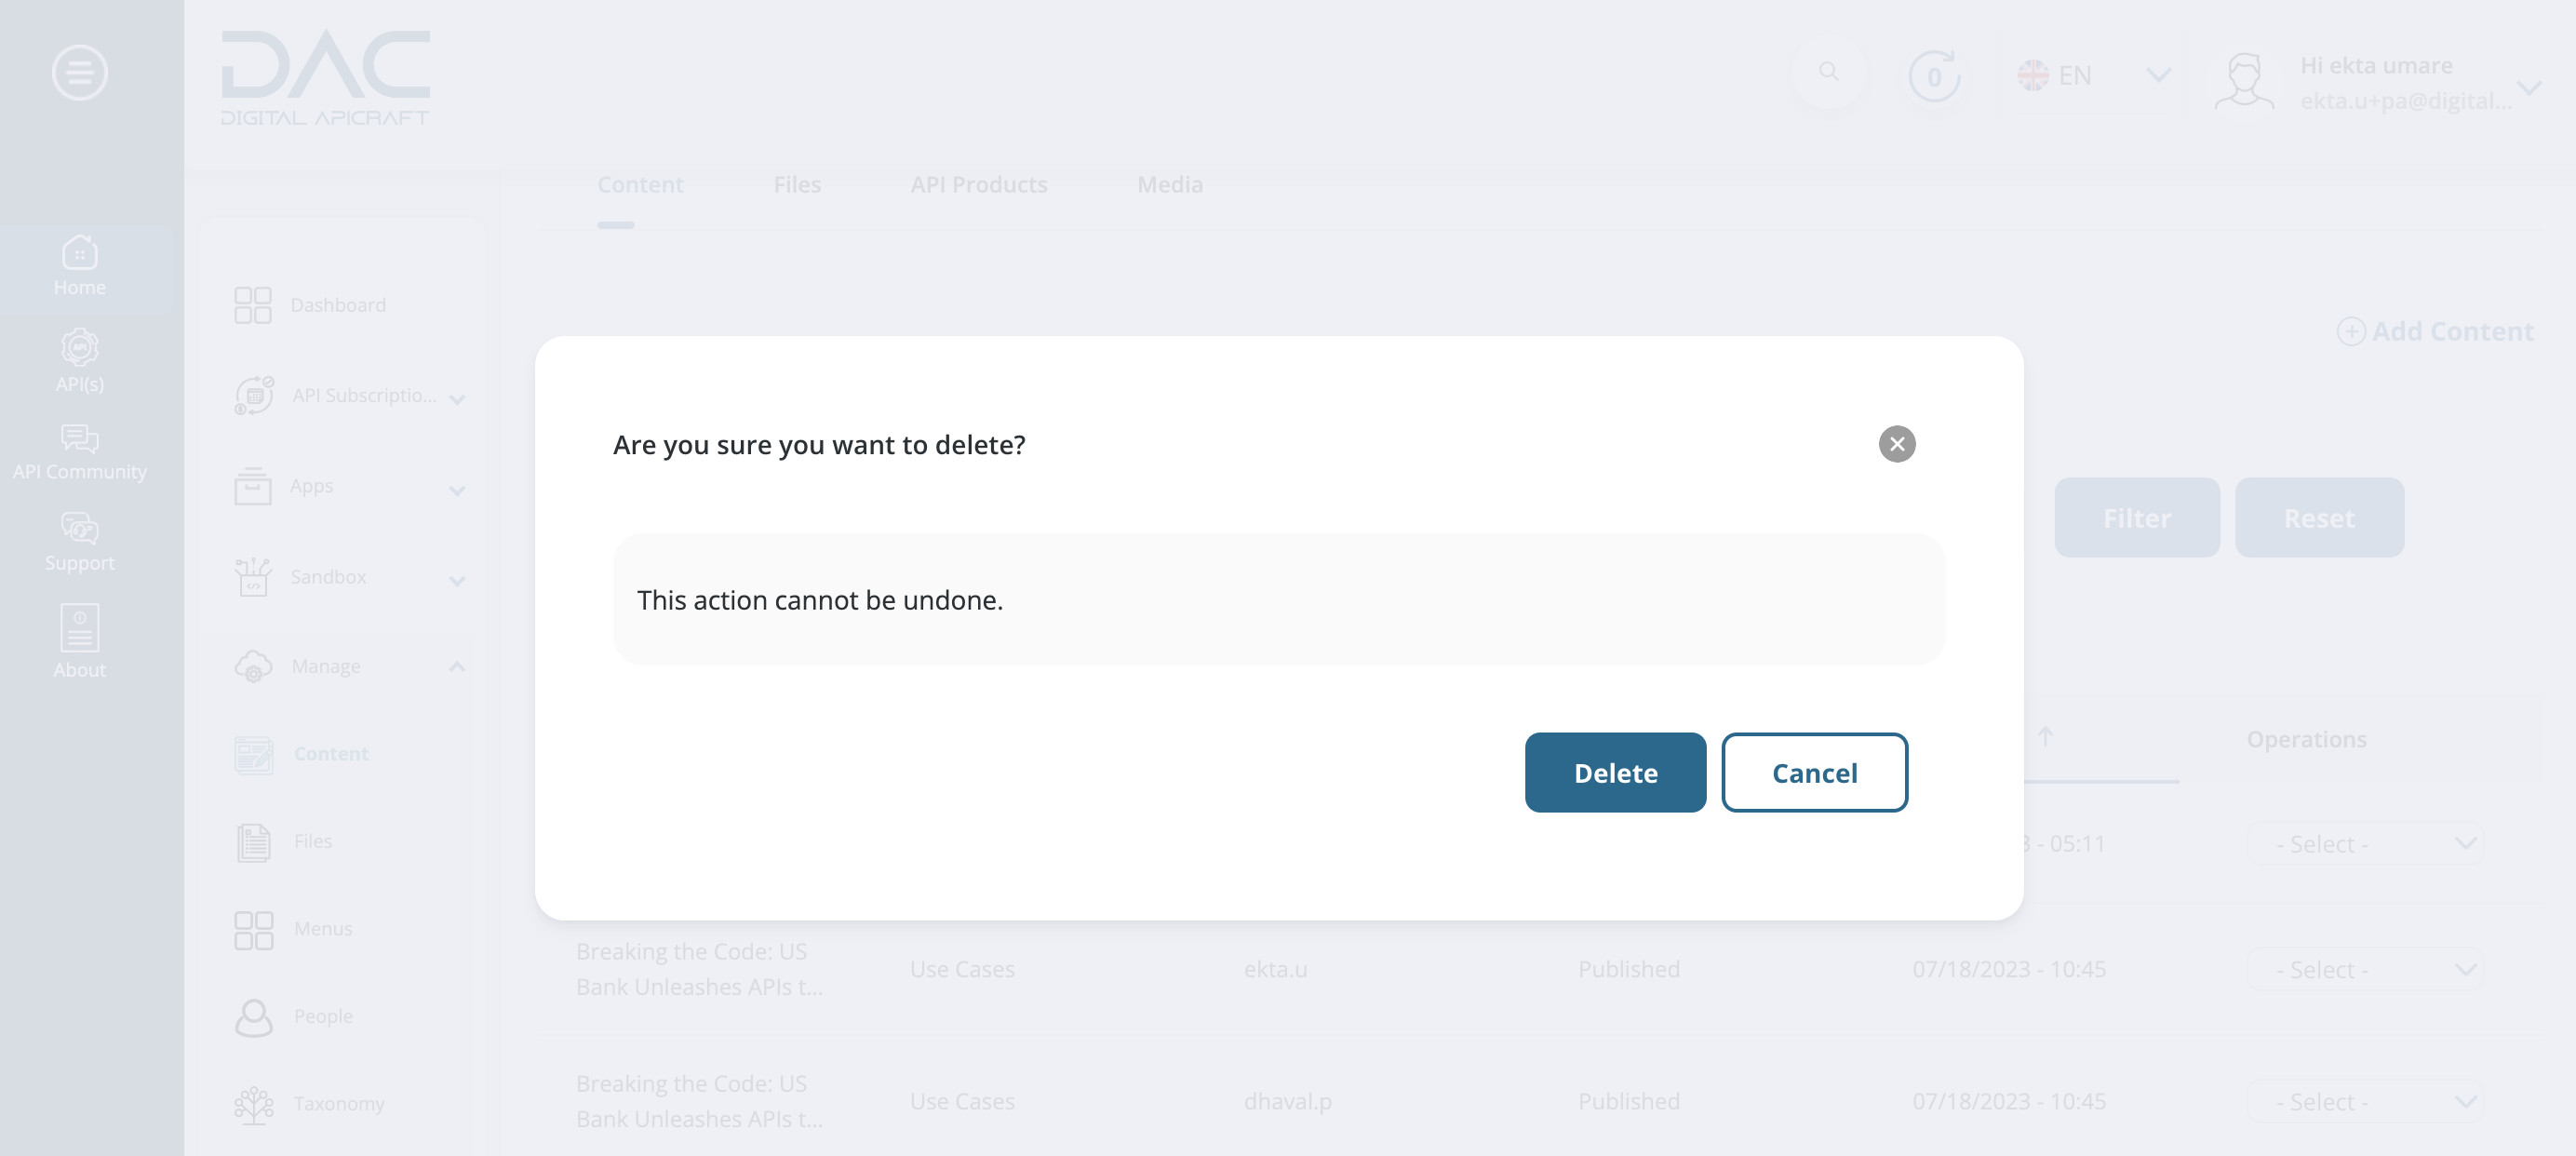
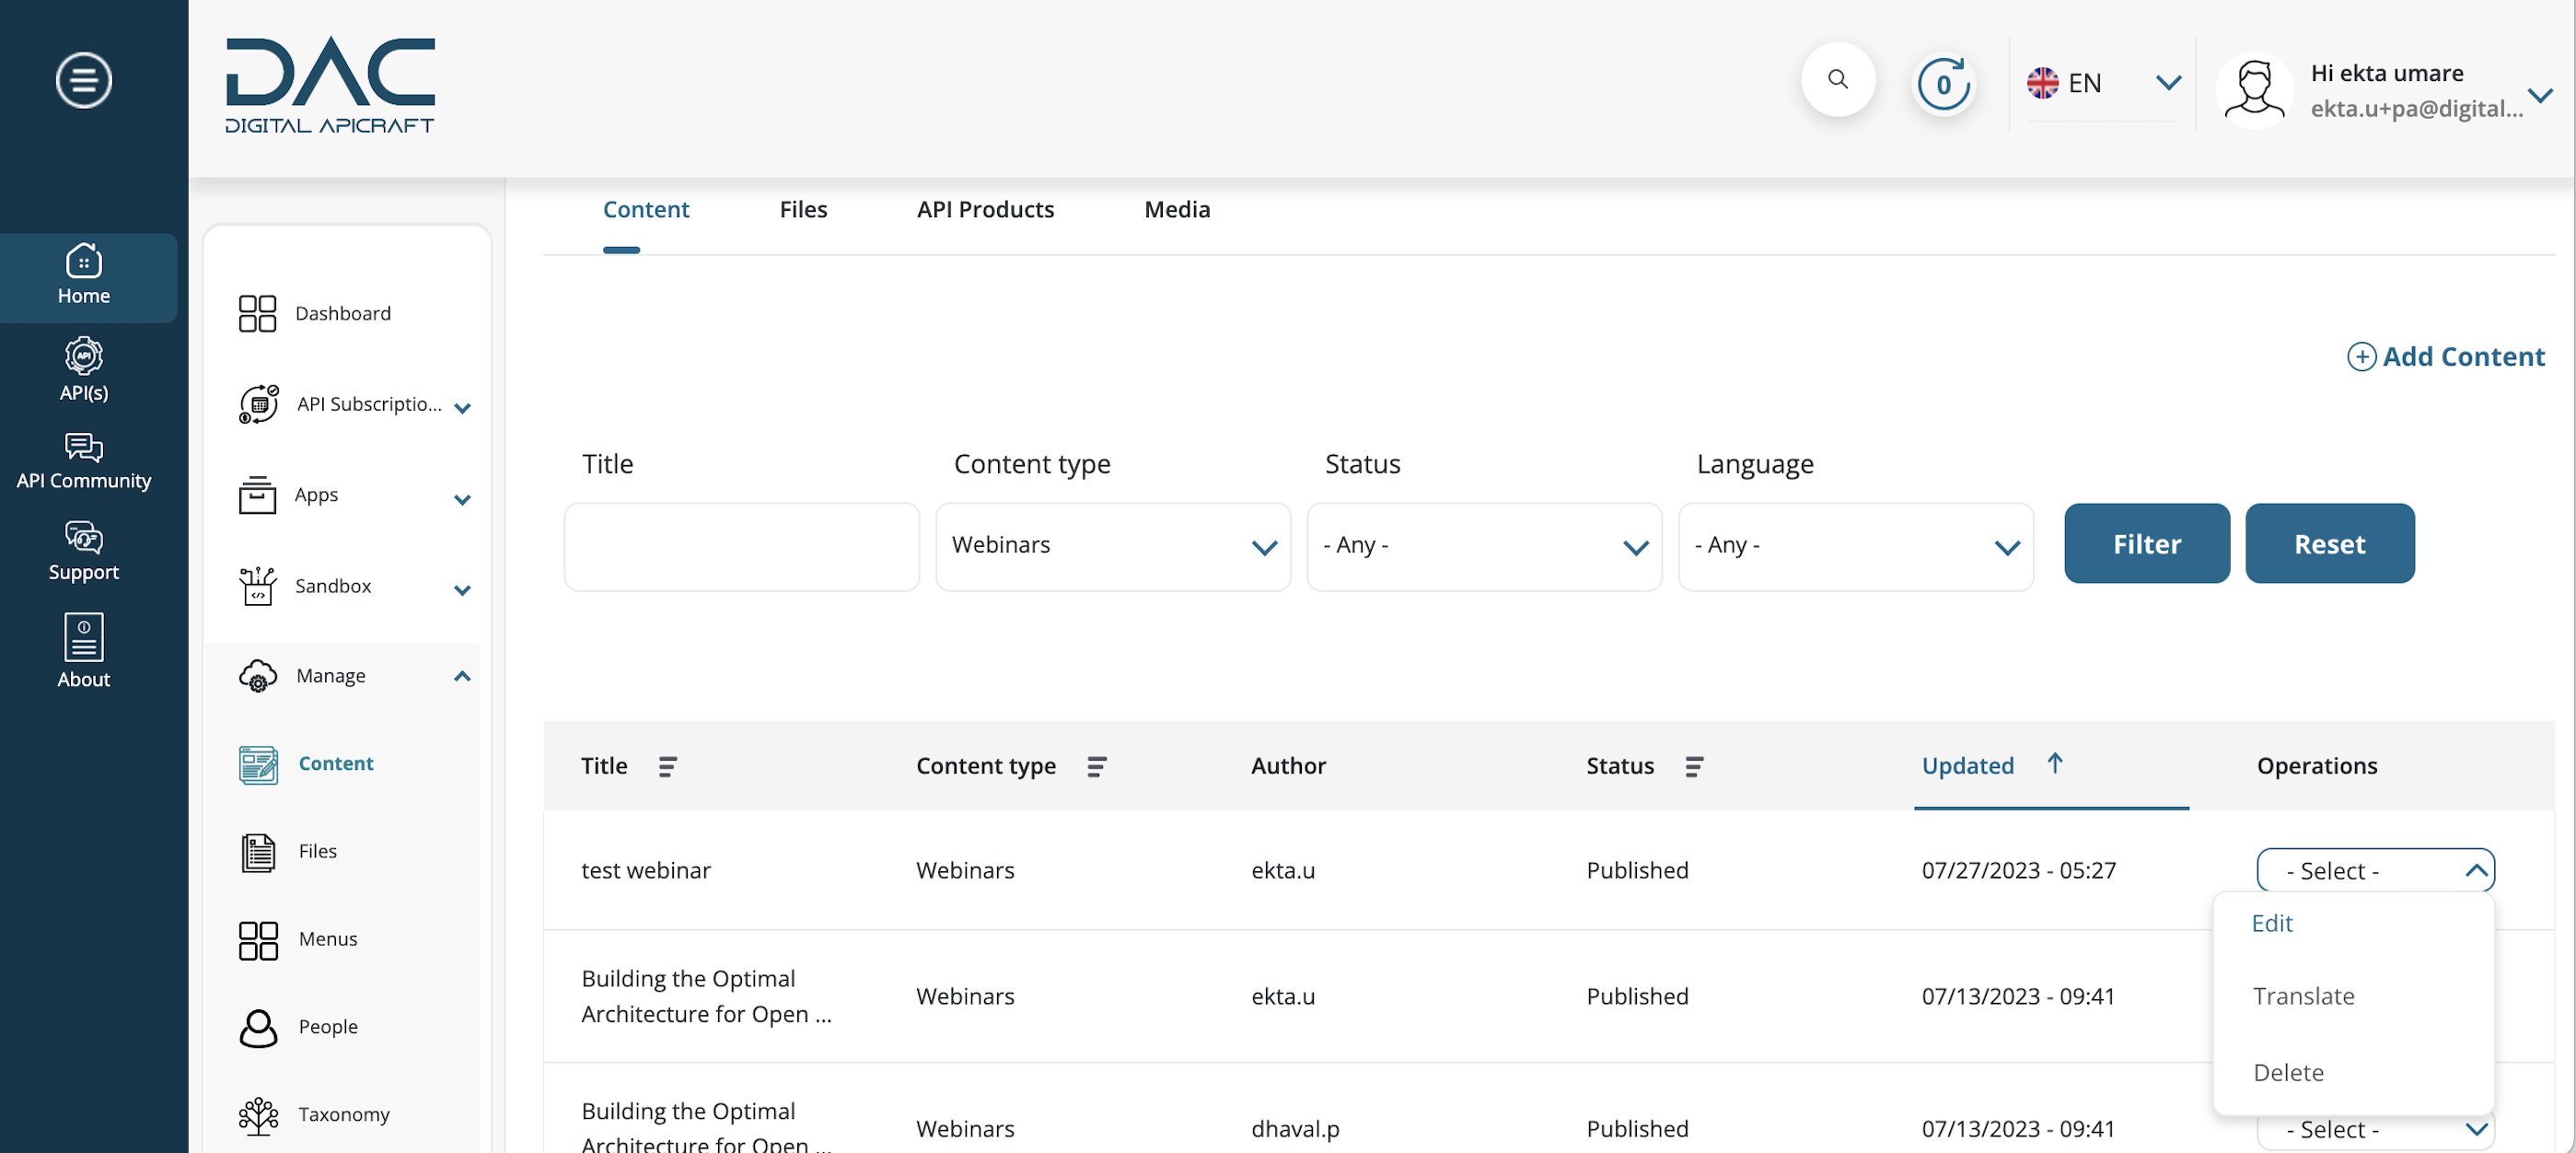
Delete Webinars
- Login to the site as a Portal Administrator / Product Manager.
- Navigate to Home > Manage > Content.
- Filter the content by title or Webinars content type.
- Click on the Dropdown arrow and click the Delete button.
- To delete the app permanently, click Delete. To keep content, click Cancel.
- Two more options available: Delete content from View and Edit features under the content page.
About Static pages
Static pages feature on One APIMarketplace can be used to provide information to developers that is not expected to change frequently, such as documentation, tutorials, FAQs, and legal information.
Developers who are new to an API or platform often rely heavily on documentation to understand how to use it. By providing static pages on a developer portal, API providers can offer developers a reliable and consistent source of information. This can help developers learn how to use the API more quickly, and reduce the likelihood of confusion or frustration.
Static pages can also be useful for providing legal information, such as terms of service, privacy policies, and licensing agreements. By hosting this information on the developer portal, API providers can ensure that developers are aware of their legal obligations and have easy access to relevant documentation.
Create Static Page
- Login to the site as a Portal Administrator / Product Manager.
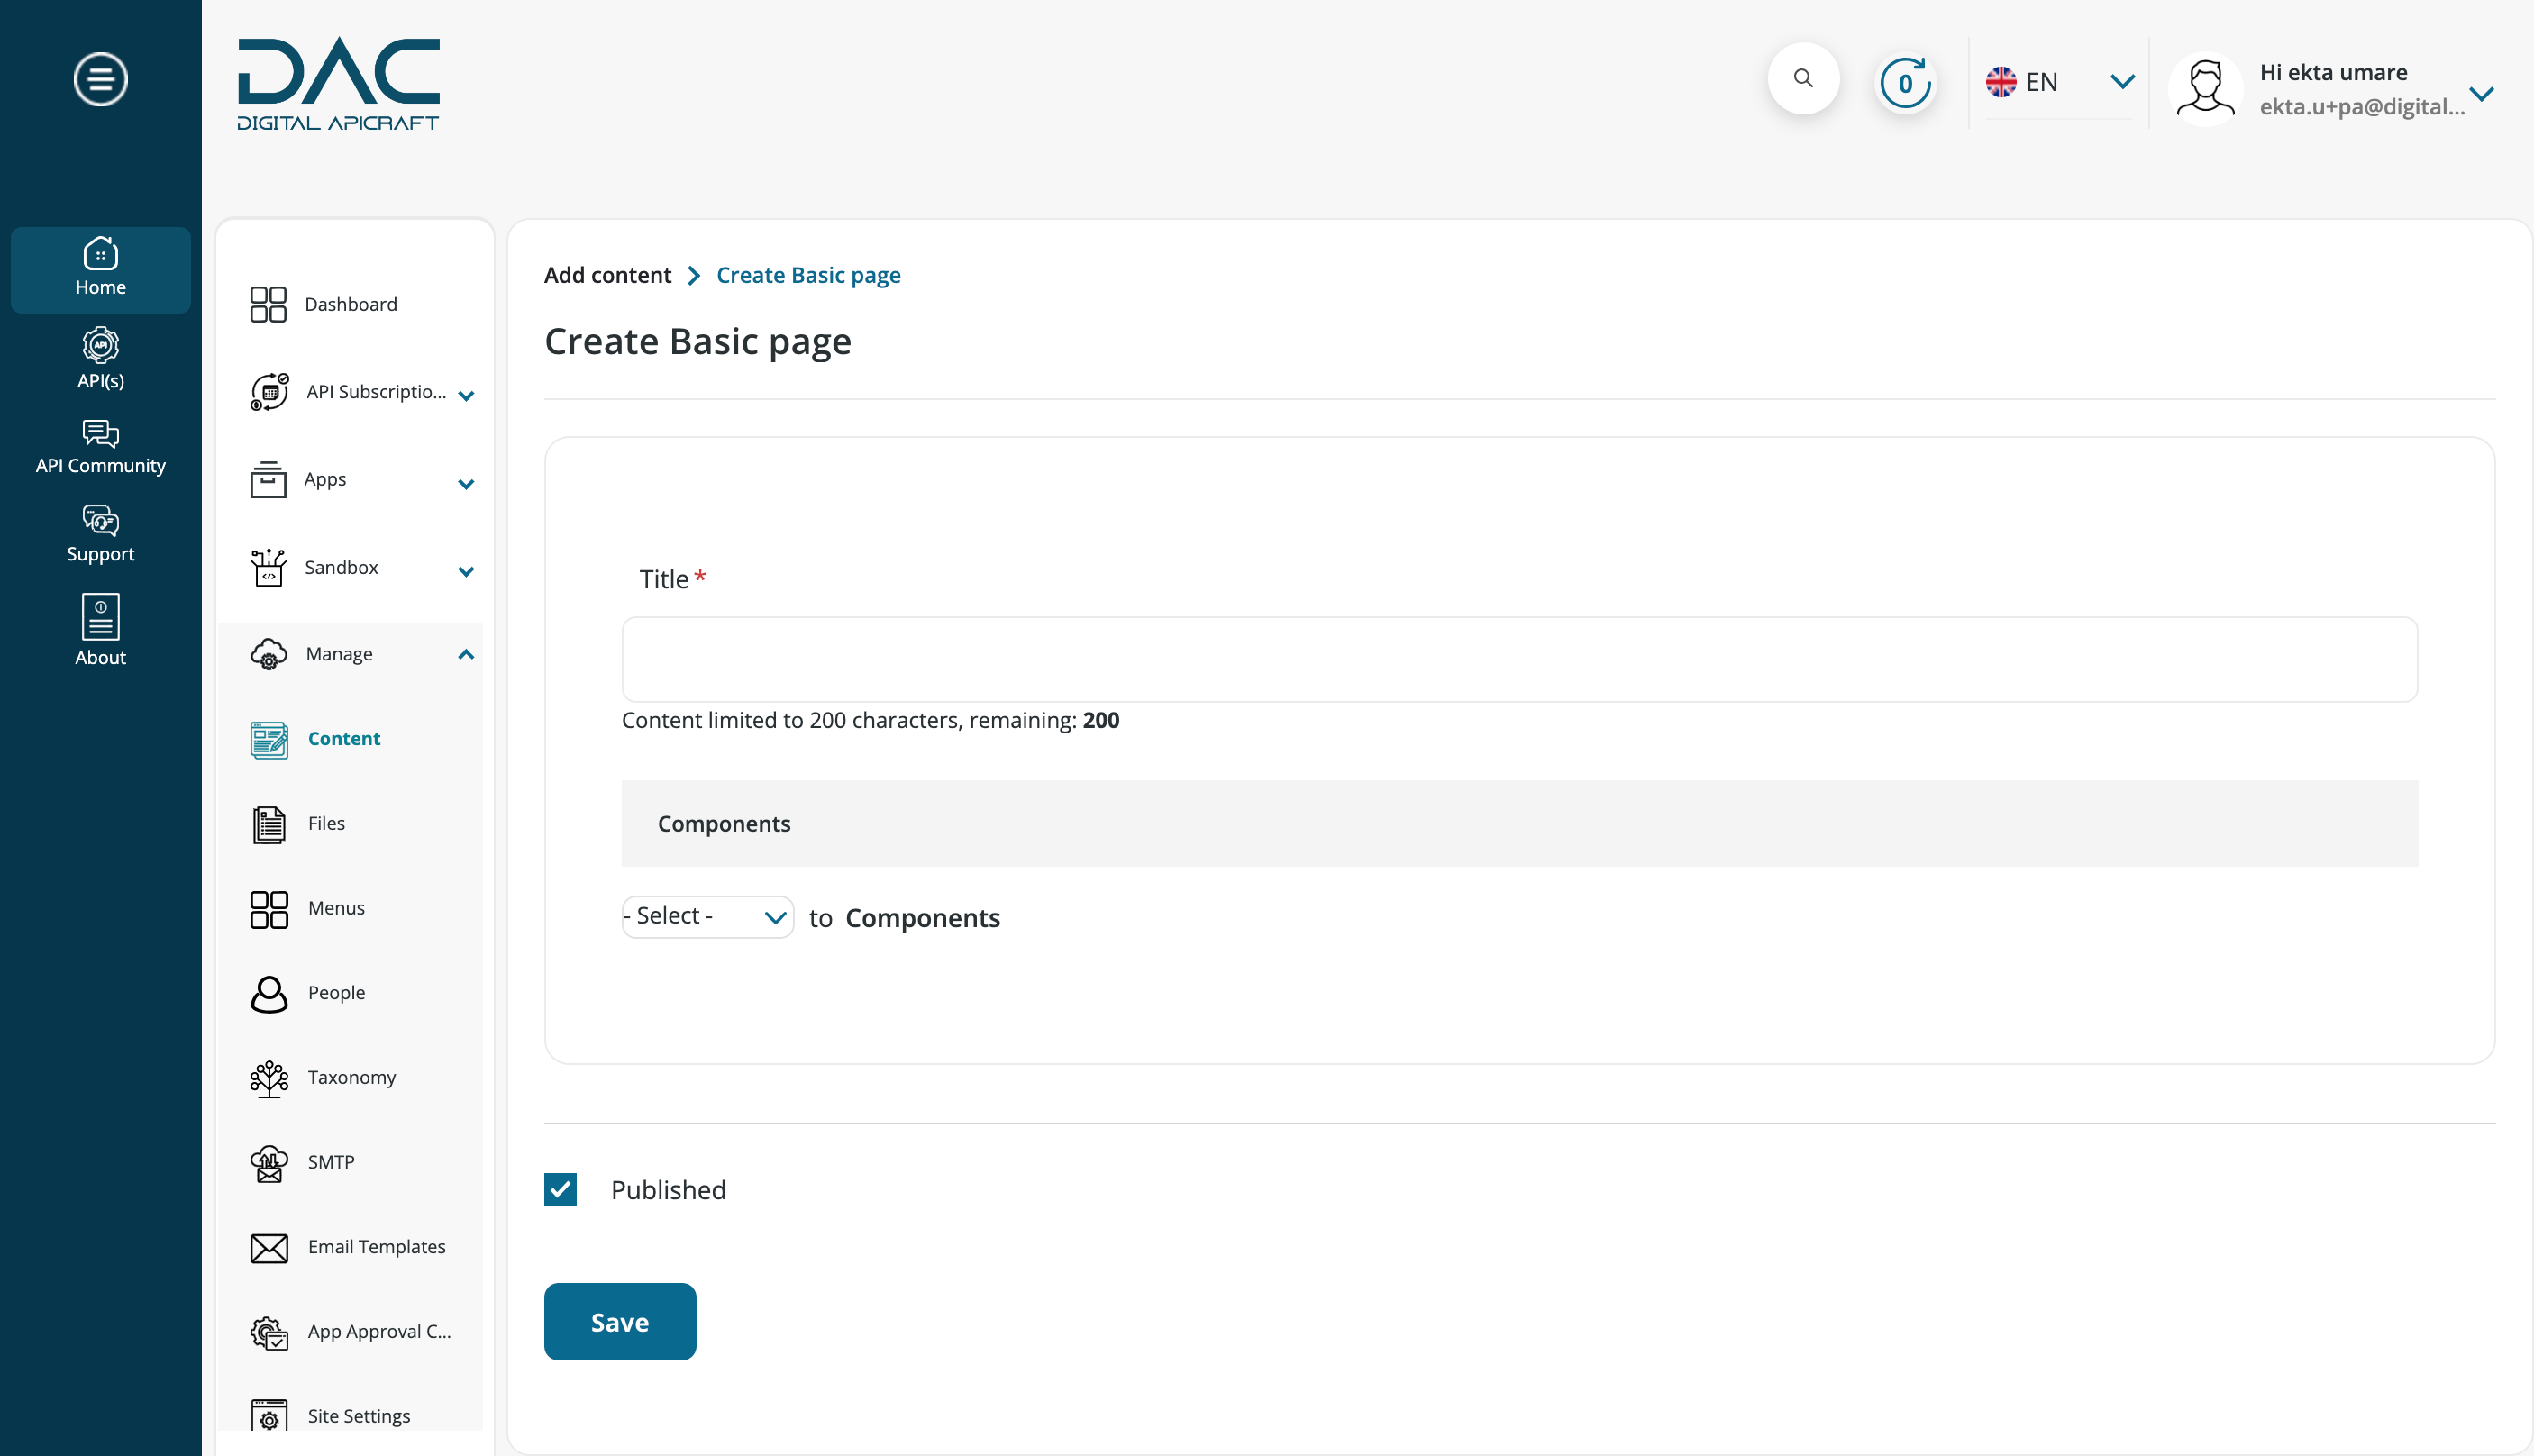
- Navigate to Home > Manage > Content > Add Content > Basic Page.
- Add the mandatory fields.
- Save the content.
Edit Static Page
- Login to the site as a Portal Administrator / Product Manager.
- Navigate to Home > Manage > Content.
- Filter content by title or Basic Page content type.
- Click on the Edit button.
- Make the changes and Save the content.
Delete Static Page
- Login to the site as a Portal Administrator / Product Manager.
- Navigate to Home > Manage > Content.
- Filter the content by title or Basic Page content type.
- Click on the Dropdown arrow and click the Delete button.
- To delete the app permanently, click Delete. To keep content, click Cancel.
- Two more options available: Delete content from View and Edit features under the content page.
About Static Page Components
Creating a web page can be an exciting and challenging task. There are many elements to consider when designing a webpage, such as the layout, the color scheme, and the content. One essential aspect of creating a webpage is choosing the right components to include. A webpage can be made more effective by including components such as a banner, FAQ, slider, How It Works section, Static content, and featured content. Each of these components serves a unique purpose and can help to engage visitors, build trust, and drive conversions. When used together, these elements can create a cohesive and compelling webpage that effectively communicates the value of a product or a service.
Add Components
- Select component from dropdown.

- Enter the required data, add more components as needed.
- Click Save after adding required components.
Remove Component
- Click on the three-dot icon and select Remove.

Below are some of the samples of the static page components displayed
Banner
Card
Documentation
FAQ
Featured Articles
Featured Contents
Features Slider
How it Works
Static Conten

Two column layout
Add Product Variations
-
Login to the site as a Portal Admin.
-
Navigate to Home > API Subscription > Manage Products.
-
Click on Add Product.
![]()
-
Add the following fields.
-
Title
-
Description
-
In the Variation section add the following fields.
- Title
- SKU
- Price
- Short Description
- Features of the variation
- Click on Select API bundle and Select API bundle.
- Promotional Tags
- Select Billing Schedule
- Subscription Type
- Click on Create Variation.
-
Click on Save.
-
Click on Add New Variation to Add Multiple Variations.
Purchase Products
-
Login to the site as a Portal Consumer.
-
Navigate to APIS > API Discovery.
-
Search with the API Product Keyword on the API Discovery Page.
![]()
-
Click on API Product to purchase.
![]()
-
Click on Subscribe.
-
Select the API Product to purchase in the dropdown.
![]()
-
Click on the Add to Cart button for the variation to purchase.
![]()
Internal Note: A confirmation message will be displayed and the cart count will be increased.
-
Click on the Cart Icon in the site header.
![]()
-
Click on the Checkout button in the cart dropdown.
-
After Click on Checkout button terms and condition popup will appear.
![]()
-
Click on Accept button.
-
If billing address is not added then error message will appear after click on Checkout button.
![]()
-
Click on Update Billing Address link → It will redirect to billing address form.
![]()
-
Enter the following details.
- First name
- Last name
- Company
- Billing Address
- Country
- State
- City
- Pin Code
-
After adding details, click on Save button it will redirect to shopping cart.
![]()
-
On click of Checkout button popup will appear, click Accept button and click Checkout.
![]()
-
Choose the payment method and Enter the following details.
- Card Number
- Expiry Month and Year of card
- CVV
-
Click on Continue To Review.
![]()
-
Review the details and click Proceed To Payment.
![]()
-
Click on OK.
-
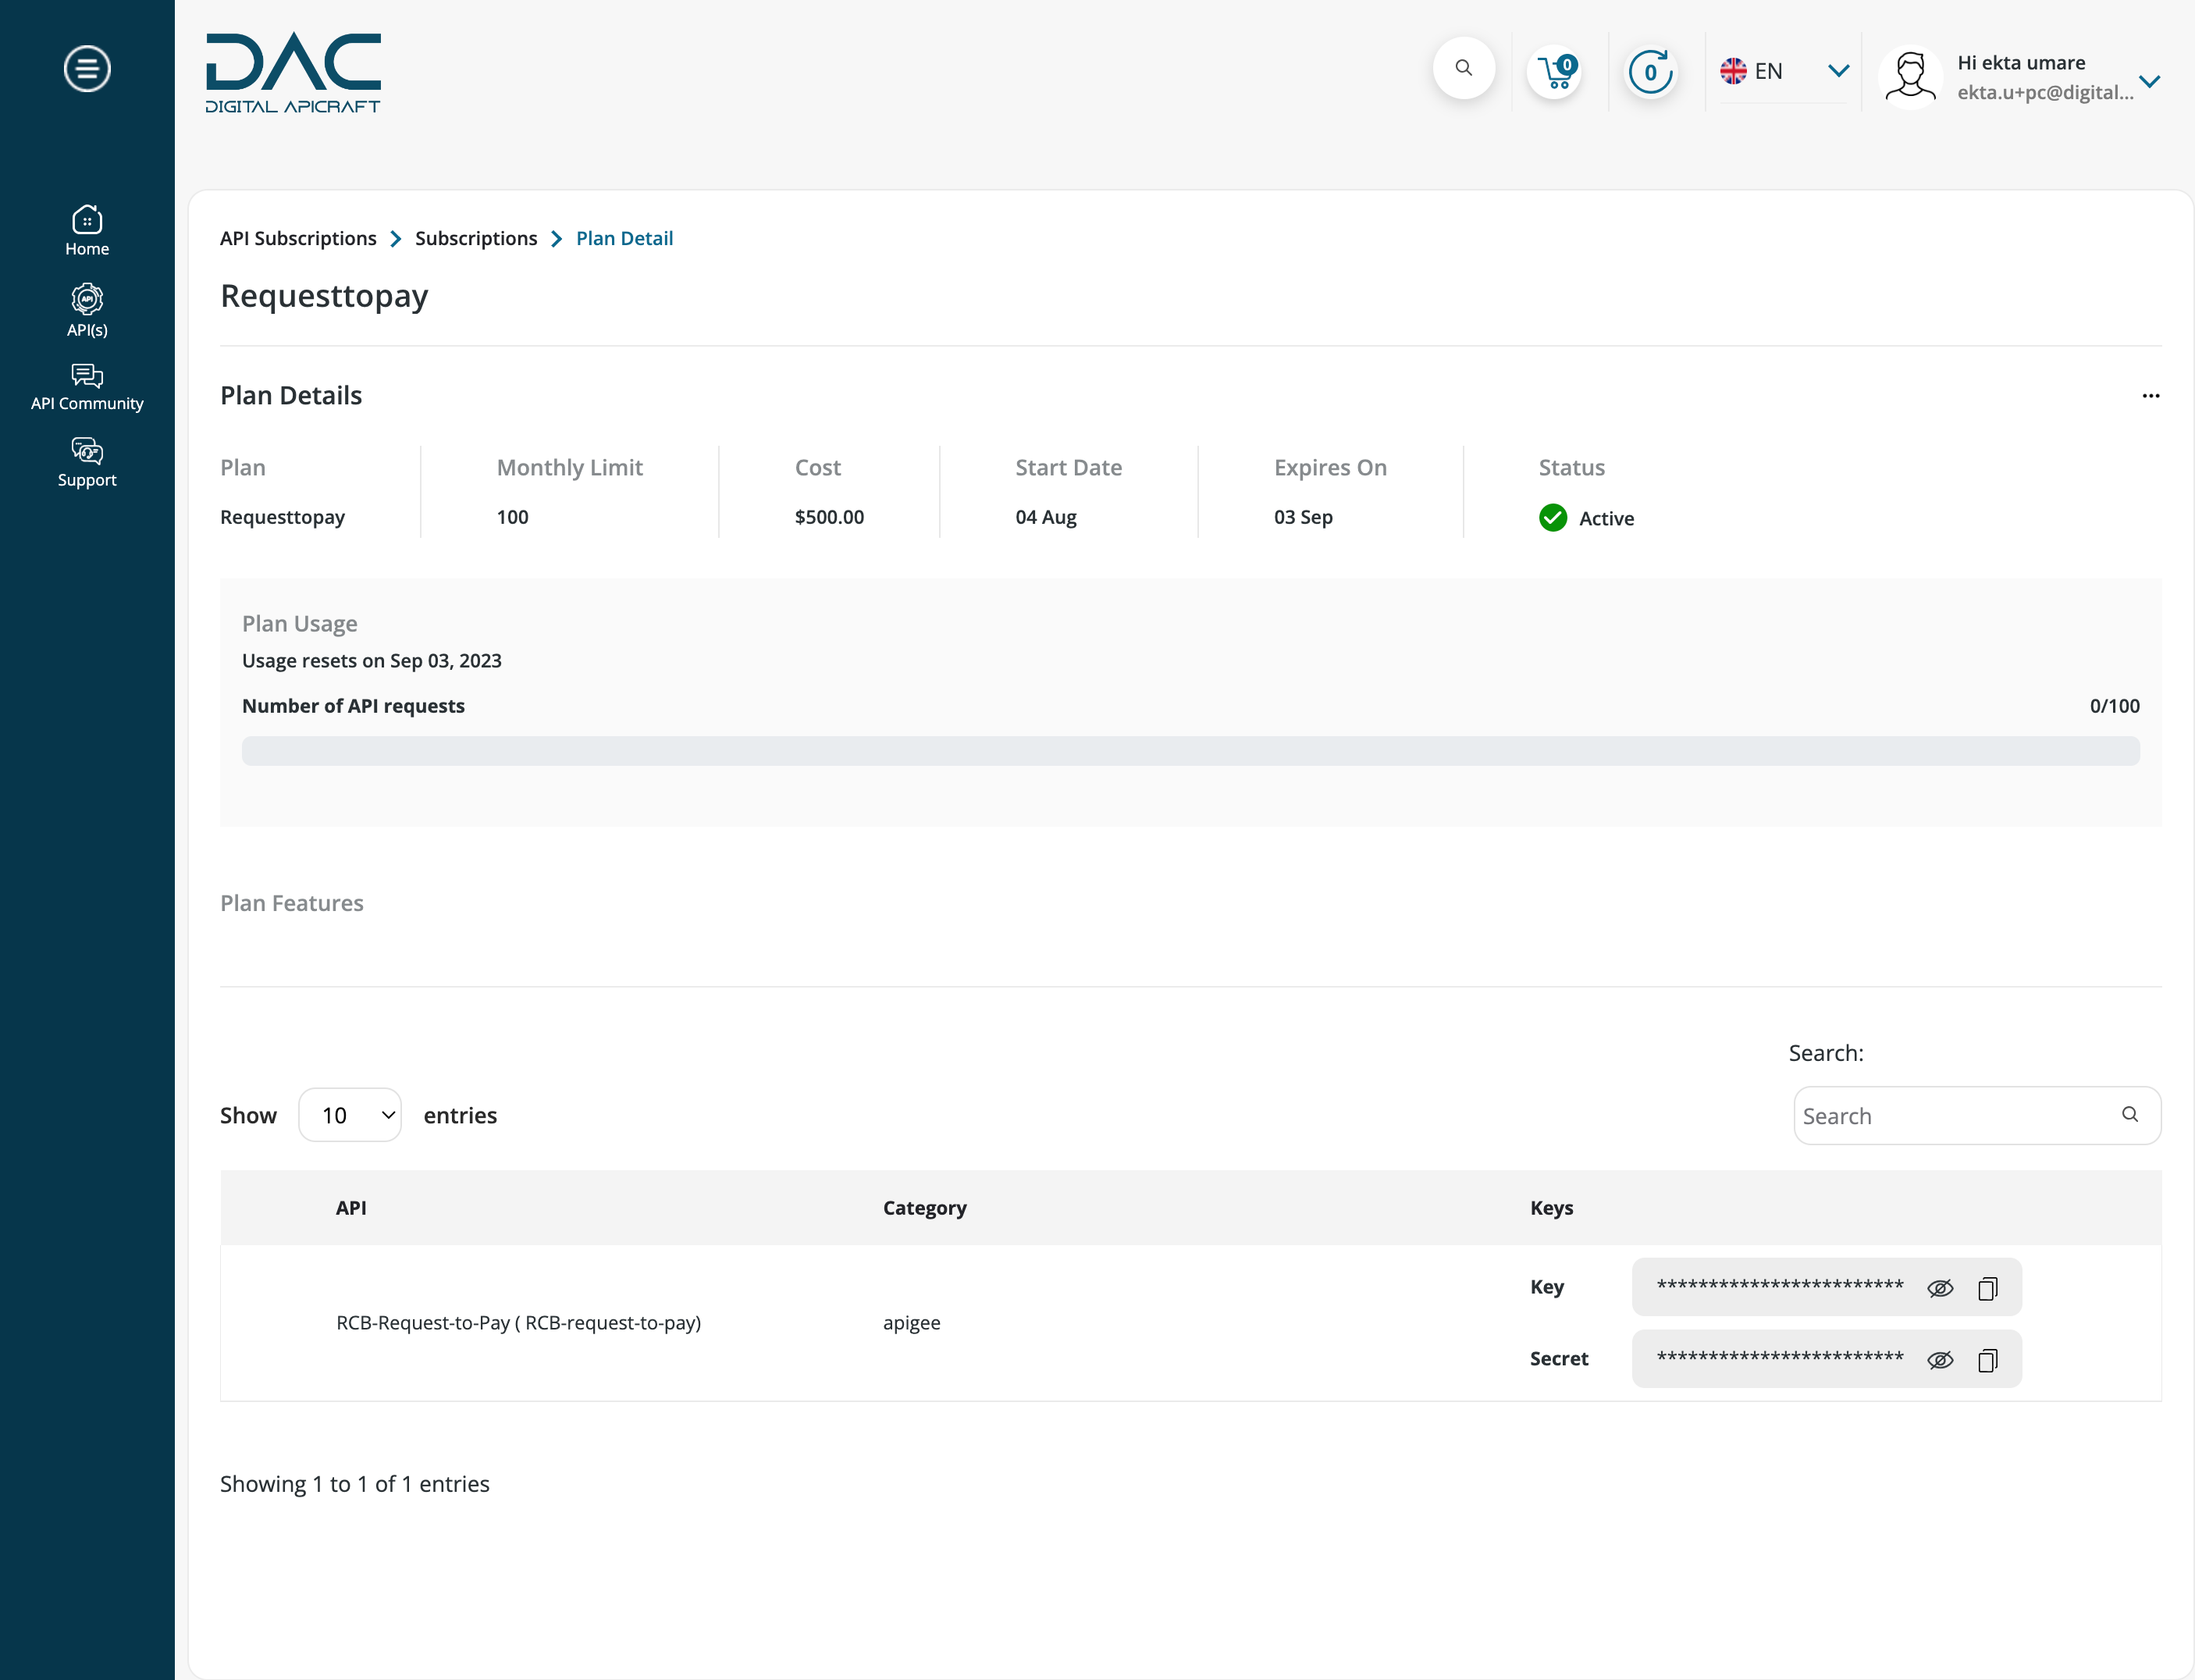
Click the plan name on the My Subscription page to view the API key and Secret.
Utilize API calls
-
Login to the site as a Portal Consumer.
-
Navigate to the My Subscription page.
-
Click on the Plan Name on the My Subscription page.
-
Copy the Consumer Key and Secret on the plan details page.
-
Click on API on the same page.
-
Navigate to the Endpoint Tab.
![]()
-
Click on Authorize button.
-
Enter the Consumer Key & Secret in the popup.
-
Click on the Submit button.
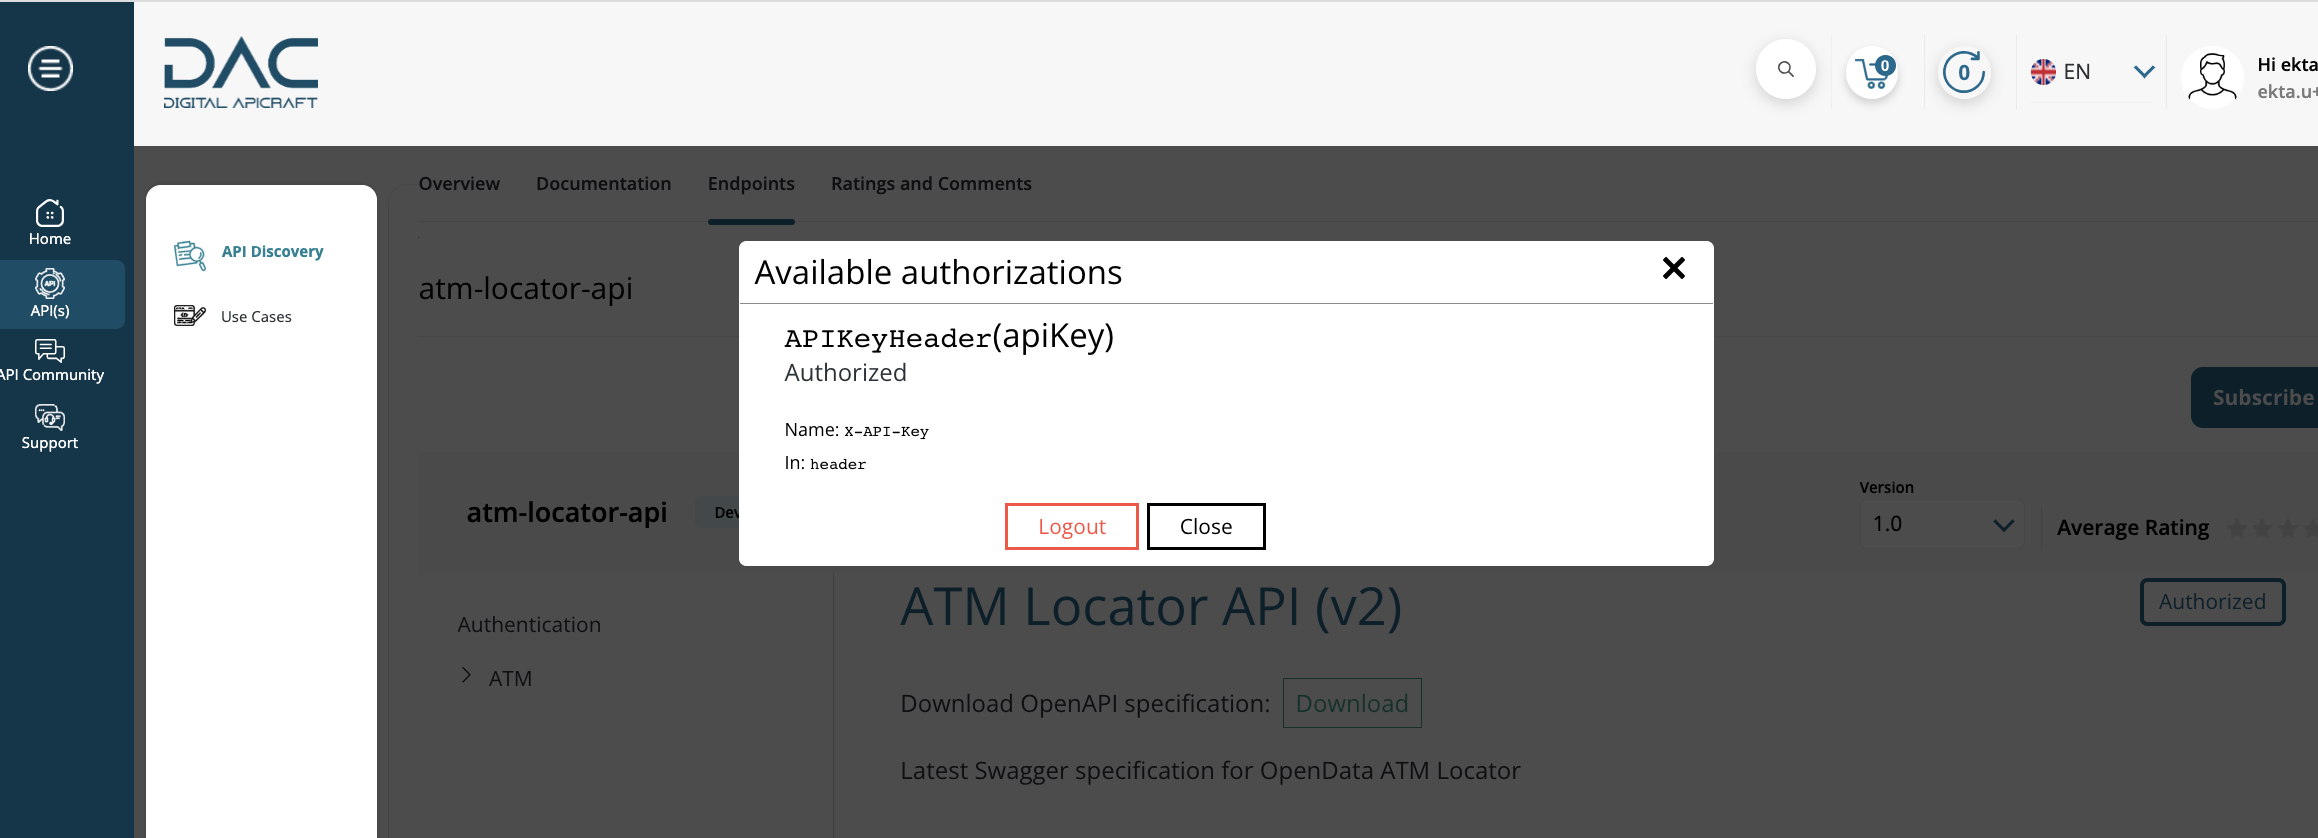
-
After successful authorization, click Close button in popup.
![]()
-
To redirect to previous popup click on Logout button.
![]()
-
Click on the Try it now button and click on Execute button to try out the APIs.
![]()
Upgrade / Downgrade Plan
-
Login to the site as a Portal Consumer.
-
Navigate to the My Subscription page.
-
Click on the 3 Dots under the operation column.
![]()
![]()
-
Click Add to Cart to upgrade or downgrade to the desired plan.
-
Click the Cart icon in the header and proceed to payment by clicking the Checkout button.
-
Click on Accept button of terms and condition popup.
-
Review the cart details and click Checkout.
![]()
-
Review Order Summary.
-
Review Payment Card Details.
-
To add a new card, click on the Credit Card option.
-
Click on Continue To Review.
![]()
-
Review all details and click Proceed to Payment.
![]()
-
Verify the refund amount, if applicable, when downgrading the plan.
-
Click on OK in the popup.
-
The user can now make API calls based on the upgraded/downgraded plan.
Manage Stores
-
Login as Portal Administrator
-
Navigate to Home > Api subscriptions > Manage Stores to access the Manage Stores page.

-
Everything starts with a store in the checkout workflow.
-
Products can belong to many stores, and orders belong to a single store.
-
The portal administrator will have access to Edit the Store.
-
The store has the below fields that can be modified
-
Store name
-
Store mail
-
Store Logo
-
Default currency
-
Supported countries
-
Store Address
-
Timezone
-
-
Click on Save to Save the changes.

Manage Payment Gateway
-
Login as Portal Administrator.
-
Navigate to Home > API Subscriptions > Manage Payment Gateway

-
The Portal administrator has the access to add , edit and delete the Payment Gateway.
-
Payment Gateway is used in the Order checkout process while the user is buying the product.
-
The portal administrator can add one or more Payment gateways in the site.
-
Click on the Add Payment Gateway button to add a new payment gateway.


-
Portal administrator can define plugins and payment methods in each payment gateway.
-
Public key and Private key is also required for a payment gateway to be added.
-
Portal administrator can add the additional conditions as well.
-
Click on Save to save the changes.
Subscriptions
-
Consumers can navigate to Home >> API Subscriptions >> My Subscriptions to check all the active and inactive subscriptions
-
Login as Portal Administrator.
-
Navigate to Home > API subscriptions > Manage Subscriptions

-
In both the pages users has the option to search for the subscriptions
-
Users can view the subscription, and cancel the subscription
-
View link will lead to the plan details page which will provide the details as per the below screenshot.

-
Cancel Subscription will cancel the user subscription after entering a reason.
Orders
-
Orders listing page will provide the users the list of all the orders that the users have placed in the site.
-
Login into the site as Consumer and navigate to Home > API subscriptions > My Orders to access the My Orders page
-
Login as Portal Administrator and navigate to Manage Orders via Home > API subscriptions > Manage Orders

-
Manage order page will help all portal admins access to modify orders of all the users in the site.
-
Portal admins can view the orders, Edit the orders, view the invoices and also delete the orders.

-
In the order edit page, portal admins can edit the billing information, add more products into the order and also add some adjustments into the order.
Invoices
-
Invoices page provides users the listing of all the invoices that the consumer has made in the site.
-
Login as Consumer and navigate to Home > API subscriptions > My invoices to access the My invoices page
-
Login as Portal Administrator and navigate to Manage Invoices via Home > API Subscriptions > Manage Invoices.
-
The Portal admins will have access to View the invoice, Download the invoice and delete the invoice.


Transactions
-
Transaction page provides the users with listing of transactions that the users have made in the site.
-
Login as Consumer and navigate to Home > API subscriptions > My Transactions to access the My transactions page.
-
Consumers can view the user balance and all their transaction details made in the My Transactions page.

-
Consumers will be able to filter by the name and date of the transactions.
-
Consumers will also be able to export the transaction details into a CSV by clicking on the Export to CSV button
-
Login as Portal administrator and navigate to Home > API subscriptions > Manage Transactions.
-
Portal admins will be able to check the transactions of all the consumers in the site in the Manage Transactions page.
-
Portal admins can also filter the results and export the transactions into a csv.

Create Sandbox APIs
-
Login to the site as a Portal Admin.
-
Click on Create Sandbox API under the Sandbox menu.
-

- Enter the following details :
- Title
- API version
- API image
- Add endpoint : Upload a swagger file (json/yaml)
- Click on the Save button to create the Sandbox API.
Create Sandbox
-
APIs listing page to provision sandbox:
-
Login as an API Manager.
-
Click on the APIs Menu under the Sandbox Menu to provision the APIs.

-
-
Navigate to the Sandboxes page and click Add Sandbox to create one.

-
Step 1 :

- Enter the following details :
- Application Name
-
Select the API Node for which the Sandbox will be provisioned.
-
Check on Swagger File from API Nodes based on the requirement (3.0 and above are supported).
-
Click on the Next button to go to Step 2
- Enter the following details :
- Step 2 :
-
Select the Policy to be applied to the API.
-
There are security policies Spike Arrest, Quota Policy, Verify API Keys, JSON Threat Protection, OAuthV2
- Spike Arrest : Protects against API traffic surges
- Quota Policy : Restricts the number of API requests based on the configured period of time
- Verify API Keys : Ensure the uploaded Open APISpec contains the API security definition
- JSON Threat Protection : Mitigates risks in the request payload JSON content
- OAuthV2 : Ensure the uploaded Open APISpec contains the OAuth 2 security definition

-
Click on Finish

-
Consumer key secret generated and Sandbox provisioned.

-
After sandbox creation goto sandbox listing page from there APIM manager can download the swagger, edit the rules and see the access keys.


-
Edit rules page

-
On edit rules page APIM manager can update the strategy

-
For every endpoint, APIM manager can update the strategy. When strategy is SATIC APIM manager can able to set the response payload

-
When APIM manager will update strategy to DYNAMIC then he can able to set the rules and update the existing one.

-
For CANNED,BACKENED and REST only APIM manager to select the dropdown strategy will get update.
-
Decommission the Sandbox
-
Login as APIM manager
-
Click on APIs menu under sandbox menu

-
Click on Decommission, confirmation popup is displayed. when click on button delete it will decommission the sandbox.

Sandbox access request
-
Login as portal consumer
-
Click on API Discovery in the left-hand side menu under the API(s)
-

-
Click on particular API and goto the Sandbox tab. Sandbox form is coming for partner admin only and partner admin only can request sandbox access.

-
After submitting form. Success message is displayed.

-
Once sandbox access is approved developer with role partner admin and partner member both can able to view access keys and dapper UI.

-
Developer can upload the seed data, they can download seed data sample file also and upload seed data should be in csv file format and not allowing to upload more that 1 MB data.

Sandbox Access Approval
-
Login as APIM manager
-
Click on Acess Approval under the Sandbox menu
APIM manager can approve and reject the sandbox access request

Revoke the sandbox
-
Login as APIM manager
-
Click on Revoke Sandbox under the Sandbox menu

-
After click on Revoke the popup is displayed for confirmation.

-
After click on Revoke button of popup sandbox will get revoke.
Reinstate the sandbox
-
Login as APIM manager
-
Click on Revoke Sandbox under the Sandbox menu

-
Click on Reinstate the popup is coming for confirmation

-
After click on Reinstate button of popup sandbox will get active again.
Sandbox DNS Settings
-
Login to the site as a Portal Admin.
-
Click on menu Sandbox DNS Settings under sandbox menu
-
There are two ways to set the DNS
-
If portal admin will check "Use Default DNS system". It will take default DNS of system

-
If portal admin are not using default one, we need to upload the certificate and key and fill domain name and submit the form then the DNS will get register.

-
The allowed types for certificate and keys are .cer,.pem
-
Portal admin get reminder for certificate expiration
Oauth Config
-
Login as Portal admin
-
Click on menu Oauth2 configuration under sandbox menu
-
There are three option given for Oauth configuration: Oauth code, Password Credentials, Client credentials
-
Portal admin can check the checkboxes and fill the base url field and submit the form
